tire type NISSAN TITAN 2023 Owners Manual
[x] Cancel search | Manufacturer: NISSAN, Model Year: 2023, Model line: TITAN, Model: NISSAN TITAN 2023Pages: 644, PDF Size: 7.8 MB
Page 45 of 644
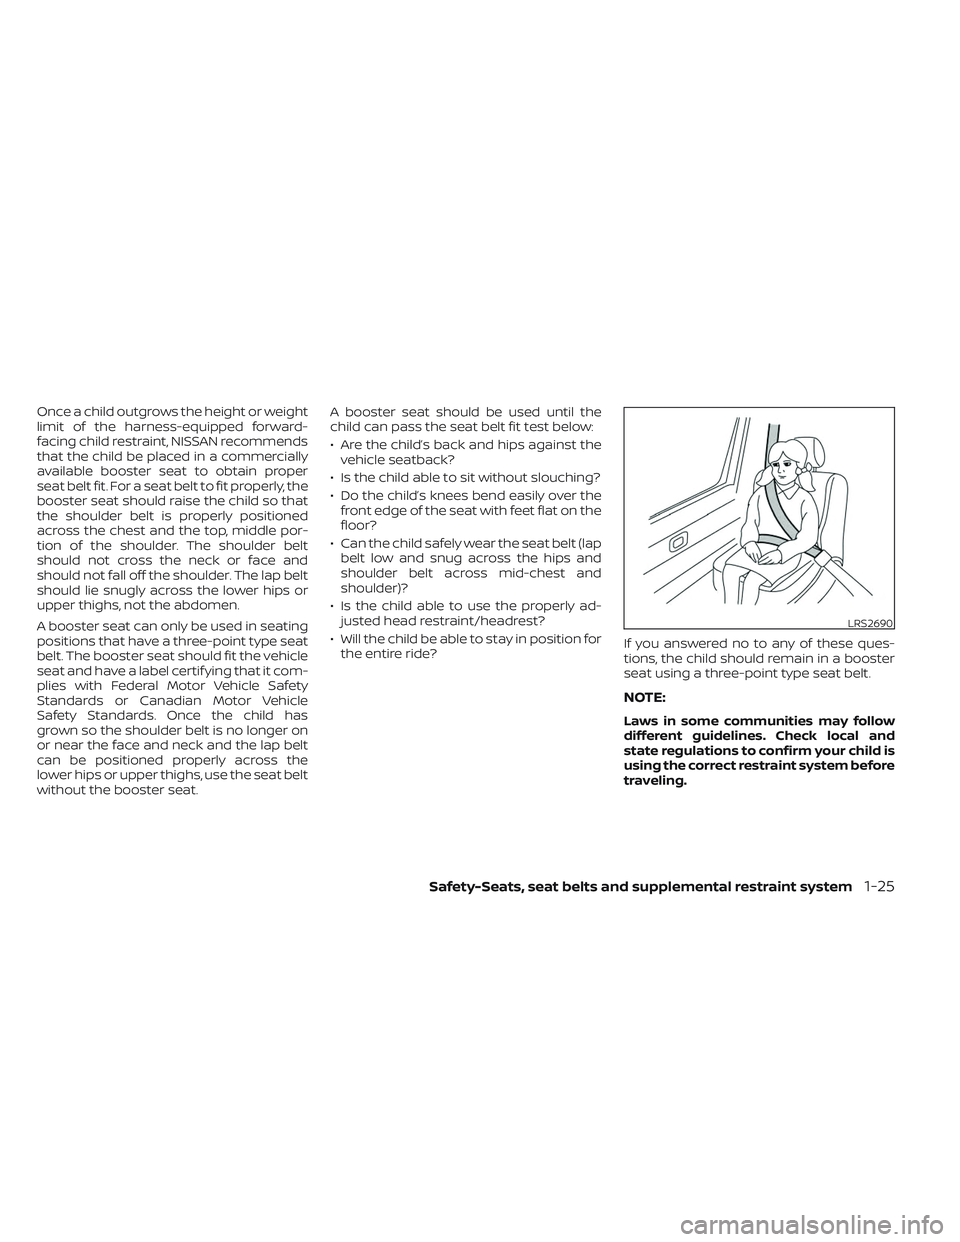
Once a child outgrows the height or weight
limit of the harness-equipped forward-
facing child restraint, NISSAN recommends
that the child be placed in a commercially
available booster seat to obtain proper
seat belt fit. For a seat belt to fit properly, the
booster seat should raise the child so that
the shoulder belt is properly positioned
across the chest and the top, middle por-
tion of the shoulder. The shoulder belt
should not cross the neck or face and
should not fall off the shoulder. The lap belt
should lie snugly across the lower hips or
upper thighs, not the abdomen.
A booster seat can only be used in seating
positions that have a three-point type seat
belt. The booster seat should fit the vehicle
seat and have a label certif ying that it com-
plies with Federal Motor Vehicle Safety
Standards or Canadian Motor Vehicle
Safety Standards. Once the child has
grown so the shoulder belt is no longer on
or near the face and neck and the lap belt
can be positioned properly across the
lower hips or upper thighs, use the seat belt
without the booster seat.A booster seat should be used until the
child can pass the seat belt fit test below:
• Are the child’s back and hips against the
vehicle seatback?
• Is the child able to sit without slouching?
• Do the child’s knees bend easily over the front edge of the seat with feet flat on the
floor?
• Can the child safely wear the seat belt (lap belt low and snug across the hips and
shoulder belt across mid-chest and
shoulder)?
• Is the child able to use the properly ad- justed head restraint/headrest?
• Will the child be able to stay in position for the entire ride? If you answered no to any of these ques-
tions, the child should remain in a booster
seat using a three-point type seat belt.
NOTE:
Laws in some communities may follow
different guidelines. Check local and
state regulations to confirm your child is
using the correct restraint system before
traveling.
LRS2690
Safety-Seats, seat belts and supplemental restraint system1-25
Page 295 of 644
How to use the wireless headphones
When placing the headphones on your
head, make sure to observe the lef t and
right orientation. The headphones must be
oriented correctly (facing forward) to re-
ceive the audio signal. Press the
(power) button on the headphones,
then select channel “A” to listen to monitor
A, or channel “B” to listen to monitor B. Ad-
just the audio level using the volume con-
trol on each headphone.
Wired headphones
There is a 3.5mm stereo headphone out-
put on each monitor which can be used
with most standard stereo headphones
(wired headphones sold separately).
Bluetooth® streaming audio
To listen to audio throughout the entire ve-
hicle, the system includes the ability to
stream audio over a Bluetooth® connec-
tion to the vehicle’s stereo system.
When monitor A is selected as the source
to stream from, the audio output to the
wireless and wired headphones will be dis-
abled (only on monitor A). To use the wire-
less or wired headphones with monitor A,
you must turn off the Bluetooth® stream-
ing feature. To enable/disable Bluetooth® streaming, navigate to the “SETTINGS”
menu, or press
on the remote control
during content playback. For additional in-
formation, see “Settings” (P. 4-68).
Media compatibility
For a list of compatible media formats for
this system, see “Storage device format-
ting” (P. 4-45).
• The metadata or file information of some audio and video files may not be correctly
displayed.
• It is not possible to play content that is protected by DRM (Digital Rights
Management).
• There may be a delay before playback begins when using USB flash drives or SD
cards with complex folder hierarchies or
many files.
• Some audio, video, and image files may be incompatible with this system due to
file characteristics, file format, recording
sof tware used, directory structure,
and/or the type of audio/video encoding
used.
Storage device formatting
This system is compatible with several
types of formatting for USB flash drives and
SD cards. Refer to the documentation that
comes with your storage device for more
details on how to format.
FAT32 - USB and SDHC
Good for smaller capacity storage devices,
but individual files on the drive must be less
than 4GB. This format is good for music
and images.
EX-FAT - USB and SDXC
Better choice for larger capacity storage
devices with files that are more than 4GB.
This format is better for larger files such as
full-length movies.
NTFS - USB and SDXC
Best choice for very large capacity storage
devices - with no limitations on file size. This
format can be used for all file sizes.
Monitor, climate, audio, phone and voice recognition systems4-45
Page 307 of 644
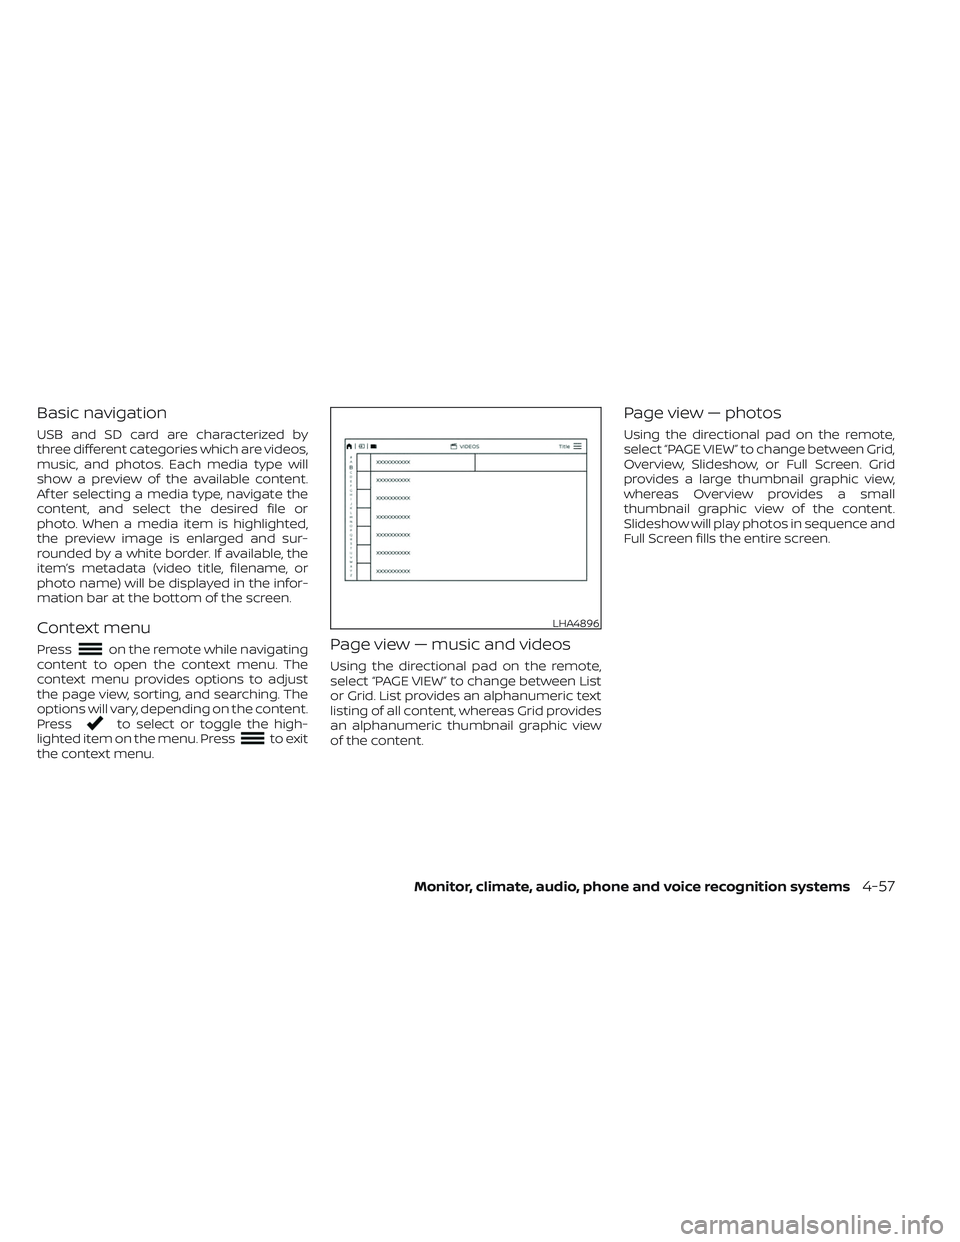
Basic navigation
USB and SD card are characterized by
three different categories which are videos,
music, and photos. Each media type will
show a preview of the available content.
Af ter selecting a media type, navigate the
content, and select the desired file or
photo. When a media item is highlighted,
the preview image is enlarged and sur-
rounded by a white border. If available, the
item’s metadata (video title, filename, or
photo name) will be displayed in the infor-
mation bar at the bottom of the screen.
Context menu
Presson the remote while navigating
content to open the context menu. The
context menu provides options to adjust
the page view, sorting, and searching. The
options will vary, depending on the content.
Press
to select or toggle the high-
lighted item on the menu. Pressto exit
the context menu.
Page view — music and videos
Using the directional pad on the remote,
select “PAGE VIEW ” to change between List
or Grid. List provides an alphanumeric text
listing of all content, whereas Grid provides
an alphanumeric thumbnail graphic view
of the content.
Page view — photos
Using the directional pad on the remote,
select “PAGE VIEW ” to change between Grid,
Overview, Slideshow, or Full Screen. Grid
provides a large thumbnail graphic view,
whereas Overview provides a small
thumbnail graphic view of the content.
Slideshow will play photos in sequence and
Full Screen fills the entire screen.
LHA4896
Monitor, climate, audio, phone and voice recognition systems4-57
Page 342 of 644
TPMS with Easy-Fill Tire Alert
WARNING
Af ter rotating the tires, do not use the
Easy-Fill Tire Alert to adjust the tire
pressure. Instead use a gauge to adjust
the tires to the correct pressure in ac-
cordance with Tire and Loading Infor-
mation label.
When adding air to an under-inflated tire,
the TPMS with Easy-Fill Tire Alert provides
visual and audible signals outside the ve-
hicle to help you inflate the tires to the rec-
ommended COLD tire pressure.
Vehicle set-up
1. Park the vehicle in a safe and level place.
2. Apply the parking brake and place the shif t lever in the P (Park) position.
3. Place the ignition switch in the ON posi- tion. Do not start the engine.
Operation
1. Add air to the tire.
2. Af ter a few seconds, the hazard indica- tors will start flashing. 3. When the designated pressure is
reached, the horn beeps once and the
hazard indicators stop flashing.
4. Perform the above steps for each tire. • If the tire is over-inflated more thanapproximately 4 psi (30 kPa), the horn
beeps and the hazard indicators flash
three times. To correct the pressure,
push the core of the valve stem on the
tire briefly to release pressure. When
the pressure reaches the designated
pressure, the horn beeps once.
• If the hazard indicator does not flash within approximately 15 seconds af ter
starting to inflate the tire, it indicates
that the Easy-Fill Tire Alert is not
operating.
• The TPMS will not activate the Easy-Fill Tire Alert under the following
conditions:– If there is interference from an exter- nal device or transmitter.
– The air pressure from the inflation device is not sufficient to inflate the
tire.
– There is a malfunction in the TPMS.
– There is a malfunction in the horn or hazard indicators. – The identification code of the tire
pressure sensor is not registered to
the system.
– The battery of the tire pressure sen- sor is low.
• If the Easy-Fill Tire Alert does not oper- ate due to TPMS interference, move
the vehicle about 3 f t (1 m) backward
or forward and try again.
If the Easy-Fill Tire Alert is not working, use a
tire pressure gauge.
ON-PAVEMENT AND OFF-ROAD
DRIVING PRECAUTIONS
Utility vehicles have a significantly
higher rollover rate than other types of
vehicles.
They have higher ground clearance than
passenger cars to make them capable of
performing in a variety of on-pavement
and off-road applications. This gives them
a higher center of gravity than ordinary ve-
hicles. An advantage of higher ground
clearance is a better view of the road, allow-
ing you to anticipate problems. However,
they are not designed for cornering at the
same speeds as conventional 2-Wheel
Drive vehicles any more than low-slung
sports cars are designed to perform satis-
factorily under off-road conditions. If at all
5-8Starting and driving
Page 343 of 644
possible, avoid sharp turns at high speeds.
As with other vehicles of this type, failure to
operate this vehicle correctly may result in
loss of control or vehicle rollover.
In a rollover crash, an unbelted person is
significantly more likely to die than a
person wearing a seat belt.
For additional information, see “Driving
safety precautions” (P. 5-10).
AVOIDING COLLISION AND
ROLLOVER
WARNING
Failure to operate this vehicle in a safe
and prudent manner may result in loss
of control or an accident.
Be alert and drive defensively at all times.
Obey all traffic regulations. Avoid excessive
speed, high speed cornering, or sudden
steering maneuvers, because these driving
practices could cause you to lose control of
your vehicle.
As with any vehicle, loss of control could
result in a collision with other vehicles or
objects or cause the vehicle to roll over,
particularly if the loss of control causes
the vehicle to slide sideways. Be attentive at all times, and avoid driving
when tired. Never drive when under the in-
fluence of alcohol or drugs (including pre-
scription or over-the-counter drugs which
may cause drowsiness). Always wear your
seat belt as outlined in “Safety – Seats, seat
belts and supplemental restraint system”
(P. 1-2), and also instruct your passengers to
do so.
Seat belts help reduce the risk of injury in
collisions and rollovers.
In a rollover crash, an unbelted person is
significantly more likely to die than a
person wearing a seat belt.
OFF-ROAD RECOVERY
While driving, the right side or lef t side
wheels may unintentionally leave the road
surface. If this occurs, maintain control of
the vehicle by following the procedure be-
low. Please note that this procedure is only
a general guide. The vehicle must be driven
as appropriate based on the conditions of
the vehicle, road and traffic.
1. Remain calm and do not overreact.
2. Do not apply the brakes.
3. Maintain a firm grip on the steering
wheel with both hands and try to hold a
straight course. 4. When appropriate, slowly release the ac-
celerator pedal to gradually slow the
vehicle.
5. If there is nothing in the way, steer the vehicle to follow the road while vehicle
speed is reduced. Do not attempt to
drive the vehicle back onto the road sur-
face until vehicle speed is reduced.
6. When it is safe to do so, gradually turn the steering wheel until both tires return
to the road surface. When all tires are on
the road surface, steer the vehicle to
stay in the appropriate driving lane.
• If you decide that it is not safe to return the vehicle to the road surface based
on vehicle, road or traffic conditions,
gradually slow the vehicle to a stop in
a safe place off the road.
RAPID AIR PRESSURE LOSS
Rapid air pressure loss or a “blow-out” can
occur if the tire is punctured or is damaged
due to hitting a curb or pothole. Rapid air
pressure loss can also be caused by driving
on under-inflated tires.
Rapid air pressure loss can affect the han-
dling and stability of the vehicle, especially
at highway speeds.
Starting and driving5-9
Page 346 of 644
•Do not attempt to test a 4WD
equipped vehicle on a 2-wheel dyna-
mometer (such as the dynamom-
eters used by some states for emis-
sions testing) or similar equipment
even if the other two wheels are
raised off the ground. Make sure you
inform test facility personnel that
your vehicle is equipped with 4WD
before it is placed on a dynamom-
eter. Using the wrong test equipment
may result in drivetrain damage or
unexpected vehicle movement
which could result in serious vehicle
damage or personal injury.
• Accelerating quickly, sharp steering
maneuvers or sudden braking may
cause loss of control.
• If at all possible, avoid sharp turning
maneuvers, particularly at high
speeds. Your NISSAN 4WD vehicle has
a higher center of gravity than a pas-
senger car. The vehicle is not de-
signed for cornering at the same
speeds as passenger cars. Failure to
operate this vehicle correctly could
result in loss of control and/or a roll-
over accident. •
Always use tires of the same type,
size, brand, construction (bias, bias-
belted, or radial), and tread pattern
on all four wheels. Install tire chains
on the rear wheels when driving on
slippery roads and drive carefully.
• Be sure to check the brakes immedi-
ately af ter driving in mud or water.
For additional information, see “Wet
brakes” (P. 5-114).
• Avoid parking your vehicle on steep
hills. If you get out of the vehicle and
it rolls forward, backward or side-
ways, you could be injured.
• Whenever you drive off-road through
sand, mud or water as deep as the
wheel hub, more frequent mainte-
nance may be required. For addi-
tional information, see “Maintenance
schedules” (P. 9-7).
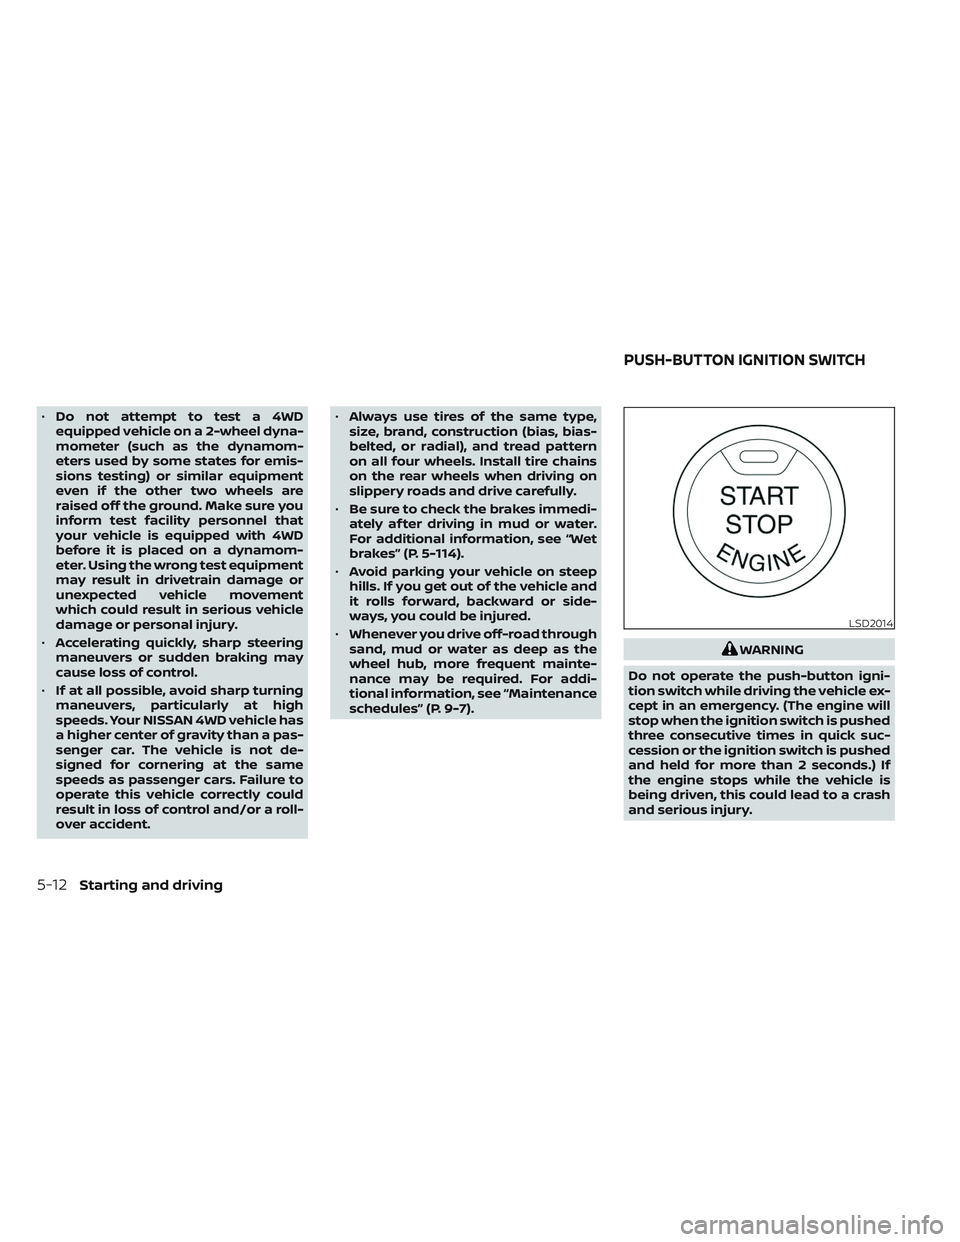
WARNING
Do not operate the push-button igni-
tion switch while driving the vehicle ex-
cept in an emergency. (The engine will
stop when the ignition switch is pushed
three consecutive times in quick suc-
cession or the ignition switch is pushed
and held for more than 2 seconds.) If
the engine stops while the vehicle is
being driven, this could lead to a crash
and serious injury.
LSD2014
PUSH-BUTTON IGNITION SWITCH
5-12Starting and driving
Page 442 of 644
The transfer case 4WD shif t switch is used
to select either 2WD or 4WD depending on
the driving conditions. There are three
types of drive modes available: 2WD, 4H and
4LO.
The 4WD shif t switch electronically controls
the transfer case operation. Rotate the
switch to move between each mode: 2WD,
4H and 4LO.
To change into or out of 4LO, the vehicle
MUST be stationary, move the shif t lever
to N (Neutral), and depress the brake
pedal. The switch must be pushed and
turned to select 4LO.
WARNING
• When parking, apply the parking
brake before stopping the engine
and make sure that the 4WD shif t in-
dicator is on and the Automatic
Transmission Park (ATP) warning
light goes off. Otherwise, the vehicle
could unexpectedly move even if the
A/T is in the P (Park) position. •
The 4LO indicator must stop blinking
and remain illuminated or turn off
before shif ting the transmission into
gear. If the shif t lever is shif ted from
the N (Neutral) position to any other
gear when the 4LO indicator is blink-
ing, the vehicle may move
unexpectedly.
CAUTION
• Never shif t the 4WD shif t switch be-
tween 4LO and 4H while driving.
• The 4H position provides greater
traction. Avoid excessive speed, as it
will cause increased fuel consump-
tion and higher oil temperatures, and
could damage drivetrain compo-
nents. Speeds over 62 mph (100
km/h) in 4H is not recommended.
• The 4LO position provides maximum
power and traction. Avoid raising ve-
hicle speed excessively, as the maxi-
mum speed is approximately 31 mph
(50 km/h). •
When driving straight, shif t the 4WD
shif t switch to the 2WD or 4H posi-
tion. Do not move the 4WD shif t
switch when making a turn or
reversing.
• Do not shif t the 4WD shif t switch (be-
tween 2WD and 4H) while driving on
steep downhill grades. Use the en-
gine brake and low A/T gears (M1 or
M2) for engine braking.
• Do not operate the 4WD shif t switch
(between 2WD and 4H) with the rear
wheels spinning.
• Do not drive on dry hard surface
roads in the 4H or 4LO position. Driv-
ing on dry hard surfaces in 4H or 4LO
may cause unnecessary noise and
tire wear. NISSAN recommends driv-
ing in the 2WD position under these
conditions.
• The 4WD transfer case may not be
shif ted between 4H and 4LO at low
ambient temperatures and the
transfer 4LO position indicator may
blink even when the 4WD shif t switch
is shif ted. Af ter driving for a while
you can change the 4WD transfer
case between 4H and 4LO.
5-108Starting and driving
Page 448 of 644
The brake system has two separate hy-
draulic circuits. If one circuit malfunctions,
you will still have braking at two wheels.
BRAKE PRECAUTIONS
Using the brakes
Avoid resting your foot on the brake pedal
while driving. This will overheat the brakes,
wear out the brake pads faster, and reduce
gas mileage.
To help reduce brake wear and to prevent
the brakes from overheating, reduce speed
and downshif t to a lower gear before going
down a slope or long grade. Overheated
brakes may reduce braking performance
and could result in loss of vehicle control.
WARNING
• While driving on a slippery surface,
be careful when braking, accelerat-
ing or downshif ting. Abrupt braking
or accelerating could cause the
wheels to skid and result in an
accident.
• If the engine is not running or is
turned off while driving, the power
assist for the brakes will not work.
Braking will be harder.
Wet brakes
When the vehicle is washed or driven
through water, the brakes may get wet. As
a result, your braking distance will be lon-
ger and the vehicle may pull to one side
during braking.
To dry the brakes, drive the vehicle at a safe
speed while lightly pressing the brake
pedal to heat up the brakes. Do this until
the brakes return to normal. Avoid driving
the vehicle at high speeds until the brakes
function correctly.
Parking brake break-in
Break in the parking brake shoes whenever
the stopping effect of the parking brake is
weakened or whenever the parking brake
shoes and/or drums/rotors are replaced,
in order to assure the best braking
performance.
This procedure is described in the vehicle
service manual. It is recommended that
you visit a NISSAN dealer for this service.
ANTI-LOCK BRAKING SYSTEM (ABS)
WARNING
• The ABS is a sophisticated device, but
it cannot prevent accidents resulting
from careless or dangerous driving
techniques. It can help maintain ve-
hicle control during braking on slip-
pery surfaces. Remember that stop-
ping distances on slippery surfaces
will be longer than on normal sur-
faces even with ABS. Stopping dis-
tances may also be longer on rough,
gravel or snow covered roads, or if
you are using tire chains. Always
maintain a safe distance from the ve-
hicle in front of you. Ultimately, the
driver is responsible for safety.
• Tire type and condition may also af-
fect braking effectiveness.
– When replacing tires, install the
specified size of tires on all four
wheels.
– When installing a spare tire, make
sure that it is the proper size and
type as specified on the Tire and
Loading Information label. For ad-
ditional information, see “Tire and
Loading Information label”
(P. 8-36).
BRAKE SYSTEM
5-114Starting and driving
Page 452 of 644
WARNING
• The VDC system is designed to help
the driver maintain stability but does
not prevent accidents due to abrupt
steering operation at high speeds or
by careless or dangerous driving
techniques. Reduce vehicle speed
and be especially careful when driv-
ing and cornering on slippery sur-
faces and always drive carefully.
• Do not modif y the vehicle's suspen-
sion. If suspension parts such as
shock absorbers, struts, springs, sta-
bilizer bars, bushings and wheels are
not NISSAN recommended for your
vehicle or are extremely deterio-
rated, the VDC system may not oper-
ate properly. This could adversely af-
fect vehicle handling performance,
and the
indicator light may flash
or theindicator light may
illuminate.
• If brake related parts such as brake
pads, rotors and calipers are not
NISSAN recommended or are ex-
tremely deteriorated, the VDC sys-
tem may not operate properly and
the
indicator light may
illuminate. •
If engine control related parts are not
NISSAN recommended or are ex-
tremely deteriorated, the
indi-
cator light may illuminate.
• When driving on extremely inclined
surfaces such as higher banked cor-
ners, the VDC system may not oper-
ate properly and the
indicator
light may flash or theindicator
light may illuminate. Do not drive on
these types of roads.
• When driving on an unstable surface
such as a turntable, ferry, elevator or
ramp, the
indicator light may
flash or theindicator light may
illuminate. This is not a malfunction.
Restart the engine af ter driving onto
a stable surface.
• If wheels or tires other than the
NISSAN recommended ones are
used, the VDC system may not oper-
ate properly and the
indicator
light may flash or theindicator
light may illuminate.
• The VDC system is not a substitute
for winter tires or tire chains on a
snow covered road.
BRAKE FORCE DISTRIBUTION
During braking while driving through turns,
the system optimizes the distribution of
force to each of the front and rear wheels
depending on the radius of the turn.
WARNING
• The VDC system is designed to help
the driver maintain stability but does
not prevent accidents due to abrupt
steering operation at high speeds or
by careless or dangerous driving
techniques. Reduce vehicle speed
and be especially careful when driv-
ing and cornering on slippery sur-
faces and always drive carefully.
• Do not modif y the vehicle's suspen-
sion. If suspension parts such as
shock absorbers, struts, springs, sta-
bilizer bars, bushings and wheels are
not NISSAN recommended for your
vehicle or are extremely deterio-
rated, the VDC system may not oper-
ate properly. This could adversely af-
fect vehicle handling performance,
and the
indicator light may flash
or theindicator light may
illuminate.
5-118Starting and driving
Page 453 of 644
•If brake related parts such as brake
pads, rotors and calipers are not
NISSAN recommended or are ex-
tremely deteriorated, the VDC sys-
tem may not operate properly and
the
indicator light may
illuminate.
• If engine control related parts are not
NISSAN recommended or are ex-
tremely deteriorated, the
indi-
cator light may illuminate.
• When driving on extremely inclined
surfaces such as higher banked cor-
ners, the VDC system may not oper-
ate properly and the
indicator
light may flash or theindicator
light may illuminate. Do not drive on
these types of roads.
• When driving on an unstable surface
such as a turntable, ferry, elevator or
ramp, the
indicator light may
flash or theindicator light may
illuminate. This is not a malfunction.
Restart the engine af ter driving onto
a stable surface. •
If wheels or tires other than the
NISSAN recommended ones are
used, the VDC system may not oper-
ate properly and the
indicator
light may flash or theindicator
light may illuminate.
• The VDC system is not a substitute
for winter tires or tire chains on a
snow covered road.
WARNING
• Never rely solely on the hill descent
control system to control vehicle
speed when driving on steep down-
hill grades. Always drive carefully and
attentively when using the hill de-
scent control system and decelerate
the vehicle speed by depressing the
brake pedal if necessary. Be espe-
cially careful when driving on frozen,
muddy or extremely steep downhill
roads. Failure to control vehicle
speed may result in a loss of control
of the vehicle and possible serious
injury or death.
• The hill descent control may not con-
trol the vehicle speed on a hill under
all load or road conditions. Always be
prepared to depress the brake pedal
to control vehicle speed. Failure to do
so may result in a collision or serious
personal injury.
HILL DESCENT CONTROL SYSTEM (if
so equipped)
Starting and driving5-119