NISSAN VERSA 2007 1.G Navigation Manual
VERSA 2007 1.G
NISSAN
NISSAN
https://www.carmanualsonline.info/img/5/721/w960_721-0.png
NISSAN VERSA 2007 1.G Navigation Manual
Page 21 of 272
MAP SCREEN TYPES
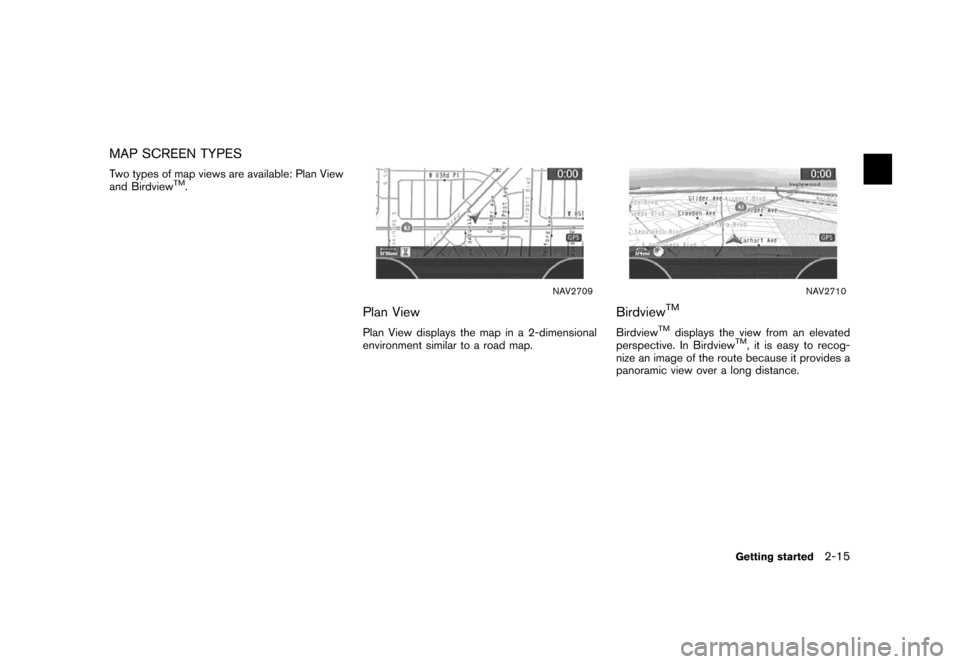
Two types of map views are available: Plan View
and BirdviewTM.
NAV2709
Plan View
Plan View displays the map in a 2-dimensional
environment similar to a road map.
NAV2710
BirdviewTM
BirdviewTMdisplays the view from an elevated
perspective. In BirdviewTM, it is easy to recog-
nize an image of the route because it provides a
panoramic view over a long distance.
Getting started2-15
Page 22 of 272
NAV2711
SWITCHING MAP VIEW
1. Pushwhile the current location
map screen is displayed.
NAV2712
2. Highlight [Map View] and push.
NAV2713
3. Highlight the preferred map view and push
. The indicator of the selected
map view illuminates.
“SWITCHING THE MAP VIEW”
(page 3-4)
4. Push
Page 23 of 272
INFO:
.When you select a map view, a preview of
that view is displayed on the right side of the
screen.
.You can also switch the map view using the
following procedure.
1) Push.
2) Highlight [Navigation] and push
.
3) Highlight [Map View] and push
.
Getting started2-17
Page 27 of 272
NAV2715
3. Highlight [Home Location (Add New)] and
push.
NAV3023
4. A confirmation message is displayed. Con-
firm the contents of the message, highlight
[Yes] and push.
NAV3048
5. Highlight [Street Address] and push
. A character input screen is
displayed.
Getting started2-21
Page 28 of 272
NAV3062
6. Enter the address of your home, highlight
[OK] and push.
The map screen is displayed.
“SETTING A STREET ADDRESS”
(page 4-5)
NAV3050
7. Using the joystick, adjust your home location
if necessary.
8. After adjusting the location, push
.
NAV3051
9. A message is displayed and your home
location is stored.
10. Push
Page 29 of 272
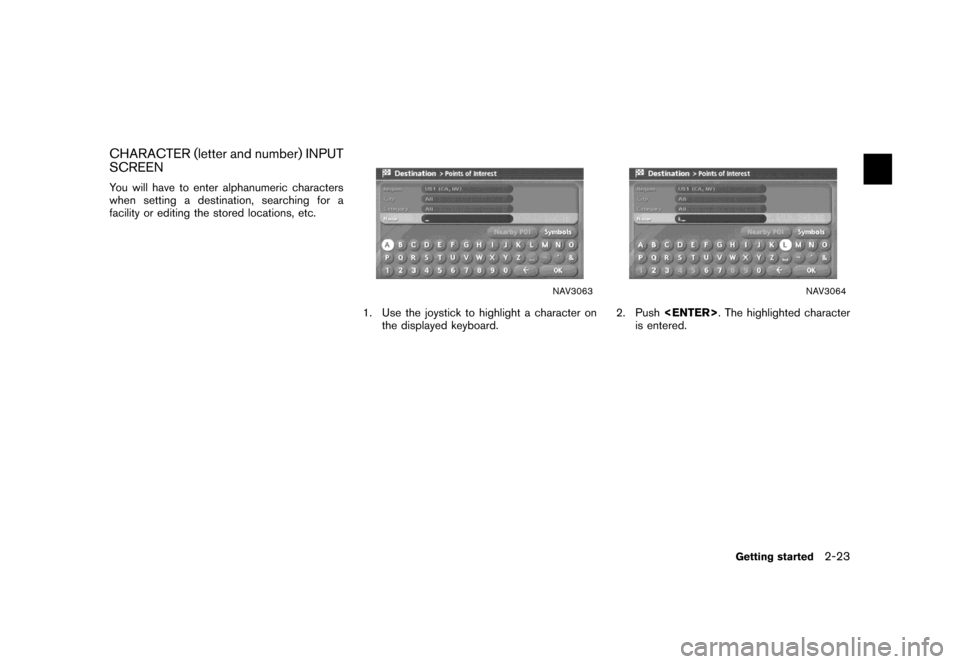
CHARACTER (letter and number) INPUT
SCREEN
You will have to enter alphanumeric characters
when setting a destination, searching for a
facility or editing the stored locations, etc.
NAV3063
1. Use the joystick to highlight a character on
the displayed keyboard.
NAV3064
2. Push. The highlighted character
is entered.
Getting started2-23
Page 31 of 272
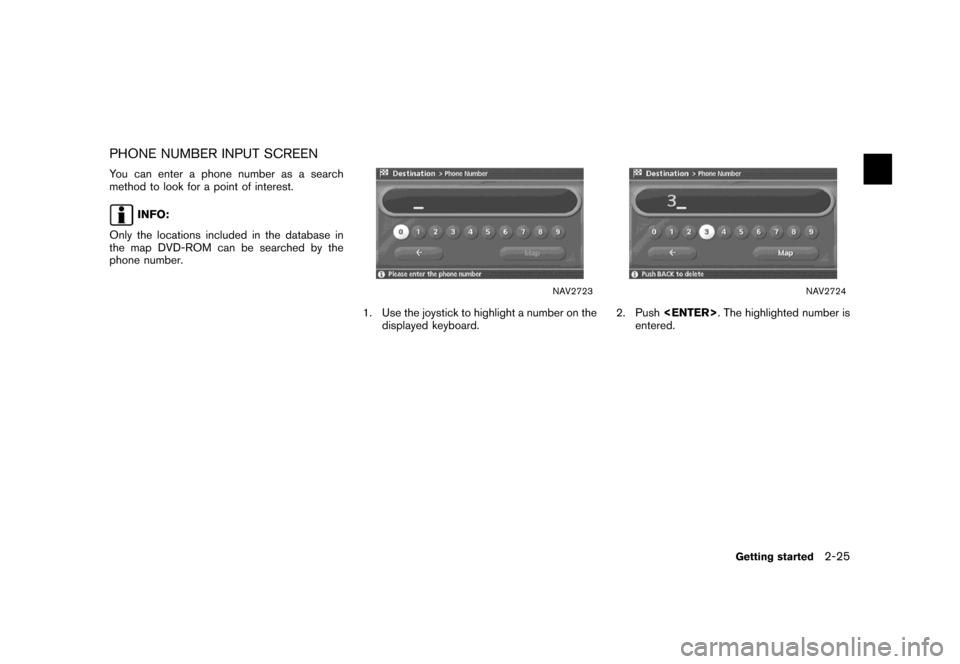
PHONE NUMBER INPUT SCREEN
You can enter a phone number as a search
method to look for a point of interest.
INFO:
Only the locations included in the database in
the map DVD-ROM can be searched by the
phone number.
NAV2723
1. Use the joystick to highlight a number on the
displayed keyboard.
NAV2724
2. Push. The highlighted number is
entered.
Getting started2-25
Page 33 of 272
NAV2727
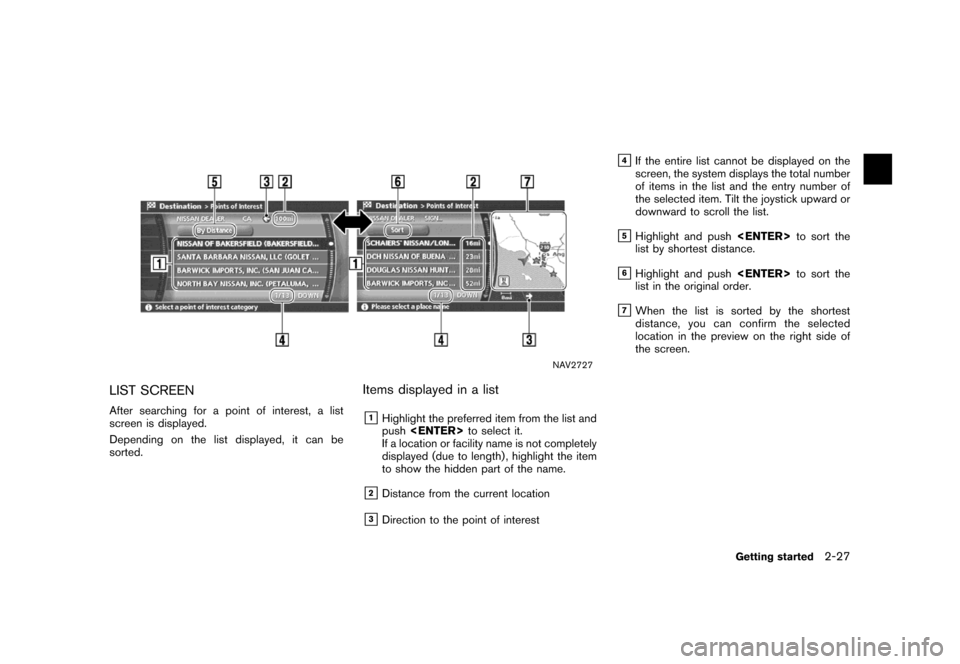
LIST SCREEN
After searching for a point of interest, a list
screen is displayed.
Depending on the list displayed, it can be
sorted.
Items displayed in a list
&1Highlight the preferred item from the list and
pushto select it.
If a location or facility name is not completely
displayed (due to length) , highlight the item
to show the hidden part of the name.
&2Distance from the current location
&3Direction to the point of interest
&4If the entire list cannot be displayed on the
screen, the system displays the total number
of items in the list and the entry number of
the selected item. Tilt the joystick upward or
downward to scroll the list.
&5Highlight and pushto sort the
list by shortest distance.
&6Highlight and pushto sort the
list in the original order.
&7When the list is sorted by the shortest
distance, you can confirm the selected
location in the preview on the right side of
the screen.
Getting started2-27
Page 35 of 272
NAV2729
3. Highlight [Travel] and push.
NAV2730
4. From the category list, highlight [AIRPORT]
and push.
The character input screen is displayed.
NAV3067
5. Highlight [OK] and push.
A list screen is displayed.
INFO:
You can enter the city name and facility
name to narrow down your search.
Getting started2-29
Page 36 of 272
NAV2732
6. Highlight the preferred airport from the list
and push.
NAV2733
INFO:
By selecting [By Distance], you can sort the
list by the shortest distance.
The position of the selected location is
displayed in the preview on the right side
of the screen.
NAV2734
7. The selected destination is displayed at the
center of the map. Highlight [OK] after
confirming the location of the displayed
destination, and push.
INFO:
The system sets the destination to the
selected location and starts calculating a
route.
2-30Getting started

![NISSAN VERSA 2007 1.G Navigation Manual NAV2711
SWITCHING MAP VIEW
1. Push<ENTER>while the current location
map screen is displayed.
NAV2712
2. Highlight [Map View] and push<ENTER>.
NAV2713
3. Highlight the preferred map view and push
<ENTE NISSAN VERSA 2007 1.G Navigation Manual NAV2711
SWITCHING MAP VIEW
1. Push<ENTER>while the current location
map screen is displayed.
NAV2712
2. Highlight [Map View] and push<ENTER>.
NAV2713
3. Highlight the preferred map view and push
<ENTE](/img/5/721/w960_721-21.png)

![NISSAN VERSA 2007 1.G Navigation Manual NAV2715
3. Highlight [Home Location (Add New)] and
push<ENTER>.
NAV3023
4. A confirmation message is displayed. Con-
firm the contents of the message, highlight
[Yes] and push<ENTER>.
NAV3048
5. Highl NISSAN VERSA 2007 1.G Navigation Manual NAV2715
3. Highlight [Home Location (Add New)] and
push<ENTER>.
NAV3023
4. A confirmation message is displayed. Con-
firm the contents of the message, highlight
[Yes] and push<ENTER>.
NAV3048
5. Highl](/img/5/721/w960_721-26.png)
![NISSAN VERSA 2007 1.G Navigation Manual NAV3062
6. Enter the address of your home, highlight
[OK] and push<ENTER>.
The map screen is displayed.
“SETTING A STREET ADDRESS”
(page 4-5)
NAV3050
7. Using the joystick, adjust your home locati NISSAN VERSA 2007 1.G Navigation Manual NAV3062
6. Enter the address of your home, highlight
[OK] and push<ENTER>.
The map screen is displayed.
“SETTING A STREET ADDRESS”
(page 4-5)
NAV3050
7. Using the joystick, adjust your home locati](/img/5/721/w960_721-27.png)


![NISSAN VERSA 2007 1.G Navigation Manual NAV2729
3. Highlight [Travel] and push<ENTER>.
NAV2730
4. From the category list, highlight [AIRPORT]
and push<ENTER>.
The character input screen is displayed.
NAV3067
5. Highlight [OK] and push<ENTER NISSAN VERSA 2007 1.G Navigation Manual NAV2729
3. Highlight [Travel] and push<ENTER>.
NAV2730
4. From the category list, highlight [AIRPORT]
and push<ENTER>.
The character input screen is displayed.
NAV3067
5. Highlight [OK] and push<ENTER](/img/5/721/w960_721-34.png)
![NISSAN VERSA 2007 1.G Navigation Manual NAV2732
6. Highlight the preferred airport from the list
and push<ENTER>.
NAV2733
INFO:
By selecting [By Distance], you can sort the
list by the shortest distance.
The position of the selected locatio NISSAN VERSA 2007 1.G Navigation Manual NAV2732
6. Highlight the preferred airport from the list
and push<ENTER>.
NAV2733
INFO:
By selecting [By Distance], you can sort the
list by the shortest distance.
The position of the selected locatio](/img/5/721/w960_721-35.png)