mirror NISSAN VERSA HATCHBACK 2012 1.G Quick Reference Guide
[x] Cancel search | Manufacturer: NISSAN, Model Year: 2012, Model line: VERSA HATCHBACK, Model: NISSAN VERSA HATCHBACK 2012 1.GPages: 16, PDF Size: 1.55 MB
Page 2 of 16

*See your Owner’s Manual for information.
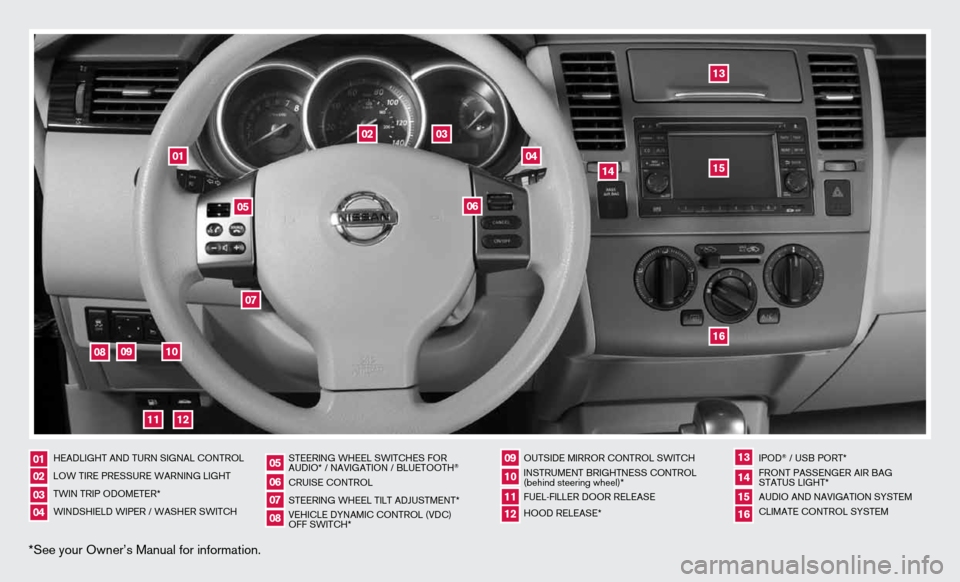
heAdLiGht And tuRn SiGnAL cOntROL
LOW tiRe PReSSuRe WARninG LiGht
tWin tRiP OdOMeteR*
WindShieLd WiPeR / WASheR SWitch SteeRinG WheeL SWitcheS fOR
AudiO* / nAViGAtiOn / bLuetOOth
®
cRuiSe cOntROL
SteeRinG WheeL tiLt AdJuStMent*
VehicLe dYnAMic cOntROL (Vdc)
Off SWitch* OutSide MiRROR cOntROL SWitch
inStRuMent bRiGhtneSS cOntROL
(behind steering wheel)*
fueL-fiLLeR dOOR ReLeASe
hOOd ReLeASe*
iPOd
® / uSb PORt*
fROnt PASSenGeR AiR bAG
StAtuS LiGht*
AudiO And nAViGAtiOn SYSteM
cLiMAte cOntROL SYSteM
01020304
05
09
13
06
10
141516
07
11
08
12
02
03
01
04
05
09
15
06
12
16
07
13
08
14
11
10
Page 3 of 16

tAbLe Of cOntentS
• A cellular telephone should not be used for any purpose while
driving so full attention may be given to vehicle operation.
• Always wear your seat belt.
• Supplemental air bags do not replace proper seat belt usage.
• Children 12 and under should always ride in the rear seat
properly secured in child restraints or seat belts according to
their age and weight.
• Do not drink and drive.
for more information, refer to the “Safety — Seats, seat belts and
supplemental restraint system (section 1)”,
“Display screen, heater,
air conditioner, audio and phone systems (section 4)” and “Starting
and driving (section 5)” of your Owner’s Manual.
Additional information about your vehicle is also
available in your Owner’s Manual, navigation System Owner’s Manual and at www.nissanusa.com.
to view detailed
instructional videos, go to
www.nissanownersinfo.mobi/2012/versahatchback or snap this barcode with an appropriate barcode reader.
E SSE ntial i nformation
Loose Fuel Cap . . . . . . . . . . . . . . . . . . . . . . . . . . . . . . . . . . . .\
. . . . . . . . . . . . 2
tire Pressure Monitoring System (tPMS) ...........................2
fir St DrivE fEatur ES
niSSAn intelligent key
® System (if so equipped) .................... 3
Rear Hatch Release (NISSAN Intelligent Key® models only) ........... 3
Seat Adjustments .............................................. 4
Outside Mirror Control Switch .................................... 4
Starting/Stopping the Engine ..................................... 4
headlight control .............................................. 5
Windshield Wiper/Washer Switch ................................ 6
Climate Control (if so equipped) .................................. 6
fM/AM/XM
® Satellite Radio with CD Player (if so equipped) ...........8
Cruise Control (if so equipped) ................................... 9
fuel-filler door ................................................. 9
Sy StEm GuiDE
bluetooth
® Hands-free Phone System (if so equipped) ...............10
Navigation System (if so equipped) ............................... 12
Page 6 of 16

To view detailed instructional videos regarding these and other features, please go to www.nissanownersinfo.mobi.
StartinG/StoPPin G tHE EnG in E
cOntinuOuSLY VARiAbLe tRAnSMiSSiOn (cVt)
(niSSAn intelligent key® models only - if so equipped)
Depress the brake pedal.
Push the ignition switch in.
confirm the intelligent key system warning light is
illuminated green.
Turn the ignition switch to start the engine.
4
first drive features
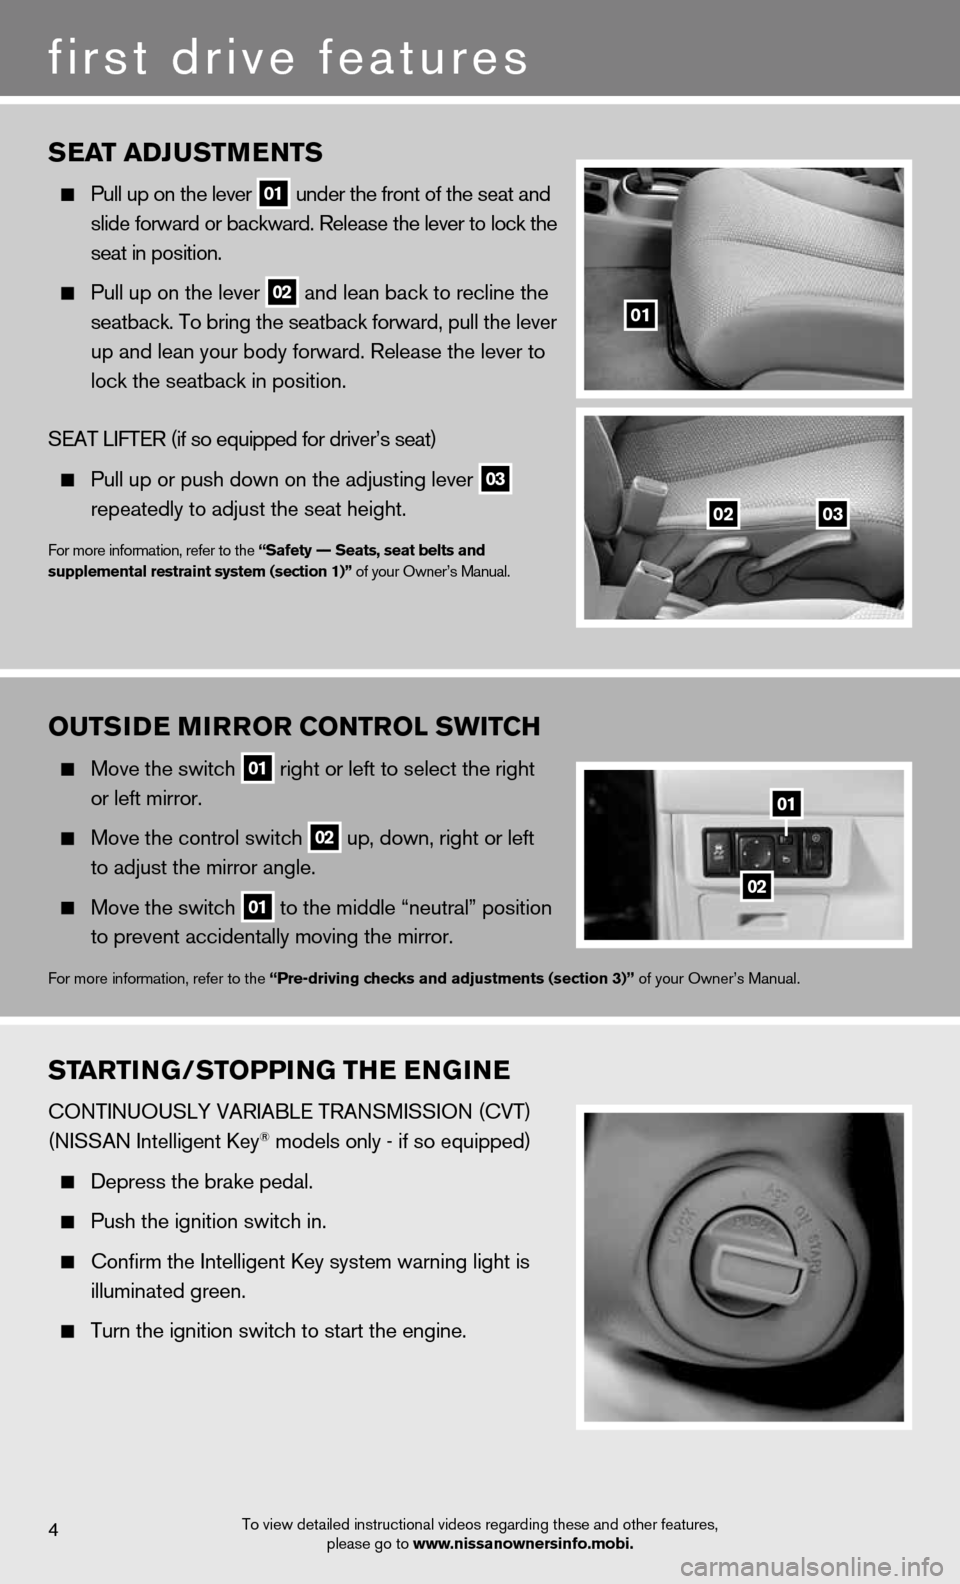
SEat aDJ uStm EntS
Pull up on the lever
01 under the front of the seat and
slide forward or backward. Release the lever to lock the
seat in position.
Pull up on the lever
02 and lean back to recline the
seatback. To bring the seatback forward, pull the lever
up and lean your body forward. Release the lever to
lock the seatback in position.
SeAt LifteR (if so equipped for driver’s seat)
Pull up or push down on the adjusting lever
03
repeatedly to adjust the seat height.
for more information, refer to the “Safety –– Seats, seat belts and
supplemental restraint system (section 1)” of your Owner’s Manual.
01
0203
outS
iDE mirror Control SWit CH
Move the switch
01 right or left to select the right
or left mirror.
Move the control switch
02 up, down, right or left
to adjust the mirror angle.
Move the switch
01 to the middle “neutral” position
to prevent accidentally moving the mirror.
for more information, refer to the “Pre-driving checks and adjustments (section 3)” of your Owner’s Manual.
01
02
Page 9 of 16

To view detailed instructional videos regarding these and other features, please go to www.nissanownersinfo.mobi.7
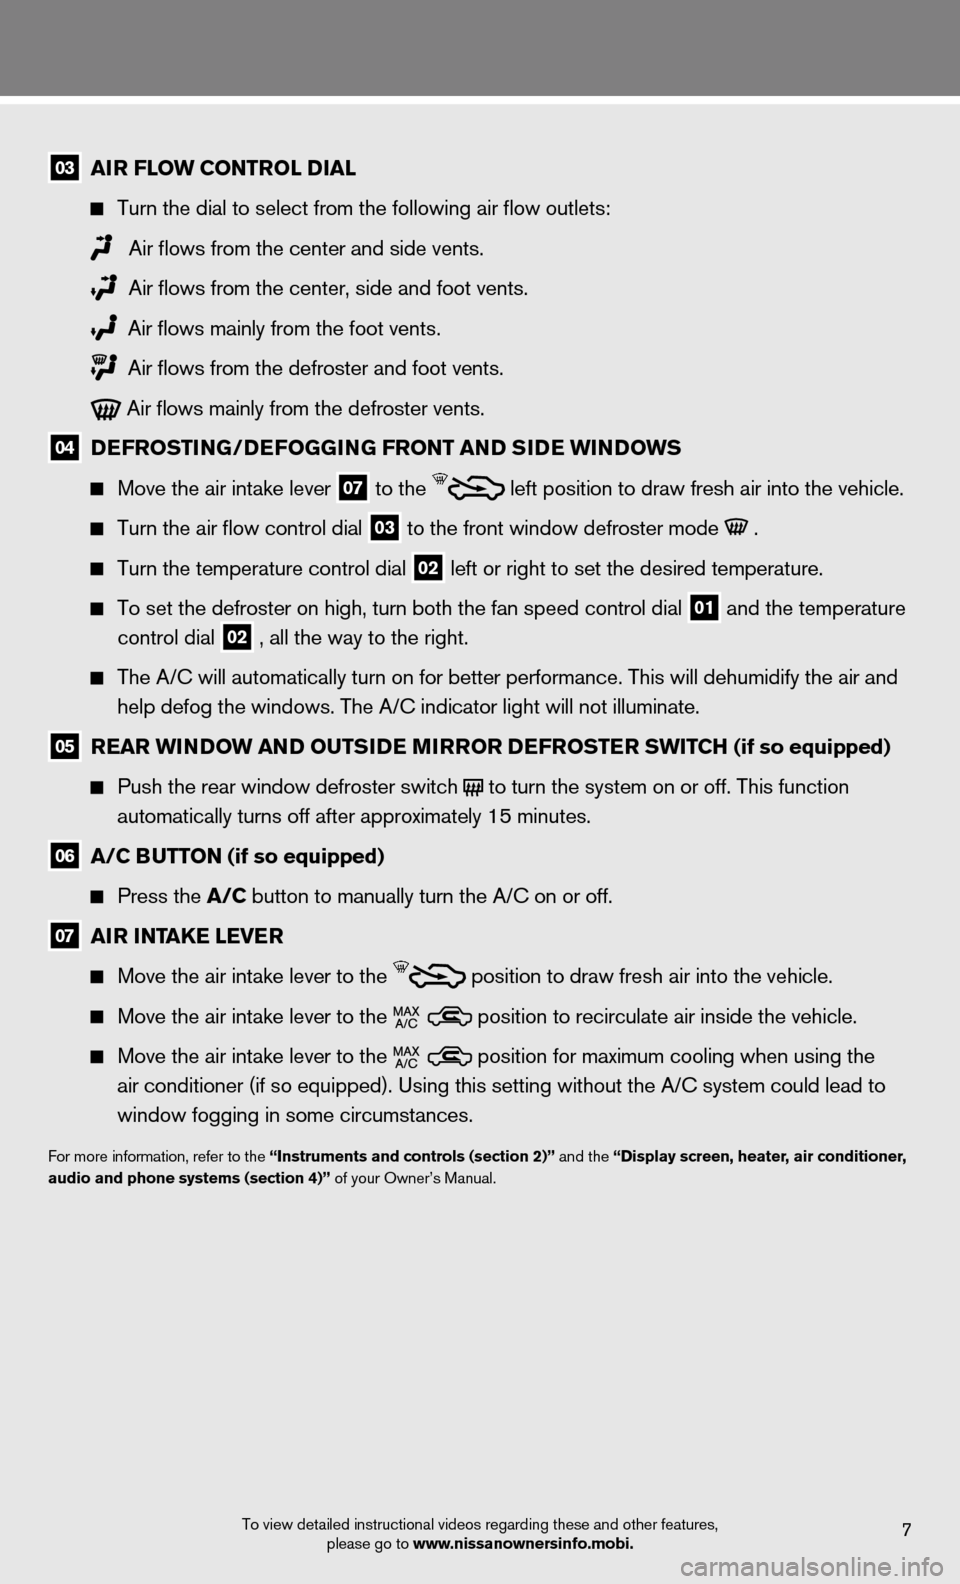
03 air floW Control D ial
Turn the dial to select from the following air flow outlets:
Air flows from the center and side vents.
Air flows from the center, side and foot vents.
Air flows mainly from the foot vents.
Air flows from the defroster and foot vents.
Air flows mainly from the defroster vents.
04 DE
froStin G/DEfoGG inG front an D SiDE Win Do WS
Move the air intake lever
07 to the
left position to draw fresh air into the vehicle.
Turn the air flow control dial
03 to the front window defroster mode .
Turn the temperature control dial
02 left or right to set the desired temperature.
To set the defroster on high, turn both the fan speed control dial
01 and the temperature
control dial
02 , all the way to the right.
The A/C will automatically turn on for better performance. this will dehumidify the air and
help defog the windows. The A/C indicator light will not illuminate.
05 rEar Win Do W an D outS iDE mirror DE froStEr SWitCH (if so equipped)
Push the rear window defroster switch
to turn the system on or off. This function
automatically turns off after approximately 15 minutes.
06 a/C Button (if so equipped)
Press the a/C button to manually turn the A/c on or off.
07 air intaKE lEvE r
Move the air intake lever to the
position to draw fresh air into the vehicle.
Move the air intake lever to the position to recirculate air inside the vehicle.
Move the air intake lever to the position for maximum cooling when using the
air conditioner (if so equipped). Using this setting without the A/C system could lead to
window fogging in some circumstances.
for more information, refer to the “instruments and controls (section 2)” and the “Display screen, heater, air conditioner,
audio and phone systems (section 4)” of your Owner’s Manual.