lock NISSAN XTERRA 2000 WD22 / 1.G Owner's Manual
[x] Cancel search | Manufacturer: NISSAN, Model Year: 2000, Model line: XTERRA, Model: NISSAN XTERRA 2000 WD22 / 1.GPages: 263, PDF Size: 2.16 MB
Page 69 of 263

The power windows operate when the igni-
tion key is in the ON position.
To open the driver window, press the driver
switch and hold it down. To close the win-
dow, lift the switch up. The driver side
control panel is equipped with switches to
open or close all the windows.
Locking passenger's windows
When the lock button is depressed, only the
driver side window can be opened or
closed. Push it in again to cancel the win-
dow lock function.
Passenger power window switch
The passenger switch opens or closes the
passenger window. To open the window,
press the switch and hold it down. To close
the window, lift the switch up.
Rear power windows
The rear power window switches open or
close only the corresponding window. To
open the window, push the switch and hold
it down. To close the window, push the
switch up.
AIC1028AIC1110
2-26Instruments and controls
ZX
Page 71 of 263
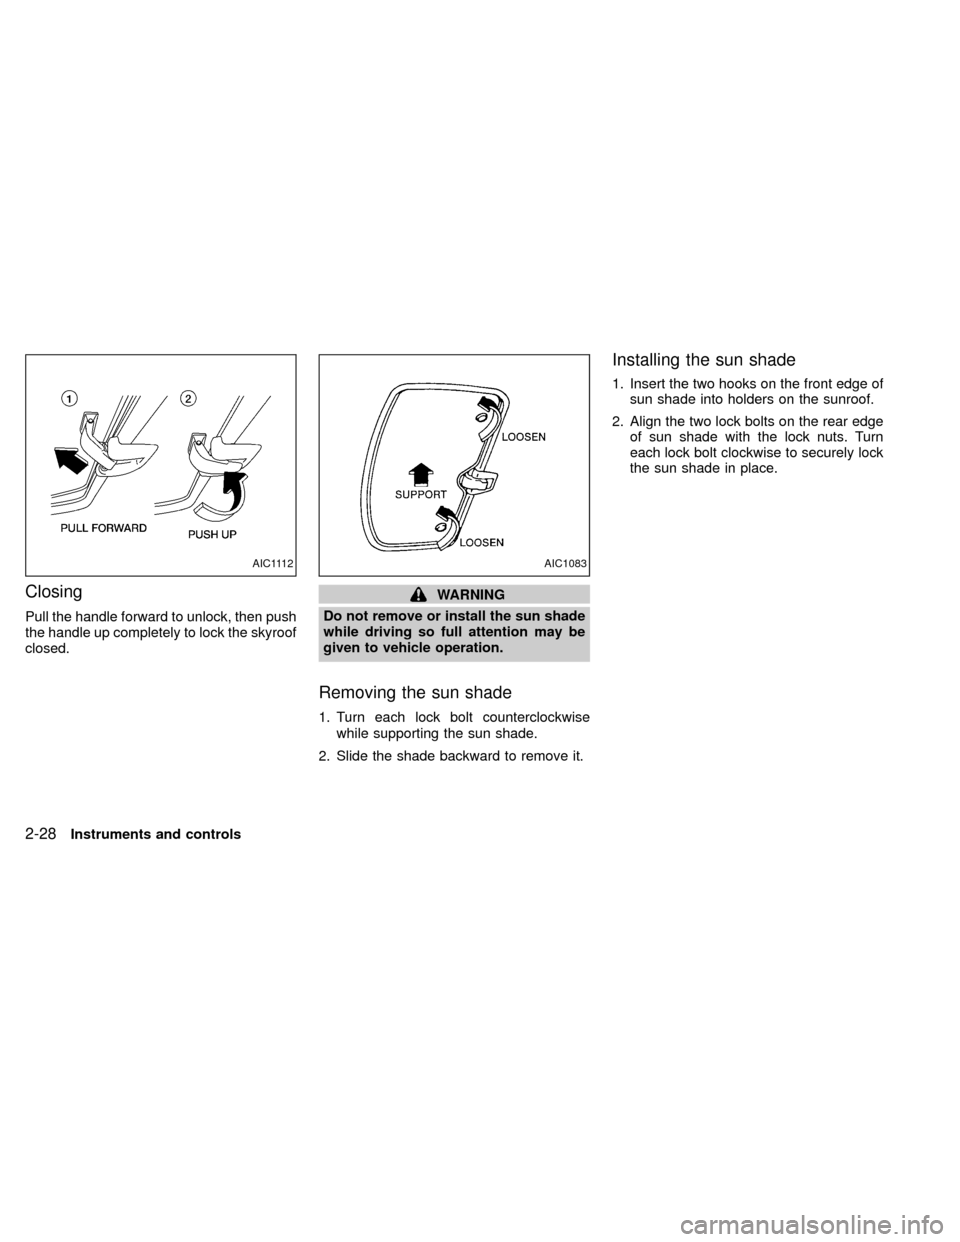
Closing
Pull the handle forward to unlock, then push
the handle up completely to lock the skyroof
closed.
WARNING
Do not remove or install the sun shade
while driving so full attention may be
given to vehicle operation.
Removing the sun shade
1. Turn each lock bolt counterclockwise
while supporting the sun shade.
2. Slide the shade backward to remove it.
Installing the sun shade
1. Insert the two hooks on the front edge of
sun shade into holders on the sunroof.
2. Align the two lock bolts on the rear edge
of sun shade with the lock nuts. Turn
each lock bolt clockwise to securely lock
the sun shade in place.
AIC1112AIC1083
2-28Instruments and controls
ZX
Page 72 of 263

3 Pre-driving checks and adjustments
Key .........................................................................3-2
Door locks ..............................................................3-2
Power door locks (if so equipped) .........................3-3
Child safety rear door lock .....................................3-4
Multi-remote control system (if so equipped).........3-4
Battery replacement ...............................................3-7
Illuminated entry system ........................................3-8
Hood release ..........................................................3-9
Glove box ...............................................................3-9Back door lock......................................................3-10
Roof rack with gear basket (if so equipped) ........ 3-11
Step rail ................................................................3-13
Fuel filler cap ........................................................3-14
Tilting steering wheel (if so equipped) .................3-15
Outside mirror remote control (if so equipped) ....3-15
Outside mirrors .....................................................3-16
Inside mirror .........................................................3-17
Vanity mirror (if so equipped) ...............................3-17
ZX
Page 73 of 263
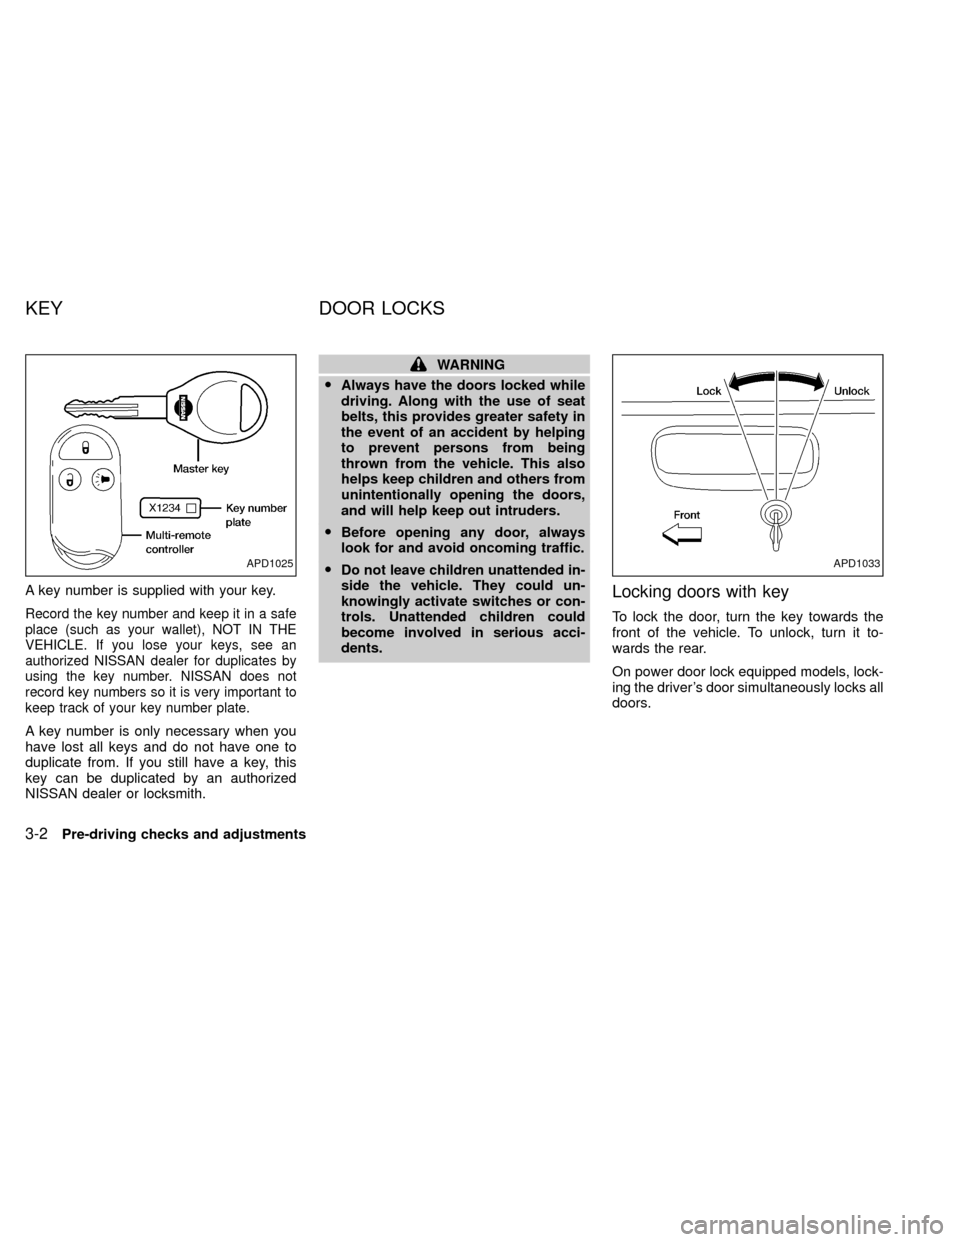
A key number is supplied with your key.
Record the key number and keep it in a safe
place (such as your wallet), NOT IN THE
VEHICLE. If you lose your keys, see an
authorized NISSAN dealer for duplicates by
using the key number. NISSAN does not
record key numbers so it is very important to
keep track of your key number plate.
A key number is only necessary when you
have lost all keys and do not have one to
duplicate from. If you still have a key, this
key can be duplicated by an authorized
NISSAN dealer or locksmith.
WARNING
OAlways have the doors locked while
driving. Along with the use of seat
belts, this provides greater safety in
the event of an accident by helping
to prevent persons from being
thrown from the vehicle. This also
helps keep children and others from
unintentionally opening the doors,
and will help keep out intruders.
OBefore opening any door, always
look for and avoid oncoming traffic.
ODo not leave children unattended in-
side the vehicle. They could un-
knowingly activate switches or con-
trols. Unattended children could
become involved in serious acci-
dents.
Locking doors with key
To lock the door, turn the key towards the
front of the vehicle. To unlock, turn it to-
wards the rear.
On power door lock equipped models, lock-
ing the driver's door simultaneously locks all
doors.
APD1025APD1033
KEY DOOR LOCKS
3-2Pre-driving checks and adjustments
ZX
Page 74 of 263

Locking doors without key
To lock the doors without the key, push the
inside lock knob to the lock position, then
close the door.
When locking the door this way, be certain
not to leave the key inside the vehicle.
POWER DOOR LOCKS
(if so equipped)
The power door lock system allows you to
lock or unlock all doors simultaneously.
Turning the key to the front of the vehicle
locks all doors.
Turning the key one time to the rear of the
vehicle unlocks that door. From that posi-
tion, returning the key to neutral (where the
key can only be removed and inserted) and
turning it to the rear again within 5 seconds
unlocks all doors. The selective unlock func-
tion and locking all doors can be operated
from the driver, passenger, or back door.To lock the doors without a key, push the
door lock button (driver or passenger side)
or the door lock knob (driver or passenger
side), then close the door. When locking the
doors this way, be certain not to leave the
key inside the vehicle.
If the key is in the ignition, all doors will
unlock automatically.
AIC1012APD1077APD1014
Pre-driving checks and adjustments3-3
ZX
Page 75 of 263
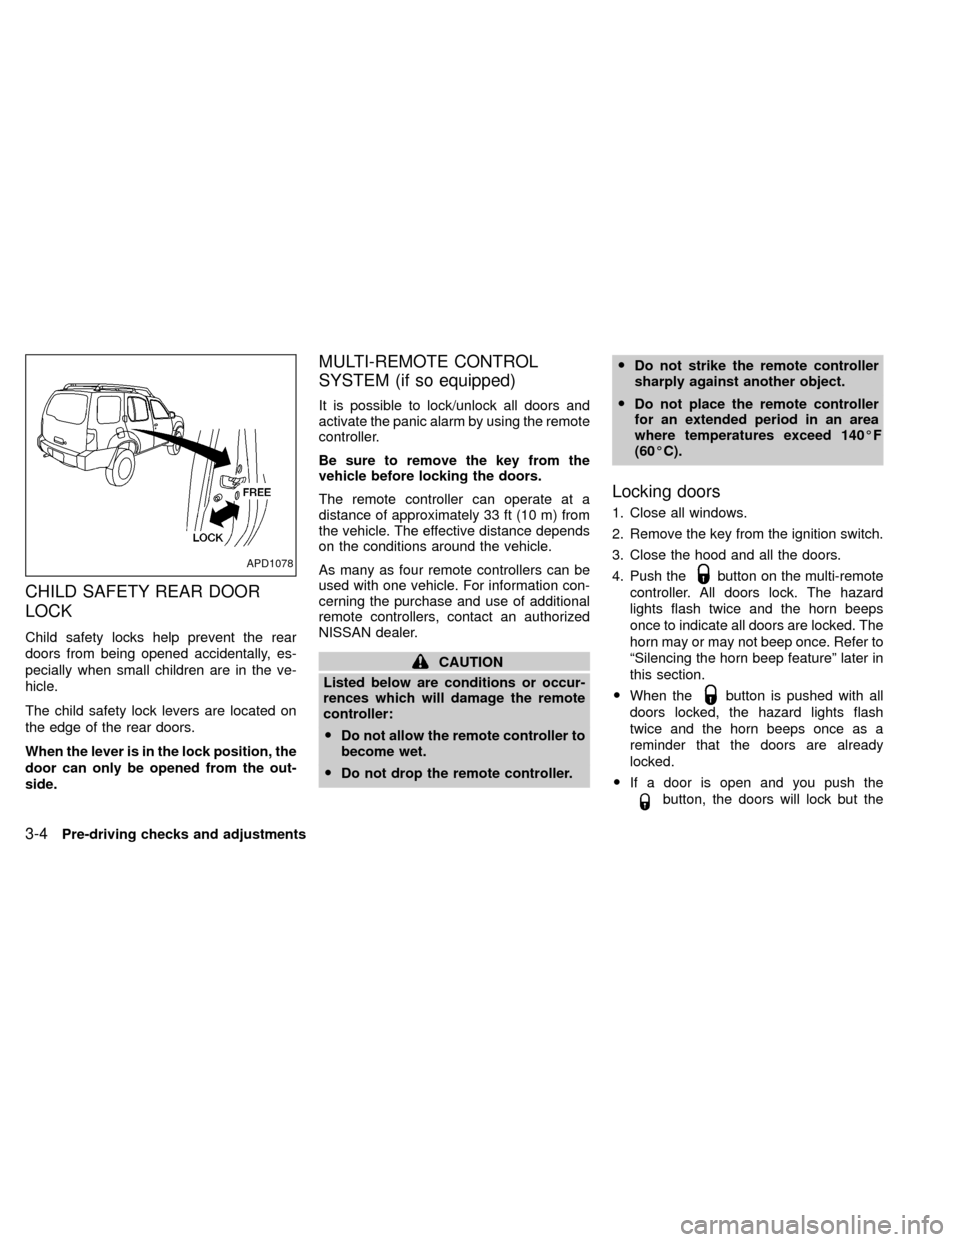
CHILD SAFETY REAR DOOR
LOCK
Child safety locks help prevent the rear
doors from being opened accidentally, es-
pecially when small children are in the ve-
hicle.
The child safety lock levers are located on
the edge of the rear doors.
When the lever is in the lock position, the
door can only be opened from the out-
side.
MULTI-REMOTE CONTROL
SYSTEM (if so equipped)
It is possible to lock/unlock all doors and
activate the panic alarm by using the remote
controller.
Be sure to remove the key from the
vehicle before locking the doors.
The remote controller can operate at a
distance of approximately 33 ft (10 m) from
the vehicle. The effective distance depends
on the conditions around the vehicle.
As many as four remote controllers can be
used with one vehicle. For information con-
cerning the purchase and use of additional
remote controllers, contact an authorized
NISSAN dealer.
CAUTION
Listed below are conditions or occur-
rences which will damage the remote
controller:
ODo not allow the remote controller to
become wet.
ODo not drop the remote controller.ODo not strike the remote controller
sharply against another object.
ODo not place the remote controller
for an extended period in an area
where temperatures exceed 140ÉF
(60ÉC).
Locking doors
1. Close all windows.
2. Remove the key from the ignition switch.
3. Close the hood and all the doors.
4. Push the
button on the multi-remote
controller. All doors lock. The hazard
lights flash twice and the horn beeps
once to indicate all doors are locked. The
horn may or may not beep once. Refer to
ªSilencing the horn beep featureº later in
this section.
OWhen the
button is pushed with all
doors locked, the hazard lights flash
twice and the horn beeps once as a
reminder that the doors are already
locked.
OIf a door is open and you push the
button, the doors will lock but the
APD1078
3-4Pre-driving checks and adjustments
ZX
Page 76 of 263

horn will not beep and the hazard lights
will not flash.Unlocking doors
1. Push thebutton on the multi-
remote controller. Only the driver's side
door unlocks.2. Push the
button on the multi-
remote controller again within five sec-
onds. All doors unlock.
3. The interior lights illuminate for 30 sec-
onds when the interior light switch is in
the O or DOOR position.
The interior lights can be turned off without
waiting 30 seconds by inserting the key into
the ignition or locking the doors with the
multi-remote controller or pushing the
interior light switch to the OFF position.
Using the panic alarm
If you are near your vehicle and feel threat-
ened, you may activate the panic alarm to
call attention as follows:
1. Push the
button on the remote con-
troller forlonger than 1.5 seconds.
2. The theft warning alarm and headlights
will stay on for 30 seconds.
3. The panic alarm stops when:
Oit has run for 30 seconds, or
Othe
,or thebutton is
pressed, on the multi-remote controller.
APD1079
Pre-driving checks and adjustments3-5
ZX
Page 80 of 263
WARNING
OMake sure the hood is completely
closed and latched before driving.
Failure to do so could cause the
hood to fly open and result in an
accident.
OIf you see steam or smoke coming
from the engine compartment, to
avoid injury do not open the hood.
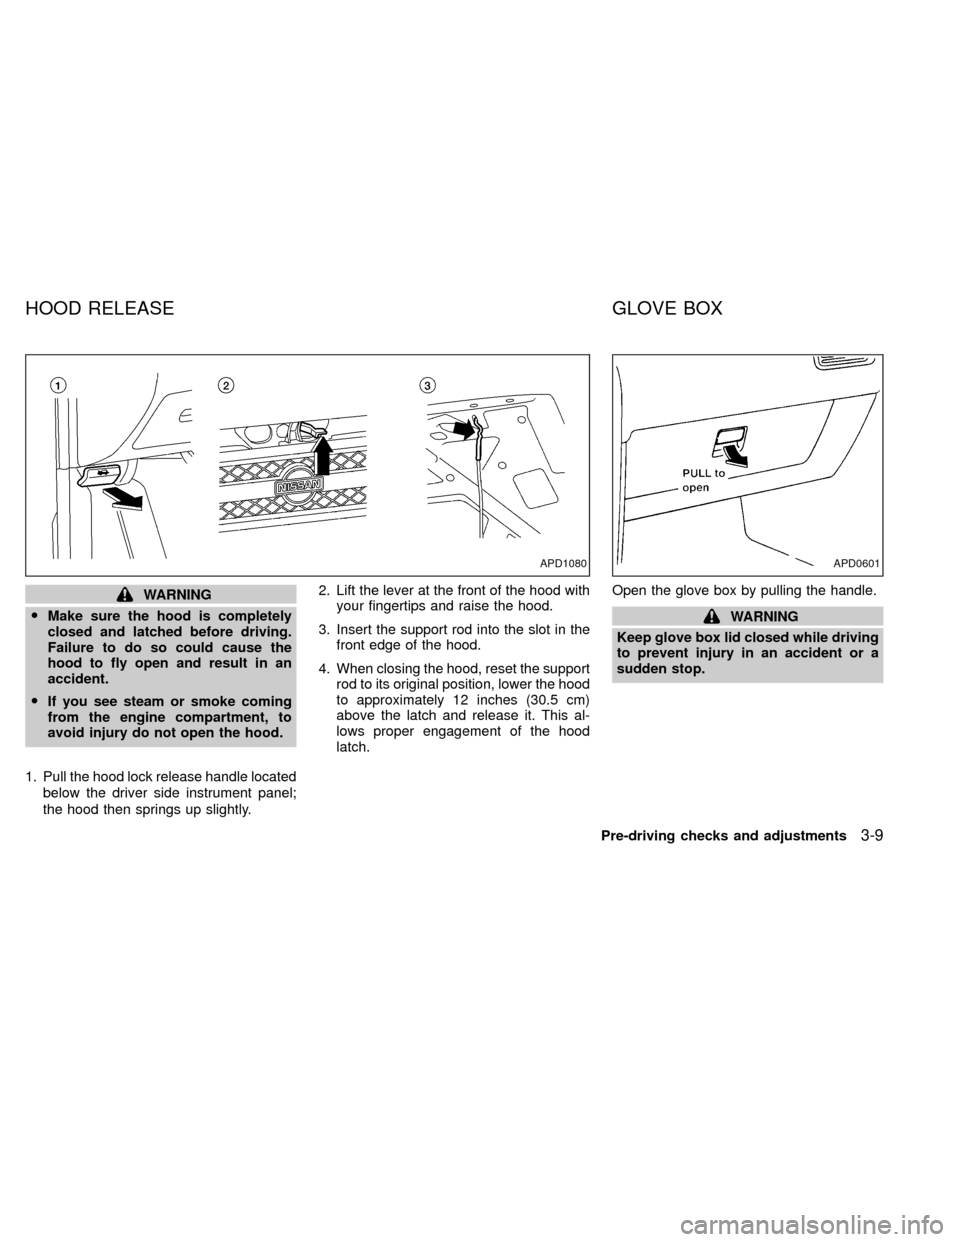
1. Pull the hood lock release handle located
below the driver side instrument panel;
the hood then springs up slightly.2. Lift the lever at the front of the hood with
your fingertips and raise the hood.
3. Insert the support rod into the slot in the
front edge of the hood.
4. When closing the hood, reset the support
rod to its original position, lower the hood
to approximately 12 inches (30.5 cm)
above the latch and release it. This al-
lows proper engagement of the hood
latch.Open the glove box by pulling the handle.
WARNING
Keep glove box lid closed while driving
to prevent injury in an accident or a
sudden stop.
APD1080APD0601
HOOD RELEASE GLOVE BOX
Pre-driving checks and adjustments3-9
ZX
Page 81 of 263
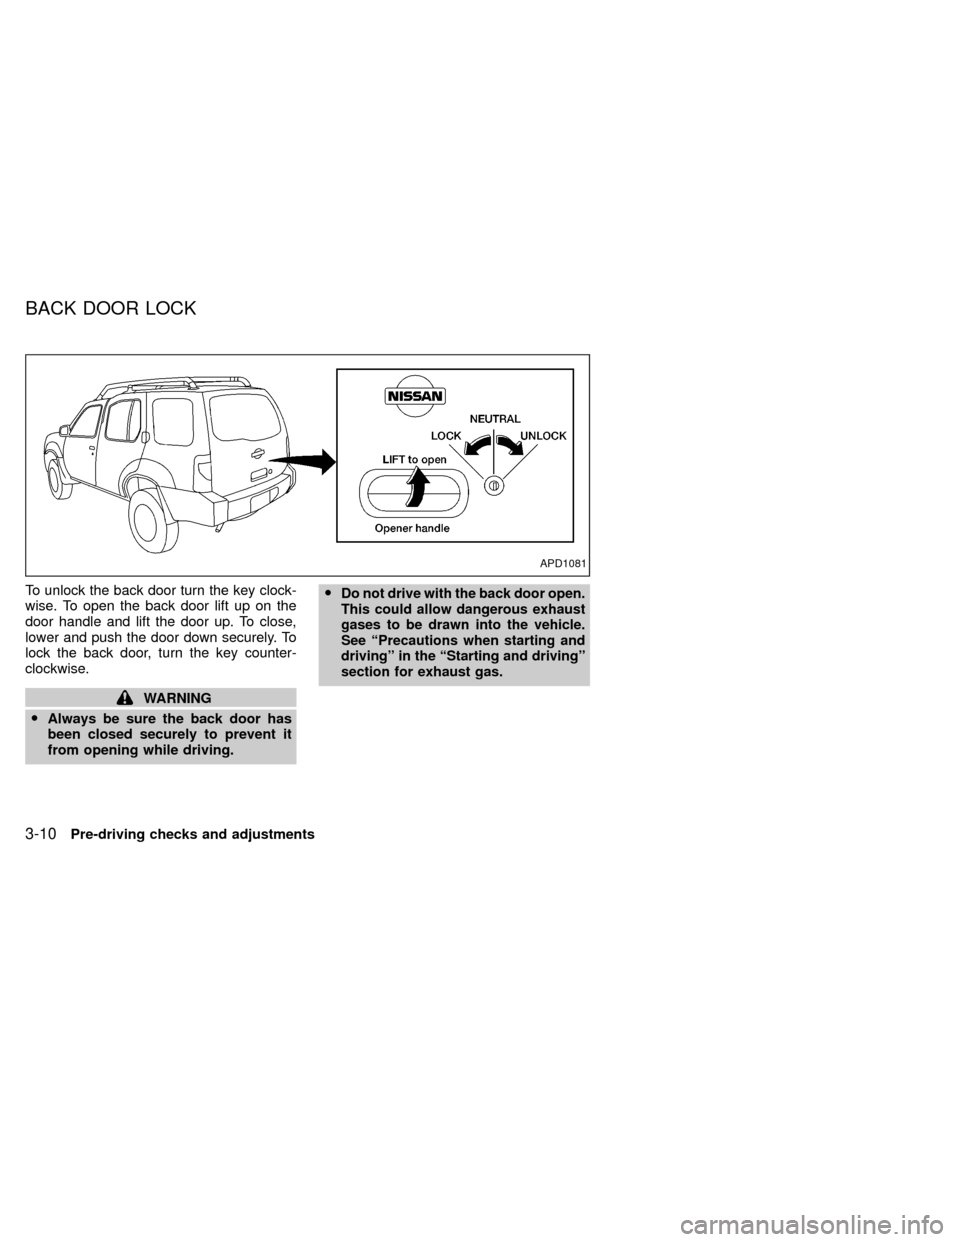
To unlock the back door turn the key clock-
wise. To open the back door lift up on the
door handle and lift the door up. To close,
lower and push the door down securely. To
lock the back door, turn the key counter-
clockwise.
WARNING
OAlways be sure the back door has
been closed securely to prevent it
from opening while driving.O
Do not drive with the back door open.
This could allow dangerous exhaust
gases to be drawn into the vehicle.
See ªPrecautions when starting and
drivingº in the ªStarting and drivingº
section for exhaust gas.
APD1081
BACK DOOR LOCK
3-10Pre-driving checks and adjustments
ZX
Page 85 of 263
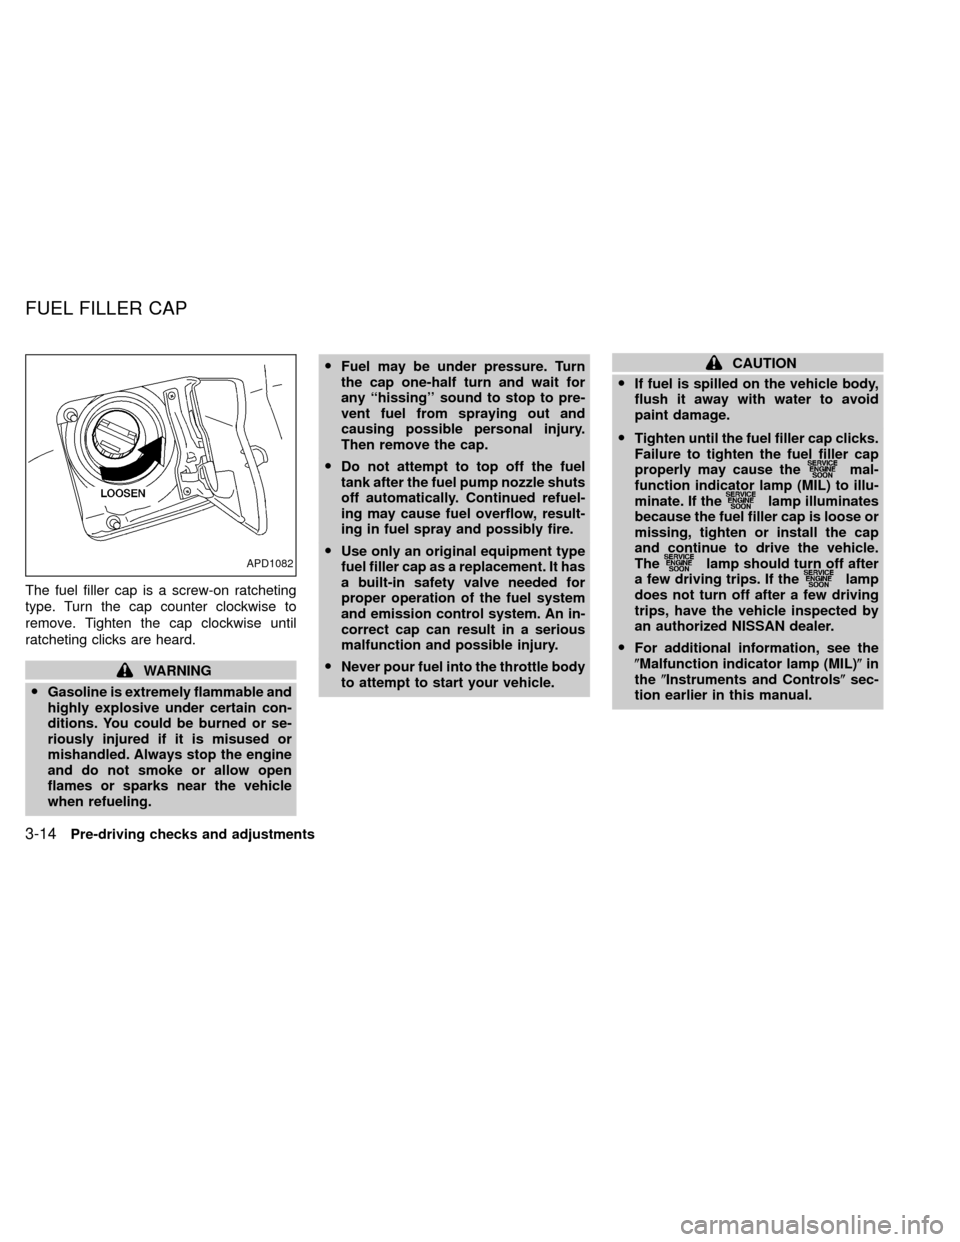
The fuel filler cap is a screw-on ratcheting
type. Turn the cap counter clockwise to
remove. Tighten the cap clockwise until
ratcheting clicks are heard.
WARNING
OGasoline is extremely flammable and
highly explosive under certain con-
ditions. You could be burned or se-
riously injured if it is misused or
mishandled. Always stop the engine
and do not smoke or allow open
flames or sparks near the vehicle
when refueling.OFuel may be under pressure. Turn
the cap one-half turn and wait for
any ``hissing'' sound to stop to pre-
vent fuel from spraying out and
causing possible personal injury.
Then remove the cap.
ODo not attempt to top off the fuel
tank after the fuel pump nozzle shuts
off automatically. Continued refuel-
ing may cause fuel overflow, result-
ing in fuel spray and possibly fire.
OUse only an original equipment type
fuel filler cap as a replacement. It has
a built-in safety valve needed for
proper operation of the fuel system
and emission control system. An in-
correct cap can result in a serious
malfunction and possible injury.
ONever pour fuel into the throttle body
to attempt to start your vehicle.
CAUTION
OIf fuel is spilled on the vehicle body,
flush it away with water to avoid
paint damage.
OTighten until the fuel filler cap clicks.
Failure to tighten the fuel filler cap
properly may cause the
mal-
function indicator lamp (MIL) to illu-
minate. If the
lamp illuminates
because the fuel filler cap is loose or
missing, tighten or install the cap
and continue to drive the vehicle.
The
lamp should turn off after
a few driving trips. If thelamp
does not turn off after a few driving
trips, have the vehicle inspected by
an authorized NISSAN dealer.
OFor additional information, see the
(Malfunction indicator lamp (MIL)(in
the(Instruments and Controls(sec-
tion earlier in this manual.
APD1082
FUEL FILLER CAP
3-14Pre-driving checks and adjustments
ZX