light NISSAN XTERRA 2001 WD22 / 1.G Owner's Guide
[x] Cancel search | Manufacturer: NISSAN, Model Year: 2001, Model line: XTERRA, Model: NISSAN XTERRA 2001 WD22 / 1.GPages: 263, PDF Size: 2.25 MB
Page 93 of 263

OFF position (indicator light off):
Outside air is drawn into the passenger
compartment and distributed through the
selected outlets.
Use the OFF position for normal heater or
air conditioner operation.
ON position (indicator light on):
Interior air is recirculated inside the vehicle.
Push the
button to the on position
when:
Odriving on a dusty road.
Oto prevent traffic fumes from entering the
passenger compartment.
Ofor maximum cooling when using the air
conditioner.
Air conditioner button
(if so equipped)
Start the engine, move the fan control dial to
the desired (one to four) position, and push
the air conditioner button to turn on the air
conditioner. The indicator light comes on
when the air conditioner is operating. To turn
off the air conditioner, push the button
again.The air conditioner cooling function op-
erates only when the engine is running.
HEATER OPERATION
Heating
This mode is used to direct most of the hot
air to the front and rear floor outlets. Rear
passenger heat is provided by the front
system through floor outlets located under
both front seats. A small amount of air also
flows from the defrost outlets.
1. Push the
button (if so equipped) to
the off position for normal heating.
2. Turn the air control dial to the
posi-
tion.
3. Turn the fan control dial to the desired
position.
4. Turn the temperature control dial to the
desired position between the middle and
the hot position.
Ventilation
This mode directs outside air from the side
and center vents.
1. Push the
button (if so equipped) to
the off position.2. Turn the air control dial to the
posi-
tion.
3. Turn the fan control dial to the desired
position.
4. Turn the temperature control dial to the
desired position.
Defrosting or defogging
This mode directs the air to the defrost
outlets to defrost/defog the windows.
1. Turn the air control dial to the
posi-
tion.
2. Turn the fan control dial to the desired
position.
3. Turn the temperature control dial to the
desired position.
When the
position is selected, the air
conditioner automatically turns on (however
the indicator light will not illuminate) if the
outside temperature is more than
45ÉF(7ÉC). This dehumidifies the air which
helps defog the windshield. The
mode automatically turns off, allow-
ing outside air to be drawn into the passen-
ger compartment to further improve the
defogging performance.
4-4Heater, air conditioner and audio systems
ZX
Page 94 of 263

Bi-level heating
The bi-level mode directs warmed air to the
side and center vents and to the front and
rear floor outlets.
1. Push the
button (if so equipped) to
the off position.
2. Turn the air control dial to the
posi-
tion.
3. Turn the fan control dial to the desired
position.
4. Turn the temperature control dial to the
the desired position.
Heating and defogging
This mode directs a portion of the air to the
defrost outlets to defrost/defog the win-
dows, and also directs air to the front and
rear floor outlets to heat the cabin.
1. Turn the air control dial to the
posi-
tion.
2. Turn the fan control dial to the desired
position.
3. Turn the temperature control dial to the
desired position between the middle and
the hot position.When the
position is selected, the air
conditioner automatically turns on (however
the indicator light will not illuminate) if the
outside temperature is more than 45ÉF
(7ÉC). This dehumidifies the air which helps
defog the windshield. The
mode auto-
maticallly turns off, allowing outside air to be
drawn into the passenger compartment to
further improve the defogging performance.
Operating tips
Clear snow and ice from the wiper
blades and air inlet in front of the wind-
shield. This improves heater operation.
AIR CONDITIONER OPERATION
(if so equipped)
Start the engine, move the fan control dial to
the desired (one to four) position, and push
in the air conditioner button to activate the
air conditioner. When the air conditioner is
on, cooling and dehumidifying functions are
added to the heater operation.
The air conditioner cooling function op-
erates only when the engine is running.
Cooling
This mode directs cooled and dryed air to
the side and center vents to cool and dehu-
midify the cabin.
1. Push the
button to the off position.
2. Turn the air control dial to the
posi-
tion.
3. Turn the fan control dial to the desired
position.
4. Push on the air conditioner button. The
indicator light comes on.
5. Turn the temperature control dial to the
desired position.
For quick cooling when the outside tem-
perature is high, push the
button to
the ON position. Be sure to return the air
recirculation button to the OFF position for
normal cooling.
Dehumidified heating
This mode directs warmed and dryed air to
the front and rear floor outlets to heat and
dehumidify the cabin.
1. Push the
button to the off position.
Heater, air conditioner and audio systems
4-5
ZX
Page 95 of 263

2. Turn the air control dial to theposi-
tion.
3. Turn the fan control dial to the desired
position.
4. Push on the air conditioner button. The
indicator light comes on.
5. Turn the temperature control dial to the
desired position.
Dehumidified defogging
This mode directs warmed and dryed air to
the defrost outlets to defrost/defog the win-
dows.
1. Turn the air control dial to the
posi-
tion.
2. Turn the fan control dial to the desired
position.
3. Push on the air conditioner button. The
indicator light comes on.
4. Turn the temperature control dial to the
desired position.
When the
,or positions in between
are selected, the air conditioner automati-
cally turns on (however the indicator light
will not illuminate) if the outside temperatureis more than 45ÉF(7ÉC). This dehumidifies
the air which helps defog the windshield.
The
mode automatically turns off, al-
lowing outside air to be drawn into the
passenger compartment to further improve
the defogging performance.
Operating tips
OKeep windows and sunroof closed while
the air conditioner is in operation.
OAfter parking in the sun, drive for two or
three minutes with the windows open to
vent hot air from the passenger compart-
ment. Then, close the windows. This
allows the air conditioner to cool the
interior more quickly.
OThe air conditioning system should be
operated for approximately ten min-
utes at least once a month. This helps
prevent damage to the system due to
lack of lubrication.
OIf the engine coolant temperature
gauge indicates engine coolant tem-
perature over the normal range, turn
the air conditioner off. See ``If your
vehicle overheats'' in the ``In case of
emergency'' section of this manual.
AIR FLOW CHARTS
The following charts show the button and
dial positions forMAXIMUM AND QUICK
heating, cooling or defrosting.The air recir-
culation switch should always be in the
OFF position for heating and defrosting.
4-6Heater, air conditioner and audio systems
ZX
Page 104 of 263

time the button is pushed, the CD moves
back one selection.
RPT (Repeat)
When the
repeat button is pushed
while the compact disc is playing, the play
pattern changes as follows.
1: The current selection is repeated.
MIX: Selections are played at random, not
following the sequence on the compact
disc. The same program may be repeated
twice.
Normal(no symbol): All selections are
played repeatedly in sequence.
When a new compact disc is inserted,
the play pattern automatically changes
to the ``Normal'' play pattern.
CD EJECT
When the
button is pushed with a com-
pact disc loaded, the compact disc ejects.
When the
button is pushed while the
compact disc is playing, the compact disc
ejects and the system turns off.
If the compact disc ejects and is notremoved within 10 seconds, it is pulled
back into the slot.
DISC indicator light
CD IN appears on the display when a CD is
loaded with the system ON.
CD care and cleaning
OHandle a CD by its edges. Never touch
the surface of the disc. Do not bend the
disc.
OAlways place the discs in the storage
case when they are not being used.
OTo clean a disc, wipe the surface from the
center to the outer edge using a clean,
soft cloth. Do not wipe the disc using a
circular motion.
Do not use a conventional record cleaner
or alcohol intended for industrial use.
LHA0049
Heater, air conditioner and audio systems4-15
ZX
Page 105 of 263
OA new disc may be rough on the inner
and outer edges. Remove the rough
edges by rubbing the inner and outer
edges with the side of a pen or pencil as
illustrated.
CAUTION
ODuring cold weather or rainy days,
the player may malfunction due to
the humidity. If this occurs, remove
the CD and dehumidify or ventilate
the player completely.
OThe player may skip while driving on
rough roads.
OThe CD player sometimes cannot
function when the passenger com-
partment temperature is extremely
high. Decrease the temperature be-
fore use.
ODo no expose the CD to direct sun-
light.
ODo not touch the playing surface of
the disc.
ODo not use 8cm discs. They may
cause player damage even if using
with the optional adapter.ORecordable compact discs (CD-R)
may not function properly in the CD
player.
4-16Heater, air conditioner and audio systems
ZX
Page 109 of 263
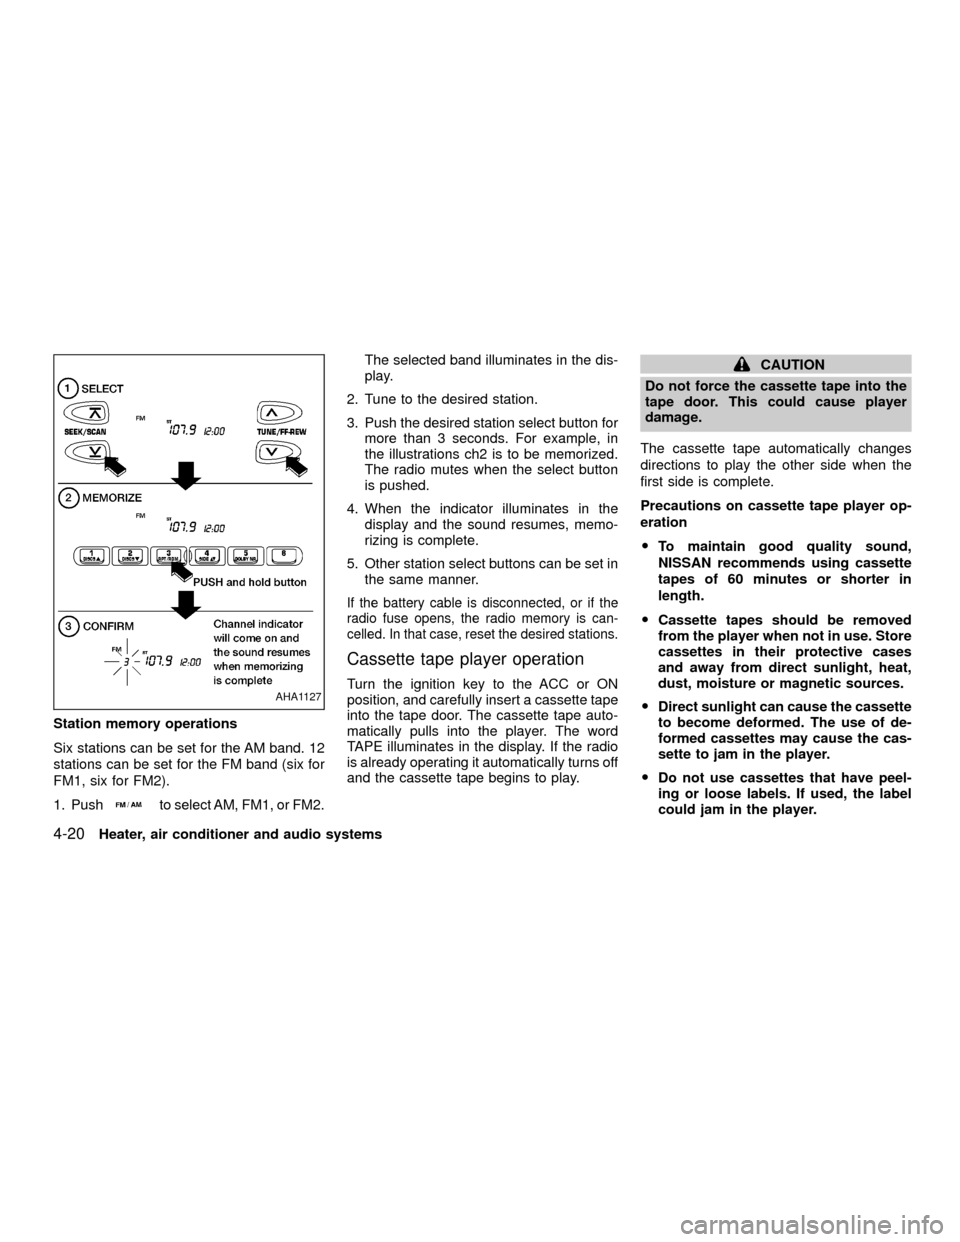
Station memory operations
Six stations can be set for the AM band. 12
stations can be set for the FM band (six for
FM1, six for FM2).
1. Push
to select AM, FM1, or FM2.The selected band illuminates in the dis-
play.
2. Tune to the desired station.
3. Push the desired station select button for
more than 3 seconds. For example, in
the illustrations ch2 is to be memorized.
The radio mutes when the select button
is pushed.
4. When the indicator illuminates in the
display and the sound resumes, memo-
rizing is complete.
5. Other station select buttons can be set in
the same manner.
If the battery cable is disconnected, or if the
radio fuse opens, the radio memory is can-
celled. In that case, reset the desired stations.
Cassette tape player operation
Turn the ignition key to the ACC or ON
position, and carefully insert a cassette tape
into the tape door. The cassette tape auto-
matically pulls into the player. The word
TAPE illuminates in the display. If the radio
is already operating it automatically turns off
and the cassette tape begins to play.
CAUTION
Do not force the cassette tape into the
tape door. This could cause player
damage.
The cassette tape automatically changes
directions to play the other side when the
first side is complete.
Precautions on cassette tape player op-
eration
OTo maintain good quality sound,
NISSAN recommends using cassette
tapes of 60 minutes or shorter in
length.
OCassette tapes should be removed
from the player when not in use. Store
cassettes in their protective cases
and away from direct sunlight, heat,
dust, moisture or magnetic sources.
ODirect sunlight can cause the cassette
to become deformed. The use of de-
formed cassettes may cause the cas-
sette to jam in the player.
ODo not use cassettes that have peel-
ing or loose labels. If used, the label
could jam in the player.
AHA1127
4-20Heater, air conditioner and audio systems
ZX
Page 112 of 263
CD EJECT
When the
button is pushed with a com-
pact disc loaded, the compact disc ejects.
When the
button is pushed while the
compact disc is playing, the compact disc
ejects and the system turns off.
If the compact disc ejects and is not
removed within 10 seconds, it is pulled
back into the slot.
DISC indicator light
This light comes on when a compact disc is
loaded into the player.
CD care and cleaning
OHandle a CD by its edges. Never touch
the surface of the disc. Do not bend the
disc.
OAlways place the discs in the storage
case when they are not being used.
OTo clean a disc, wipe the surface from the
center to the outer edge using a clean,
soft cloth. Do not wipe the disc using a
circular motion. Do not use a conven-
tional record cleaner or alcohol intended
for industrial use.
OA new disc may be rough on the inner
and outer edges. Remove the roughedges by rubbing the inner and outer
edges with the side of a pen or pencil as
illustrated.
CAUTION
ODuring cold weather or rainy days,
the player may malfunction due to
the humidity. If this occurs, remove
the CD and dehumidify or ventilate
the player completely.
OThe player may skip while driving on
rough roads.
OThe CD player sometimes cannot
function when the compartment tem-
perature is extremely high. Decrease
the temperature before use.
ODo not expose the CD to direct sun-
light.
ODo not touch the playing surface of
the disc.
ODo not use 8 cm discs. They may
cause player damage even if using
with the optional adapter.
ORecordable compact discs (CD-R)
may not function properly in the CD
player.
LHA0049
Heater, air conditioner and audio systems4-23
ZX
Page 125 of 263
Ejectºfor 2 seconds. The display then
changes toªEjecting Discº.
3. When a disc is removed, the indicator
and disc icon will be turned off, and then
the next disc will emerge, and so on.
4. The display will be turned off after all
discs are ejected and removed.
If a disc is not removed within 15 seconds,
or if the EJECT button is pressed again
during the Eject sequence, the entire disc
Eject sequence will be canceled.
CD care and cleaning:
OHandle a CD by its edges. Never touch the
surface of the disc. Do not bend the disc.
OAlways place the discs in the storage
case when they are not being used.
OTo clean a disc, wipe the surface from the
center to the outer edge using a clean,
soft cloth. Do not wipe the disc using a
circular motion.
Do not use a conventional record cleaner
or alcohol intended for industrial use.
OA new disc may be rough on the inner
and outer edges. Remove the roughedges by rubbing the inner and outer
edges with the side of a pen or pencil as
illustrated.
CAUTION
ODuring cold weather or rainy days,
the player may malfunction due to
the humidity. If this occurs, remove
the CD and dehumidify or ventilate
the player completely.
OThe player may skip while driving on
rough roads.
OThe CD player sometimes cannot
function when the passenger com-
partment temperature is extremely
high. Decrease the temperature be-
fore use.
ODo not expose the CD to direct sun-
light.
ODo not touch the playing surface of
the disc.
ODo not use 8 cm discs. They may
cause player damage even if using
with the optional adapter.
ORecordable compact discs (CD-R)
may not function properly in the CD
player.
LHA0049
4-36Heater, air conditioner and audio systems
ZX
Page 132 of 263
OMany hills are too steep for any ve-
hicle. If you drive up them, you may
stall. If you drive down them, you may
not be able to control your speed. If
you drive across them, you may roll
over.
ODo not shift gears while driving on
downhill grades as this could cause
loss of control of the vehicle.
OStay alert when driving to the top of
a hill. At the top there could be a
drop-off or other hazard that could
cause an accident.
OIf your engine stalls or you cannot
make it to the top of a steep hill,
never attempt to turn around. Your
vehicle could tip or roll over. Always
back straight down in R (Reverse)
gear. Never back down in N (Neutral)
or with the clutch depressed
(manual transmission vehicles), us-
ing only the brake, as this could
cause loss of control.
OHeavy braking going down a hill-
could cause your brakes to over heatand fade, resulting in loss of control
and an accident. Apply brakes lightly
and use a low gear to control your
speed.
OUnsecured cargo can be thrown
around when driving over rough ter-
rain. Properly secure all cargo so it
will not be thrown forward and cause
injury to you or your passengers.
OTo avoid raising the center of gravity
excessively, do not exceed the rated
capactiy of the roof rack/gear bin (if
so equipped) and evenly distribute
the load. Secure heavy loads in the
cargo area as far forward and as low
as possible. Do not equip the vehicle
with tires larger than specified in this
manual. This could cause your ve-
hicle to roll over.
ODo not grip the inside or spokes of
the steering wheel when driving
offroad. The steering wheel could
move suddenly and injure your
hands. Instead drive with your fin-
gers and thumbs on the outside of
the rim.OBefore operating the vehicle, ensure
that the driver and all passengers
have their seat belts fastened.
OAlways drive with the floor mats in
place as the floor may become hot.
OLower your speed when encoutering
strong crosswinds. With a higher
center of gravity, your NISSAN is
more affected by strong side winds.
Slower speeds ensure better vehicle
control.
ODo not drive beyond the perfor-
mance of the tires, even with 4WD
engaged.
OAccelerating quickly, sharp steering
maneuvers or sudden braking may
cause loss of control.
OIf at all possible, avoid sharp turning
maneuvers, particularly at high
speeds. Your NISSAN four wheel
drive vehicle has a higher center of
gravity than a two-wheel drive ve-
hicle. The vehicle is not designed for
cornering at the same speeds as
conventional two-wheel drive ve-
hicles. Failure to operate this vehicle
Starting and driving
5-5
ZX
Page 133 of 263
correctly could result in loss of con-
trol and/or a rollover accident.
OAlways use tires of the same type,
size, brand, construction (bias, bias
belted or radial), and tread pattern
on all four wheels. Install tire chains
on the rear wheels when driving on
slippery roads and drive carefully.
OBe sure to check the brakes immedi-
ately after driving in mud or water.
See ``Brake system'' later in this sec-
tion for ``Wet brakes''.
OAvoid parking your vehicle on steep
hills. If you get out of the vehicle and
it rolls forward, backward or side-
ways, you could be injured.
OWhenever you drive off-road
through sand, mud or water as deep
as the wheel hub, more frequent
maintenance may be required. See
``Periodic maintenance'' in the
``Maintenance'' section of this
manual.
AUTOMATIC TRANSMISSION
On automatic transmission models, the ig-
nition lock is designed so the key cannot be
turned to LOCK and removed until the shift
selector lever is moved to the P (Park)
position.
When removing the key from the ignition,
make sure the shift selector lever is in the P
(Park) position.
If the key cannot be turned to the LOCK
position, proceed as follows to remove the key:
1) Move the shift selector lever into the P
(Park) position.2) Turn the ignition key slightly in the ON
direction.
3) Turn the key toward the LOCK position.
4) Remove the key.
The shift lever is designed so it cannot be
moved out of P (Park) and into any of the
other gear positions if the ignition key is
turned to OFF or if the key is removed from
the switch.
The shift lever can be moved if the igni-
tion switch is in the ACC position. This
allows the vehicle to be moved if the
battery is discharged. The shift lever can
also be moved if the ignition switch is in
the ON position and the foot brake pedal
is depressed.
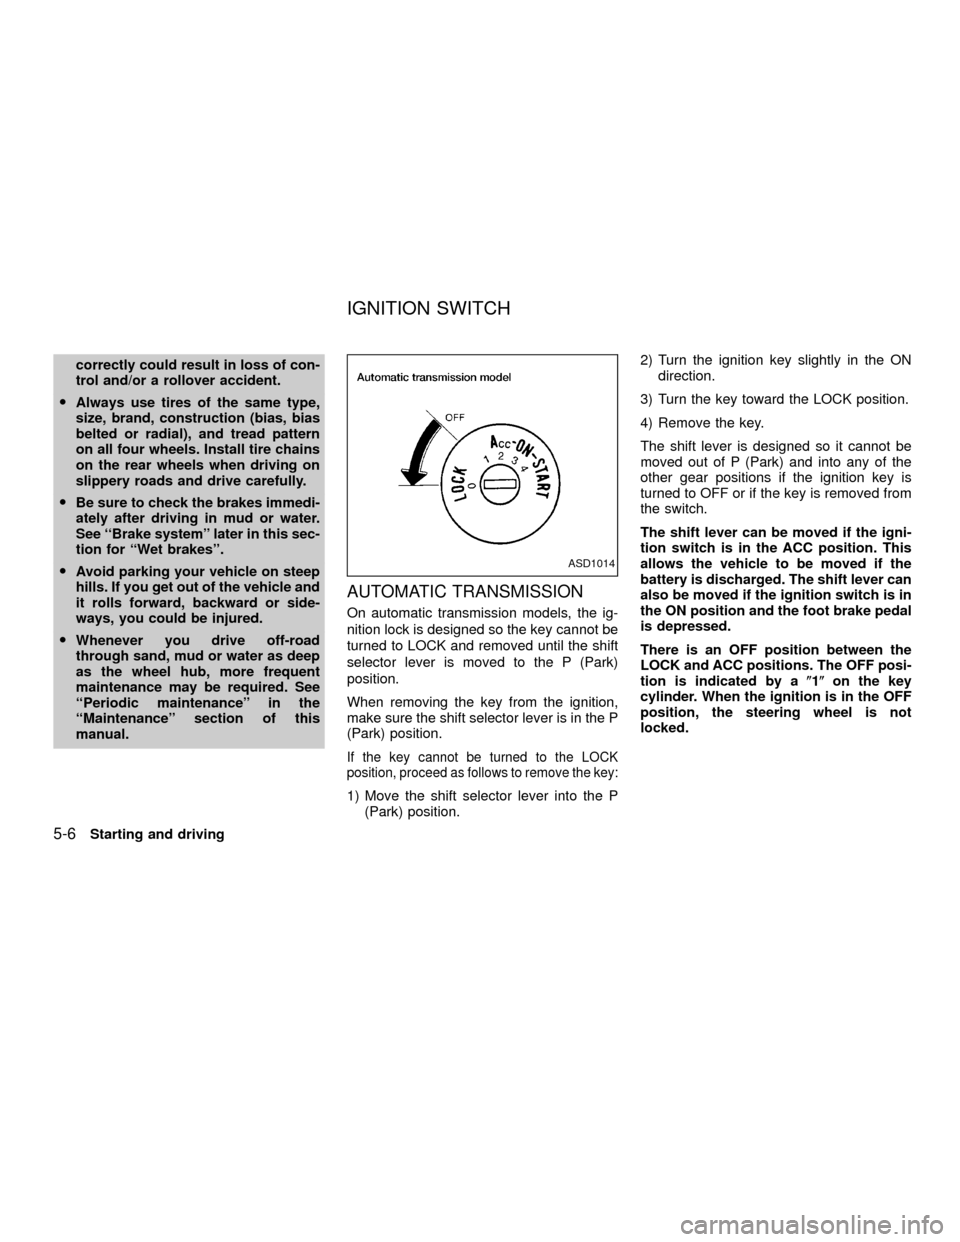
There is an OFF position between the
LOCK and ACC positions. The OFF posi-
tion is indicated by a(1(on the key
cylinder. When the ignition is in the OFF
position, the steering wheel is not
locked.
ASD1014
IGNITION SWITCH
5-6Starting and driving
ZX