door lock NISSAN XTERRA 2001 WD22 / 1.G Owners Manual
[x] Cancel search | Manufacturer: NISSAN, Model Year: 2001, Model line: XTERRA, Model: NISSAN XTERRA 2001 WD22 / 1.GPages: 263, PDF Size: 2.25 MB
Page 20 of 263
SUPPLEMENTAL AIR BAG
WARNING LIGHT
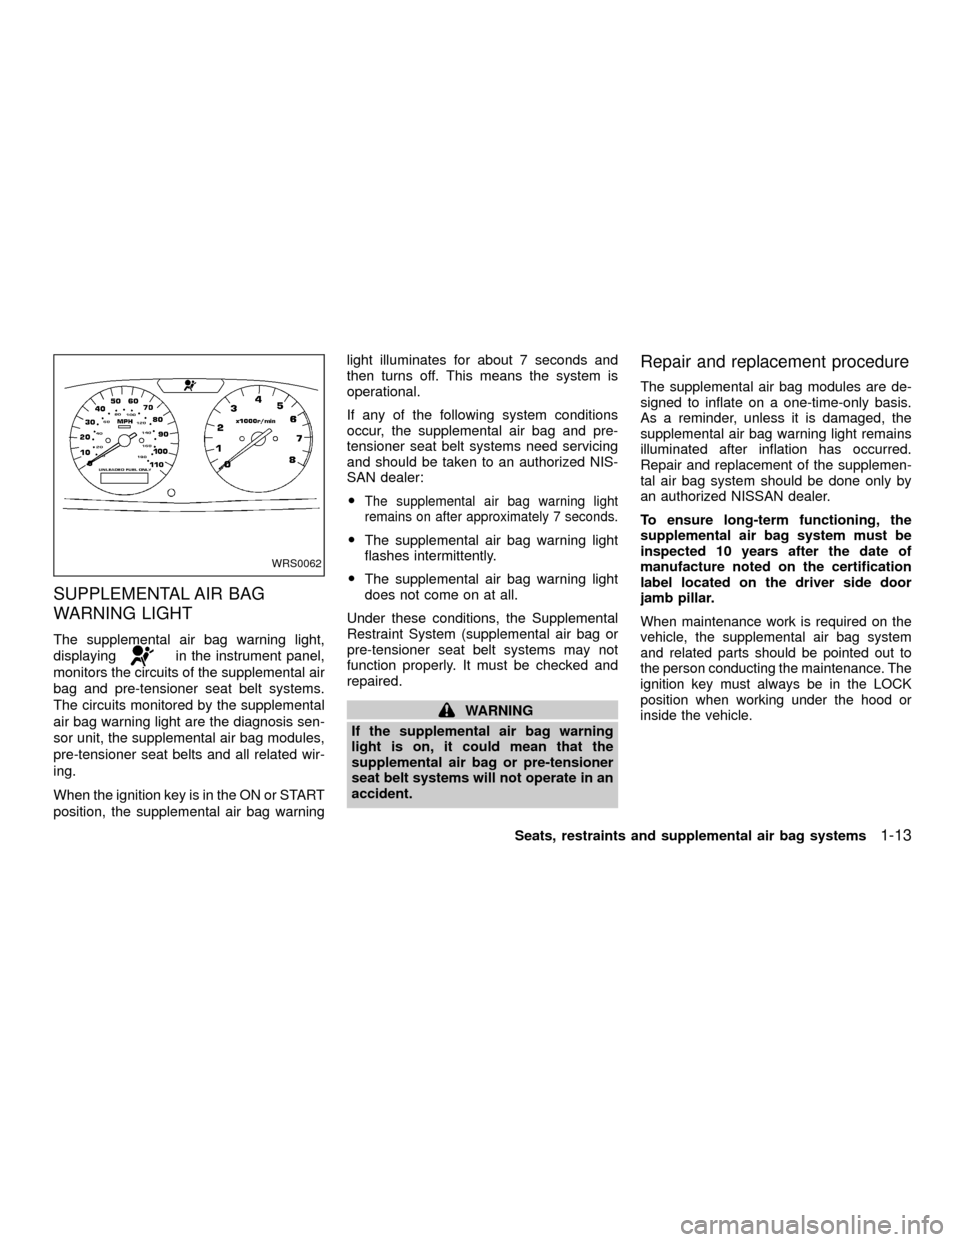
The supplemental air bag warning light,
displaying
in the instrument panel,
monitors the circuits of the supplemental air
bag and pre-tensioner seat belt systems.
The circuits monitored by the supplemental
air bag warning light are the diagnosis sen-
sor unit, the supplemental air bag modules,
pre-tensioner seat belts and all related wir-
ing.
When the ignition key is in the ON or START
position, the supplemental air bag warninglight illuminates for about 7 seconds and
then turns off. This means the system is
operational.
If any of the following system conditions
occur, the supplemental air bag and pre-
tensioner seat belt systems need servicing
and should be taken to an authorized NIS-
SAN dealer:
O
The supplemental air bag warning light
remains on after approximately 7 seconds.
OThe supplemental air bag warning light
flashes intermittently.
OThe supplemental air bag warning light
does not come on at all.
Under these conditions, the Supplemental
Restraint System (supplemental air bag or
pre-tensioner seat belt systems may not
function properly. It must be checked and
repaired.
WARNING
If the supplemental air bag warning
light is on, it could mean that the
supplemental air bag or pre-tensioner
seat belt systems will not operate in an
accident.
Repair and replacement procedure
The supplemental air bag modules are de-
signed to inflate on a one-time-only basis.
As a reminder, unless it is damaged, the
supplemental air bag warning light remains
illuminated after inflation has occurred.
Repair and replacement of the supplemen-
tal air bag system should be done only by
an authorized NISSAN dealer.
To ensure long-term functioning, the
supplemental air bag system must be
inspected 10 years after the date of
manufacture noted on the certification
label located on the driver side door
jamb pillar.
When maintenance work is required on the
vehicle, the supplemental air bag system
and related parts should be pointed out to
the person conducting the maintenance. The
ignition key must always be in the LOCK
position when working under the hood or
inside the vehicle.
WRS0062
Seats, restraints and supplemental air bag systems1-13
ZX
Page 50 of 263
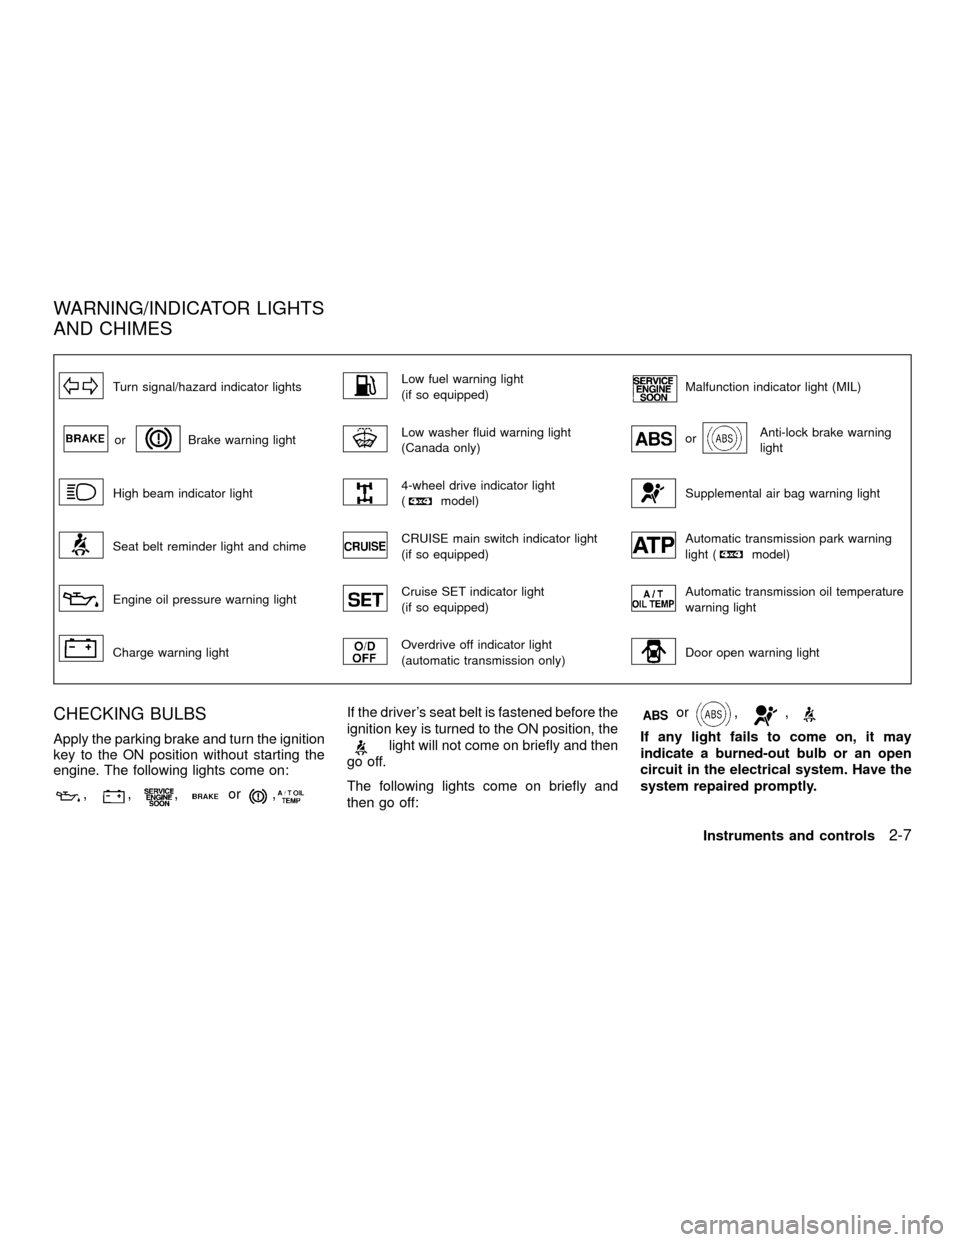
Turn signal/hazard indicator lightsLow fuel warning light
(if so equipped)Malfunction indicator light (MIL)
orBrake warning lightLow washer fluid warning light
(Canada only)orAnti-lock brake warning
light
High beam indicator light4-wheel drive indicator light
(model)Supplemental air bag warning light
Seat belt reminder light and chimeCRUISE main switch indicator light
(if so equipped)Automatic transmission park warning
light (model)
Engine oil pressure warning lightCruise SET indicator light
(if so equipped)Automatic transmission oil temperature
warning light
Charge warning lightOverdrive off indicator light
(automatic transmission only)Door open warning light
CHECKING BULBS
Apply the parking brake and turn the ignition
key to the ON position without starting the
engine. The following lights come on:
,,,or,
If the driver's seat belt is fastened before the
ignition key is turned to the ON position, the
light will not come on briefly and then
go off.
The following lights come on briefly and
then go off:
or,,
If any light fails to come on, it may
indicate a burned-out bulb or an open
circuit in the electrical system. Have the
system repaired promptly.
WARNING/INDICATOR LIGHTS
AND CHIMES
Instruments and controls2-7
ZX
Page 55 of 263

the brakes checked as soon as possible if
the warning sound is heard.
Key reminder chime
The chime sounds when the driver's door is
opened and the key is in the ignition switch.
Take the ignition key when you leave the
vehicle.
Light reminder chime
A chime sounds if the driver's door is
opened with the headlight switch on unless
the ignition key is in the ON position. Turn
the headlight switch off when you leave the
vehicle.
VEHICLE SECURITY SYSTEM
(if so equipped)
The vehicle security system provides visual
and audio alarm signals if parts of the
vehicle are disturbed.
Security indicator light
The security indicator light shows the status
of the vehicle security system.
The light operates whenever the ignition
switch is in the LOCK, OFF, or ACC posi-
tion.
The vehicle security system has four
phases. For each phase the operation of the
security indicator light is different.
IC0005WIC0072
SECURITY SYSTEM
2-12Instruments and controls
ZX
Page 56 of 263

How to activate the vehicle security
system
1. Close all windows.(The system can beactivated even if the windows are
open.)
2. Remove the key from the ignition switch.
3. Close the hood and all the doors. The
doors can be locked using the key, power
door switch or multi-remote controller.
Multi-remote controller operation:
OPush the LOCK button on the multi-
remote controller. All doors lock. The
hazard lights flash twice and the horn
beeps once to indicate all doors are
locked.
OWhen the LOCK button is pushed with
all doors locked, the hazard lights
flash twice and the horn beeps once
as a reminder that the doors are al-
ready locked. The horn may or may
not beep once. Refer to ``Silencing the
horn beep feature'' later in this section.
OIf a door is open and you push the
LOCK button the doors lock but the
horn does not chirp and the hazard
lights do not flash.
4.
Confirm that the SECURITY indicator
light comes on. The SECURITY light
glows for about 30 seconds and thenbegins to flash once every three seconds.
The system is now activated. If, during
this 30 second time period, a door is
unlocked by the key or the multi-remote
controller, or the ignition key is turned to
ACC or ON, the system will not activate.
OIf the key is turned slowly when lock-
ing the door, the system may not acti-
vate. Furthermore, if the key is turned
excessively to the unlock position, the
system may be deactivated when the
key is removed. If the indicator light
fails to glow for 30 seconds, unlock
the door once and lock it again.
OEven when the driver and/or passen-
gers are in the vehicle, the system will
activate with all doors and hood
closed and locked and with the igni-
tion key in the OFF position. Turn the
ignition key to ACC or ON to turn the
system off.
The vehicle security system is NOT acti-
vated if one of the following occurs:
OA door is unlocked or the ignition key is
turned to the ACC or ON position during
the 30 seconds in which the SECURITY
light stays on.
LIC0053
Instruments and controls2-13
ZX
Page 57 of 263

OThe SECURITY light blinks at a steady
1/2 second on - 1/2 second off rate (a
door, or the hood is open and the key is
not in the ACC or ON position). When the
ignition key is turned to the ACC or ON
position, the SECURITY light turns off.
Vehicle security system operation
The vehicle security system emits the fol-
lowing alarm:
OThe headlights blink and the horn sounds
intermittently. In addition, the starter mo-
tor does not operate.
OThe alarm automatically turns off after 50
seconds. However, the alarm reactivates
if the vehicle is tampered with again. The
alarm can be shut off by unlocking a door
with the key or by pressing the UNLOCK
buttonon the multi-remote controller.
The alarm is activated by:
Oopening a door without using the key
(even if the door is unlocked by releasing
the inside lock knob).
Oopening the hood.
How to stop the alarm
The alarm stops only by unlocking a door with
the key or by pressing the UNLOCK button
on the multi-remote controller.The alarm
does not stop if the ignition switch is turned to
ACC or ON position.
Silencing the horn beep feature
If desired, the horn beep feature can be
deactivated using the multi-remote controller.
To deactivate:Press and hold the LOCK
and UNLOCK buttonsfor at least two
seconds.
The hazard lights will quickly flash three
times to confirm that the horn beep feature
has been deactivated.
To activate:Press and hold the LOCK and
UNLOCK buttonsfor at least two seconds
once more.
WIC0060
2-14Instruments and controls
ZX
Page 69 of 263
ODo not leave children unattended in-
side the vehicle. They could unknow-
ingly activate switches or controls
and become trapped in a window.
Unattended children could become
involved in serious accidents.
The power windows operate when the igni-
tion key is in the ON position, or for 45
seconds after the ignition key is turned to
the OFF position. If the driver's or passen-
ger's door is opened during this 45 second
period, power to the windows is cancelled.
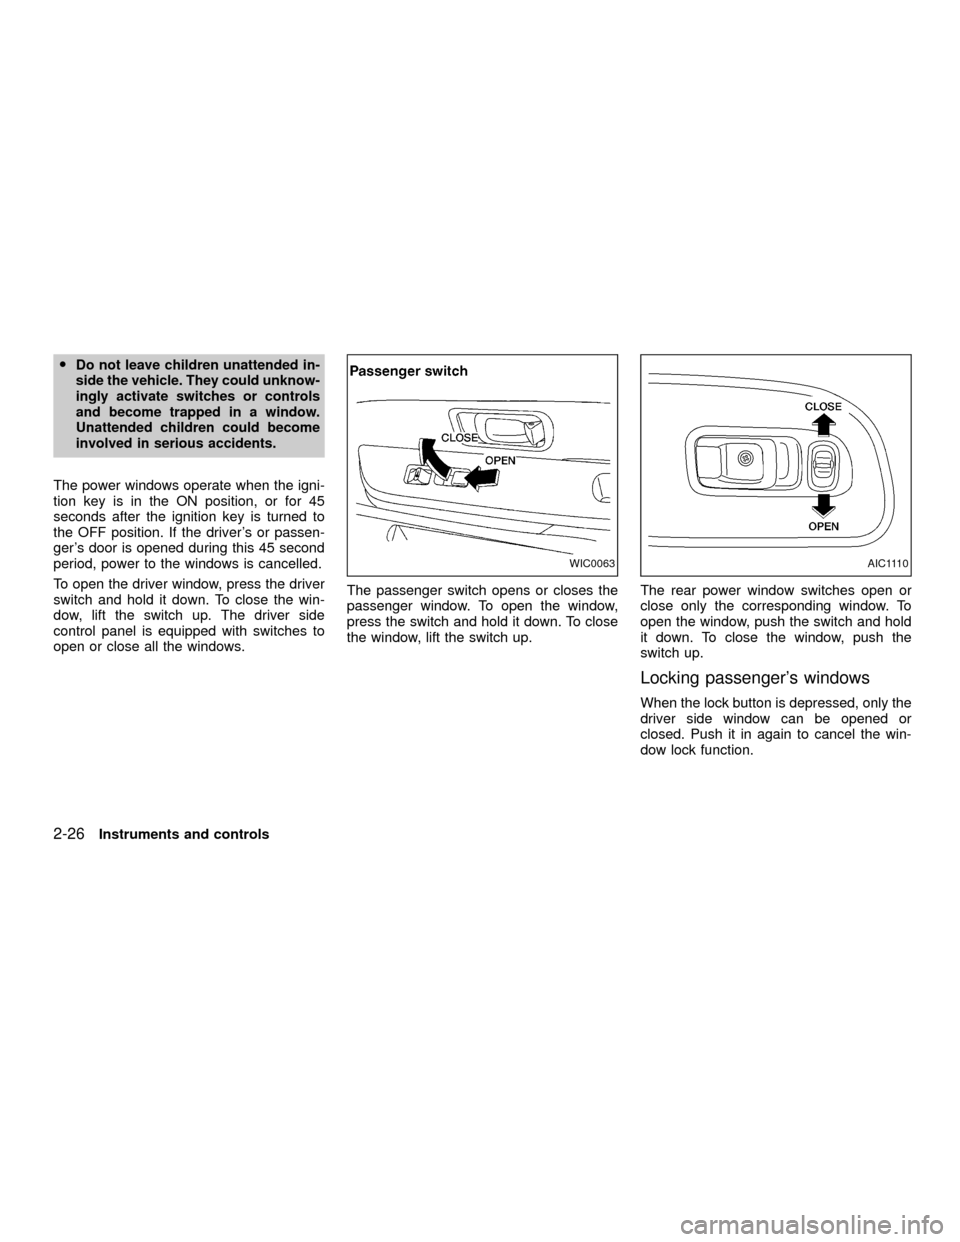
To open the driver window, press the driver
switch and hold it down. To close the win-
dow, lift the switch up. The driver side
control panel is equipped with switches to
open or close all the windows.The passenger switch opens or closes the
passenger window. To open the window,
press the switch and hold it down. To close
the window, lift the switch up.The rear power window switches open or
close only the corresponding window. To
open the window, push the switch and hold
it down. To close the window, push the
switch up.
Locking passenger's windows
When the lock button is depressed, only the
driver side window can be opened or
closed. Push it in again to cancel the win-
dow lock function.
WIC0063AIC1110
2-26Instruments and controls
ZX
Page 70 of 263

Automatic operation
To fully open the driver window, completely
press the driver window switch down and
release it; it need not be held. To stop the
window, lift the switch up while the window
is opening.
MANUAL WINDOWS
The side windows can be opened or closed
by turning the hand crank on each door.
To open a window on the driver side, turn
the crank clockwise. To close a window, turn
the crank counterclockwise.
To open a window on the passenger side,
turn the crank counterclockwise. To close a
window, turn the crank clockwise.
TILTING THE SKYROOF
Pull the handle down, then push the handle
up to the fully tilted position.The skyroof
cannot be removed.
WARNING
In an accident you could be thrown
from the vehicle through an open sky-
roof. Always use seat belts and child
restraints.
AIC1121AIC0648A I C 1111
SKYROOF
(if so equipped)
Instruments and controls2-27
ZX
Page 72 of 263
4. Align the two lock bolts on the rear edge
of sun shade with the lock nuts. Turn
each lock bolt clockwise to securely lock
the sun shade in place.
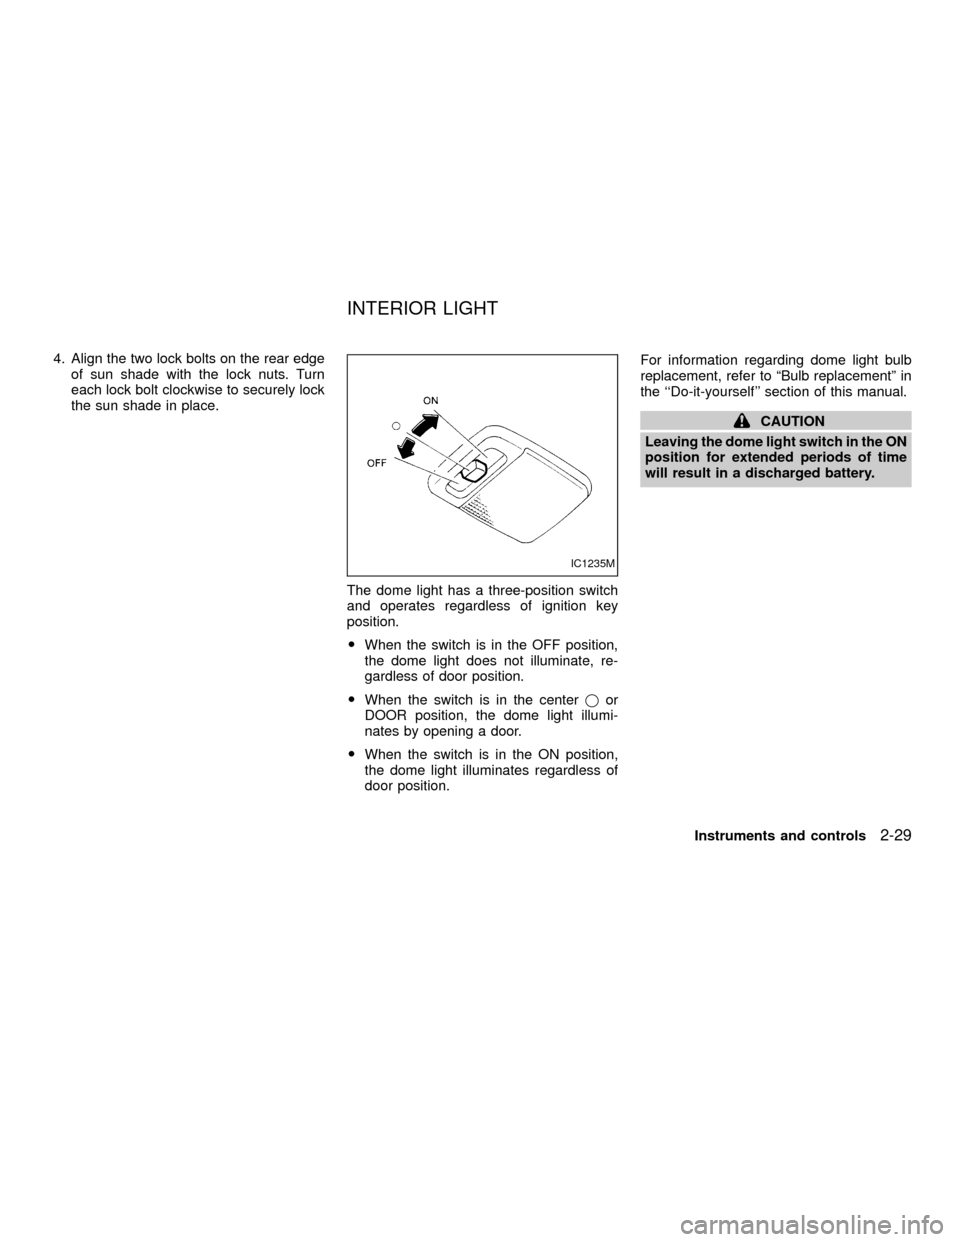
The dome light has a three-position switch
and operates regardless of ignition key
position.
OWhen the switch is in the OFF position,
the dome light does not illuminate, re-
gardless of door position.
OWhen the switch is in the centerjor
DOOR position, the dome light illumi-
nates by opening a door.
OWhen the switch is in the ON position,
the dome light illuminates regardless of
door position.For information regarding dome light bulb
replacement, refer to ªBulb replacementº in
the ``Do-it-yourself'' section of this manual.
CAUTION
Leaving the dome light switch in the ON
position for extended periods of time
will result in a discharged battery.
IC1235M
INTERIOR LIGHT
Instruments and controls2-29
ZX
Page 74 of 263

3 Pre-driving checks and adjustments
Key .........................................................................3-2
Doors ......................................................................3-2
Locking with key ................................................3-2
Locking with inside lock knob............................3-3
Locking with power door lock switch.................3-3
Child safety rear door lock ................................3-4
Multi-remote control system (if so equipped).........3-4
How to use multi-remote control system...........3-4
Battery replacement ..........................................3-7
Hood .......................................................................3-8
Rear door ...............................................................3-9
Roof rack with gear basket (if so equipped) ........3-10Step rail ................................................................3-12
Fuel filler lid ..........................................................3-13
Fuel filler cap ...................................................3-13
Steering wheel .....................................................3-14
Tilt operation ....................................................3-14
Sun visors.............................................................3-14
Vanity mirror ....................................................3-14
Mirrors ..................................................................3-15
Inside mirror.....................................................3-15
Outside mirrors ................................................3-15
Outside mirror remote control
(if so equipped)................................................3-16
ZX
Page 75 of 263
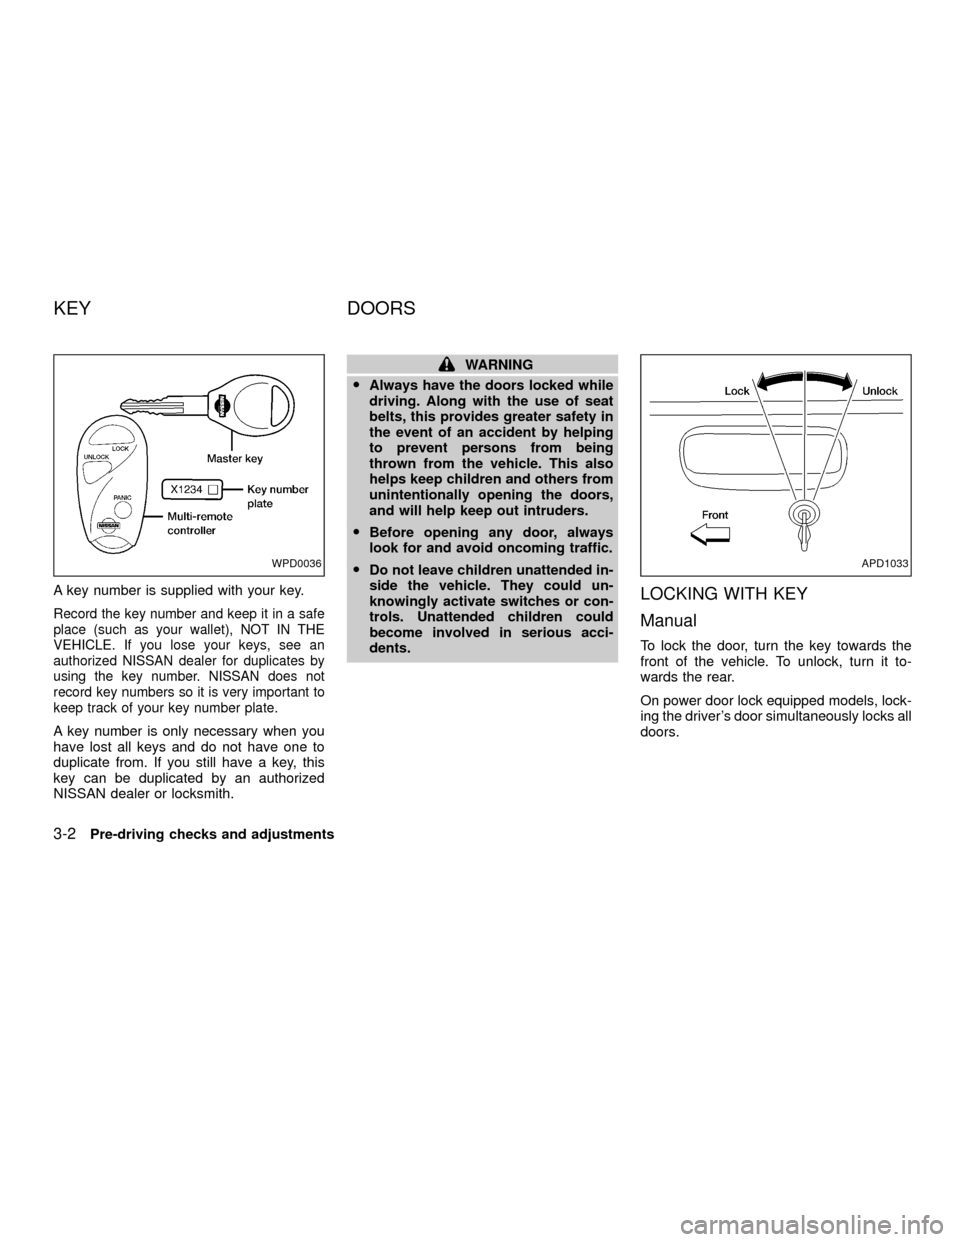
A key number is supplied with your key.
Record the key number and keep it in a safe
place (such as your wallet), NOT IN THE
VEHICLE. If you lose your keys, see an
authorized NISSAN dealer for duplicates by
using the key number. NISSAN does not
record key numbers so it is very important to
keep track of your key number plate.
A key number is only necessary when you
have lost all keys and do not have one to
duplicate from. If you still have a key, this
key can be duplicated by an authorized
NISSAN dealer or locksmith.
WARNING
OAlways have the doors locked while
driving. Along with the use of seat
belts, this provides greater safety in
the event of an accident by helping
to prevent persons from being
thrown from the vehicle. This also
helps keep children and others from
unintentionally opening the doors,
and will help keep out intruders.
OBefore opening any door, always
look for and avoid oncoming traffic.
ODo not leave children unattended in-
side the vehicle. They could un-
knowingly activate switches or con-
trols. Unattended children could
become involved in serious acci-
dents.
LOCKING WITH KEY
Manual
To lock the door, turn the key towards the
front of the vehicle. To unlock, turn it to-
wards the rear.
On power door lock equipped models, lock-
ing the driver's door simultaneously locks all
doors.
WPD0036APD1033
KEY DOORS
3-2Pre-driving checks and adjustments
ZX