check engine light NISSAN XTERRA 2002 WD22 / 1.G Owners Manual
[x] Cancel search | Manufacturer: NISSAN, Model Year: 2002, Model line: XTERRA, Model: NISSAN XTERRA 2002 WD22 / 1.GPages: 263, PDF Size: 2.22 MB
Page 47 of 263

2 Instruments and controls
Instrument panel ....................................................2-2
Meters and gauges ................................................2-3
Speedometer and odometer .............................2-3
Tachometer ........................................................2-5
Engine coolant temperature gauge ...................2-5
Fuel gauge ........................................................2-6
Compass and outside temperature display
(if so equipped) ......................................................2-6
Outside temperature display .............................2-6
Compass display ...............................................2-7
Warning/indicator lights and audible
reminders..............................................................2-10
Checking bulbs ................................................2-10
Warning lights .................................................. 2-11
Indicator lights .................................................2-13
Audible reminders............................................2-14
Security system ....................................................2-15
Vehicle security system (if so equipped).........2-15
Windshield wiper and washer switch ...................2-18
Switch operation ..............................................2-18
Rear window wiper and washer switch................2-19
Rear window defogger switch ..............................2-20Headlight and turn signal switch ..........................2-20
Headlight switch ..............................................2-20
Turn signal switch............................................2-21
Front fog light switch (if so equipped)..................2-22
Hazard warning flasher switch .............................2-22
Horn ......................................................................2-23
Cigarette lighter and ash tray (accessories) ........2-23
Power point (if so equipped) ................................2-24
Storage .................................................................2-25
Map pocket ......................................................2-25
Cup holders .....................................................2-26
Glove box ........................................................2-27
Console box (if so equipped) ..........................2-27
Luggage hooks (if so equipped) .....................2-28
Tonneau cover (if so equipped).......................2-29
Windows .............................................................2-30
Power windows (if so equipped) .....................2-30
Manual windows ..............................................2-31
Sunroof (if so equipped).......................................2-32
Tilting the sunroof ............................................2-32
Removing/installing..........................................2-33
Interior light...........................................................2-33
ZX
Page 57 of 263
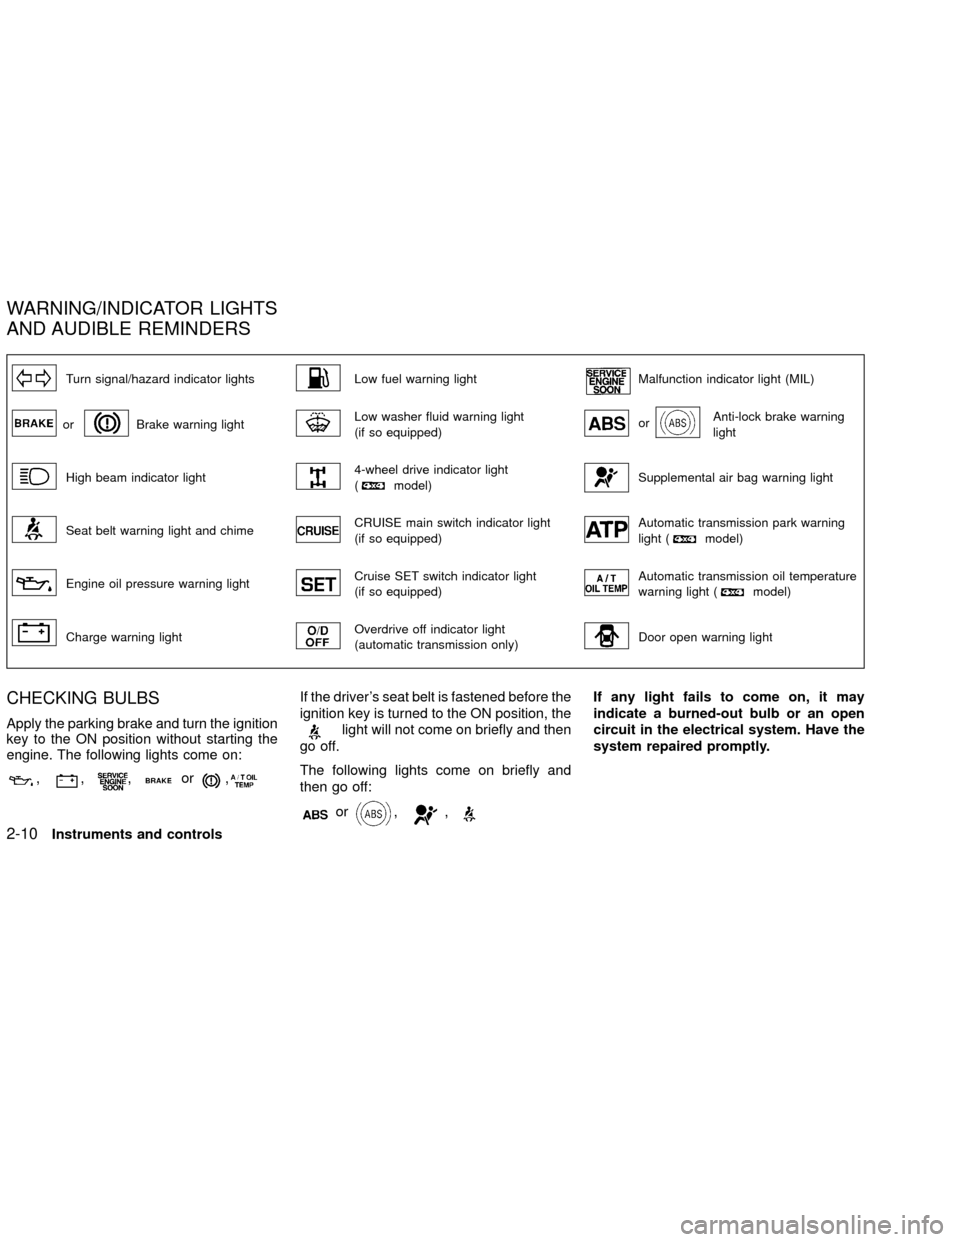
Turn signal/hazard indicator lightsLow fuel warning lightMalfunction indicator light (MIL)
orBrake warning lightLow washer fluid warning light
(if so equipped)orAnti-lock brake warning
light
High beam indicator light4-wheel drive indicator light
(model)Supplemental air bag warning light
Seat belt warning light and chimeCRUISE main switch indicator light
(if so equipped)Automatic transmission park warning
light (model)
Engine oil pressure warning lightCruise SET switch indicator light
(if so equipped)Automatic transmission oil temperature
warning light (model)
Charge warning lightOverdrive off indicator light
(automatic transmission only)Door open warning light
CHECKING BULBS
Apply the parking brake and turn the ignition
key to the ON position without starting the
engine. The following lights come on:
,,,or,
If the driver's seat belt is fastened before the
ignition key is turned to the ON position, the
light will not come on briefly and then
go off.
The following lights come on briefly and
then go off:
or,,
If any light fails to come on, it may
indicate a burned-out bulb or an open
circuit in the electrical system. Have the
system repaired promptly.
WARNING/INDICATOR LIGHTS
AND AUDIBLE REMINDERS
2-10Instruments and controls
ZX
Page 58 of 263
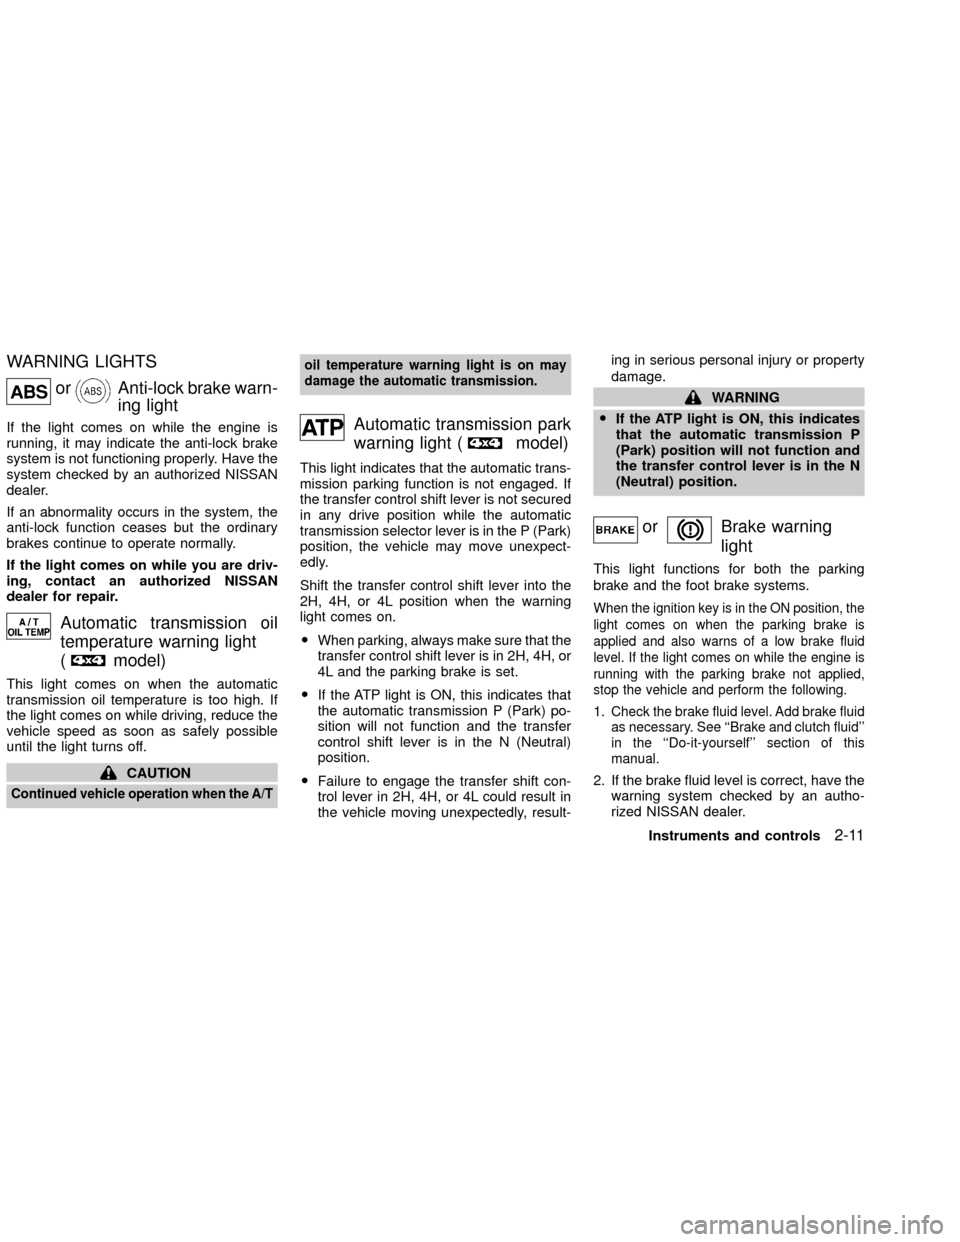
WARNING LIGHTS
orAnti-lock brake warn-
ing light
If the light comes on while the engine is
running, it may indicate the anti-lock brake
system is not functioning properly. Have the
system checked by an authorized NISSAN
dealer.
If an abnormality occurs in the system, the
anti-lock function ceases but the ordinary
brakes continue to operate normally.
If the light comes on while you are driv-
ing, contact an authorized NISSAN
dealer for repair.
Automatic transmission oil
temperature warning light
(
model)
This light comes on when the automatic
transmission oil temperature is too high. If
the light comes on while driving, reduce the
vehicle speed as soon as safely possible
until the light turns off.
CAUTION
Continued vehicle operation when the A/Toil temperature warning light is on may
damage the automatic transmission.
Automatic transmission park
warning light (
model)
This light indicates that the automatic trans-
mission parking function is not engaged. If
the transfer control shift lever is not secured
in any drive position while the automatic
transmission selector lever is in the P (Park)
position, the vehicle may move unexpect-
edly.
Shift the transfer control shift lever into the
2H, 4H, or 4L position when the warning
light comes on.
OWhen parking, always make sure that the
transfer control shift lever is in 2H, 4H, or
4L and the parking brake is set.
OIf the ATP light is ON, this indicates that
the automatic transmission P (Park) po-
sition will not function and the transfer
control shift lever is in the N (Neutral)
position.
OFailure to engage the transfer shift con-
trol lever in 2H, 4H, or 4L could result in
the vehicle moving unexpectedly, result-ing in serious personal injury or property
damage.
WARNING
OIf the ATP light is ON, this indicates
that the automatic transmission P
(Park) position will not function and
the transfer control lever is in the N
(Neutral) position.
orBrake warning
light
This light functions for both the parking
brake and the foot brake systems.
When the ignition key is in the ON position, the
light comes on when the parking brake is
applied and also warns of a low brake fluid
level. If the light comes on while the engine is
running with the parking brake not applied,
stop the vehicle and perform the following.
1.Check the brake fluid level. Add brake fluid
as necessary. See ``Brake and clutch fluid''
in the ``Do-it-yourself'' section of this
manual.
2. If the brake fluid level is correct, have the
warning system checked by an autho-
rized NISSAN dealer.
Instruments and controls
2-11
ZX
Page 59 of 263
WARNING
O
Your brake system may not be working
properly if the warning light is on.
Driving could be dangerous. If you
judge it to be safe, drive carefully to
the nearest service station for repairs.
Otherwise have your vehicle towed be-
cause driving it could be dangerous.
OPressing the brake pedal with the
engine stopped and/or low brake
fluid level may increase your stop-
ping distance and require greater
pedal effort as well as pedal travel.
OIf the brake fluid level is below the
MINIMUM or MIN mark on the brake
fluid reservoir, do not drive until the
brake system has been checked at
an authorized NISSAN dealer.
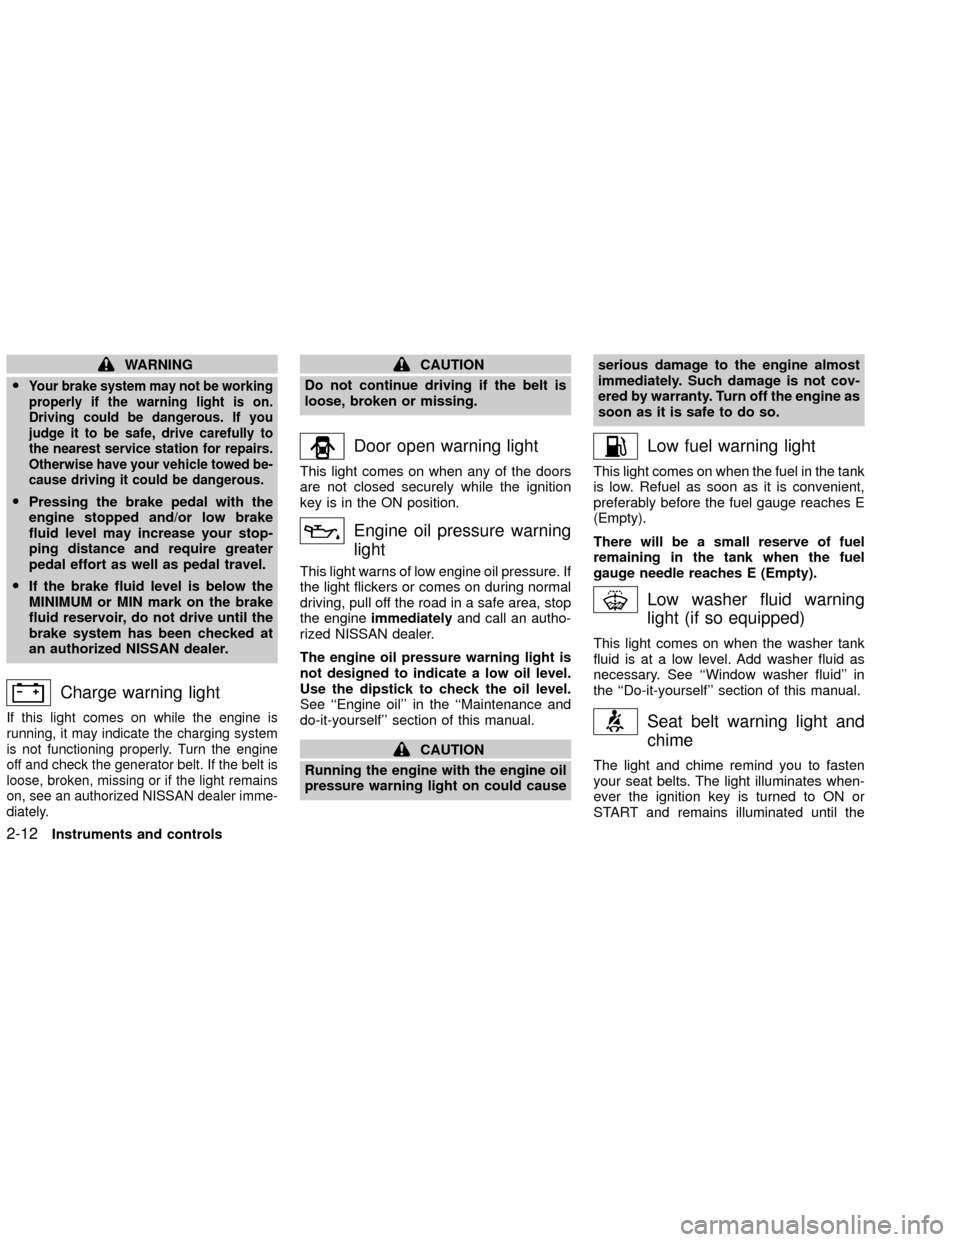
Charge warning light
If this light comes on while the engine is
running, it may indicate the charging system
is not functioning properly. Turn the engine
off and check the generator belt. If the belt is
loose, broken, missing or if the light remains
on, see an authorized NISSAN dealer imme-
diately.
CAUTION
Do not continue driving if the belt is
loose, broken or missing.
Door open warning light
This light comes on when any of the doors
are not closed securely while the ignition
key is in the ON position.
Engine oil pressure warning
light
This light warns of low engine oil pressure. If
the light flickers or comes on during normal
driving, pull off the road in a safe area, stop
the engineimmediatelyand call an autho-
rized NISSAN dealer.
The engine oil pressure warning light is
not designed to indicate a low oil level.
Use the dipstick to check the oil level.
See ``Engine oil'' in the ``Maintenance and
do-it-yourself'' section of this manual.
CAUTION
Running the engine with the engine oil
pressure warning light on could causeserious damage to the engine almost
immediately. Such damage is not cov-
ered by warranty. Turn off the engine as
soon as it is safe to do so.
Low fuel warning light
This light comes on when the fuel in the tank
is low. Refuel as soon as it is convenient,
preferably before the fuel gauge reaches E
(Empty).
There will be a small reserve of fuel
remaining in the tank when the fuel
gauge needle reaches E (Empty).
Low washer fluid warning
light (if so equipped)
This light comes on when the washer tank
fluid is at a low level. Add washer fluid as
necessary. See ``Window washer fluid'' in
the ``Do-it-yourself'' section of this manual.
Seat belt warning light and
chime
The light and chime remind you to fasten
your seat belts. The light illuminates when-
ever the ignition key is turned to ON or
START and remains illuminated until the
2-12Instruments and controls
ZX
Page 60 of 263
driver's seat belt is fastened. At the same
time, the chime sounds for about seven
seconds unless the driver seat belt is se-
curely fastened.
Refer to ``Seat belts'' in the ``Seats, re-
straints and supplemental air bag systems''
section for precautions on seat belt usage.
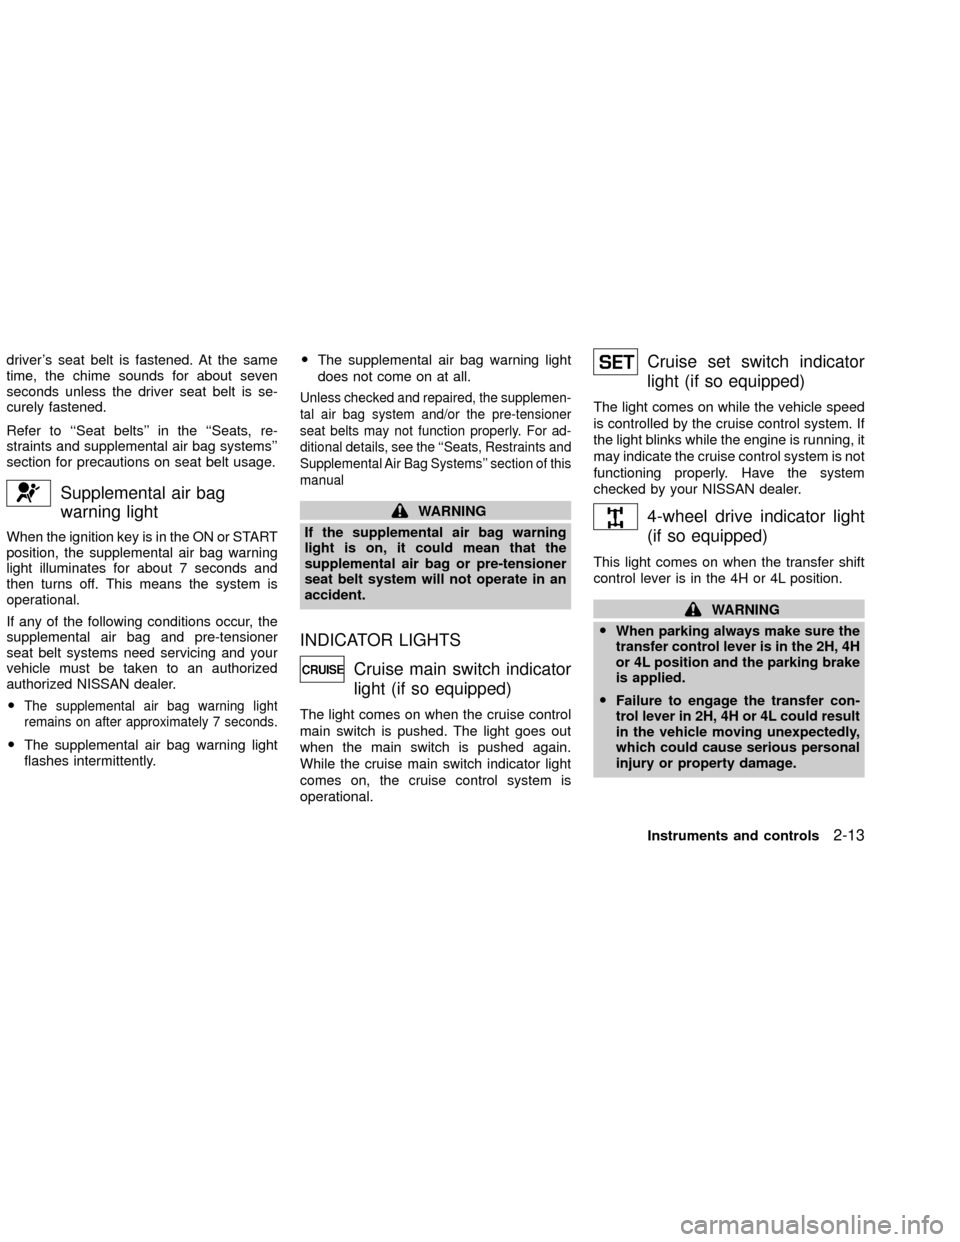
Supplemental air bag
warning light
When the ignition key is in the ON or START
position, the supplemental air bag warning
light illuminates for about 7 seconds and
then turns off. This means the system is
operational.
If any of the following conditions occur, the
supplemental air bag and pre-tensioner
seat belt systems need servicing and your
vehicle must be taken to an authorized
authorized NISSAN dealer.
O
The supplemental air bag warning light
remains on after approximately 7 seconds.
OThe supplemental air bag warning light
flashes intermittently.OThe supplemental air bag warning light
does not come on at all.
Unless checked and repaired, the supplemen-
tal air bag system and/or the pre-tensioner
seat belts may not function properly. For ad-
ditional details, see the ``Seats, Restraints and
Supplemental Air Bag Systems'' section of this
manual
WARNING
If the supplemental air bag warning
light is on, it could mean that the
supplemental air bag or pre-tensioner
seat belt system will not operate in an
accident.
INDICATOR LIGHTS
Cruise main switch indicator
light (if so equipped)
The light comes on when the cruise control
main switch is pushed. The light goes out
when the main switch is pushed again.
While the cruise main switch indicator light
comes on, the cruise control system is
operational.
Cruise set switch indicator
light (if so equipped)
The light comes on while the vehicle speed
is controlled by the cruise control system. If
the light blinks while the engine is running, it
may indicate the cruise control system is not
functioning properly. Have the system
checked by your NISSAN dealer.
4-wheel drive indicator light
(if so equipped)
This light comes on when the transfer shift
control lever is in the 4H or 4L position.
WARNING
OWhen parking always make sure the
transfer control lever is in the 2H, 4H
or 4L position and the parking brake
is applied.
OFailure to engage the transfer con-
trol lever in 2H, 4H or 4L could result
in the vehicle moving unexpectedly,
which could cause serious personal
injury or property damage.
Instruments and controls
2-13
ZX
Page 61 of 263
High beam indicator light
This blue light comes on when the headlight
high beams are on and goes out when the
low beams are selected.
The high beam indicator light also comes on
when the passing signal is activated.
Malfunction indicator light
(MIL)
If this indicator light comes on steady or
blinks while the engine is running, it may
indicate a potential emission control mal-
function.
The malfunction indicator lamp may also
come on steady if the fuel filler cap is loose
or missing, or if the vehicle runs out of fuel.
Check to make sure the fuel filler cap is
installed and closed tightly, and that the
vehicle has at least three gallons of fuel in
the fuel tank.
After a few driving trips, the
lamp
should turn off if no other potential emission
control system malfunction exists.
Operation
The malfunction indicator lamp will come on
in one of two ways:O
Malfunction indicator lamp on steady þ An
emission control system malfunction has
been detected. Check the fuel filler cap. If
the fuel filler cap is loose or missing, tighten
or install the cap and continue to drive the
vehicle. The
lamp should turn off
after a few driving trips. If the
lamp
does not turn off after a few driving trips,
have the vehicle inspected by an autho-
rized NISSAN dealer. You do not need to
have your vehicle towed to the dealer.
OMalfunction indicator lamp blinking þ An
engine misfire has been detected which
may damage the emission control sys-
tem. To reduce or avoid emission control
system damage:
Odo not drive at speeds above 45 MPH
(72 km/h).
O
avoid hard acceleration or deceleration.
Oavoid steep uphill grades.
Oif possible, reduce the amount of cargo
being hauled or towed.
The malfunction indicator lamp may stop
blinking and come on steady.
Have the vehicle inspected by an autho-
rized NISSAN dealer. You do not need to
have your vehicle towed to the dealer.
CAUTION
Continued vehicle operation without
having the emission control system
checked and repaired as necessary
could lead to poor driveability, reduced
fuel economy, and possible damage to
the emission control system.
Overdrive off indicator light
(automatic transmission mod-
els only)
This light comes on when the overdrive
switch is pushed to the OFF position.
Turn signal/hazard indicator
lights
These lights flash when the turn signal
switch or hazard switch is turned on.
AUDIBLE REMINDERS
Brake pad wear warning
The disc brake pads have audible wear
warnings. When a brake pad requires re-
placement, it makes a high pitched scraping
sound when the vehicle is in motion whether
or not the brake pedal is depressed. Have
2-14Instruments and controls
ZX
Page 91 of 263

device must accept any interference re-
ceived including interference that may
cause undesired operation of the device.
WARNING
OMake sure the hood is completely
closed and latched before driving.
Failure to do so could cause the
hood to fly open and result in an
accident.
OIf you see steam or smoke coming
from the engine compartment, to
avoid injury do not open the hood.
1. Pull the hood lock release handle located
below the driver side instrument panel;
the hood then springs up slightly.2. Lift the lever at the front of the hood with
your fingertips and raise the hood.
3. Insert the support rod into the slot in the
front edge of the hood.
4. When closing the hood, reset the support
rod to its original position, lower the hood
to approximately 12 inches (30.5 cm)
above the latch and release it. This al-
lows proper engagement of the hood
latch.
LPD0061
HOOD
3-8Pre-driving checks and adjustments
ZX
Page 96 of 263
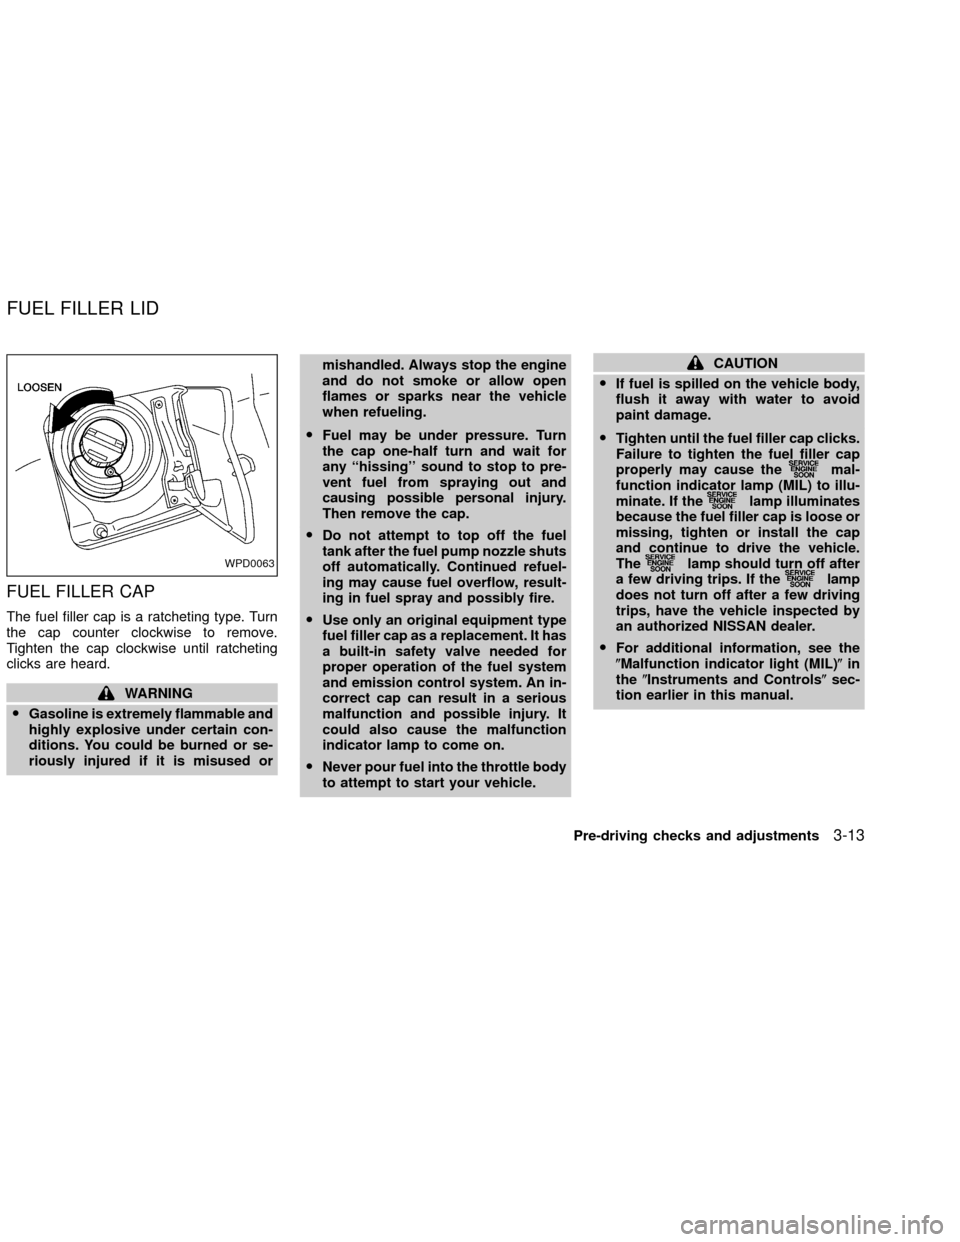
FUEL FILLER CAP
The fuel filler cap is a ratcheting type. Turn
the cap counter clockwise to remove.
Tighten the cap clockwise until ratcheting
clicks are heard.
WARNING
OGasoline is extremely flammable and
highly explosive under certain con-
ditions. You could be burned or se-
riously injured if it is misused ormishandled. Always stop the engine
and do not smoke or allow open
flames or sparks near the vehicle
when refueling.
OFuel may be under pressure. Turn
the cap one-half turn and wait for
any ``hissing'' sound to stop to pre-
vent fuel from spraying out and
causing possible personal injury.
Then remove the cap.
ODo not attempt to top off the fuel
tank after the fuel pump nozzle shuts
off automatically. Continued refuel-
ing may cause fuel overflow, result-
ing in fuel spray and possibly fire.
OUse only an original equipment type
fuel filler cap as a replacement. It has
a built-in safety valve needed for
proper operation of the fuel system
and emission control system. An in-
correct cap can result in a serious
malfunction and possible injury. It
could also cause the malfunction
indicator lamp to come on.
ONever pour fuel into the throttle body
to attempt to start your vehicle.
CAUTION
OIf fuel is spilled on the vehicle body,
flush it away with water to avoid
paint damage.
OTighten until the fuel filler cap clicks.
Failure to tighten the fuel filler cap
properly may cause the
mal-
function indicator lamp (MIL) to illu-
minate. If the
lamp illuminates
because the fuel filler cap is loose or
missing, tighten or install the cap
and continue to drive the vehicle.
The
lamp should turn off after
a few driving trips. If thelamp
does not turn off after a few driving
trips, have the vehicle inspected by
an authorized NISSAN dealer.
OFor additional information, see the
(Malfunction indicator light (MIL)(in
the(Instruments and Controls(sec-
tion earlier in this manual.
WPD0063
FUEL FILLER LID
Pre-driving checks and adjustments3-13
ZX
Page 139 of 263

ON (Normal operating position) (3)
This position turns on the ignition system
and electrical accessories.
START (4)
This position starts the engine. As soon as
the engine has started, release the key. It
automatically returns to the ON position.OMake sure the area around the vehicle is
clear.
OCheck fluid levels such as engine oil,
coolant, brake and clutch fluid, and win-
dow washer fluid as frequently as pos-
sible, at least whenever you refuel.
OCheck that all windows and lights are
clean.
OVisually inspect tires for their appearance
and condition. Also check tires for proper
inflation.
OLock all doors.
OPosition seat and adjust head restraints.
OAdjust inside and outside mirrors.
OFasten seat belts and ask all passengers
to do likewise.
OCheck the operation of warning lights
when key is turned to the ON (3) position.
See9Warning/Indicator lights and au-
dible reminders9in the9Instruments and
controls9section.1. Apply the parking brake.
2.Automatic transmission:
Move the selector lever to P (Park) or N
(Neutral). P (Park) is preferred.
The shift lever cannot be moved out of
P (Park) and into any of the other gear
positions if the ignition key is turned
to OFF or if the key is removed from
the ignition switch.
The starter is designed not to operate
if the selector lever is in one of the
driving positions.
Manual transmission:
Move the gearshift lever to N (Neutral),
and fully depress the clutch pedal to the
floor while starting the engine.
The starter is designed not to operate
unless the clutch pedal is fully de-
pressed.
3.With your foot off the accelerator
pedal,turn the ignition key to START.
Release the key when the engine starts.
If the engine starts, but fails to run, repeat
the above procedure.
BEFORE STARTING THE
ENGINESTARTING THE ENGINE
5-8Starting and driving
ZX
Page 183 of 263

8 Maintenance and do-it-yourself
Maintenance requirements .....................................8-2
General maintenance .............................................8-3
Explanation of general maintenance
items ..................................................................8-3
Exterior maintenance.........................................8-3
Interior maintenance ..........................................8-3
Maintenance precautions .......................................8-5
Engine compartment check locations ....................8-7
Engine cooling system .........................................8-10
Checking engine coolant level ........................8-10
Changing engine coolant ................................ 8-11
Engine oil ............................................................. 8-11
Checking engine oil level ................................ 8-11
Changing engine oil ........................................8-13
Changing engine oil filter.................................8-14
Automatic transmission fluid ................................8-15
Temperature conditions for checking ..............8-15
Power steering fluid..............................................8-17
Brake and clutch fluid...........................................8-17
Window washer fluid ............................................8-18
Window washer fluid reservoir ........................8-18
Battery ..................................................................8-19Jump starting ...................................................8-20
Drive belts ............................................................8-20
Spark plugs ..........................................................8-21
Replacing spark plugs
(except supercharger) .....................................8-22
Replacing spark plugs
(with supercharger)..........................................8-23
Air cleaner ............................................................8-23
Windshield wiper blades ......................................8-25
Cleaning ..........................................................8-25
Replacing .........................................................8-25
Parking brake and brake pedal ............................8-27
Checking parking brake...................................8-27
Checking brake pedal .....................................8-27
Brake booster ..................................................8-28
Clutch pedal .........................................................8-29
Checking clutch pedal .....................................8-29
Fuses ....................................................................8-30
Passenger compartment .................................8-30
Keyfob battery replacement .................................8-31
Lights ....................................................................8-32
Headlights ........................................................8-32
ZX