parking brake NISSAN XTERRA 2005 N50 / 2.G Owners Manual
[x] Cancel search | Manufacturer: NISSAN, Model Year: 2005, Model line: XTERRA, Model: NISSAN XTERRA 2005 N50 / 2.GPages: 296, PDF Size: 4.89 MB
Page 84 of 296
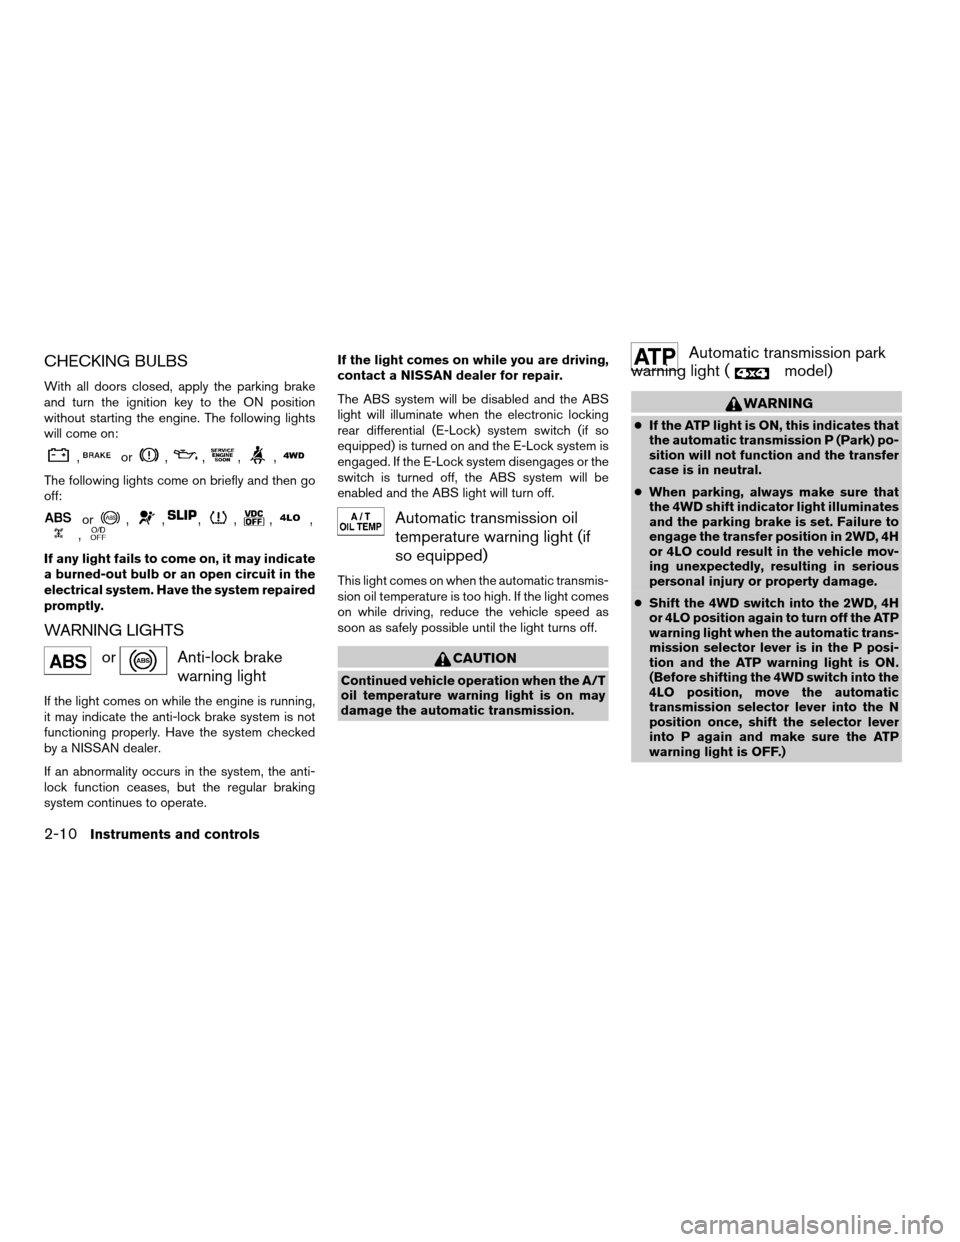
CHECKING BULBS
With all doors closed, apply the parking brake
and turn the ignition key to the ON position
without starting the engine. The following lights
will come on:
,or,,,,
The following lights come on briefly and then go
off:
or,,,,,,,
If any light fails to come on, it may indicate
a burned-out bulb or an open circuit in the
electrical system. Have the system repaired
promptly.
WARNING LIGHTS
orAnti-lock brake
warning light
If the light comes on while the engine is running,
it may indicate the anti-lock brake system is not
functioning properly. Have the system checked
by a NISSAN dealer.
If an abnormality occurs in the system, the anti-
lock function ceases, but the regular braking
system continues to operate.If the light comes on while you are driving,
contact a NISSAN dealer for repair.
The ABS system will be disabled and the ABS
light will illuminate when the electronic locking
rear differential (E-Lock) system switch (if so
equipped) is turned on and the E-Lock system is
engaged. If the E-Lock system disengages or the
switch is turned off, the ABS system will be
enabled and the ABS light will turn off.
Automatic transmission oil
temperature warning light (if
so equipped)
This light comes on when the automatic transmis-
sion oil temperature is too high. If the light comes
on while driving, reduce the vehicle speed as
soon as safely possible until the light turns off.
CAUTION
Continued vehicle operation when the A/T
oil temperature warning light is on may
damage the automatic transmission.
Automatic transmission park
warning light (
model)
WARNING
cIf the ATP light is ON, this indicates that
the automatic transmission P (Park) po-
sition will not function and the transfer
case is in neutral.
cWhen parking, always make sure that
the 4WD shift indicator light illuminates
and the parking brake is set. Failure to
engage the transfer position in 2WD, 4H
or 4LO could result in the vehicle mov-
ing unexpectedly, resulting in serious
personal injury or property damage.
cShift the 4WD switch into the 2WD, 4H
or 4LO position again to turn off the ATP
warning light when the automatic trans-
mission selector lever is in the P posi-
tion and the ATP warning light is ON.
(Before shifting the 4WD switch into the
4LO position, move the automatic
transmission selector lever into the N
position once, shift the selector lever
into P again and make sure the ATP
warning light is OFF.)
2-10Instruments and controls
ZREVIEW COPYÐ2005 Xterra(xtr)
Owners ManualÐUSA_English(nna)
11/15/04Ðdebbie
X
Page 85 of 296
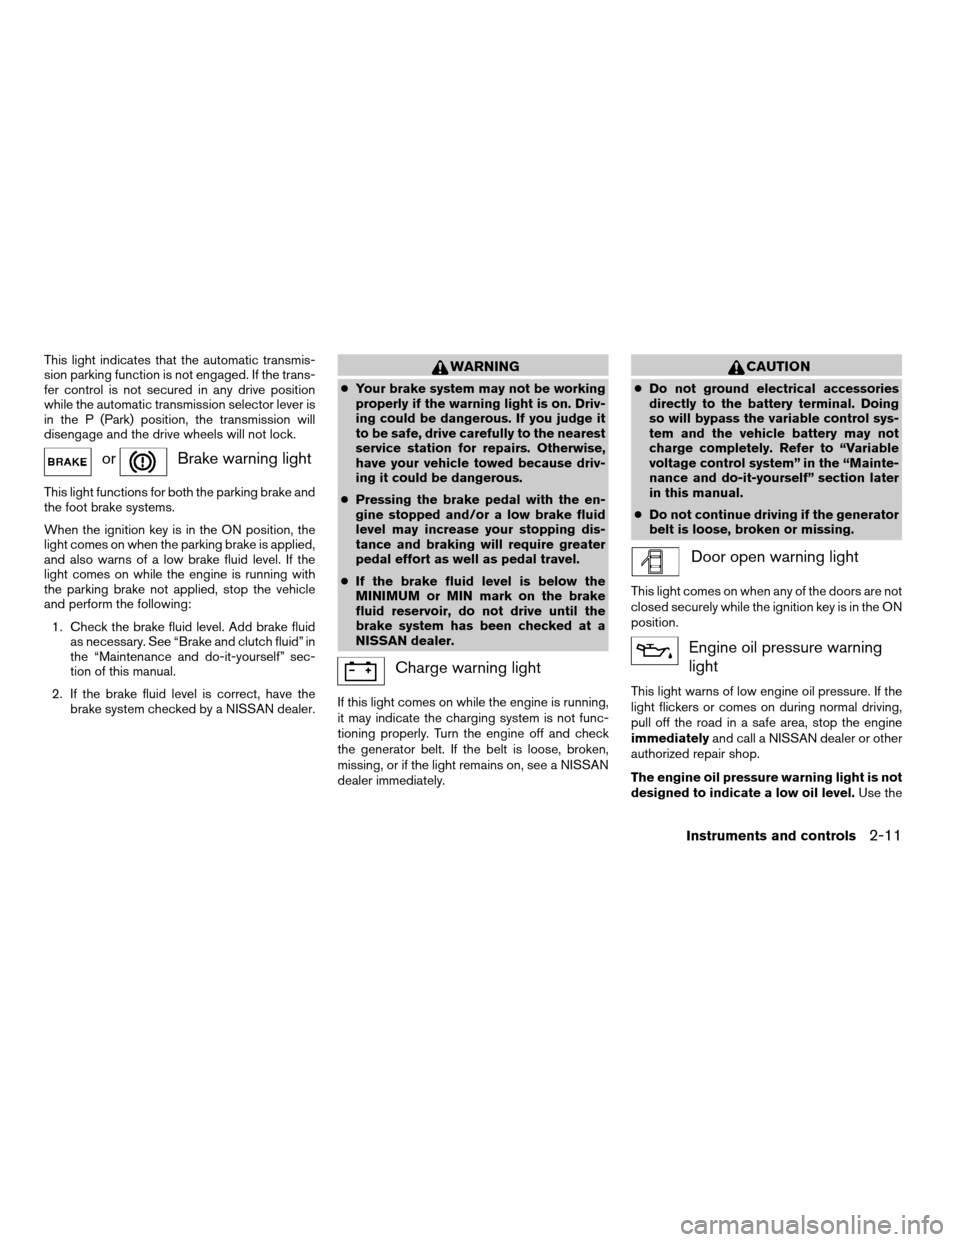
This light indicates that the automatic transmis-
sion parking function is not engaged. If the trans-
fer control is not secured in any drive position
while the automatic transmission selector lever is
in the P (Park) position, the transmission will
disengage and the drive wheels will not lock.
orBrake warning light
This light functions for both the parking brake and
the foot brake systems.
When the ignition key is in the ON position, the
light comes on when the parking brake is applied,
and also warns of a low brake fluid level. If the
light comes on while the engine is running with
the parking brake not applied, stop the vehicle
and perform the following:
1. Check the brake fluid level. Add brake fluid
as necessary. See “Brake and clutch fluid” in
the “Maintenance and do-it-yourself” sec-
tion of this manual.
2. If the brake fluid level is correct, have the
brake system checked by a NISSAN dealer.
WARNING
cYour brake system may not be working
properly if the warning light is on. Driv-
ing could be dangerous. If you judge it
to be safe, drive carefully to the nearest
service station for repairs. Otherwise,
have your vehicle towed because driv-
ing it could be dangerous.
cPressing the brake pedal with the en-
gine stopped and/or a low brake fluid
level may increase your stopping dis-
tance and braking will require greater
pedal effort as well as pedal travel.
cIf the brake fluid level is below the
MINIMUM or MIN mark on the brake
fluid reservoir, do not drive until the
brake system has been checked at a
NISSAN dealer.
Charge warning light
If this light comes on while the engine is running,
it may indicate the charging system is not func-
tioning properly. Turn the engine off and check
the generator belt. If the belt is loose, broken,
missing, or if the light remains on, see a NISSAN
dealer immediately.
CAUTION
cDo not ground electrical accessories
directly to the battery terminal. Doing
so will bypass the variable control sys-
tem and the vehicle battery may not
charge completely. Refer to “Variable
voltage control system” in the “Mainte-
nance and do-it-yourself” section later
in this manual.
cDo not continue driving if the generator
belt is loose, broken or missing.
Door open warning light
This light comes on when any of the doors are not
closed securely while the ignition key is in the ON
position.
Engine oil pressure warning
light
This light warns of low engine oil pressure. If the
light flickers or comes on during normal driving,
pull off the road in a safe area, stop the engine
immediatelyand call a NISSAN dealer or other
authorized repair shop.
The engine oil pressure warning light is not
designed to indicate a low oil level.Use the
Instruments and controls2-11
ZREVIEW COPYÐ2005 Xterra(xtr)
Owners ManualÐUSA_English(nna)
11/15/04Ðdebbie
X
Page 92 of 296

AUDIBLE REMINDERS
Brake pad wear warning
The front disc brake pads have audible wear
warnings. When a front brake pad requires re-
placement, it makes a high pitched scraping
sound when the vehicle is in motion, whether or
not the brake pedal is depressed. Have the
brakes checked as soon as possible if the warn-
ing sound is heard.
Key reminder chime
A chime sounds if the driver’s door is opened
while the key is left in the ignition switch. Remove
the key and take it with you when leaving the
vehicle.
Light reminder chime
With the ignition switch in the OFF position, a
chime sounds when the driver’s door is opened if
the headlights or parking lights are on.
Turn the headlight control switch off before leav-
ing the vehicle.Your vehicle may have two types of security sys-
tems:
cVehicle security system (if so equipped)
cNISSAN Vehicle Immobilizer System—NVIS
(if so equipped)
VEHICLE SECURITY SYSTEM (if so
equipped)
The vehicle security system provides visual and
audible alarm signals if someone opens the doors
when the system is armed. It is not, however, a
motion detection type system that activates when
a vehicle is moved or when a vibration occurs.The system helps deter vehicle theft but cannot
prevent it, nor can it prevent the theft of interior or
exterior vehicle components in all situations. Al-
ways secure your vehicle even if parking for a
brief period. Never leave your keys in the ignition,
and always lock the vehicle when unattended. Be
aware of your surroundings, and park in secure,
well-lit areas whenever possible.
Many devices offering additional protection, such
as component locks, identification markers, and
tracking systems, are available at auto supply
stores and specialty shops. Your NISSAN dealer
may also offer such equipment. Check with your
insurance company to see if you may be eligible
for discounts for various theft protection features.
How to arm the vehicle security
system
1. Close all windows.(The system can be
armed even if the windows are open.)
2. Remove the key from the ignition switch.
3. Close all doors. Lock all doors. The doors
can be locked with the key, power door lock
switch (if the door is opened, locked and
then closed) , or with the keyfob.
LIC0372
SECURITY SYSTEMS (if so equipped)
2-18Instruments and controls
ZREVIEW COPYÐ2005 Xterra(xtr)
Owners ManualÐUSA_English(nna)
11/15/04Ðdebbie
X
Page 97 of 296
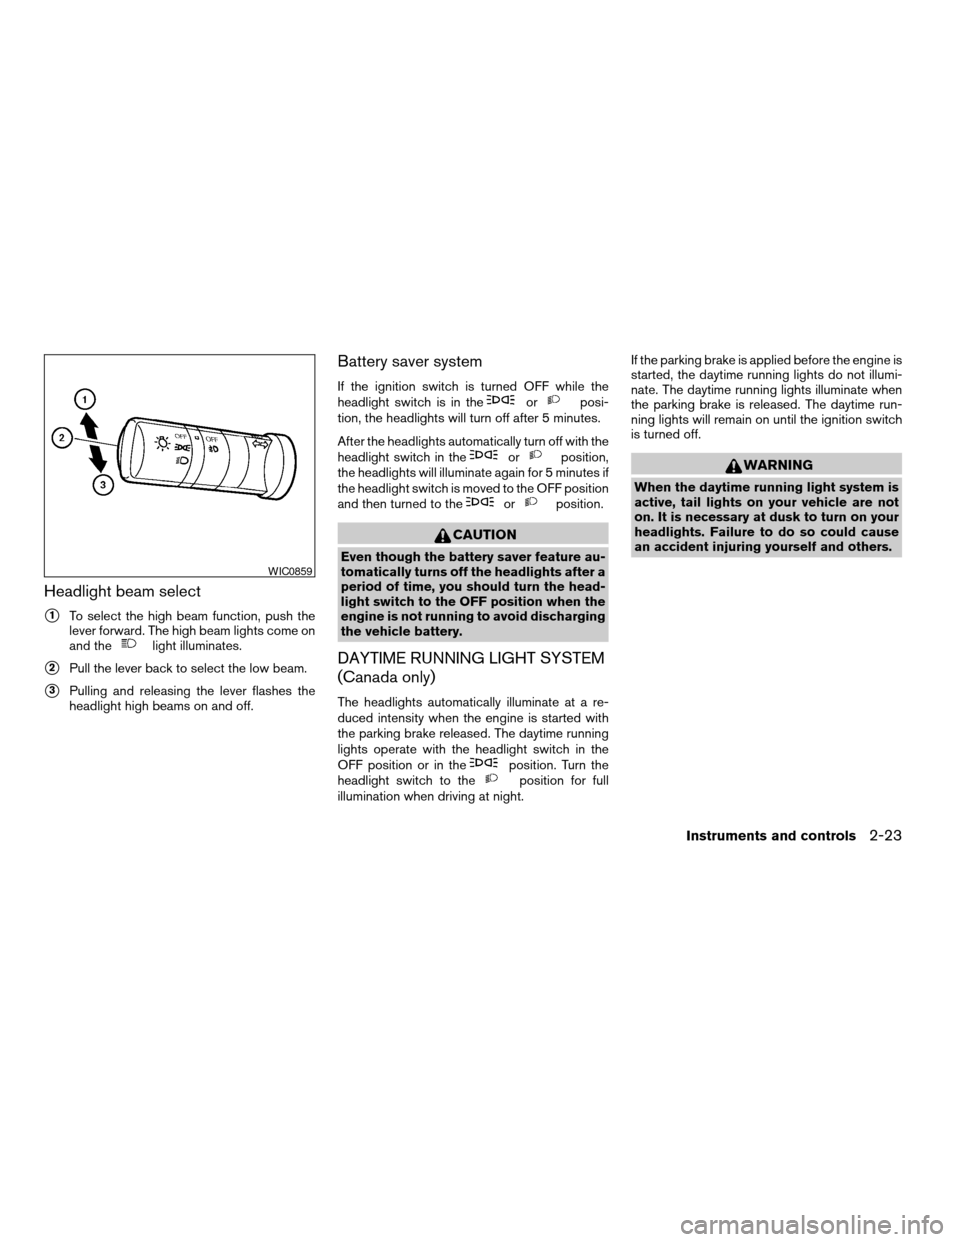
Headlight beam select
s1To select the high beam function, push the
lever forward. The high beam lights come on
and the
light illuminates.
s2Pull the lever back to select the low beam.
s3Pulling and releasing the lever flashes the
headlight high beams on and off.
Battery saver system
If the ignition switch is turned OFF while the
headlight switch is in theorposi-
tion, the headlights will turn off after 5 minutes.
After the headlights automatically turn off with the
headlight switch in the
orposition,
the headlights will illuminate again for 5 minutes if
the headlight switch is moved to the OFF position
and then turned to the
orposition.
CAUTION
Even though the battery saver feature au-
tomatically turns off the headlights after a
period of time, you should turn the head-
light switch to the OFF position when the
engine is not running to avoid discharging
the vehicle battery.
DAYTIME RUNNING LIGHT SYSTEM
(Canada only)
The headlights automatically illuminate at a re-
duced intensity when the engine is started with
the parking brake released. The daytime running
lights operate with the headlight switch in the
OFF position or in the
position. Turn the
headlight switch to theposition for full
illumination when driving at night.If the parking brake is applied before the engine is
started, the daytime running lights do not illumi-
nate. The daytime running lights illuminate when
the parking brake is released. The daytime run-
ning lights will remain on until the ignition switch
is turned off.
WARNING
When the daytime running light system is
active, tail lights on your vehicle are not
on. It is necessary at dusk to turn on your
headlights. Failure to do so could cause
an accident injuring yourself and others.
WIC0859
Instruments and controls2-23
ZREVIEW COPYÐ2005 Xterra(xtr)
Owners ManualÐUSA_English(nna)
11/15/04Ðdebbie
X
Page 102 of 296
cUse the E-Lock system only when free-
ing a stuck vehicle. Try the 4LO position
before using the E-Lock system. Never
use the E-Lock system on a slippery
road surface such as snow or ice sur-
face. Using the E-Lock system when
driving in these road conditions may
cause unexpected movement of the ve-
hicle during engine braking, accelerat-
ing or turning, which may result in an
accident and serious personal injury.
CAUTION
cAfter using the E-Lock system, turn the
switch OFF to prevent possible damage
to driveline components from extended
use.
cDo not drive over 12 MPH (20 km/h)
when the system is engaged. Doing so
could result in possible damage to the
driveline.
WARNING
Pay special attention to your surround-
ings when using the clutch interlock
switch. The vehicle will move forward or
backward according to the gear selected.
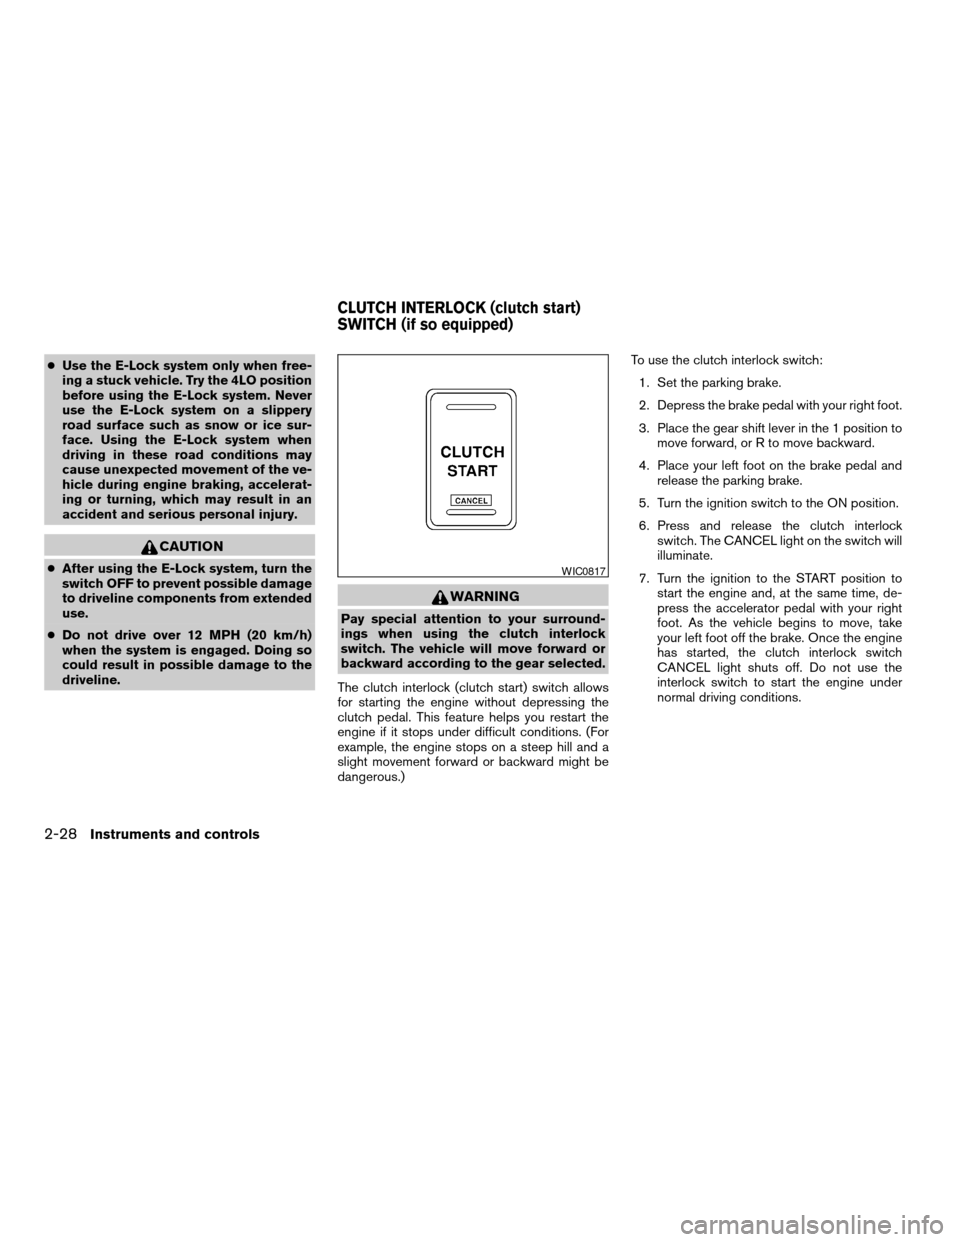
The clutch interlock (clutch start) switch allows
for starting the engine without depressing the
clutch pedal. This feature helps you restart the
engine if it stops under difficult conditions. (For
example, the engine stops on a steep hill and a
slight movement forward or backward might be
dangerous.)To use the clutch interlock switch:
1. Set the parking brake.
2. Depress the brake pedal with your right foot.
3. Place the gear shift lever in the 1 position to
move forward, or R to move backward.
4. Place your left foot on the brake pedal and
release the parking brake.
5. Turn the ignition switch to the ON position.
6. Press and release the clutch interlock
switch. The CANCEL light on the switch will
illuminate.
7. Turn the ignition to the START position to
start the engine and, at the same time, de-
press the accelerator pedal with your right
foot. As the vehicle begins to move, take
your left foot off the brake. Once the engine
has started, the clutch interlock switch
CANCEL light shuts off. Do not use the
interlock switch to start the engine under
normal driving conditions.
WIC0817
CLUTCH INTERLOCK (clutch start)
SWITCH (if so equipped)
2-28Instruments and controls
ZREVIEW COPYÐ2005 Xterra(xtr)
Owners ManualÐUSA_English(nna)
11/15/04Ðdebbie
X
Page 160 of 296

5 Starting and driving
Precautions when starting and driving................5-2
Exhaust gas (carbon monoxide)..................5-2
Three-way catalyst..............................5-2
Low tire pressure warning system................5-3
On-pavement and off-road driving
precautions....................................5-4
Avoiding collision and rollover....................5-4
Drinking alcohol/drugs and driving................5-5
Driving safety precautions.......................5-5
Ignition switch.....................................5-7
Automatic transmission..........................5-7
Manual transmission............................5-8
Key positions..................................5-8
Nissan Vehicle Immobilizer System (NVIS)
(if so equipped)................................5-8
Before starting the engine..........................5-9
Starting the engine................................5-9
Driving the vehicle................................5-10
Automatic transmission.........................5-10
Manual transmission...........................5-14
Parking brake....................................5-16
Cruise control (if so equipped).....................5-17
Precautions on cruise control...................5-17Cruise control operations.......................5-17
Break-in schedule................................5-18
Increasing fuel economy...........................5-19
Using four wheel drive (4WD).............5-19
Transfer case shifting procedures...............5-19
Electronic locking rear differential (E-Lock) system
(if so equipped)..................................5-24
Parking/parking on hills............................5-26
Power steering...................................5-27
Brake system....................................5-27
Brake precautions.............................5-27
Anti-lock brake system (ABS)...................5-28
Active brake limited slip (ABLS) system
(if so equipped)..................................5-29
Vehicle dynamic control (VDC) system
(if so equipped)..................................5-29
Hill descent control (HDC) system (if so equipped) . . . 5-31
Hill start assist (HSA) system (if so equipped).......5-31
Cold weather driving..............................5-32
Freeing a frozen door lock......................5-32
Anti-freeze....................................5-32
Battery.......................................5-32
Draining of coolant water.......................5-32
ZREVIEW COPYÐ2005 Xterra(xtr)
Owners ManualÐUSA_English(nna)
11/15/04Ðdebbie
X
Page 166 of 296
cHeavy braking going down a hill could
cause your brakes to overheat and fade,
resulting in loss of control and an acci-
dent. Apply brakes lightly and use a low
gear to control your speed. Use the Hill
Descent Control feature (if so
equipped) .
cUnsecured cargo can be thrown around
when driving over rough terrain. Prop-
erly secure all cargo so it will not be
thrown forward and cause injury to you
or your passengers.
cTo avoid raising the center of gravity
excessively, do not exceed the rated
capactiy of the roof rack/gear bin (if so
equipped) and evenly distribute the
load. Secure heavy loads in the cargo
area as far forward and as low as pos-
sible. Do not equip the vehicle with tires
larger than specified in this manual.
This could cause your vehicle to roll
over.
cDo not grip the inside or spokes of the
steering wheel when driving off-road.
The steering wheel could move sud-
denly and injure your hands. Instead
drive with your fingers and thumbs on
the outside of the rim.cBefore operating the vehicle, ensure
that the driver and all passengers have
their seat belts fastened.
cAlways drive with the floor mats in
place as the floor may become hot.
cLower your speed when encountering
strong crosswinds. With a higher center
of gravity, your NISSAN is more af-
fected by strong side winds. Slower
speeds ensure better vehicle control.
cDo not drive beyond the performance
capablity of the tires, even with 4WD
engaged.
cAccelerating quickly, sharp steering
maneuvers or sudden braking may
cause loss of control.
cIf at all possible, avoid sharp turning
maneuvers, particularly at high speeds.
Your NISSAN four-wheel drive vehicle
has a higher center of gravity than a
two-wheel drive vehicle. The vehicle is
not designed for cornering at the same
speeds as conventional two-wheel
drive vehicles. Failure to operate this
vehicle correctly could result in loss of
control and/or a rollover accident.cAlways use tires of the same type, size,
brand, construction (bias, bias-belted,
or radial) , and tread pattern on all four
wheels. Install tire chains on the rear
wheels when driving on slippery roads
and drive carefully.
cBe sure to check the brakes immedi-
ately after driving in mud or water. See
“Brake system” later in this section for
“Wet brakes”.
cAvoid parking your vehicle on steep
hills. If you get out of the vehicle and it
rolls forward, backward or sideways,
you could be injured.
cWhenever you drive off-road through
sand, mud or water as deep as the
wheel hub, more frequent maintenance
may be required. See “Periodic mainte-
nance” in the “NISSAN Service and
Maintenance Guide.”
5-6Starting and driving
ZREVIEW COPYÐ2005 Xterra(xtr)
Owners ManualÐUSA_English(nna)
11/15/04Ðdebbie
X
Page 169 of 296
cMake sure the area around the vehicle is
clear.
cCheck fluid levels such as engine oil, cool-
ant, brake fluid, and window washer fluid as
frequently as possible, or at least whenever
you refuel.
cCheck that all windows and lights are clean.
cVisually inspect tires for their appearance
and condition. Also check tires for proper
inflation.
cLock all doors.
cPosition seat and adjust head restraints.
cAdjust inside and outside mirrors.
cFasten seat belts and ask all passengers to
do likewise.
cCheck the operation of warning lights when
the key is turned to the ON (3) position. See
“Warning/indicator lights and audible re-
minders” in the “Instruments and controls”
section of this manual.1. Apply the parking brake.
2.Automatic transmission:
Move the shift selector lever to P (Park) or N
(Neutral) . P (Park) is recommended.
The shift selector lever cannot be
moved out of P (Park) and into any of
the other gear positions if the ignition
key is turned to the OFF position or if
the key is removed from the ignition
switch.
The starter is designed not to operate if
the shift selector lever is in any of the
driving positions.
Manual transmission:
Move the shift lever to N (Neutral) . Depress
the clutch pedal to the floor while cranking
the engine.
The starter is designed not to operate
unless the clutch pedal is fully de-
pressed.
3. Crank the enginewith your foot off the
accelerator pedalby turning the ignition
key to START. Release the key when the
engine starts. If the engine starts, but fails to
run, repeat the above procedure.cIf the engine is very hard to start in ex-
tremely cold weather or when restarting,
depress the accelerator pedal a little (ap-
proximately 1/3 to the floor) and hold it
and then crank the engine. Release the
key and the accelerator pedal when the
engine starts.
cIf the engine is very hard to start because
it is flooded, depress the accelerator
pedal all the way to the floor and hold it.
Crank the engine for 5-6 seconds. After
cranking the engine, release the accel-
erator pedal. Crank the enginewith your
foot off the accelerator pedalby turn-
ing the ignition key to START. Release the
key when the engine starts. If the engine
starts, but fails to run, repeat the above
procedure.
CAUTION
Do not operate the starter for more than
15 seconds at a time. If the engine does
not start, turn the key off and wait 10
seconds before cranking again, otherwise
the starter could be damaged.
BEFORE STARTING THE ENGINE STARTING THE ENGINE
Starting and driving5-9
ZREVIEW COPYÐ2005 Xterra(xtr)
Owners ManualÐUSA_English(nna)
11/15/04Ðdebbie
X
Page 171 of 296
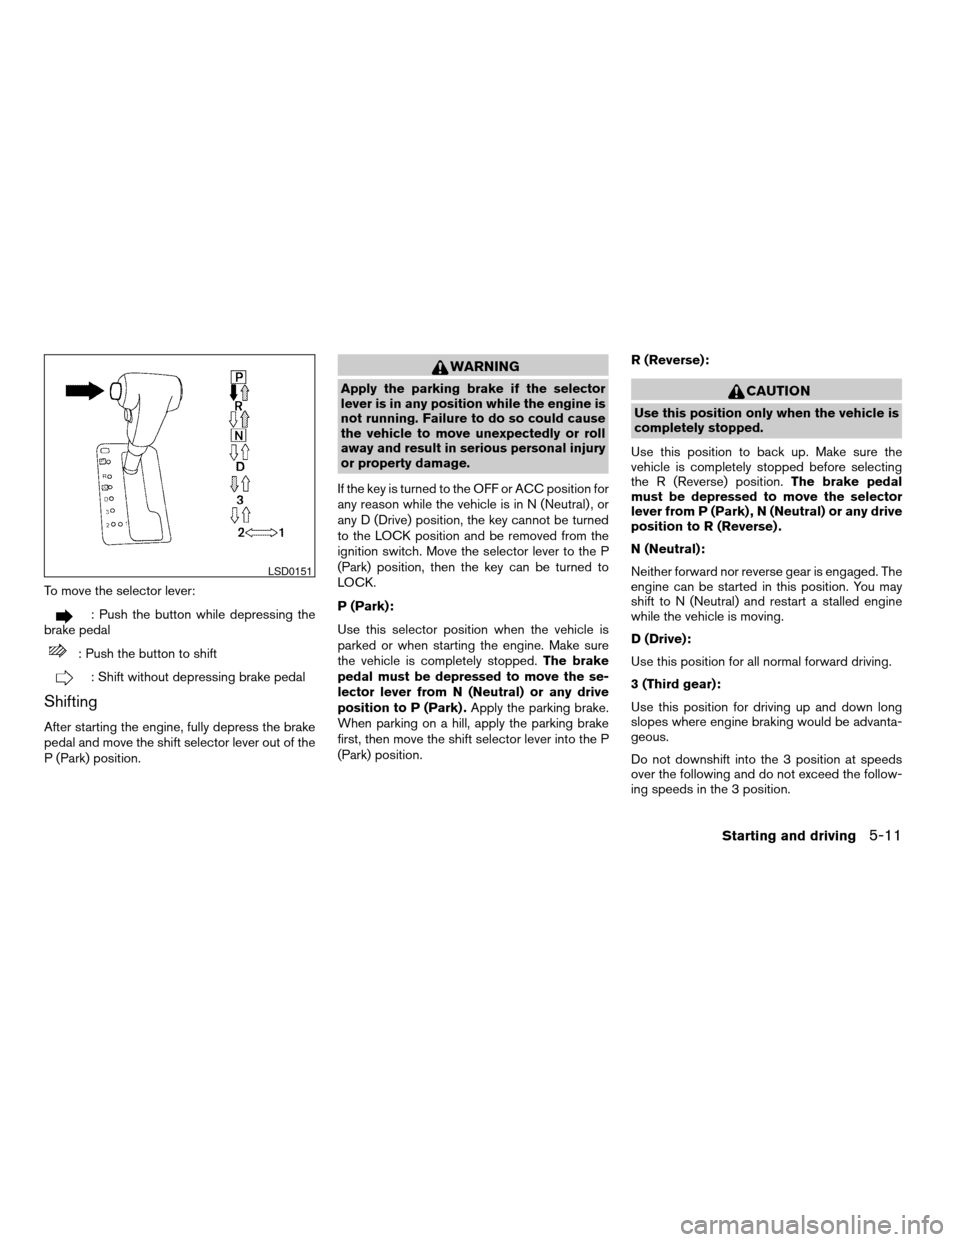
To move the selector lever:
: Push the button while depressing the
brake pedal
: Push the button to shift
: Shift without depressing brake pedal
Shifting
After starting the engine, fully depress the brake
pedal and move the shift selector lever out of the
P (Park) position.
WARNING
Apply the parking brake if the selector
lever is in any position while the engine is
not running. Failure to do so could cause
the vehicle to move unexpectedly or roll
away and result in serious personal injury
or property damage.
If the key is turned to the OFF or ACC position for
any reason while the vehicle is in N (Neutral) , or
any D (Drive) position, the key cannot be turned
to the LOCK position and be removed from the
ignition switch. Move the selector lever to the P
(Park) position, then the key can be turned to
LOCK.
P (Park):
Use this selector position when the vehicle is
parked or when starting the engine. Make sure
the vehicle is completely stopped.The brake
pedal must be depressed to move the se-
lector lever from N (Neutral) or any drive
position to P (Park) .Apply the parking brake.
When parking on a hill, apply the parking brake
first, then move the shift selector lever into the P
(Park) position.R (Reverse):CAUTION
Use this position only when the vehicle is
completely stopped.
Use this position to back up. Make sure the
vehicle is completely stopped before selecting
the R (Reverse) position.The brake pedal
must be depressed to move the selector
lever from P (Park) , N (Neutral) or any drive
position to R (Reverse) .
N (Neutral):
Neither forward nor reverse gear is engaged. The
engine can be started in this position. You may
shift to N (Neutral) and restart a stalled engine
while the vehicle is moving.
D (Drive):
Use this position for all normal forward driving.
3 (Third gear):
Use this position for driving up and down long
slopes where engine braking would be advanta-
geous.
Do not downshift into the 3 position at speeds
over the following and do not exceed the follow-
ing speeds in the 3 position.
LSD0151
Starting and driving5-11
ZREVIEW COPYÐ2005 Xterra(xtr)
Owners ManualÐUSA_English(nna)
11/15/04Ðdebbie
X
Page 173 of 296
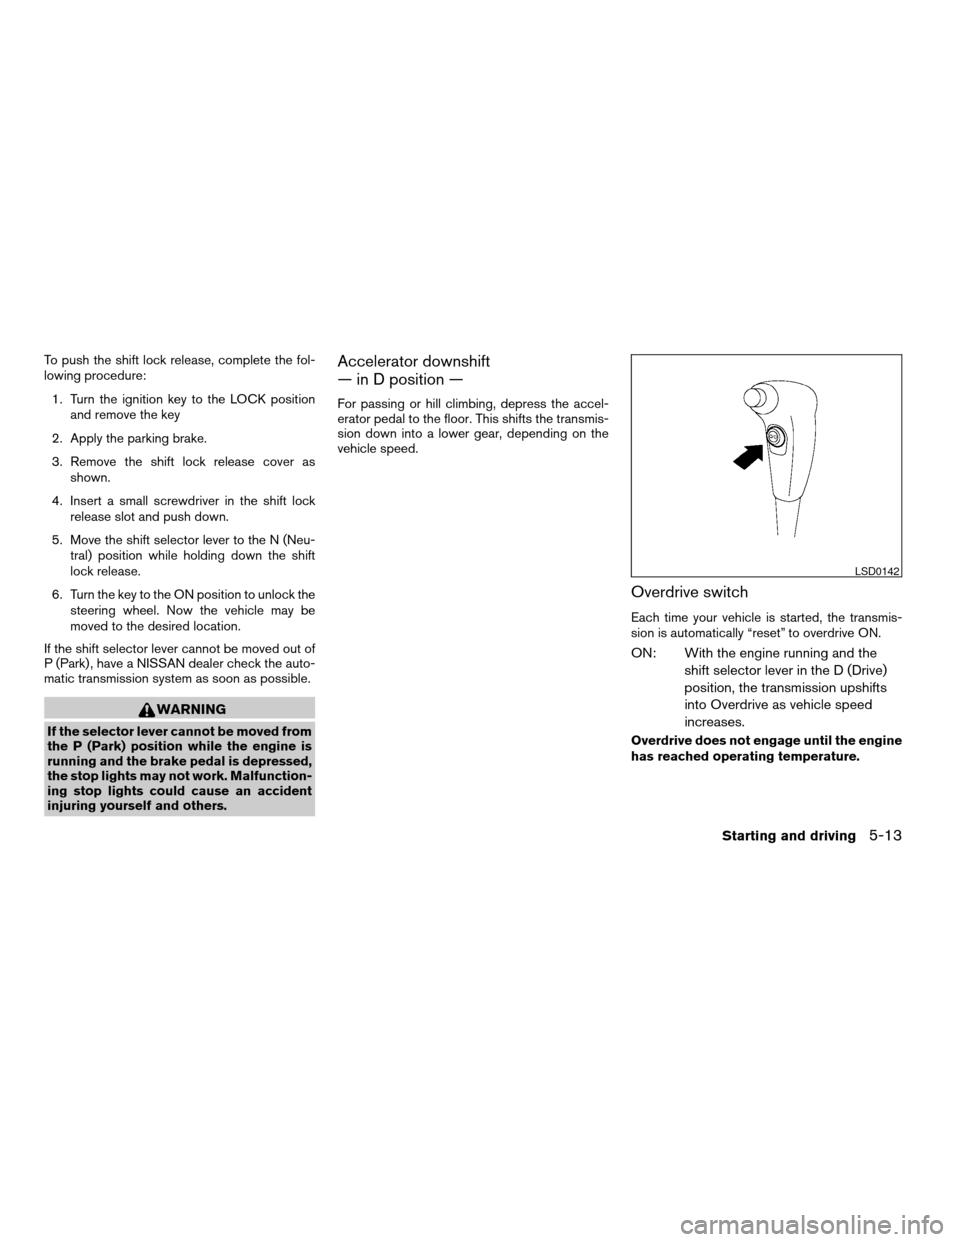
To push the shift lock release, complete the fol-
lowing procedure:
1. Turn the ignition key to the LOCK position
and remove the key
2. Apply the parking brake.
3. Remove the shift lock release cover as
shown.
4. Insert a small screwdriver in the shift lock
release slot and push down.
5. Move the shift selector lever to the N (Neu-
tral) position while holding down the shift
lock release.
6. Turn the key to the ON position to unlock the
steering wheel. Now the vehicle may be
moved to the desired location.
If the shift selector lever cannot be moved out of
P (Park) , have a NISSAN dealer check the auto-
matic transmission system as soon as possible.
WARNING
If the selector lever cannot be moved from
the P (Park) position while the engine is
running and the brake pedal is depressed,
the stop lights may not work. Malfunction-
ing stop lights could cause an accident
injuring yourself and others.
Accelerator downshift
— in D position —
For passing or hill climbing, depress the accel-
erator pedal to the floor. This shifts the transmis-
sion down into a lower gear, depending on the
vehicle speed.
Overdrive switch
Each time your vehicle is started, the transmis-
sion is automatically “reset” to overdrive ON.
ON: With the engine running and the
shift selector lever in the D (Drive)
position, the transmission upshifts
into Overdrive as vehicle speed
increases.
Overdrive does not engage until the engine
has reached operating temperature.
LSD0142
Starting and driving5-13
ZREVIEW COPYÐ2005 Xterra(xtr)
Owners ManualÐUSA_English(nna)
11/15/04Ðdebbie
X