window NISSAN XTERRA 2013 N50 / 2.G Owner's Manual
[x] Cancel search | Manufacturer: NISSAN, Model Year: 2013, Model line: XTERRA, Model: NISSAN XTERRA 2013 N50 / 2.GPages: 394, PDF Size: 3.39 MB
Page 164 of 394
Dehumidified defogging
This mode is used to defog the windows and
dehumidify the air.1. Press the
air flow control button.
2. Turn the fan control dial to the desired posi- tion.
3. Press the
button. The indicator light
comes on.
When the
orpositions are se-
lected, the air conditioner automatically turns on
(however, the indicator light will not illuminate) if
the outside temperature is more than 36°F (2°C) .
If one of these air flow control buttons is selected
for more than one minute, the air conditioning
system will continue to operate until the fan con-
trol dial is turned to OFF, the air conditioner is
turned OFF, or the vehicle is shut off, even if a
position other than these positions is selected.
This dehumidifies the air which helps defog the
windshield. The
mode automatically turns
off, allowing outside air to be drawn into the
passenger compartment to further improve the
defogging performance.
4. Turn the temperature control dial to the de- sired position.
Operating tips
●Keep the windows closed while the air con-
ditioner is in operation.
● After parking in the sun, drive for 2 or 3 min-
utes with the windows open to vent hot air
from the passenger compartment. Then,
close the windows. This allows the air con-
ditioner to cool the interior more quickly.
● The air conditioning system should be
operated for approximately 10 minutes
at least once a month. This helps pre-
vent damage to the system due to lack
of lubrication.
● A visible mist may be seen coming from the
ventilators in hot, humid conditions as the air
is cooled rapidly. This does not indicate a
malfunction.
● If the engine coolant temperature
gauge indicates engine coolant tem-
perature over the normal range, turn
the air conditioner off. See “If your
vehicle overheats” in the “In case of
emergency” section of this manual.
AIR FLOW CHARTS
The following charts show the button and dial
positions for MAXIMUM AND QUICK heating,
cooling or defrosting. For additional information
on heating and cooling, see “Heater and air con-
ditioner (manual)” in this section. The air recir-
culation (
) button should always be in
the OFF position for heating and defrost-
ing.
Monitor, climate, audio, phone and voice recognition systems4-19
Page 168 of 394
WARNING
●The air conditioner cooling function op-
erates only when the engine is running.
● Do not leave children or adults who
would normally require the assistance
of others alone in your vehicle. Pets
should also not be left alone. They
could accidentally injure themselves or
others through inadvertent operation of
the vehicle. Also, on hot, sunny days,
temperatures in a closed vehicle could
quickly become high enough to cause
severe or possibly fatal injuries to
people or animals.
● Do not use the recirculation mode for
long periods as it may cause the interior
air to become stale and the windows to
fog up.
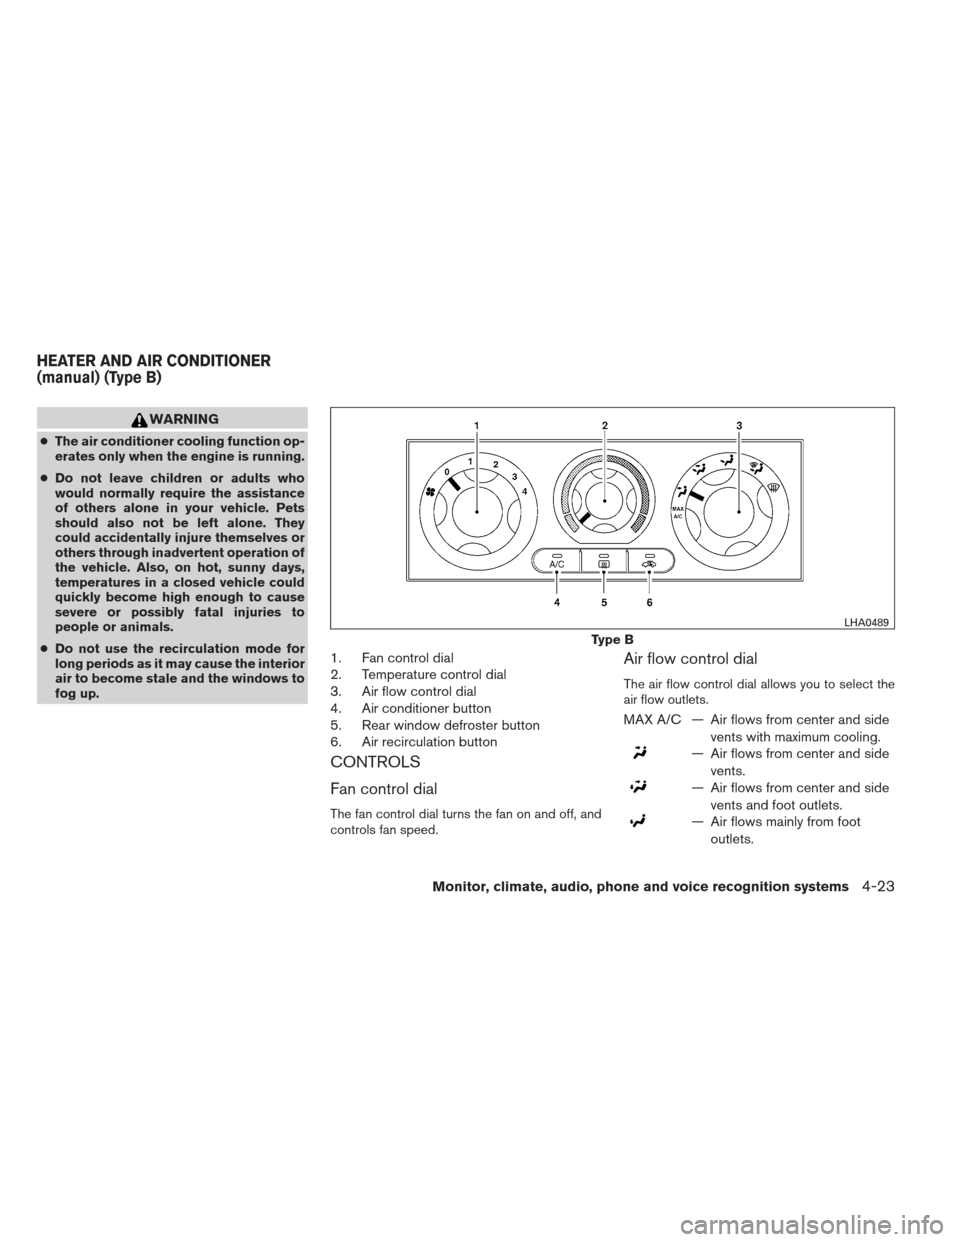
1. Fan control dial
2. Temperature control dial
3. Air flow control dial
4. Air conditioner button
5. Rear window defroster button
6. Air recirculation button
CONTROLS
Fan control dial
The fan control dial turns the fan on and off, and
controls fan speed.
Air flow control dial
The air flow control dial allows you to select the
air flow outlets.
MAX A/C — Air flows from center and side
vents with maximum cooling.
— Air flows from center and sidevents.
— Air flows from center and sidevents and foot outlets.
— Air flows mainly from footoutlets.
Type B
LHA0489
HEATER AND AIR CONDITIONER
(manual) (Type B)
Monitor, climate, audio, phone and voice recognition systems4-23
Page 169 of 394
— Air flows from defroster outletsand foot outlets.
— Air flows mainly from defrosteroutlets.
● When the,orposition is
selected, the air recirculation
mode
cannot be turned on. This prevents the win-
dows from fogging.
Temperature control dial
The temperature control dial allows you to adjust
the temperature of the outlet air. To lower the
temperature, turn the dial to the left. To increase
the temperature, turn the dial to the right.
Air recirculation button
ON position (Indicator light on):
Interior air is recirculated inside the vehicle.
Press the
button to the on position when:
● driving on a dusty road.
● to prevent traffic fumes from entering pas-
senger compartment.
● for maximum cooling when using the air con-
ditioner. OFF position (Indicator light off):
Outside air is drawn into the passenger compart-
ment and distributed through the selected outlet.
Use the off position for normal heater or air con-
ditioner operation.
Air conditioner button
Start the engine, turn the fan control dial to the
desired (1 to 4) position and push the
button to turn on the air conditioner. The indicator
light on the
button will come on. Push
the
button again to turn off the air condi-
tioner. The indicator light on the
button will
go off.
The air conditioner cooling function oper-
ates only when the engine is running.
Rear window defroster switch
For more information about the rear window de-
froster switch, see “Rear window and outside
mirror defroster switch” in the “Instruments and
controls” section of this manual.
HEATER OPERATION
Heating
This mode is used to direct heated air to the foot
outlets. Some air also flows from the defrost
outlets.
1. Push the
button to the OFF position
for normal heating. The indicator light on
the
button will go off.
2. Turn the air flow control dial to the
position.
3. Turn the fan control dial to the desired posi- tion.
4. Turn the temperature control dial to the de- sired position between the middle and the
hot position.
Ventilation
This mode directs outside air to the side and
center vent.
1. Push the
button to the OFF position.
The indicator light on the
button will
go off.
2. Turn the air flow control dial to the
position.
4-24Monitor, climate, audio, phone and voice recognition systems
Page 170 of 394
3. Turn the fan control dial to the desired posi-tion.
4. Turn the temperature control dial to the de- sired position.
Defrosting or defogging
This mode directs the air to the defrost outlets to
defrost/defog the windows.
1. Turn the air flow control dial to the
position.
2. Turn the fan control dial to the desired posi- tion.
3. Turn the temperature control dial to the de- sired position between the middle and the
hot position.
● To quickly remove ice or fog from the win-
dows, turn the fan control dial to 4 and the
temperature control lever to the full HOT
position. ●
When the
position is selected, the air
conditioner automatically turns on (however,
the indicator light will not illuminate) if the
outside temperature is more than 36°F
(2°C) . If the system is in defrost mode for
more than one minute, the air conditioning
system will continue to operate until the fan
control dial is turned to OFF or the vehicle is
shut off, even if the air flow control dial is
turned to a position other than the
position. This dehumidifies the air which
helps defog the windshield. The
mode automatically turns off, allowing out-
side air to be drawn into the passenger
compartment to further improve the defog-
ging performance.
Bi-level heating
The bi-level mode directs warmed air to the side
and center vents and to the front and rear floor
outlets.
1. Push the
button to the OFF position.
The indicator light on the
button will
go off.
2. Turn the air flow control dial to the
position.
3.
Turn the fan control dial to the desired position.
4. Turn the temperature control dial to the de- sired position.
Heating and defogging
This mode heats the interior and defogs the wind-
shield.
1. Turn the air flow control dial to the
position.
2.
Turn the fan control dial to the desired position.
3. Turn the temperature control dial to the de- sired position between the middle and the
hot position.
● When the
position is selected, the air
conditioner automatically turns on (however,
the indicator light on the
button will
not come on) if the outside temperature is
more than 36°F (2°C) . If the air flow control
dial is in the
position for more than
one minute, the air conditioning system will
continue to operate until the fan control dial
is turned to OFF or the vehicle is shut off,
even if the air flow control dial is turned to a
position other than the
position. This
dehumidifies the air which helps defog the
windshield. The
mode automatically
turns off, allowing outside air to be drawn
into the passenger compartment to further
improve the defogging performance.
Monitor, climate, audio, phone and voice recognition systems4-25
Page 171 of 394
Operating tips
Clear snow and ice from the wiper blades
and air inlet in front of the windshield. This
improves heater operation.
AIR CONDITIONER OPERATION
Start the engine, turn the fan control dial to the
desired position, and press the
button to
activate the air conditioner. When the air condi-
tioner is on, cooling and dehumidifying functions
are added to the heater operation.
The air conditioner cooling function oper-
ates only when the engine is running.
Cooling
This mode is used to cool and dehumidify the air.
1. Push the
button to the off position.
2. Turn the air flow control dial to the
position.
3. Turn the fan control dial to the desired posi- tion.
4. Push the
button. The indicator light
comes on.
5. Turn the temperature control dial to the de- sired position. ●
For quick cooling when the outside tem-
perature is high, push the
button to
the on position (indicator light on) . Be sure
to return the
button to the off position
for normal cooling.
Dehumidified defogging
This mode is used to defog the windows and
dehumidify the air.
1. Turn the air flow control dial to the
position.
2. Turn the fan control dial to the desired posi- tion.
3. Push the
button. The indicator light
comes on.
When the air flow control dial is in the
orposition, the air conditioner automati-
cally turns on (however, the indicator light will not
illuminate) if the outside temperature is more than
36°F (2°C) . If one of these positions is selected
for more than one minute, the air conditioning
system will continue to operate until the fan con-
trol dial is turned to OFF or the vehicle is shut off,
even if the air flow control dial is turned to a
position other than these positions. This dehu-
midifies the air which helps defog the windshield.
The
mode automatically turns off, allowing outside air to be drawn into the passenger com-
partment to further improve the defogging perfor-
mance.
4. Turn the temperature control dial to the de- sired position.
Operating tips
●Keep the windows closed while the air con-
ditioner is in operation.
● After parking in the sun, drive for 2 or 3 min-
utes with the windows open to vent hot air
from the passenger compartment. Then,
close the windows. This allows the air con-
ditioner to cool the interior more quickly.
● The air conditioning system should be
operated for approximately 10 minutes
at least once a month. This helps pre-
vent damage to the system due to lack
of lubrication.
● A visible mist may be seen coming from the
ventilators in hot, humid conditions as the air
is cooled rapidly. This does not indicate a
malfunction.
4-26Monitor, climate, audio, phone and voice recognition systems
Page 178 of 394
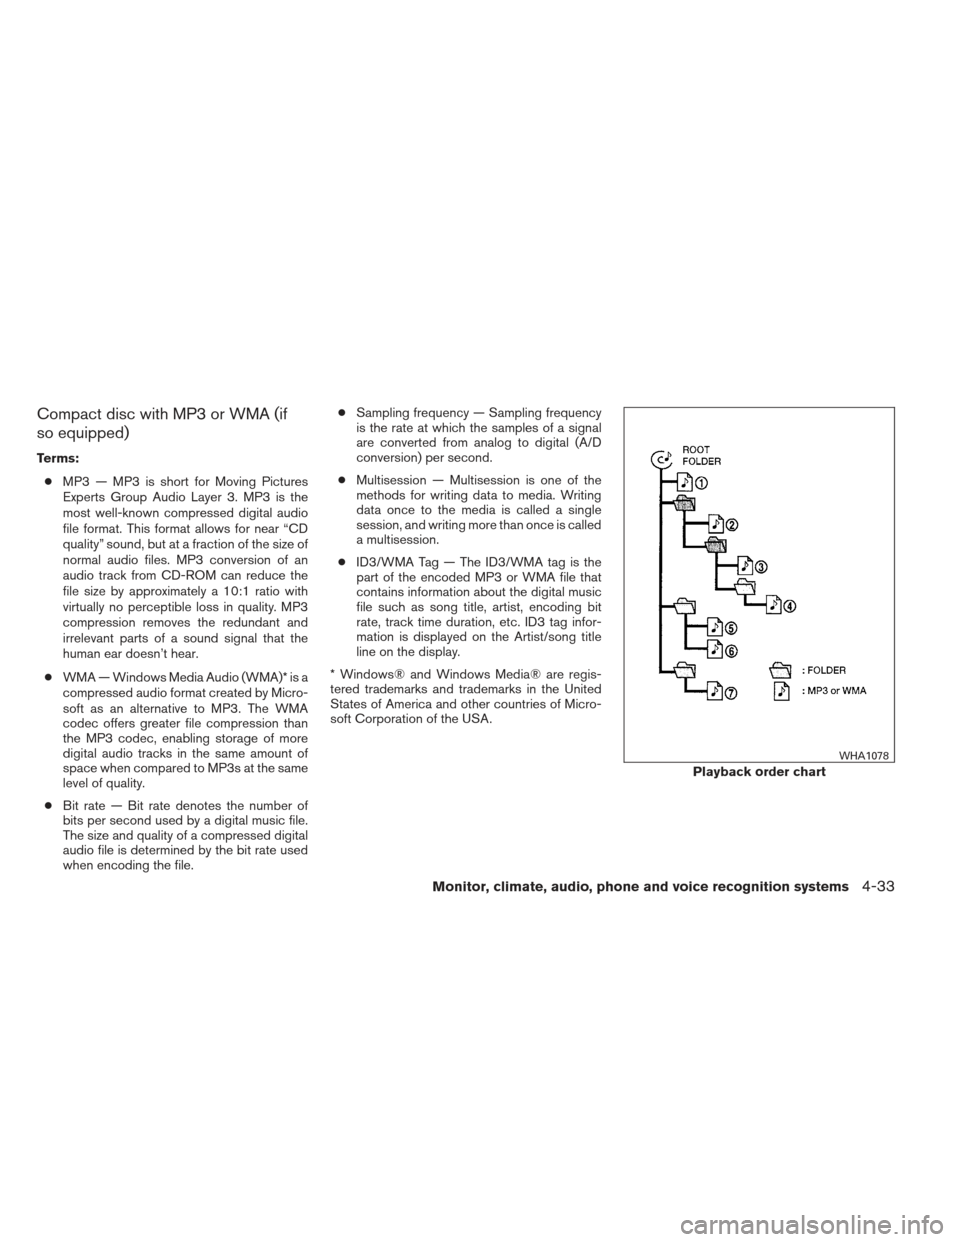
Compact disc with MP3 or WMA (if
so equipped)
Terms:● MP3 — MP3 is short for Moving Pictures
Experts Group Audio Layer 3. MP3 is the
most well-known compressed digital audio
file format. This format allows for near “CD
quality” sound, but at a fraction of the size of
normal audio files. MP3 conversion of an
audio track from CD-ROM can reduce the
file size by approximately a 10:1 ratio with
virtually no perceptible loss in quality. MP3
compression removes the redundant and
irrelevant parts of a sound signal that the
human ear doesn’t hear.
● WMA — Windows Media Audio (WMA)* is a
compressed audio format created by Micro-
soft as an alternative to MP3. The WMA
codec offers greater file compression than
the MP3 codec, enabling storage of more
digital audio tracks in the same amount of
space when compared to MP3s at the same
level of quality.
● Bit rate — Bit rate denotes the number of
bits per second used by a digital music file.
The size and quality of a compressed digital
audio file is determined by the bit rate used
when encoding the file. ●
Sampling frequency — Sampling frequency
is the rate at which the samples of a signal
are converted from analog to digital (A/D
conversion) per second.
● Multisession — Multisession is one of the
methods for writing data to media. Writing
data once to the media is called a single
session, and writing more than once is called
a multisession.
● ID3/WMA Tag — The ID3/WMA tag is the
part of the encoded MP3 or WMA file that
contains information about the digital music
file such as song title, artist, encoding bit
rate, track time duration, etc. ID3 tag infor-
mation is displayed on the Artist/song title
line on the display.
* Windows® and Windows Media® are regis-
tered trademarks and trademarks in the United
States of America and other countries of Micro-
soft Corporation of the USA.
Playback order chart
WHA1078
Monitor, climate, audio, phone and voice recognition systems4-33
Page 187 of 394
TUNE (rewind and fastforward) buttons:
When the TUNE
orbutton is
pressed while the compact disc is playing, the
compact disc plays at an increased speed while
rewinding or fast forwarding. When the button is
released, the compact disc returns to normal play
speed.
SEEK buttons:
When
is pressed while the compact disc
is playing, the next track following the present
one starts to play from the beginning.
Press
several times to skip several tracks.
Each time the button is pressed, the CD ad-
vances 1 additional track. The track number ap-
pears in the display window. (When the last track
on the compact disc is skipped, the first track is
played.)
When
is pressed, the track being played
returns to the beginning. Press
several
times to skip back several tracks. Each time the
button is pressed, the CD moves back one track. SEEK (Scan CDs) button:
Press and hold the SEEK
button for more
than 1.5 seconds to scan through the first
10 seconds of a track on the compact disc. The
SCAN icon is flashed during scan mode.
The scan mode is canceled once it scans through
all the tracks on the disc, or if the SEEK
orbutton is pressed during the scan
mode.
RPT button:
When the RPT button is pressed while the com-
pact disc is being played, the play pattern can be
changed as follows:
1 ←→ Normal
1: The track that is currently playing will be re-
peated.
RDM button:
When the RDM button is pressed while the com-
pact disc is being played, the play pattern can be
changed as follows:
RDM ←→Normal
RDM: Tracks from the disc that is currently play-
ing will be played randomly.
CD EJECT button:
When the
button is pressed with a com-
pact disc loaded, the compact disc will be
ejected.
When the
button is pressed while the
compact disc is being played, the compact disc
will eject and the system will turn off.
CD IN indicator:
CD IN indicator appears on the display when the
CD is loaded with the system on.
4-42Monitor, climate, audio, phone and voice recognition systems
Page 219 of 394
Initialization
When the ignition switch is placed in the ON
position, NISSAN Voice Recognition is initialized,
which takes a few seconds. If the
button is
pressed before the initialization completes, the
system will announce “Hands-free phone system
not ready” and will not react to voice commands.
Operating tips
To get the best performance out of the NISSAN
Voice Recognition system, observe the following:
● Keep the interior of the vehicle as quiet as
possible. Close the windows to eliminate
surrounding noises (traffic noises, vibration
sounds, etc.) , which may prevent the system
from recognizing voice commands correctly.
● Wait until the tone sounds before speaking a
command. Otherwise, the command will not
be received properly.
● Start speaking a command within 5 seconds
after the tone sounds.
● Speak in a natural voice without pausing
between words.
Giving voice commands
To operate NISSAN Voice Recognition, press
and release the
button located on the
steering wheel. After the tone sounds, speak a
command.
The command given is picked up by the micro-
phone, and voice feedback is given when the
command is accepted.
● If you need to hear the available commands
for the current menu again, say “Help” and
the system will repeat them.
● If a command is not recognized, the system
announces, “Command not recognized.
Please try again.” Make sure the command is
said exactly as prompted by the system and
repeat the command in a clear voice.
● If you want to go back to the previous com-
mand, you can say “Go back” or “Correc-
tion” any time the system is waiting for a
response. ●
You can cancel a command when the sys-
tem is waiting for a response by saying,
“Cancel” or “Quit.” The system announces
“Cancel” and ends the VR session. You can
also press and hold the
button on the
steering wheel for 5 seconds at any time to
end the VR session. Whenever the VR ses-
sion is cancelled, a double beep is played to
indicate you have exited the system.
● If you want to adjust the volume of the voice
feedback, press the volume control switches
(+ or -) on the steering wheel while being
provided with feedback. You can also use
the radio volume control knob.
● In most cases you can interrupt the voice
feedback to speak the next command by
pressing the
button on the steering
wheel.
● To use the system faster, you may speak the
second level commands with the main menu
command on the main menu. For example,
press the
button and after the tone
say, “Call Redial.”
4-74Monitor, climate, audio, phone and voice recognition systems
Page 229 of 394
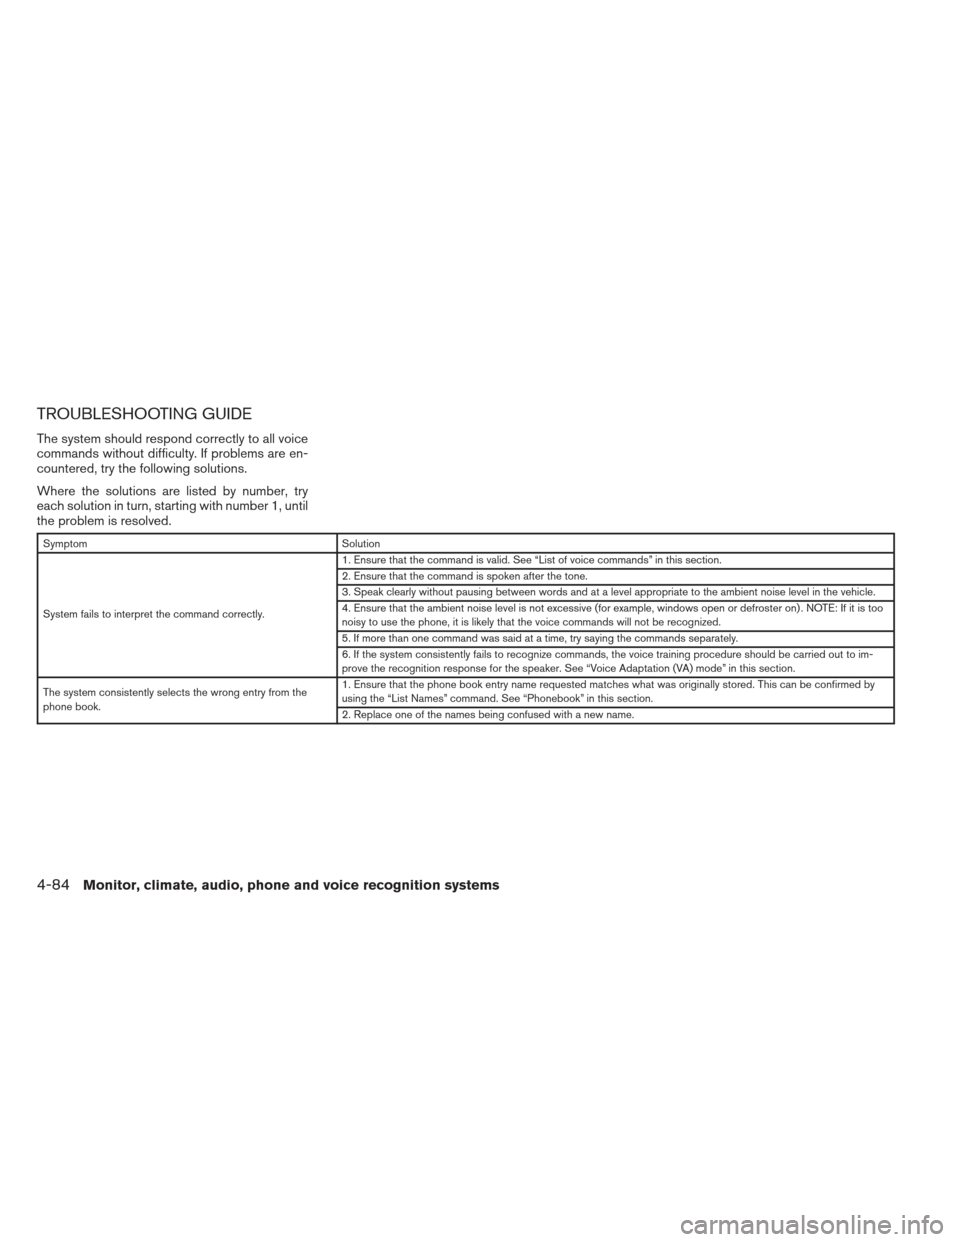
TROUBLESHOOTING GUIDE
The system should respond correctly to all voice
commands without difficulty. If problems are en-
countered, try the following solutions.
Where the solutions are listed by number, try
each solution in turn, starting with number 1, until
the problem is resolved.
SymptomSolution
System fails to interpret the command correctly. 1. Ensure that the command is valid. See “List of voice commands” in this section.
2. Ensure that the command is spoken after the tone.
3. Speak clearly without pausing between words and at a level appropriate to the ambient noise level in the vehicle.
4. Ensure that the ambient noise level is not excessive (for example, windows open or defroster on) . NOTE: If it is too
noisy to use the phone, it is likely that the voice commands will not be recognized.
5. If more than one command was said at a time, try saying the commands separately.
6. If the system consistently fails to recognize commands, the voice training procedure should be carried out to im-
prove the recognition response for the speaker. See “Voice Adaptation (VA) mode” in this section.
The system consistently selects the wrong entry from the
phone book. 1. Ensure that the phone book entry name requested matches what was originally stored. This can be confirmed by
using the “List Names” command. See “Phonebook” in this section.
2. Replace one of the names being confused with a new name.
4-84Monitor, climate, audio, phone and voice recognition systems
Page 241 of 394
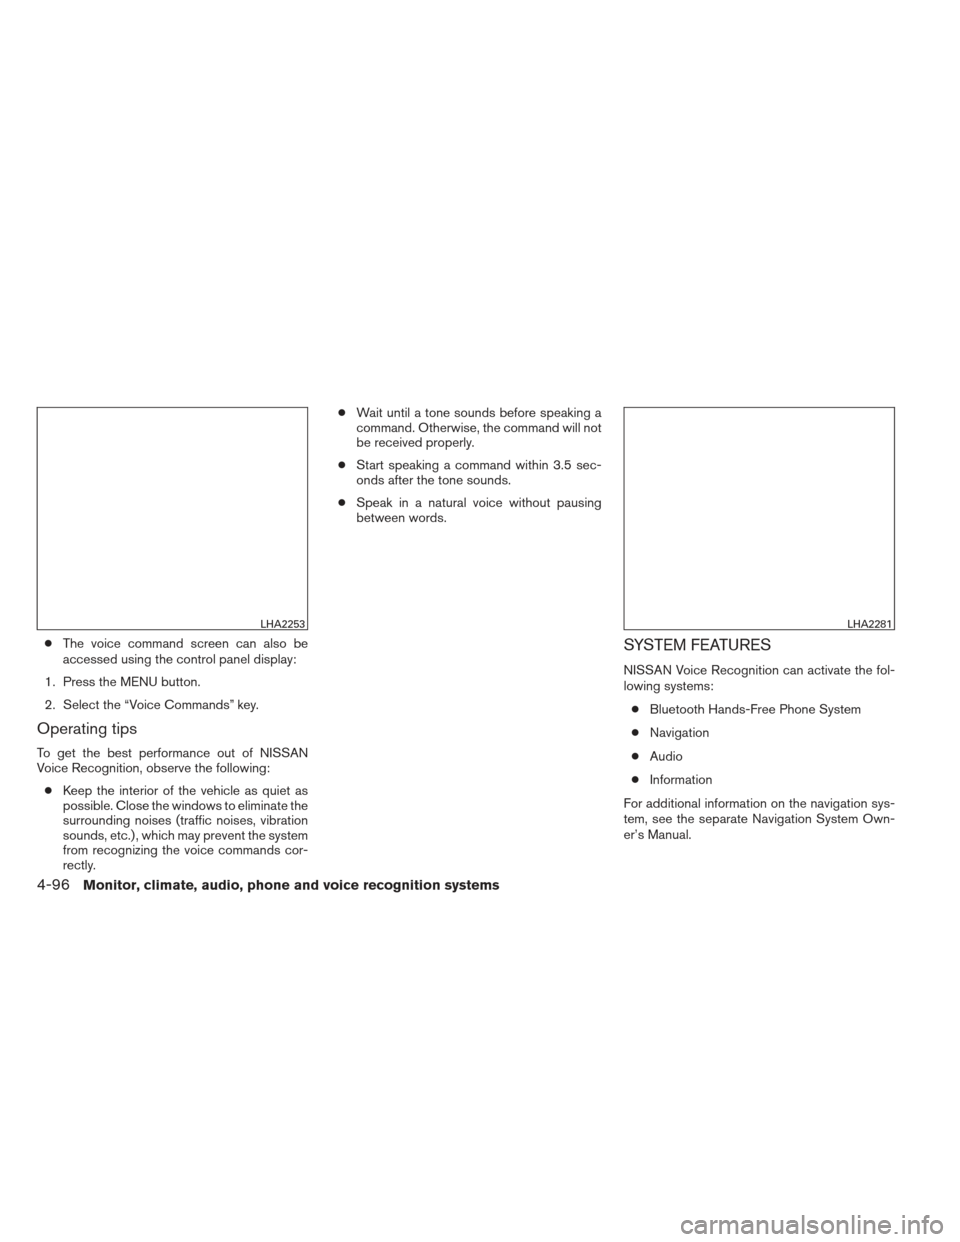
●The voice command screen can also be
accessed using the control panel display:
1. Press the MENU button.
2. Select the “Voice Commands” key.
Operating tips
To get the best performance out of NISSAN
Voice Recognition, observe the following: ● Keep the interior of the vehicle as quiet as
possible. Close the windows to eliminate the
surrounding noises (traffic noises, vibration
sounds, etc.) , which may prevent the system
from recognizing the voice commands cor-
rectly. ●
Wait until a tone sounds before speaking a
command. Otherwise, the command will not
be received properly.
● Start speaking a command within 3.5 sec-
onds after the tone sounds.
● Speak in a natural voice without pausing
between words.
SYSTEM FEATURES
NISSAN Voice Recognition can activate the fol-
lowing systems:
● Bluetooth Hands-Free Phone System
● Navigation
● Audio
● Information
For additional information on the navigation sys-
tem, see the separate Navigation System Own-
er’s Manual.
LHA2253LHA2281
4-96Monitor, climate, audio, phone and voice recognition systems