ECU Oldsmobile Alero 2003 s Owner's Guide
[x] Cancel search | Manufacturer: OLDSMOBILE, Model Year: 2003, Model line: Alero, Model: Oldsmobile Alero 2003Pages: 354, PDF Size: 16.74 MB
Page 80 of 354
Lockout Protection
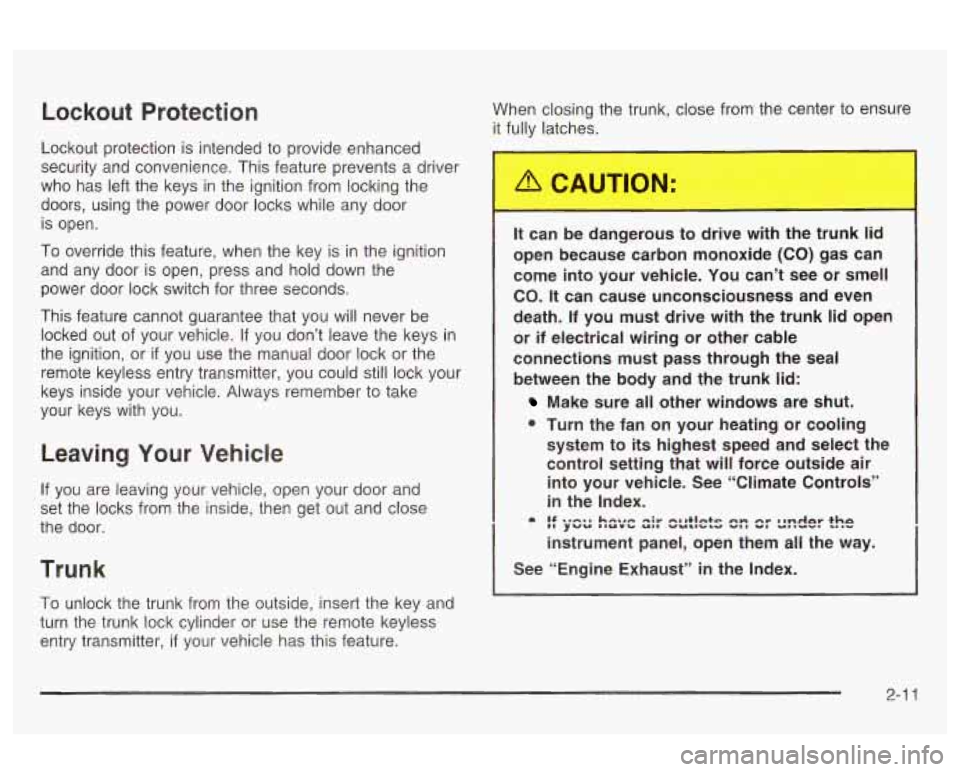
Lockout protection is intended to provide enhanced
security and convenience. This feature prevents a driver
who has left the keys in the ignition from locking the
doors, using the power door locks while any door
is open.
To override this feature, when the key is in the ignition
and any door is open, press and hold down the
power door lock switch for three seconds.
This feature cannot guarantee that you will never be
locked out of your vehicle.
If you don’t leave the keys in
the ignition, or
if you use the manual door lock or the
remote keyless entry transmitter, you could still lock your
keys inside your vehicle. Always remember to take
your keys with you.
Leaving Your Vehicle
If you are leaving your vehicle, open your door and
set the locks from the inside, then get out and close
the door.
Trunk
When closing the trunk, close from the center to ensure
’+ ‘ully latches.
It can be d,,,gerous L drive wit.. Ihe trL ... c lid
open because carbon monoxide (CO) gas can
come into your vehicle. You can’t see or smell
CO.
It can cause unconsciousness and even
death. If you must drive with the trunk
lid open
or if electrical wiring or other cable
connections must pass through the seal
between the body and the trunk
lid:
Make sure all other windows are shut.
0 Turn the fan on your heating or cooling
system to
its highest speed and select the
control setting that will force outside air into your vehicle. See “Climate Controls”
in the Index.
instrument panel, open them all the way.
- !f ywu lIUYC UII “ULlrLV V., V. U..UY. L.. Y .-~~ma CImnerr mi~ AII+ICI+E A- AS. ~~nr(ar )ha
See “Engine Exhaust” in the Index.
To unlock the trunk from the outside, insert the key and
turn the trunk lock cylinder or use the remote keyless
entry transmitter,
if your vehicle has this feature.
2-1 1
Page 82 of 354
Emergency Trunk Release Handle
v‘
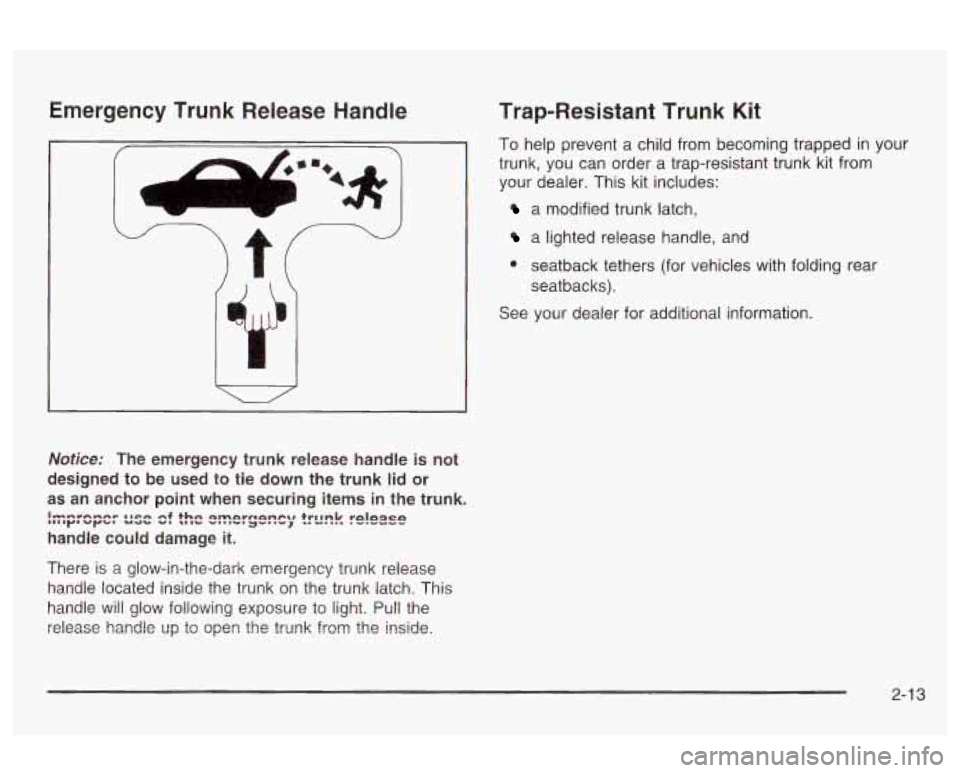
Notice: The emergency trunk release handle is not
designed to be used to tie down the trunk
lid or
as an anchor point when securing items in the trunk.
handle could damage it.
I-nwnm-w mmen -4 +ha nmnrnnnrur tr1Bnk rnlngcn nnntrr urws v-zb VI LIIW -m..v. 3-m m-1 =m -...I .-.-I--
There is a glow-in-the-dark emergency trunk release
handle located inside the trunk on the trunk latch. This
handle will glow following exposure to light. Pull the
rzlease handle up te open the trur~k frm the inside.
Trap-Resistant Trunk Kit
To help prevent a child from becoming trapped in your
trunk, you can order a trap-resistant trunk kit from
your dealer. This kit includes:
a modified trunk latch,
a lighted release handle, and
@ seatback tethers (for vehicles with folding rear
seat backs).
See your dealer for additional information.
2-1 3
Page 85 of 354
Theft-Deterrent Systems
Vehicle theft is big business, especially in some cities.
Although your vehicle has a number of theft-deterrent
features, we know that nothing we put on it can make
it
impossible to steal.
Passlock@
Your vehicle has the Passlock@ theft-deterrent system.
Passlock@ is a passive theft-deterrent system.
Passlock@ enables fuel
if the ignition lock cylinder has
not been tampered with.
During normal operation, the SECURITY light will go
off
approximately five seconds after the ignition key is
turned to
ON and the engine is started.
After attempting to start the engine,
if the SECURITY
light flashes or stays on, wait ten minutes with the key in
ON until the light goes off. Then turn the ignition to
OFF before attempting to start the engine again.
See
Roadside Assistance Program on page 7-5 for
more information.
2-1 6
Page 106 of 354
Section 3 Instrument Panel
Instrument Panel Overview ............................... 3.4
Hazard Warning Flashers
.......... .............. 3.6
Other Warning Devices
................................... 3.6
Horn
............................................................. 3.6
Tilt Wheel
..................................................... 3.7
Turn SignaVMultifunction Lever
......................... 3.7
Exterior Lamps
............................................. 3.13
Interior Lamps
.............................................. 3.16
Accessory Power Outlets
............................... 3.17
Ashtrays and Cigarette Lighter
........................ 3.18
Climate Controls
........................................... -3-1 9
Climate Control System
................................. 3.19
Outlet Adjustment
......................................... 3.22
Warning Lights, Gages and Indicators
............. 3.23
Instrument Panel Cluster
................................ 3.24
Speedometer and Odometer
........................... 3.25
Tachometer
................................................. 3.25
Safety Belt Reminder Light
............................. 3.26
Air
Eag Reauiness iighi 3-LW
Charging System Light .................................. 3.27
fi cln ................................
Up-Shift Light .............................. .......... 3-28
Brake System Warning Light
........, .......... 3-28
Anti-Lock Brake System
Enhanced Traction System
Enhanced Traction System
Warning
bight
........................................ 3-29
Warning Light
........................................... 3-29
Active Light
.............................................. 3-30
Engine Coolant Temperature Gage
.................. 3-31
Low Coolant Warning Light
............................ 3-31
Malfunction Indicator Lamp
............................. 3-31
Oil Pressure Light
......................................... 3-34
Low Oil Level Light
....................................... 3-35
Security Light
............................................... 3-36
Cruise Control Light
...................................... 3-36
%??:ice ‘!ehic!n see!? Light ........................... ._ 2-36
Fuel Gage ................................................... 3-37
Change Engine
Oil Light
................................ 3-35
Low Washer Fluid Warning Light
..................... 3-36
3-
1
Page 141 of 354
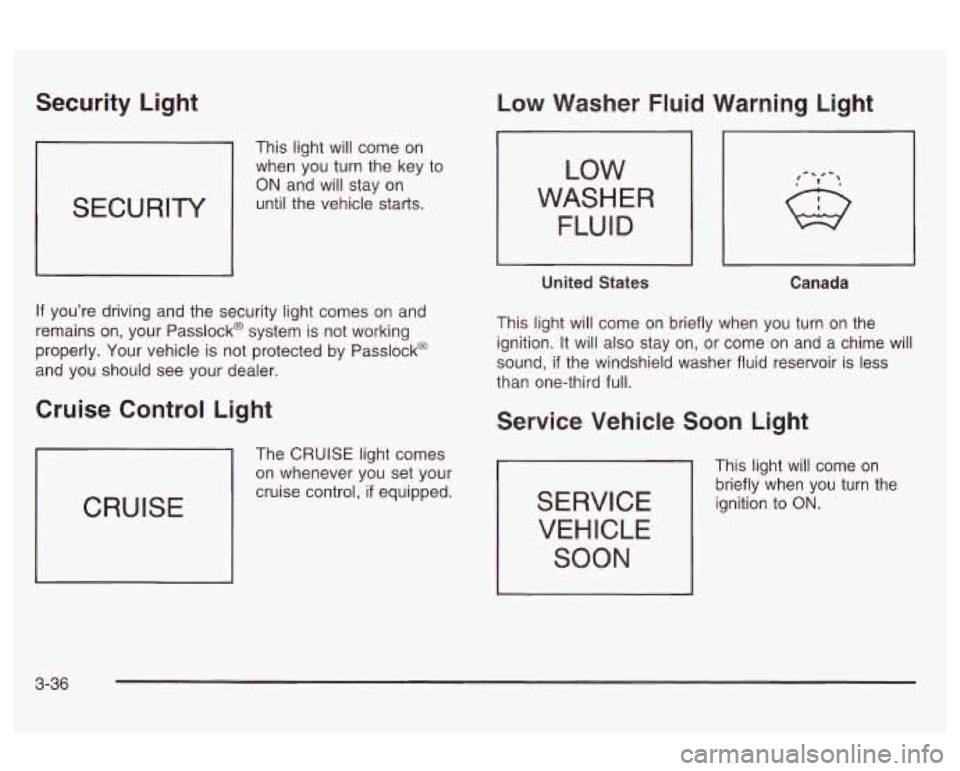
Security Light
SECURITY
This light will come on
when you turn the key to
ON and will stay on
until the vehicle starts.
If you’re driving and the security light comes on and
remains on, your Passlock@ system is not working
properly. Your vehicle is not protected by Passlock@
and you should see your dealer.
Cruise Control Light
CRUISE
The CRUISE light comes
on whenever you set your
cruise control,
if equipped.
Low Washer Fluid Warning Light
LOW
WASHER
FLUID
United States Canada
This light will come on briefly when you turn on the
ignition. It will also stay on, or come on and a chime will
sound,
if the windshield washer fluid reservoir is less
than one-third full.
Service Vehicle Soon Light
SERVICE VEHICLE
SOON
This light will come on
briefly when you turn the
ignition
to ON.
3-36
Page 155 of 354
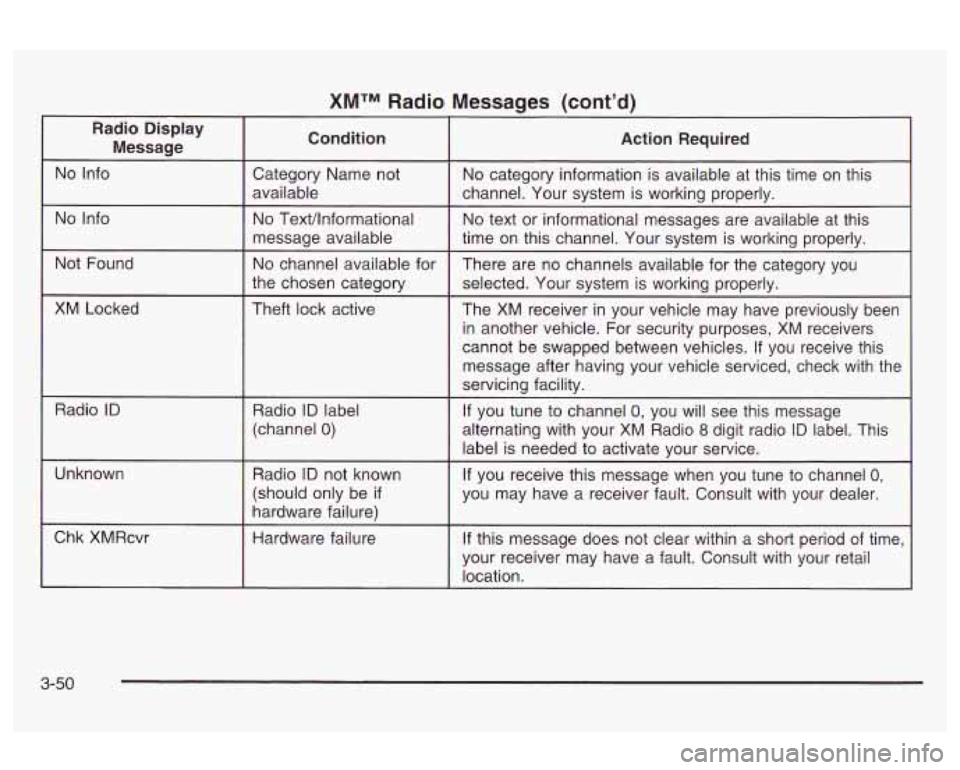
XMTM Radio Messages (cont’d) -
Radio Display
Message Condition Action Required
I
Not Found
XM Locked Category Name
not
No category information is available at this time on this
available channel. Your system is working properly.
No TexVlnformational No text or informational messages are available at this
message available
time on this channel. Your system is working properly.
No channel available for
There are no channels available for the category you
the chosen category
selected. Your system is working properly.
Theft lock active The XM receiver in your vehicle may have previously been
in another vehicle. For security purposes,
XM receivers
cannot be swapped between vehicles. If you receive this
message after having your vehicle serviced, check with the
servicing facility.
Radio
ID Radio ID label
(channel
0)
Unknown Radio ID not known
(should only be
if
hardware failure) If
you tune to channel
0, you will see this message
alternating with your XM Radio
8 digit radio ID label. This
label is needed to activate your service.
~~ ~~ ~ ~ ~~~~~~
If you receive this message when you tune to channel 0,
you may have a receiver fault. Consult with your dealer.
~ ~~~ ~~~
Chk XMRcvr
Hardware failure
If this message does not clear within a short period of time,
your receiver may have a fault. Consult with your retail
location.
3-50
Page 198 of 354
Winter Driving
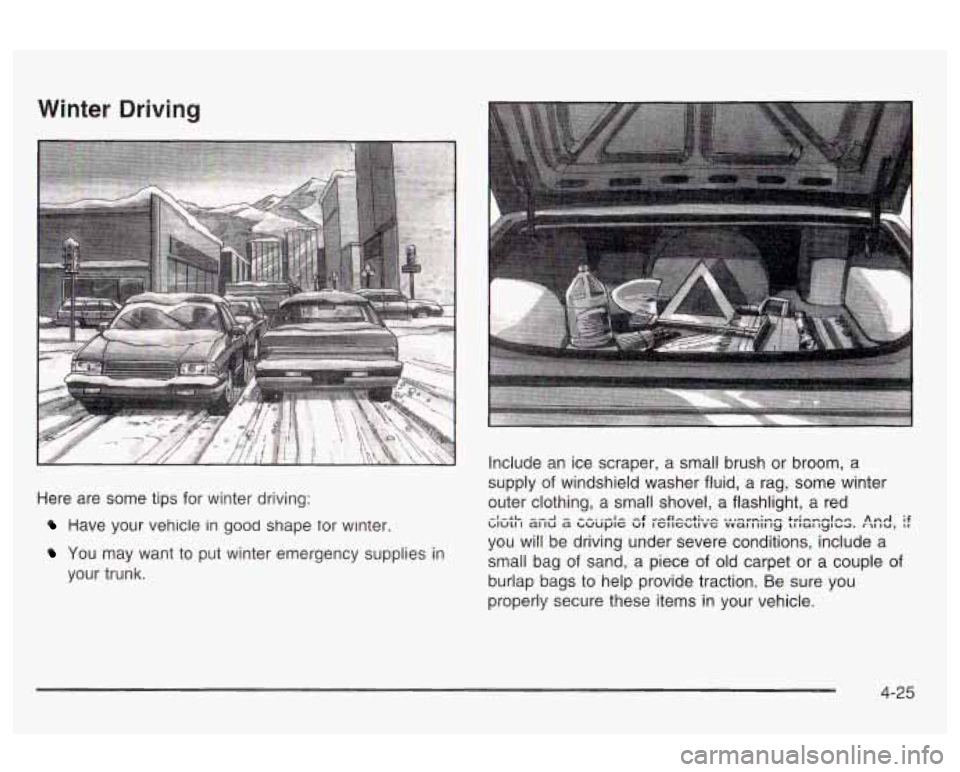
Here are some tips for winter driving:
Have your vehicle in good shape tor winter.
You may want to put winter emergency supplies in
your trunk. Include an ice scraper,
a small brush or broom, a
supply of windshield washer fluid, a rag, some winter
outer clothing, a small shovel, a flashlight, a red
you will be driving under severe conditions, include a
small bag of sand, a piece of old carpet or a couple of
burlap bags to help provide traction. Be sure you
properly secure these items in your vehicle.
-l-LL -.--I - --..-Ir -x -,.SI--+:.,- +v:nnmlnc wuu I a1 Iu a t,uuplc uI ImltuIvc vval I 19 lul tylbd. AA, if
4-25
Page 205 of 354
Dinghy Towing
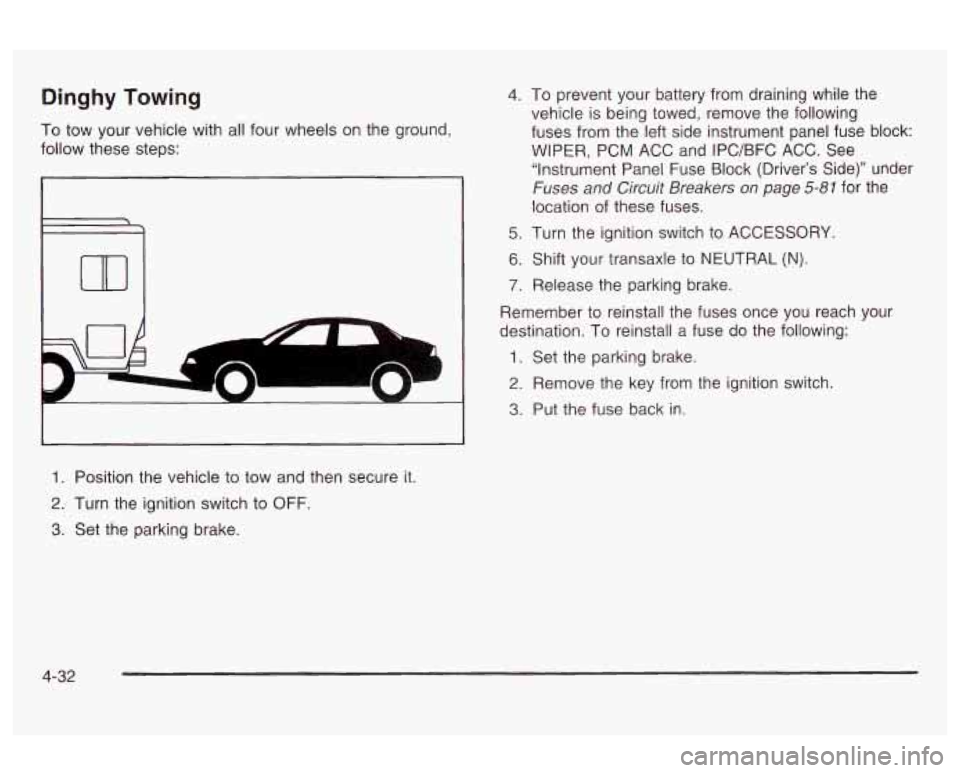
To tow your vehicle with all four wheels on the ground,
follow these steps:
I
L
m
1. Position the vehicle to tow and then secure it.
2. Turn the ignition switch to OFF.
3. Set the parking brake
4. To prevent your battery from draining while the
vehicle is being towed, remove the following
fuses from the left side instrument panel fuse block:
WIPER, PCM ACC and IPC/BFC ACC. See
“Instrument Panel Fuse Block (Driver’s Side)” under
Fuses and Circuit Breakers on page 5-81 for the
location
of these fuses.
5. Turn the ignition switch to ACCESSORY.
6. Shift your transaxle to NEUTRAL (N).
7. Release the parking brake.
Remember to reinstall the fuses once you reach your
destination. To reinstall a fuse do the following:
1. Set the parking brake.
2. Remove the key from the ignition switch.
3. Put the fuse back in
4-32
Page 208 of 354
And, if you do have a heavy load, you should spread
it out. Don’t carry more than
132 Ibs. (60 kg) in
your trunk.
Things you put inside your vehicle can ,ike
and injure people
in a sudden stop or turn, or
in a crash.
Do not load your vehicle any heavier than the
GVWR, or either the maximum front or rear
GAWR. If you do, parts on your vehicle can
break, and
it can change the way your vehicle
handles. These could cause you to lose
control and crash. Also, overloading can
shorten the iife of your vehicle.
e
e
e
Put things in the trunk of your vehicle. In a
trunk, put them as far forward as you can.
Try to spread the weight evenly.
Never stack heavier things, like suitcases,
inside the vehicle
so that some of them
are above the tops of the seats.
Don’t leave an unsecured child restraint
in
When you carry something inside the
vehicle, secure
it whenever you can.
Don’t leave a seat folded down unless you
need to.
your vehicie.
4-35
Page 213 of 354
Driving with a Trailer
Towing a trailer requires a certain amount of experience.
Before setting out for the open road, you’ll want to get
to know your rig. Acquaint yourself with the feel of
handling and braking with the added weight of the trailer.
And always keep in mind that the vehicle you are
driving is now a good deal longer and not nearly as
responsive as your vehicle is by itself.
Before you start, check the trailer hitch and platform
(and attachments), safety chains, electrical connector,
lamps, tires and mirror adjustment.
If the trailer has
electric brakes, start your vehicle and trailer moving and
then apply the trailer brake controller by hand to be
sure the brakes are working. This lets you check your
electrical connection at the same time.
During your trip, check occasionally to be sure that the
load is secure, and that the lamps and any trailer
brakes are still working.
Following Distance
Stay at least twice as far behind the vehicle ahead as
you would when driving your vehicle without a trailer.
This can help you avoid situations that require
heavy braking and sudden turns.
Passing
You’ll need more passing distance up ahead when
you’re towing a trailer. And, because you’re a good deal
longer, you’ll need to go much farther beyond the
passed vehicle before you can return to your lane.
Backing Up
Hold the bottom of the steering wheel with one hand.
Then, to move the trailer to the left, just move that hand
to the left. To move the trailer to the right, move your
hand to the right. Always back up slowly and,
if possible,
have someone guide you.
Making Turns
Notice: Making very sharp turns while trailering
could cause the trailer to come in contact with the
vehicle. Your vehicle could be damaged. Avoid
making very sharp turns while trailering.
When you’re turning with a trailer, make wider turns
than normal.
Do this so your trailer won’t strike
soft shoulders, curbs, road signs, trees or other objects.
Avoid jerky or sudden maneuvers. Signal well in
advance.
4-40