tow Oldsmobile Aurora 1997 s Service Manual
[x] Cancel search | Manufacturer: OLDSMOBILE, Model Year: 1997, Model line: Aurora, Model: Oldsmobile Aurora 1997Pages: 404, PDF Size: 20.75 MB
Page 258 of 404
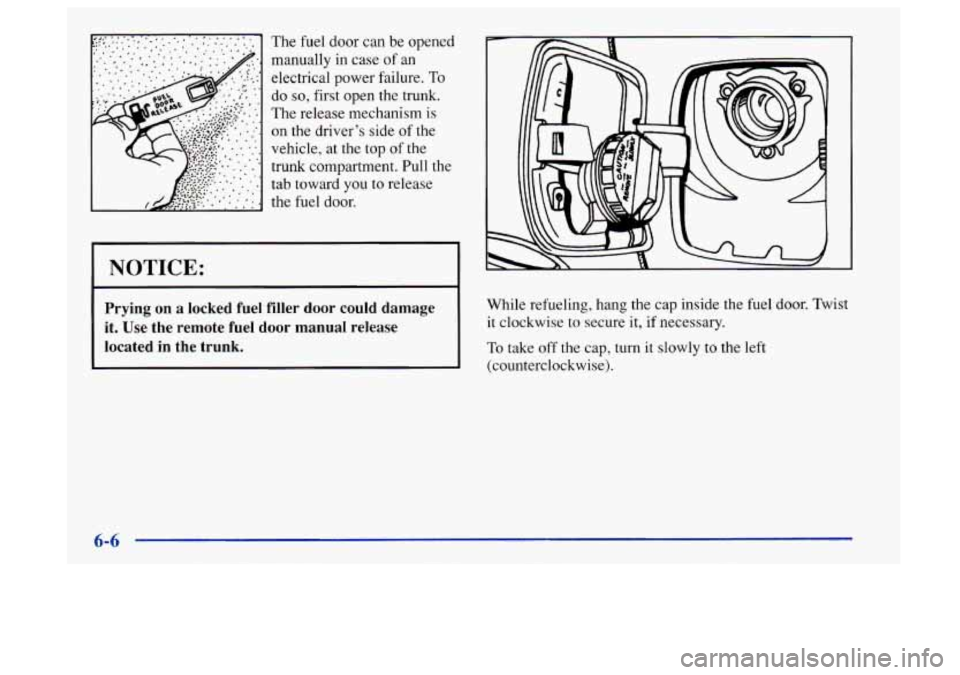
The fuel door can be opened
manually in case
of an
electrical power failure. To
do
so, first open the trunk.
The release mechanism
is
on the driver’s side of the
vehicle, at the top of
the
trunk compartment. Pull the
tab toward you to release
the fuel door.
I NOTICE:
Prying on a locked fuel filler door could damage
it. Use the remote fuel
door manual release
located in the trunk.
While refueling, hang the cap inside the fuel door. Twist
it clockwise to secure
it, if necessary.
To take
off the cap, turn it slowly to the left
(counterclockwise).
6-6
Page 263 of 404
Engine Oil
73
OIL
Checking Engine Oil
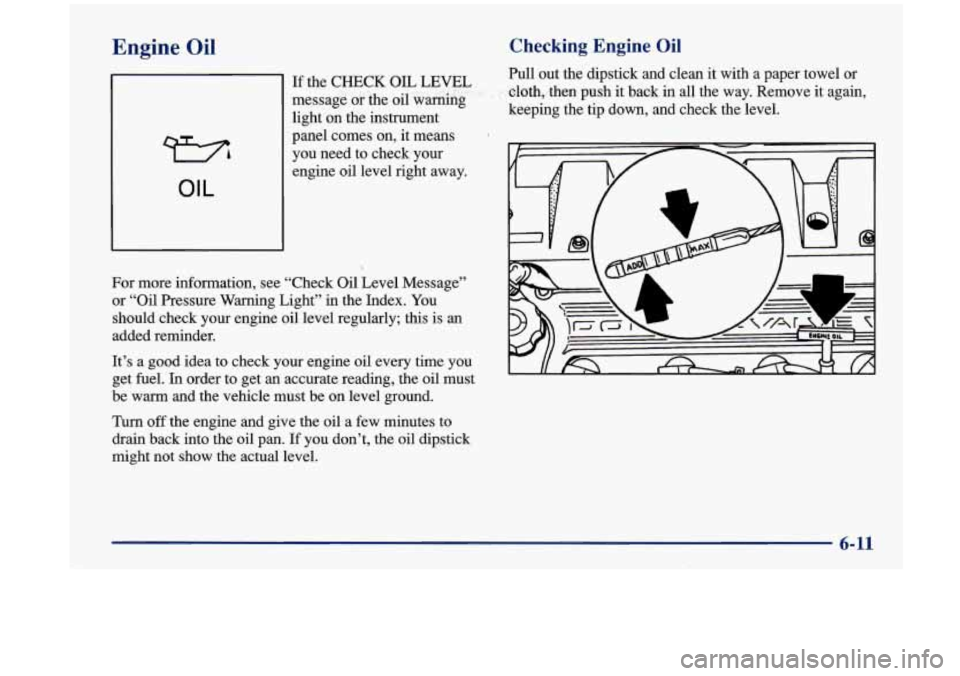
Pull out the dipstick and clean it with a paper towel or
-cloth, ,then push it back in all the way. Remove it again,
keeping the tip down, and check the level. If the CHECK OIL LEVEL
message or the
oil warnkg
light on the instrument
panel comes on, it means
you need to check your
engine oil level right away.
For more information, see “Check
Oil Level Message”
or “Oil Pressure Warning Light” in the Index. You
should check your engine
oil level regularly; this is an
added reminder.
It’s a good idea to check your engine
oil every time you
get
fuel. In order to get an accurate reading, the oil must
be warm
and the vehicle must be on level ground.
Turn off the engine and give the oil a few minutes to
drain back into the oil pan. If you don’t, the oil dipstick
might not show the actual level.
6-11
Page 266 of 404
Engine Oil Additives
Don’t add anything to your oil. Your Aurora retailer is
ready to advise
if you think something should be added.
When to Change Engine Oil
If any one of these is true for you, use the short trip/city
maintenance schedule:
0
0
0
0
0
Most trips are less than 5 to 10 miles (8 to 16 km).
This is particularly important when outside
temperatures are below freezing.
Most trips include extensive idling (such
as frequent
driving in stop-and-go traffic).
Most trips are through dusty areas.
You frequently tow a trailer or use a carrier on top of
your vehicle.
The vehicle is used for delivery service, police, taxi
or other commercial application. Driving under
these conditions causes engine oil to
break down sooner.
If any one of these is true for your
vehicle, then you need
to change your oil and filter
every
3,000 miles (5 000 km) or 3 months -- whichever
occurs first. (See “Change Oil Message’’ in the Index.)
If
the CHANGE OIL NOW message appears in the Driver
Information Center, you should change your oil.
If none of them is
true, use the long triphighway
maintenance schedule. Change the oil and filter every
7,500 miles ( 12 500 km) or 12 months -- whichever
occurs first. Driving a vehicle with a
fully warmed
engine under highway conditions causes engine oil to
break down slower.
(See “Change Oil Message” in the Index.) Always reset
the engine oil life to 100% after every oil change.
6-14
Page 269 of 404
- , . .. .‘,. .
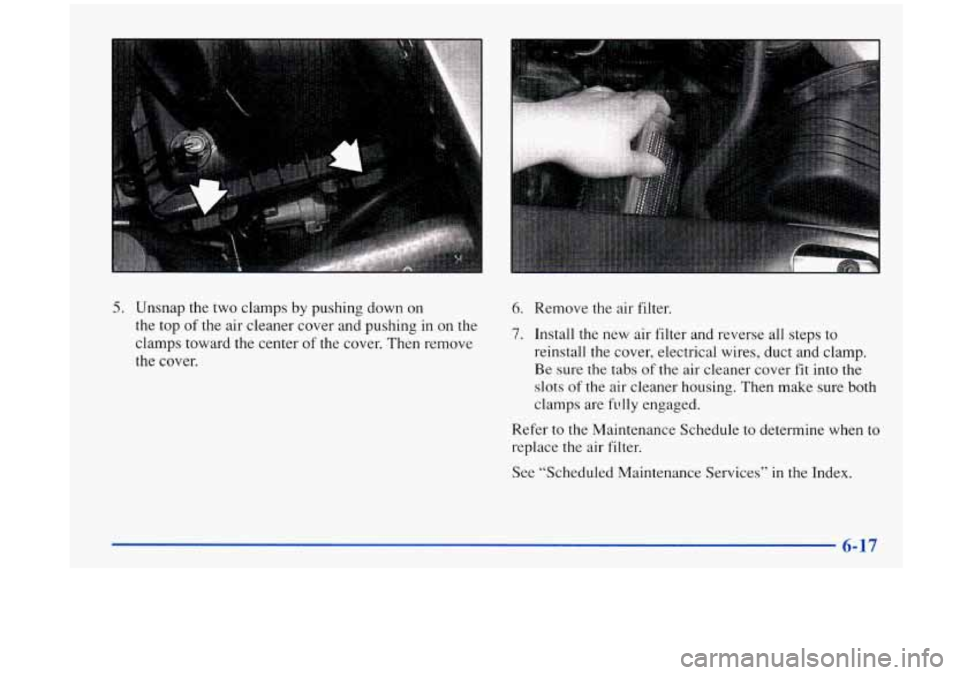
6. Remove the air filter. 5. Unsnap the two clamps by pushing down on
the top
of the air cleaner cover and pushing in on the
clamps toward the center
of the cover. Then remove
the cover. 7. Install the new air filter and reverse all steps to
reinstall the cover, electrical wires, duct and clamp.
Be sure
the tabs of the air cleaner cover fit into the
slots
of the air cleaner housing. Then make sure both
clamps are
fully engaged.
Refer
to the Maintenance Schedule to determine when to
replace the air filter.
See “Scheduled Maintenance Services”
in the Index.
6- 17
Page 270 of 404
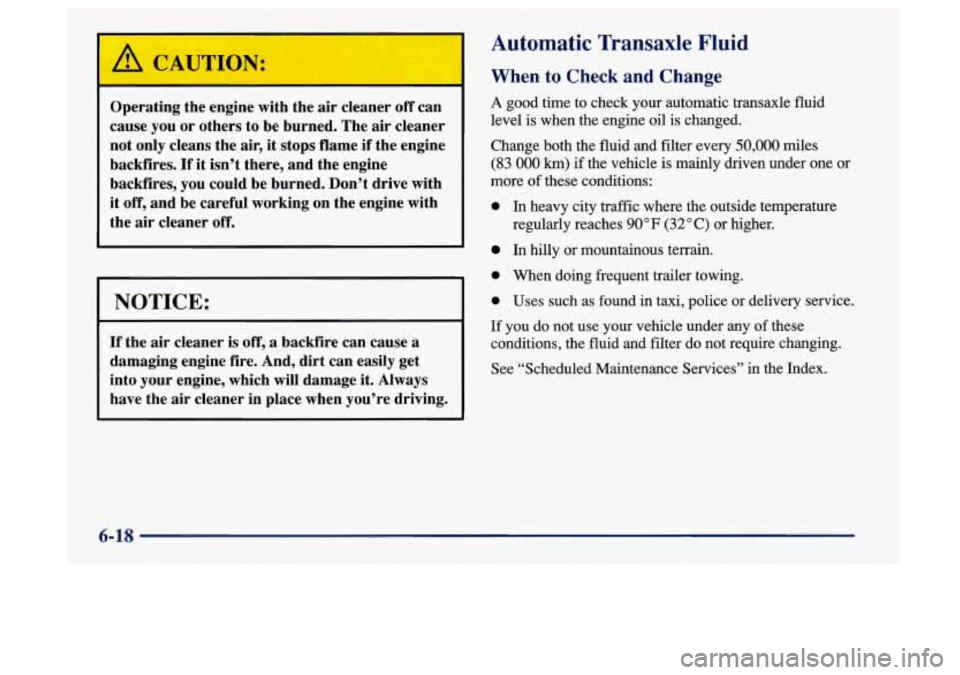
Operating the engine with the air cleaner off can
cause you or others to be burned. The air cleaner
not only cleans the air, it stops flame if the engine
backfires.
If it isn’t there, and the engine
backfires, you could be burned. Don’t drive with
it off, and be careful working on the engine with
the air cleaner
off.
NOTICE:
If the air cleaner is off, a backfire can cause a
damaging engine fire. And, dirt can easily get
into your engine, which will damage it. Always
have the air cleaner in place when you’re driving.
Automatic Transaxle Fluid
When to Check and Change
A good time to check your automatic transaxle fluid
level is when the engine oil is changed.
Change both the fluid and filter every
50,000 miles
(83 000 km) if the vehicle is mainly driven under one or
more of these conditions:
0 In heavy city traffic where the outside temperature
regularly reaches
90 OF (32 O C) or higher.
In hilly or mountainous terrain.
0 When doing frequent trailer towing.
0 Uses such as found in taxi, police or delivery service.
If you do not use your vehicle under any of these
conditions, the fluid and filter do not require changing.
See “Scheduled Maintenance Services” in the Index.
6-18
Page 272 of 404

Then, without shutting off the engine, follow
these steps:
1. Pull out the dipstick and
wipe it with a clean rag
or paper towel.
2. Push it back in all the way, wait three seconds and
then pull it back out again.
3. Check both sides of the dipstick, and read the
lower level. The fluid level must be in the
cross-hatched area.
4. If the fluid level is in the acceptable range, push the
dipstick back in all the way.
Page 299 of 404
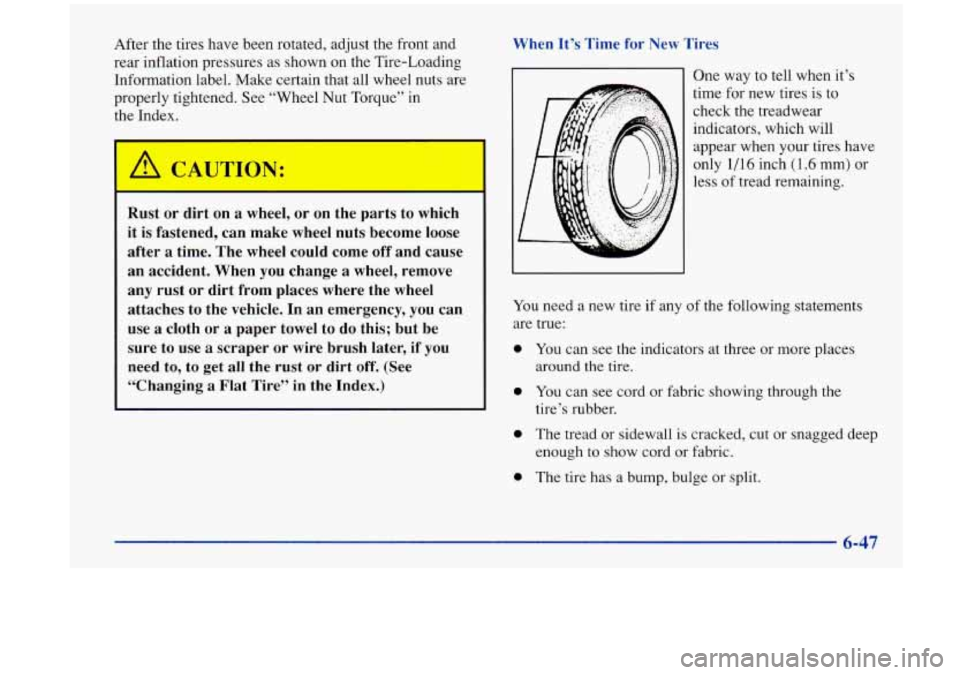
After the tires have been rotated, adjust the front and
rear inflation pressures as shown on the Tire-Loading
Information label. Make certain that all wheel nuts are
properly tightened. See “Wheel Nut Torque” in
the Index.
Rust or dirt on a wheel, or on the parts to which
it is fastened, can make wheel nuts become loose
after a time. The wheel could come off and cause
an accident. When you change
a wheel, remove
any rust
or dirt from places where the wheel
attaches to the vehicle.
In an emergency, you can
use
a cloth or a paper towel to do this; but be
sure
to use a scraper or wire brush later, if you
need to, to get
all the rust or dirt off. (See
“Changing
a Flat Tire” in the Index.) When
It’s Time for New Tires
r
L
I One way to tell when it’s
time for new tires is to
check the treadwear
indicators, which will
appear when your tires have
only
1/16 inch (1.6 mrn) or
less of tread remaining.
You need a new tire if any
of the following statements
are true:
0
0
0
0
You can see the indicators at three or more places
around
the tire.
You can see cord or fabric showing through the
tire’s rubber.
The tread
or sidewall is cracked, cut or snagged deep
enough to show cord or fabric.
The tire has a bump, bulge or split.
6-47
-
Page 305 of 404
Don’t use any of these unless this manual says you can.
In many uses, these will damage
your vehicle:
Alcohol
Laundry Soap
Bleach
Reducing Agents
Cleaning the Inside of Your Aurora
Use a vacuum cleaner often to get rid of dust and loose
dirt. Wipe vinyl or leather with a clean, damp cloth.
Your Aurora retailer has two cleaners, a solvent-type
spot lifter and a foam-type powdered cleaner. They will
clean normal spots and stains very well. Do not use
them on vinyl or leather.
Here are some cleaning tips:
1.
2.
3.
4.
Always read the instructions on the cleaner label.
Clean
up stains as soon as you can -- before they set.
Use a clean cloth or sponge, and change to a clean
area often. A soft brush may be used
if stains
are stubborn.
Use solvent-type cleaners in
a well-ventilated area
only. If
you use them, don’t saturate the stained area.
5. If a ring forms after spot cleaning, clean the entire
area immediately or it will set.
Using Foam-Type Cleaner on Fabric
1.
2.
3.
4.
5.
6.
7.
8.
9.
Vacuum and brush the area to remove any loose dirt.
Always clean a whole trim panel or section. Mask
surrounding trim along stitch or welt lines.
Mix Multi-Purpose Powdered Cleaner following the
directions on the container label.
Use suds only and apply with a clean sponge. Don’t
saturate the material and don’t rub
it roughly.
As soon
as you’ve cleaned the section, use a sponge
to remove the suds.
Rinse the section with a clean, wet sponge.
Wipe off what’s left with a slightly damp paper towel
or cloth.
Dry it immediately with a blow dryer.
Wipe with a clean cloth.
Page 306 of 404
Using Solvent-Type Cleaner on Fabric
First, see if you have to use solvent-type cleaner at all.
Some spots and stains will clean
off better with just
water and mild soap.
If
you need to use a solvent:
1. Gently scrape excess soil from the trim material with
a clean, dull knife or scraper.
2. Use very little cleaner, light pressure and clean cloths
(preferably cheesecloth). Cleaning should start at the
outside of the stain, “feathering” toward the center.
3. Keep changing to a clean section of the cloth.
4. When you clean a stain from fabric, immediately
dry the area with a blow dryer to help prevent a
cleaning ring.
Special Cleaning Problems
Greasy or Oily Stains
Stains caused by grease, oil, butter, margarine, shoe
polish, coffee with cream, chewing gum, cosmetic
creams, vegetable oils, wax crayon, tar and asphalt can
be removed as follows:
1. Carefully scrape off excess stain.
2. Follow the solvent-type instructions described earlier.
Shoe polish, wax crayon, tar and asphalt will stain if left
on a vehicle’s seat fabric. They should be removed as
soon as possible. Be careful, because the cleaner will
dissolve them and may cause them to spread.
Non-Greasy Stains
Stains caused by catsup, coffee (black), egg, fruit, fruit
juice, milk, soft drinks, wine, vomit, urine and blood can
be removed as follows:
1.
2.
3.
4.
Carefully scrape off excess stain, then sponge the
soiled area with cool water.
If a stain remains, follow the foam-type instructions
described earlier.
If an odor lingers after cleaning vomit or urine, treat
the area with a waterbaking soda solution:
1
teaspoon (5 ml) of baking soda to 1 cup (250 ml) of
lukewarm water.
If needed, clean lightly with solvent-type cleaner.
6-54
Page 309 of 404

Cleaning the Outside of Your Aurora
The paint finish on your vehicle provides beauty, depth
of color, gloss retention and durability.
Washing Your Vehicle
The best way to preserve your vehicle’s finish is to keep it
clean by washing it often with lukewarm or cold water.
Don’t wash your vehicle in the direct rays of the sun.
Don’t use strong soaps or chemical detergents. Use
liquid hand, dish or car washing (mild detergent) soaps.
Don’t use cleaning agents that are petroleum based, or
that contain acid or abrasives. All cleaning agents
should be flushed promptly and not allowed to dry on
the surface, or they could stain. Dry the finish with
a
soft, clean chamois or an all-cotton towel to avoid
surface scratches and water spotting.
High pressure car washes may cause water to enter
your vehicle.
Cleaning Exterior Lamps/Lenses
Use lukewarm or cold water, a soft cloth and a liquid
hand, dish or vehicle washing (mild detergent) soap to
clean exterior lamps and lenses. Follow instructions
under “Washing Your Vehicle.”
Finish Care
Occasional waxing or mild polishing or your Aurora by
hand may be necessary to remove residue from the paint
finish.
You can get GM-approved cleaning products
from your retailer. (See “Appearance Care and
Materials” in the Index.)
Your Aurora has a “basecoatklearcoat” paint finish. The
clearcoat gives more depth and gloss to the colored
basecoat. Always use waxes and polishes that are
non-abrasive and made for a basecoat/clearcoat
paint finish.
FOTICE:
Machine compounding or aggressive polishing on
a basecoat/clearcoat paint finish may dull the
finish or leave swirl marks.