bulb Oldsmobile Aurora 1997 Owner's Manuals
[x] Cancel search | Manufacturer: OLDSMOBILE, Model Year: 1997, Model line: Aurora, Model: Oldsmobile Aurora 1997Pages: 404, PDF Size: 20.75 MB
Page 92 of 404
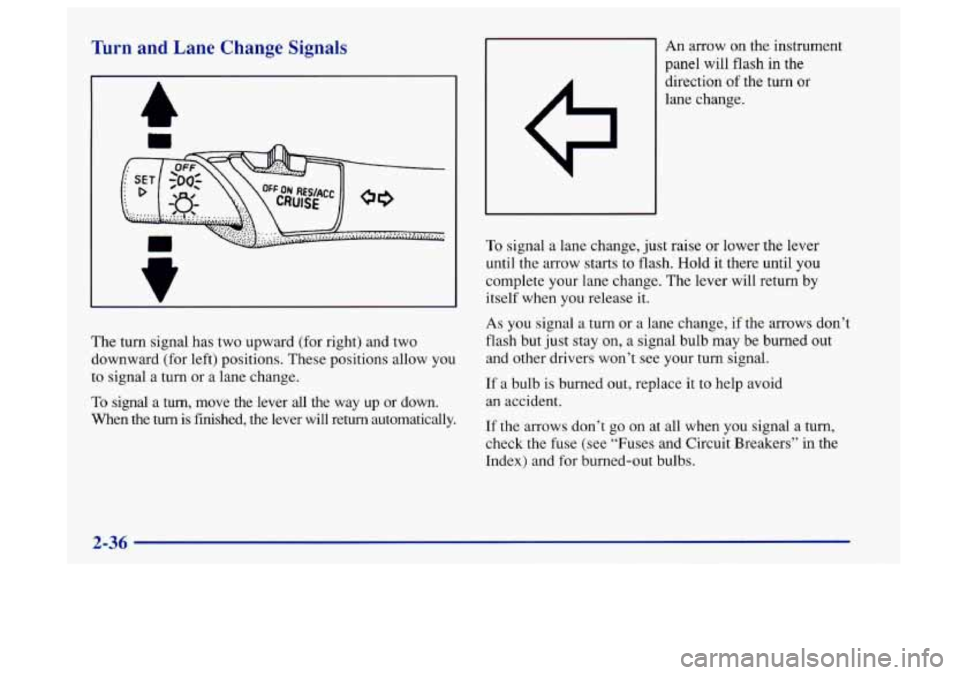
Turn and Lane Change Signals
n
The turn signal has two upward (for right) and two
downward (for left) positions. These positions allow you
to signal a turn or a lane change.
To signal a tum, move the lever all the way up or down.
When the
turn is finished, the lever will return automatically. An
arrow
on the instrument
panel will
flash in the
direction of the turn or
lane change.
To signal a lane change, just raise or lower the lever
until the arrow starts to flash. Hold it there until you
complete your lane change. The lever will return
by
itself when you release it.
As you signal a turn or a lane change, if the arrows don’t
flash but just stay
on, a signal bulb may be burned out
and other drivers won’t see your turn signal.
If a bulb is burned out, replace it to help avoid
an accident.
If the arrows don’t go on at all when you signal a turn,
check the fuse (see “Fuses and Circuit Breakers” in the
Index) and for burned-out bulbs.
2-36
Page 134 of 404
The oil light could also come on in three other situations:
When the ignition is on but the engine is not running,
the light will
come on as a test to show you it is
working, but the light will go out when you turn the
ignition to
START. If it doesn’t come on with the
ignition
on, you may have a problem with the fuse or
bulb. Have it fixed right away.
0 Sometimes when the engine is idling at a stop, the
light may blink on and off. This is normal.
If you make a hard stop, the light may come on for a
moment. This is normal.
d!!, CAUTION:
Don’t keep driving if the oil pressure is low. If
you do, your engine can become so hot that it
catches fire. You
or others could be burned.
Check your oil
as soon as possible and have your
vehicle serviced.
NOTICE:
Damage to your engine from neglected oil
problems can be costly and
is not covered by
your warranty.
2-78
Page 213 of 404
Making Turns
I NOTICE:
Making very sharp turns while trailering could
cause the trailer to come in contact with the
vehicle. Your vehicle could be damaged. Avoid
making very sharp turns while trailering.
When you’re turning with a trailer, make wider turns than
normal.
Do this so your trailer won’t strike soft shoulders,
curbs, road signs,
trees or other objects. Avoid jerky or
sudden maneuvers. Signal well in advance.
Turn Signals When Towing a Trailer
The green arrows on your instrument panel will flash
whenever you signal a turn or lane change. Properly
hooked up, the trailer lamps will also flash, telling other
drivers you’re about to turn, change lanes or stop.
When towing a trailer, the green arrows
on your
instrument panel will flash for turns even
if the bulbs on
the trailer are burned out. Thus, you may think drivers
behind you
are seeing your signal when they are not. It’s
important to check occasionally to be sure the trailer
bulbs are still working. Your
vehicle may have bulb warning messages. When
you plug a trailer lighting system into your vehicle’s
lighting system, its bulb warning messages may not let
you know
if one of your lamps goes out. So, when you
have a trailer lighting system plugged in, be sure to
check your vehicle and trailer lamps from time
to time
to be sure they’re all working. Once you disconnect the
trailer lamps, the bulb warning messages again can tell
you if one
of your vehicle lamps is out.
Driving On Grades
Reduce speed and shift to a lower gear before you start
down a long or steep downgrade.
If you don’t shift
down, you might have
to use your brakes so much that
they would get hot and no longer work well.
Parking on Hills
You really should not park your vehicle, with a trailer
attached, on a hill. If something goes wrong, your rig
could start to move. People can be injured, and both
your vehicle and the trailer can be damaged.
4-37
Page 253 of 404
@ Section 6 Service and Appearance Care
Here you will find information about the care of your Aurora. This section begins with service and fuel information,
and then it shows how to check important fluid and lubricant levels. There is also technical information about your
vehicle, and a part devoted to its appearance care.
6-2
6-3
6-8
6-1 1
6-15 6-18
6-2
1
6-27
6-28
6-32
6-33
6-3 7
6-44
6-52 Service
Fuel
Checking Things Under the Hood
Engine Oil
Air Cleaner
Automatic Transaxle Fluid
Engine Coolant Windshield Washer Fluid
Brakes
Battery
Bulb Replacement
Headlamp Aiming
Tires
Appearance Care 6-53
6-57
6-59
6-59
6-60 6-6 1
6-62
6-65
6-72
6-73
6-74
6-74
6-74
6-74 Cleaning the
Inside
of Your Aurora
Cleaning the Outside
of Your Aurora
Underbody Maintenance Chemical Paint Spotting
Appearance Care Materials Chart
Vehicle Identification Number (VIN)
Electrical System
Removing the Rear Seat Cushion
Replacement Bulbs
Capacities and Specifications
Air Conditioning Refrigerants
Engine Specifications
Normal Maintenance Replacement Parts
Vehicle Dimensions
6-1
Page 285 of 404
Vehicle Storage
If you’re not going to drive your vehicle for 25 days or
more, take off the black, negative
(-) cable from
the battery. This will help keep your battery from
r ning down.
A CAUTION:
Batteries have acid that can burn you and gas
that can explode.
You can be badly hurt if you
aren’t careful. See
“Jump Starting” in the Index
for tips on working around
a battery without
getting hurt.
Contact your retailer to learn how to prepare your
vehicle for longer storage periods.
Also, for your audio system, see “Theft-Deterrent
Feature”
in the Index.
Bulb Replacement
For any bulb changing procedure not listed in this
section, contact your Aurora retailer’s service
department.
For the type of bulb to
use, see “Replacement Bulbs” in
the Index.
Halogen Bulbs
I A CAUTION:
Halogen bulbs have pressurized gas inside and
can burst if you drop or scratch the bulb.
You or
others could be injured. Be sure to read and
follow the instructions on the bulb package.
Page 286 of 404
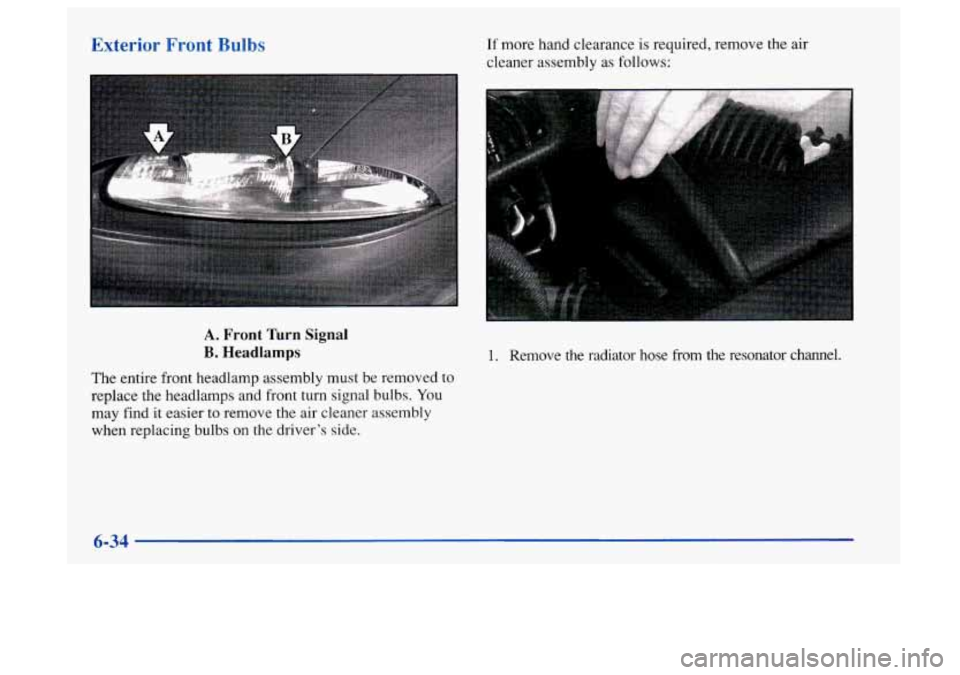
Exterior Front Bulbs If more hand clearance is required, remove the air
cleaner assembly as follows:
A. Front Wrn Signal
B. Headlamps
The entire front headlamp assembly must be removed to
replace the headlamps and front turn signal bulbs.
You
may find it easier to remove the air cleaner assembly
when replacing bulbs on the driver’s side.
1. Remove the radiator hose fi-om the resonator channel.
6-34
Page 287 of 404
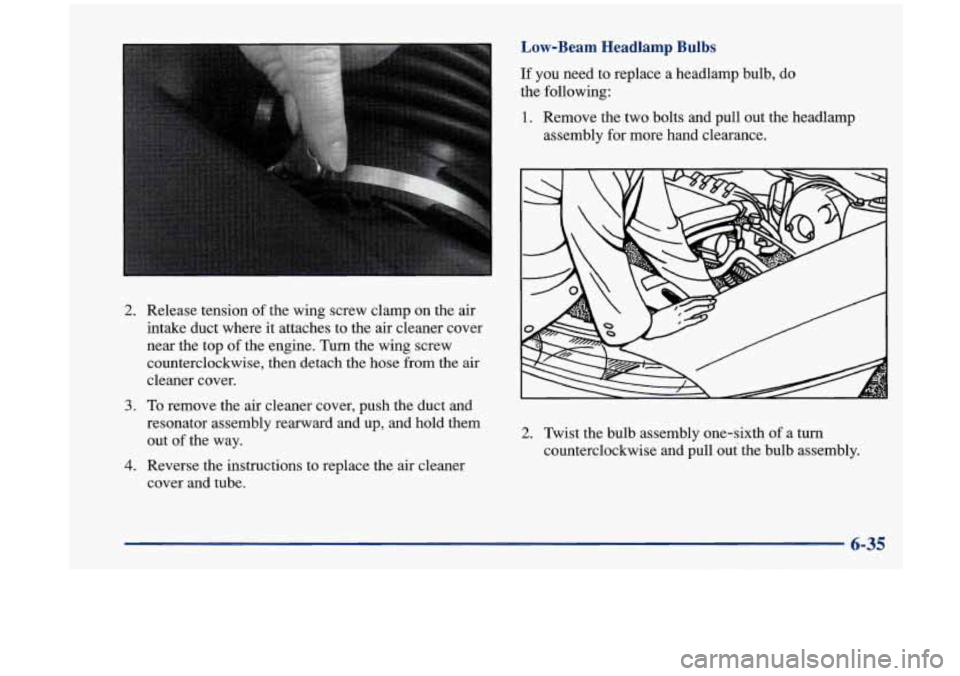
2. Release tension of the wing screw clamp on the air
intake duct where it attaches to the air cleaner cover
near the top of the engine.
Turn the wing screw
counterclockwise, then detach the hose
from the air
cleaner cover.
3. To remove the air cleaner cover, push the duct and
resonator assembly rearward and up, and hold them
out
of the way.
cover and tube.
4. Reverse the instructions to replace the air cleaner
Low-Beam Headlamp Bulbs
If you need to replace a headlamp bulb, do
the following:
1. Remove the two bolts and pull out the headlamp
assembly for more hand clearance.
2. Twist the bulb assembly one-sixth of a turn
counterclockwise and pull out the bulb assembly.
6-35
Page 288 of 404
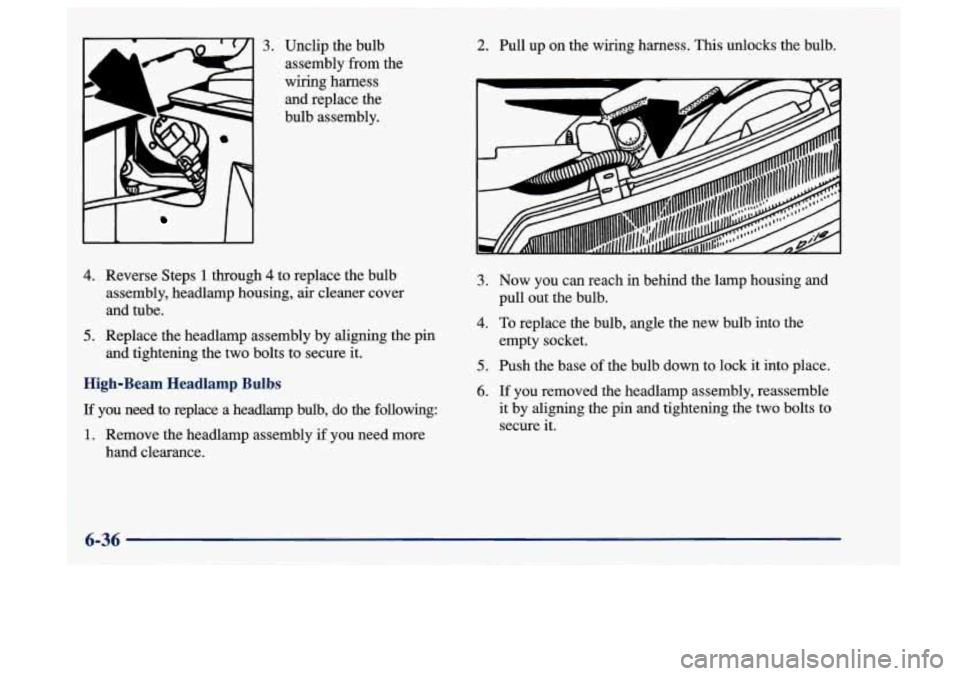
3.
II II
Unclip the bulb
assembly from the
wiring harness and replace the
bulb assembly.
4. Reverse Steps 1 through 4 to replace the bulb
assembly, headlamp housing, air cleaner cover
and tube.
5. Replace the headlamp assembly by aligning the pin
and tightening the two bolts to secure it.
High-Beam Headlamp Bulbs
If you need to replace a headlamp bulb, do the following:
1. Remove the headlap assembly if you need more
hand clearance.
2. Pull up on the wiring harness. This unlocks the bulb.
- v-
3. Now you can reach in behind the lamp housing and
4. To replace the bulb, angle the new bulb into the
pull out
the bulb.
empty socket.
5. Push the base of the bulb down to lock it into place.
6. If you removed the headlamp assembly, reassemble
it by aligning the pin and tightening the two bolts to
secure it.
Page 289 of 404
Front Turn Signal
The turn signal bulb is on the inboard edge of the
headlamp assembly.
To replace a bulb, do the following:
1.
2.
3.
4.
Remove the headlamp assembly if you need more
hand clearance.
Reach in and press the locking tab while twisting the
bulb assembly one-quarter of a turn
counterclockwise.
Replace the bulb and reverse Step
2 to reassemble.
If you removed the headlamp assembly, reassemble
it by aligning the pin and tightening the two bolts to
secure
it.
Headlamp Aiming
Your vehicle has the composite headlamp system. These
headlamps have horizontal and vertical aim indicators.
The aim has been pre-set at the factory and should need
no further adjustment.
If your vehicle is damaged in an accident and the
headlamp aim seems
to be affected, see your Aurora
retailer. Headlamps on damaged vehicles may require
recalibration
of the horizontal aim by your Aurora retailer.
To check the aim, the vehicle should be properly
prepared as
follows:
e
0
e
The vehicle must have all four tires on a perfectly
level surface.
The vehicle should not have
any snow, ice or mud
attached to it.
There should not be any cargo or loading of the
vehicle, except it should have a full tank
of gas and
one person or
160 lbs. (75 kg) on the driver’s seat.
Tires should be properly inflated.
I NOTICE:
To make sure your headlamps are aimed
properly, read all the instructions before
beginning. Failure to
follow these instructions
could cause damage to headlamp parts.
State inspection stations will allow a vertical reading of
plus
0.76 degrees or minus 0.76 degrees from the center
of the bubble.
It is recommended that the upper limit not exceed plus
0.4 degrees from the center of the bubble. Other drivers
may flash their high beams at
you if your adjustment is
much above plus
0.4 degrees.
6-37
Page 291 of 404
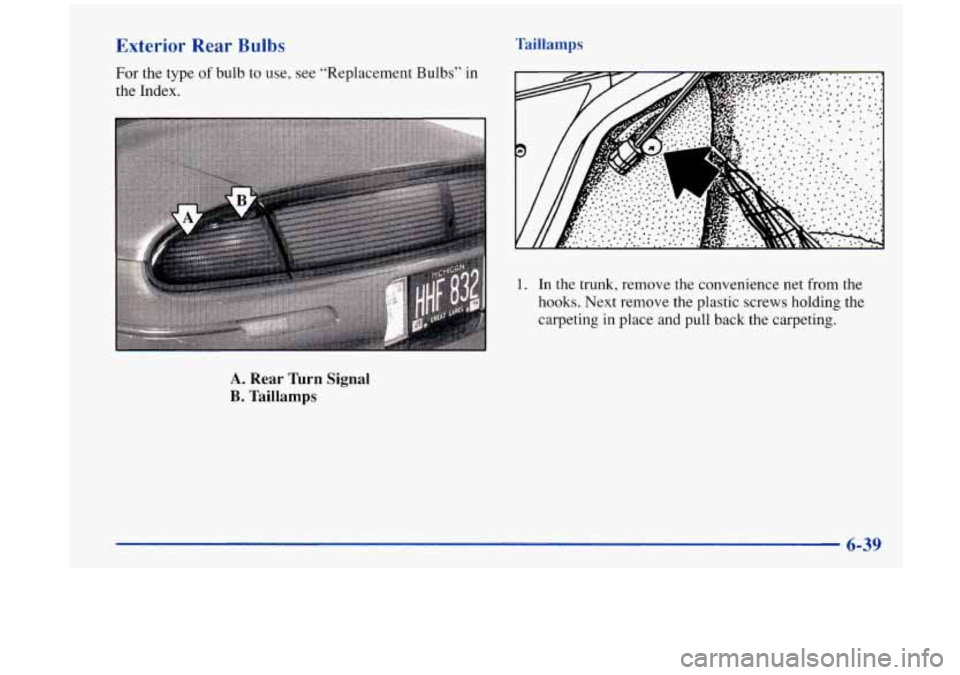
Exterior Rear Bulbs Taillamps
For the type of bulb to use, see “Replacement Bulbs” in
the Index.
1. In the trunk, remove the convenience net from the
hooks. Next remove the plastic screws holding the
carpeting
in place and pull back the carpeting.
A. Rear Turn Signal
B. Taillamps
6-39