change time Oldsmobile Aurora 1998 Owner's Manuals
[x] Cancel search | Manufacturer: OLDSMOBILE, Model Year: 1998, Model line: Aurora, Model: Oldsmobile Aurora 1998Pages: 380, PDF Size: 19.75 MB
Page 8 of 380

I Oldsmobiie
GENERAL MOTORS, GM, the GM Emblem,
OLDSMOBILE, the OLDSMOBILE Rocket Emblem
and the name AURORA are registered trademarks of
General Motors Corporation. “AURORA” is used with
permission of Hankook Tire.
This manual includes the latest information at
the time it
was printed. We reserve the right to make changes in the
product after that time without further notice. For
vehicles first sold in Canada, substitute the name
“General Motors
of Canada Limited” for Oldsmobile
Division whenever it appears in this manual.
Please keep this manual in your vehicle,
so it will be
there
if you ever need it when you’re on the road. If you
sell the vehicle, please leave this manual in it
so the new
owner can use it.
Litho in U.S.A.
Part
No. 22656193 B First Edition
..
WE SUPPORT
VOLUNTARY TECHNICIAN
CERTIFICATION THROUGH
National Institute for AUTOMOTIVE
SERVICE
EXCELLENCE
We support voluntary
technician certification.
For Canadian Owners Who Prefer a
French Language Manual:
Aux propriitaires canadiens: Vous pouvez vous
procurer un exemplaire de ce guide en fraqais chez
votre concessionaire ou au:
DGN Marketing Services Ltd.
1577 Meyerside Dr.
Mississauga, Ontario
L5T 1B9
@Copyright General Motors Corporation 1997
All Rights Reserved
Page 72 of 380
Customizing Your Automatic Door Locks Feature
You can program the automatic door locks feature to
change to the following modes:
Mode Operation
0 No automatic door lock or unlock.
1 All doors automatically lock when shifted
out of PARK (P).
No automatic door unlock.
2
3
All doors automatically lock when shifted
out of PARK
(P). Only the driver’s door
automatically unlocks when shifted into
PARK (P).
All doors automatically lock when shifted
out of PARK
(P). All doors automatically
unlock when shifted into PARK (P).
Vehicles are delivered programmed in Mode
3.
To change the modes:
1. Close all doors and turn the ignition on. Keep all
2. Press and hold the lock position on the driver’s
doors
closed throughout this procedure.
power door lock switch through Step
4.
3. Press the LOCK button on the remote lock control
transmitter. The automatic door locks will remain in
the current mode.
4. Press the LOCK button on the transmitter again.
Each time the transmitter’s
LOCK button is pressed,
the mode will advance by one, going from Mode
3 to
0 to 1, etc.
NOTE: The door locks will cycle according
to the
mode entered while customizing memory door locks.
(Mode
“0” has no feedback.)
5. Release the power door lock switch. The automatic door
locks will remain in the most recent mode selected.
6. Turn the ignition to OFF.
Delayed Locking
This Personalization feature lets the driver delay the
actual locking of the vehicle. When the power door lock
switch is pressed with the key removed from the ignition
and the driver’s door open, a chime will sound three
times to signal that the lock delay mode
is active. When
all doors have been closed, the doors will lock
automatically after five seconds. If any door
is opened
before this, the five-second timer will reset itself once
all
the doors have been closed again.
Pressing the door lock switch twice within two seconds will override this feature.
2-6
Page 78 of 380
Vehicles are delivered programmed in Mode 5. To
change to another mode:
1. Turn the ignition key to OFF.
2. Press and hold the lock position on the driver’s
3. Press the trunk button on the transmitter to enter the
power door
lock switch throughout this procedure.
programming mode.
The transmitter will remain in
its current mode.
4. Press the trunk button again. Each time the trunk
button is pressed, the horn will chirp and the
transmitter will advance to the next mode.
5. Release the power door lock switch.
This procedure changes the mode for only the
transmitter used to change this setting. The procedure
will need
to be repeated for the second transmitter.
Matching Transmitter(s) To Your Vehicle
Each remote lock control transmitter is coded to
prevent another transmitter from unlocking your vehicle.
If a transmitter is lost or stolen, a replacement can be
purchased through your retailer. Remember to bring any
remaining transmitters with you when you go to your
retailer. When the retailer matches the replacement
transmitter to your vehicle, any remaining transmitters
must also be matched. Once your retailer has coded the
new transmitter,
the lost transmitter will not unlock your
vehicle. Each vehicle can have only four transmitters
matched to it.
See your retailer to match transmitters to
another vehicle.
2-12
-.
Page 79 of 380
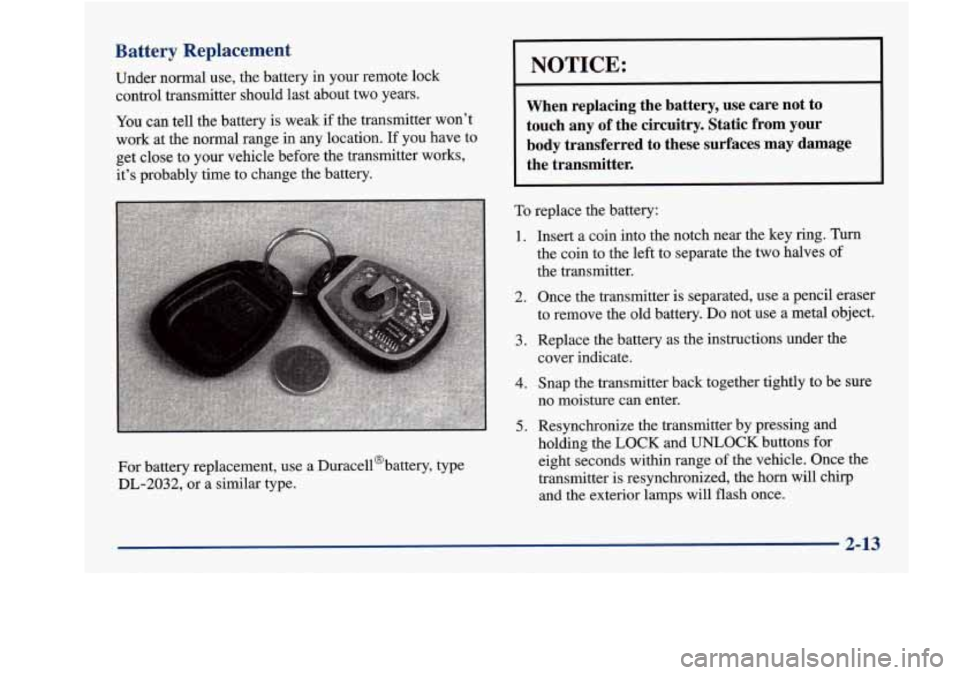
Battery Replacement
Under normal use, the battery in your remote lock
control transmitter should last about two years.
You can tell the battery is weak if the transmitter won’t
work at the normal range in any location.
If you have to
get close to your vehicle before the transmitter works,
it’s probably time to change the battery.
For battery replacement, use a Duracell@battery, type
DL-2032,
or a similar type.
1.
2.
3.
4.
5.
NOTICE:
When replacing the battery, use care not to touch any of the circuitry. Static from your
body transferred to these surfaces
may damage
the transmitter.
To replace the battery:
Insert a coin into the notch near the key ring. Turn
the coin to the left to separate the two halves of
the transmitter.
Once the transmitter is separated, use a pencil eraser
to remove the old battery. Do not use a metal object.
Replace the battery as the instructions under the
cover indicate.
Snap the transmitter back together tightly to be sure
no moisture can enter.
Resynchronize the transmitter by pressing and
holding the
LOCK and UNLOCK buttons for
eight seconds within range of the vehicle. Once the
transmitter is resynchronized, the horn will cllrp
and the exterior lamps will flash once.
c 2-13
Page 88 of 380
Starting Your 4.0L Engine
1. Without pushing the accelerator pedal, turn your
ignition key to START. When the engine starts, let
go of the key. The idle speed will go down as
your
engine gets warm.
I 1
I NOTICE:
Holding your key in START for longer than
15 seconds at a time will cause your battery to
be drained much sooner. And the excessive heat
can damage
your starter motor. I
2. If it doesn’t start right away, hold your key in
START for about three seconds at a time until your
engine starts. Wait about
15 seconds between each
try to help avoid draining your battery or damaging
your starter.
3. If your engine still won’t start (or starts but then
stops), it could be flooded with too much gasoline.
Try pushing your accelerator pedal all the way to the
floor and holding it there as you hold the key in
START for about three seconds.
If the vehicle starts
briefly but then stops again,
do the same thing.
NOTICE:
Your engine is designed to work with the
electronics in your vehicle.
If you add electrical
parts or accessories,
you could change the way
the engine operates, Before adding electrical
equipment, check with
your retailer. If you don’t,
your engine might not perform properly.
If you ever have to have your vehicle towed, see
the part of this manual that tells how to do it
without damaging your vehicle. See “Towing
Your Vehicle”
in the Index.
2-22
Page 113 of 380
To turn the feature on:
1.
2.
3.
4.
5.
Turn the ignition key to OFF
Press and hold the door lock switch throughout this
procedure. All doors will
lock.
Press the instant alarm button on the remote lock
control transmitter. Perimeter lighting remains off
at this time and the horn will chirp one time.
Press the instant alarm button on the transmitter
again. Perimeter lighting is now enabled and the
horn will chirp two times.
Release the door lock switch. The perimeter lighting
option
is now on.
This procedure changes the mode for only the
transmitter used to change this setting. The procedure
will need to be repeated for the second transmitter.
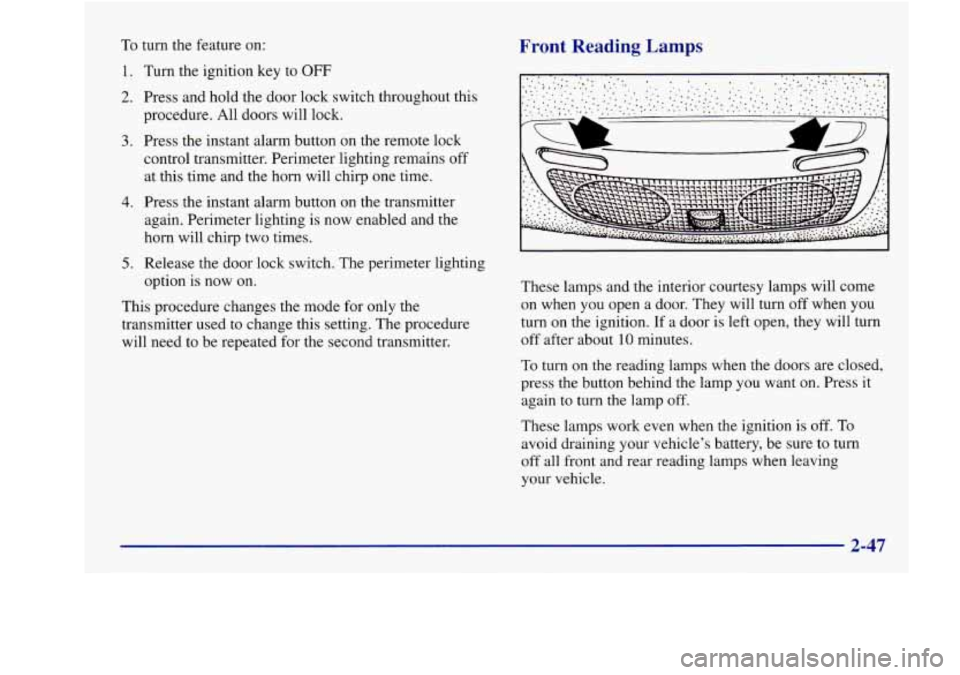
Front Reading Lamps
These lamps and the interior courtesy lamps will come
on when you open a door. They will turn
off when you
turn on the ignition. If a door is left open, they will
turn
off after about 10 minutes.
To turn on the reading lamps when the doors are closed,
press the button behind the lamp you want on. Press it
again to turn the lamp
off.
These lamps work even when the ignition is off. To
avoid draining your vehicle’s battery, be sure to turn
off all front and rear reading lamps when leaving
your vehicle.
2-47
Page 115 of 380
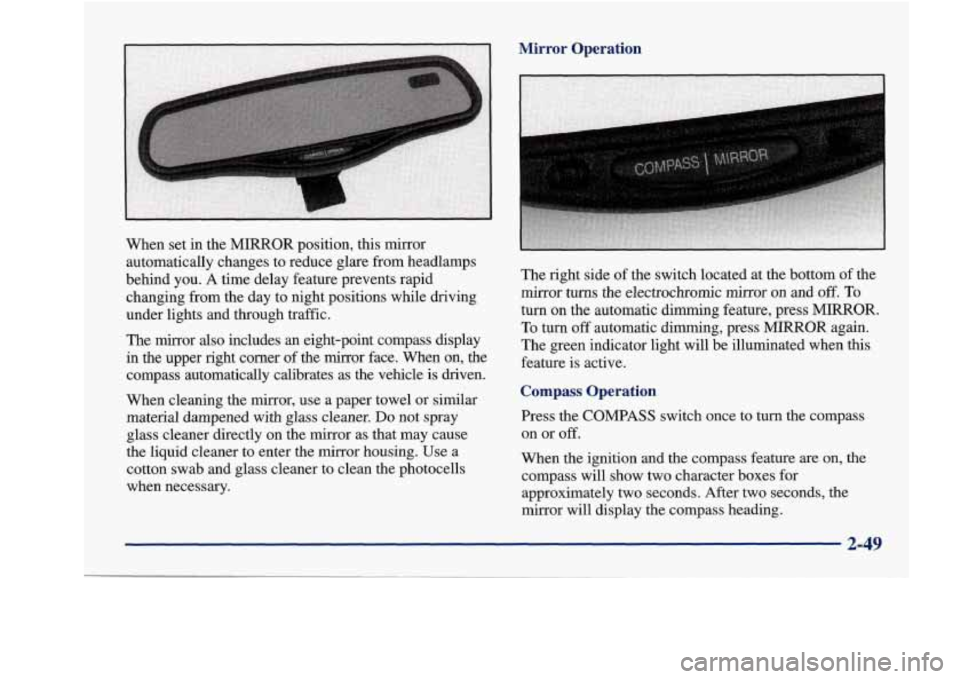
Mirror Operation
When set in the MIRROR position, this mirror
automatically changes to reduce glare
from headlamps
behind you.
A time delay feature prevents rapid
changing from the day to night positions while driving
under lights and through traffic.
The mirror
also includes an eight-point compass display
in the upper right corner of the mirror face. When on, the
compass automatically calibrates as the vehicle is driven.
When cleaning the mirror, use a paper towel or similar
material dampened with glass cleaner.
Do not spray
glass cleaner directly on the mirror as that may cause
the liquid cleaner to enter the mirror housing. Use a
cotton swab and glass cleaner to clean the photocells
when necessary. The right side
of the switch located at the bottom
of the
mirror
turns the electrochromic mirror on and off. To
turn on the automatic dimming feature, press MIRROR.
To turn off automatic dimming, press MIRROR again.
The green indicator light will be illuminated when
this
feature is active.
Compass Operation
Press the COMPASS switch once to turn the compass
on or
off.
When the ignition and the compass feature are on, the
compass
will show two character boxes for
approximately
two seconds. After two seconds, the
mirror will display the compass heading.
2-49
Page 124 of 380
If you have trouble programming the universal
transmitter, make sure that you have followed the
directions exactly as described and that the batteries
in the hand-held transmitter are not dead. If
you still
cannot program it, rotate your hand-held transmitter
end over end and try again. The universal transmitter
may not work with older garage door openers that do
not meet current Federal Consumer Safety Standards.
If you cannot program the transmitter after repeated
attempts, consult your Aurora retailer.
Be sure to keep your original hand-held transmitter
in case you need to erase and reprogram the
universal transmitter.
Note to Canadian Owners: During programming, your
hand-held transmitter may stop transmitting after one or
two seconds. If you are programming from one of these
transmitters,
you should press and re-press the button on
the hand-held transmitter every two seconds without
ever releasing the button on the universal transmitter.
Release both buttons three seconds after the red light on
the universal transmitter begins to flash rapidly.
Operating the Transmitter
Press and hold the appropriate button on the universal
transmitter. The red light comes on while the signal is
being transmitted.
Note that the effective transmission range of the
universal transmitter may differ from your hand-held
transmitter and
also from one channel to another.
Training a Garage Door Opener Equipped
with “Rolling Codes”
If you programmed the universal transmitter, but the
garage door will not open, and
if your garage door
opener was manufactured after
1995, your garage
door may have a security feature that changes the
“code” of your garage door opener every time it is
opened or closed.
To determine if your garage door opener has this rolling
code feature, press and hold the appropriate button on
the universal transmitter that was programmed. If the
red light flashes rapidly for one
to two seconds, then
turns solid, your garage door opener has this feature.
Page 144 of 380
0 Engine oil life, such as:
OIL LIFE 30%
This is an estimate of the oil’s remaining useful life.
It will show
100% when the system is reset after an
oil change.
It will alert you to change your oil on a
schedule consistent with your driving conditions.
When the remaining oil life or transaxle fluid life is low,
the system will alert you with a message:
CHANGE
OIL SOON or CHANGE TRNS
FLUID SOON
When the oil or transaxle fluid life is down to zero,
you will receive the message:
CHANGE OIL NOW or CHANGE TRNS FLUID NOW
To reset the OIL LIFE reminder after an oil change
or the TRNS FLUID LIFE reminder after a transaxle
fluid change:
1. With the ignition on, press the ENG button so the
OIL LIFE percentage or the TRNS LIFE percentage
is displayed.
2. Press RESET and hold for five seconds. The word
RESET will appear, then OIL LIFE
100% or TRNS
FLUID 100%.
Remember, you must reset the OIL LIFE or TRNS
FLUID yourself after each oil or transaxle fluid change.
It will not reset itself. Also, be careful not to reset the
OIL LIFE
or TRNS FLUID accidentally at any time
other than when the oil or transaxle fluid has just been
changed. It can’t be reset accurately until the next oil or
transaxle fluid change.
The DIC does not replace the need to maintain your
vehicle as recommended in the Maintenance Schedule
in this manual. Also, the oil change reminder will not
detect dusty conditions or engine malfunctions that may
affect the oil. If you drive in dusty areas, change your oil
after every
3,000 miles (5 000 km) or three months,
whichever occurs first, unless the DIC instructs you to
do
so sooner. Also, the oil change reminder does not
measure how much oil you have in your engine.
So, be
sure to check your oil level often. See “Engine Oil” in
the Index.
2-78
Page 146 of 380

When the trip is complete a chime will sound and the
display will show:
TRIP
COMPLETE
The trip complete message will go off when you
press any button,
or when you turn your ignition off,
then on. The display returns to the mode displayed
prior to the interruption.
Elapsed Time (ET)
When the ignition is on, the DIC can be used as a
stopwatch. The display will show hours and minutes.
The elapsed time indicator will record up to
100 hours,
then it will reset to zero and continue counting. Press
ET, and the display will show the amount of time that
has elapsed since the elapsed time indicator was last
reset (not including time the ignition is off), such
as:
01:OS ELAPSED TIME
To reset elapsed time to zero, press RESET while the
elapsed time
is displayed.
Date
Press DATE to display the date. To change the date,
press DATE then RESET. The following display
will appear:
MONTH? XX/DD/YY
MM,
DD and YY represent the month, date and year
you currently have
in your system. Check to make sure
your clock is in the correct AM or PM mode.
Notice that each key has a number. Push the key
to
enter the number. The first XX’s will flash until you
enter the first digit for the month. You don’t need to
enter the leading zero
if the number is under 10. Press
ENTER after you’ve entered the month. The display will change to:
DAY? MM/XX/YY
Set the day just
as you set the month. After the day entry
is made, press ENTER and the display will change to:
YEAR? MM/DD/XX
2-80