run flat OLDSMOBILE AURORA 1999 Owners Manual
[x] Cancel search | Manufacturer: OLDSMOBILE, Model Year: 1999, Model line: AURORA, Model: OLDSMOBILE AURORA 1999Pages: 360, PDF Size: 3.24 MB
Page 1 of 360

yellowblue
i
The 1999 Oldsmobile Aurora Owner's Manual
1-1 Seats and Restraint SystemsThis section tells you how to use your seats and safety belts properly. It also explains the ªSRSº system.
2-1 Features and ControlsThis section explains how to start and operate your vehicle.
3-1 Comfort Controls and Audio SystemsThis section tells you how to adjust the ventilation and comfort controls and how to operate your audio system.
4-1 Your Driving and the RoadHere you'll find helpful information and tips about the road and how to drive under different conditions.
5-1 Problems on the RoadThis section tells you what to do if you have a problem while driving, such as a flat tire or overheated engine, etc.
6-1 Service and Appearance CareHere the manual tells you how to keep your vehicle running properly and looking good.
7-1 Maintenance ScheduleThis section tells you when to perform vehicle maintenance and what fluids and lubricants to use.
8-1 Customer Assistance InformationThis section tells you how to contact Oldsmobile for assistance and how to get service and owner publications.
It also gives you information on ªReporting Safety Defectsº on page 8-10.
9-1 IndexHere's an alphabetical listing of almost every subject in this manual. You can use it to quickly find
something you want to read.
ProCarManuals.com
Page 110 of 360
yellowblue
2-52 Convenience Net
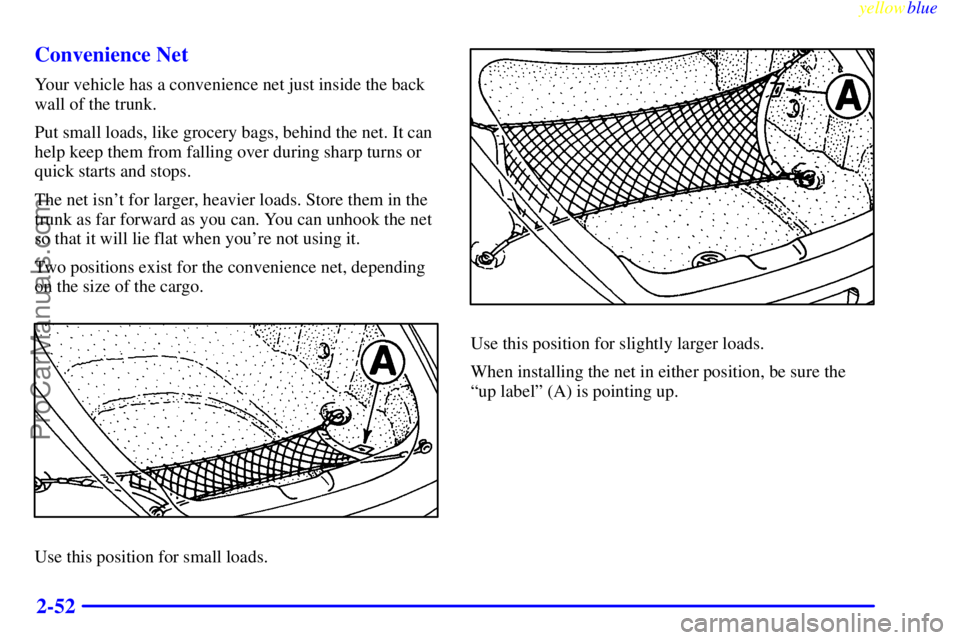
Your vehicle has a convenience net just inside the back
wall of the trunk.
Put small loads, like grocery bags, behind the net. It can
help keep them from falling over during sharp turns or
quick starts and stops.
The net isn't for larger, heavier loads. Store them in the
trunk as far forward as you can. You can unhook the net
so that it will lie flat when you're not using it.
Two positions exist for the convenience net, depending
on the size of the cargo.
Use this position for small loads.
Use this position for slightly larger loads.
When installing the net in either position, be sure the
ªup labelº (A) is pointing up.
ProCarManuals.com
Page 200 of 360
yellowblue
4-30
Loading Your Vehicle
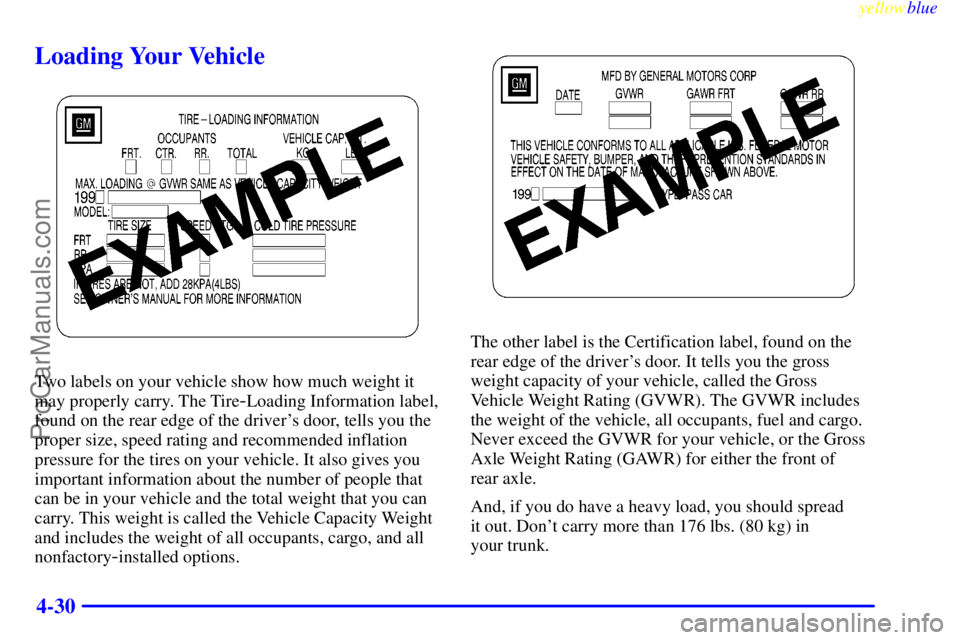
Two labels on your vehicle show how much weight it
may properly carry. The Tire
-Loading Information label,
found on the rear edge of the driver's door, tells you the
proper size, speed rating and recommended inflation
pressure for the tires on your vehicle. It also gives you
important information about the number of people that
can be in your vehicle and the total weight that you can
carry. This weight is called the Vehicle Capacity Weight
and includes the weight of all occupants, cargo, and all
nonfactory
-installed options.
The other label is the Certification label, found on the
rear edge of the driver's door. It tells you the gross
weight capacity of your vehicle, called the Gross
Vehicle Weight Rating (GVWR). The GVWR includes
the weight of the vehicle, all occupants, fuel and cargo.
Never exceed the GVWR for your vehicle, or the Gross
Axle Weight Rating (GAWR) for either the front of
rear axle.
And, if you do have a heavy load, you should spread
it out. Don't carry more than 176 lbs. (80 kg) in
your trunk.
ProCarManuals.com
Page 233 of 360
yellowblue
5-25
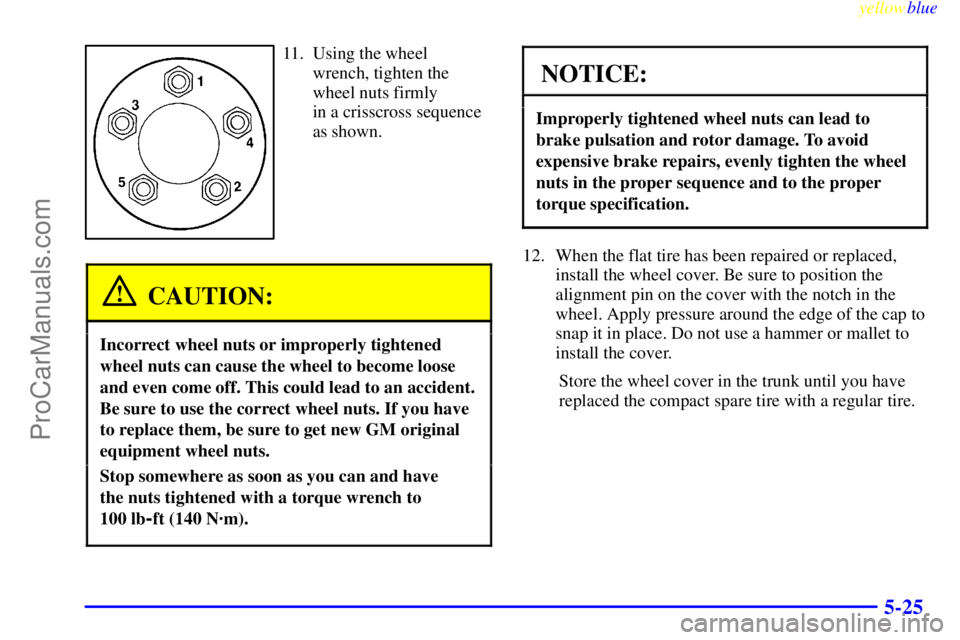
11. Using the wheel
wrench, tighten the
wheel nuts firmly
in a crisscross sequence
as shown.
CAUTION:
Incorrect wheel nuts or improperly tightened
wheel nuts can cause the wheel to become loose
and even come off. This could lead to an accident.
Be sure to use the correct wheel nuts. If you have
to replace them, be sure to get new GM original
equipment wheel nuts.
Stop somewhere as soon as you can and have
the nuts tightened with a torque wrench to
100 lb
-ft (140 N´m).
NOTICE:
Improperly tightened wheel nuts can lead to
brake pulsation and rotor damage. To avoid
expensive brake repairs, evenly tighten the wheel
nuts in the proper sequence and to the proper
torque specification.
12. When the flat tire has been repaired or replaced,
install the wheel cover. Be sure to position the
alignment pin on the cover with the notch in the
wheel. Apply pressure around the edge of the cap to
snap it in place. Do not use a hammer or mallet to
install the cover.
Store the wheel cover in the trunk until you have
replaced the compact spare tire with a regular tire.
ProCarManuals.com
Page 234 of 360
yellowblue
5-26
NOTICE:
Wheel covers won't fit on your compact spare. If
you try to put a wheel cover on your compact
spare, you could damage the cover or the spare.
Storing the Flat Tire and Tools
CAUTION:
Storing a jack, a tire or other equipment in the
passenger compartment of the vehicle could
cause injury. In a sudden stop or collision, loose
equipment could strike someone. Store all these
in the proper place.
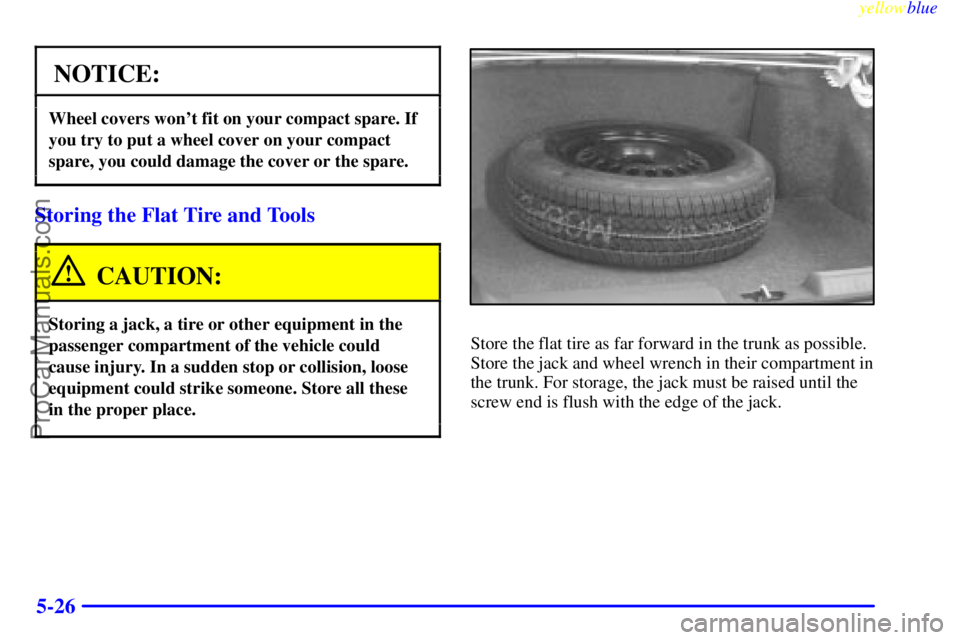
Store the flat tire as far forward in the trunk as possible.
Store the jack and wheel wrench in their compartment in
the trunk. For storage, the jack must be raised until the
screw end is flush with the edge of the jack.
ProCarManuals.com
Page 352 of 360

yellowblue
9-4
On Grades While Towing a Trailer 4-37 . . . . . . . . . . . . . . .
On Hill and Mountain Roads 4-23 . . . . . . . . . . . . . . . . . . . .
On Snow or Ice 4-26 . . . . . . . . . . . . . . . . . . . . . . . . . . . . . .
Through Water 4-19 . . . . . . . . . . . . . . . . . . . . . . . . . . . . . . .
Wet Roads 4-17 . . . . . . . . . . . . . . . . . . . . . . . . . . . . . . . . . .
Winter 4-25 . . . . . . . . . . . . . . . . . . . . . . . . . . . . . . . . . . . . . .
With a Trailer 4-35 . . . . . . . . . . . . . . . . . . . . . . . . . . . . . . . .
DRL 2-42 . . . . . . . . . . . . . . . . . . . . . . . . . . . . . . . . . . . . . . . . .
Drunken Driving 4-3 . . . . . . . . . . . . . . . . . . . . . . . . . . . . . . . .
Elapsed Time Indicator 2-81 . . . . . . . . . . . . . . . . . . . . . . . . .
Electrical Equipment, Adding 2-22, 3-24, 6-60 . . . . . . . . . . .
Electrical System 6-60 . . . . . . . . . . . . . . . . . . . . . . . . . . . . . . .
Electrochromic Day/Night Rearview Mirror 2-47 . . . . . . . . . .
Electronic Climate Control 3-2 . . . . . . . . . . . . . . . . . . . . . . . .
Electronic Level Control 4-31 . . . . . . . . . . . . . . . . . . . . . . . . .
Engine 6-10 . . . . . . . . . . . . . . . . . . . . . . . . . . . . . . . . . . . . . . .
Accessory Belt 6-72 . . . . . . . . . . . . . . . . . . . . . . . . . . . . . . .
Air Cleaner/Filter 6-15 . . . . . . . . . . . . . . . . . . . . . . . . . . . . .
Coolant 6-21 . . . . . . . . . . . . . . . . . . . . . . . . . . . . . . . . . . . . .
Coolant Heater 2-23 . . . . . . . . . . . . . . . . . . . . . . . . . . . . . . .
Coolant Level Check 7-14 . . . . . . . . . . . . . . . . . . . . . . . . . .
Coolant Temperature Gage 2-70 . . . . . . . . . . . . . . . . . . . . .
Exhaust 2-31 . . . . . . . . . . . . . . . . . . . . . . . . . . . . . . . . . . . . .
Fuse Blocks 6-61 . . . . . . . . . . . . . . . . . . . . . . . . . . . . . . . . .
Identification 6-59 . . . . . . . . . . . . . . . . . . . . . . . . . . . . . . . .
Oil Level Check 7-14 . . . . . . . . . . . . . . . . . . . . . . . . . . . . . .
Overheating 5-9 . . . . . . . . . . . . . . . . . . . . . . . . . . . . . . . . . .
Running While Parked 2-32 . . . . . . . . . . . . . . . . . . . . . . . . .
Specifications 6-71 . . . . . . . . . . . . . . . . . . . . . . . . . . . . . . . .
Starting Your 2-21 . . . . . . . . . . . . . . . . . . . . . . . . . . . . . . . .
Engine Message (DIC) 2-78 . . . . . . . . . . . . . . . . . . . . . . . . . . . Engine Oil 6
-11 . . . . . . . . . . . . . . . . . . . . . . . . . . . . . . . . . . . .
Adding 6-11 . . . . . . . . . . . . . . . . . . . . . . . . . . . . . . . . . . . . .
Additives 6-14 . . . . . . . . . . . . . . . . . . . . . . . . . . . . . . . . . . .
Checking 6-11 . . . . . . . . . . . . . . . . . . . . . . . . . . . . . . . . . . .
Life Indicator 2-78, 6-14 . . . . . . . . . . . . . . . . . . . . . . . . . . .
Life Monitor 2-78, 6-14 . . . . . . . . . . . . . . . . . . . . . . . . . . . .
Pressure Light 2-73 . . . . . . . . . . . . . . . . . . . . . . . . . . . . . . .
Used 6-14 . . . . . . . . . . . . . . . . . . . . . . . . . . . . . . . . . . . . . . .
When to Change 6-14 . . . . . . . . . . . . . . . . . . . . . . . . . . . . . .
Estimated Time of Arrival 2-80 . . . . . . . . . . . . . . . . . . . . . . . .
Exhaust, Engine 2-31 . . . . . . . . . . . . . . . . . . . . . . . . . . . . . . . .
Exit Lighting 2-45 . . . . . . . . . . . . . . . . . . . . . . . . . . . . . . . . . .
Express-Down Window 2-33 . . . . . . . . . . . . . . . . . . . . . . . . . .
Fabric Cleaning 6-51 . . . . . . . . . . . . . . . . . . . . . . . . . . . . . . .
Fan Knob, Climate Control System 3-3 . . . . . . . . . . . . . . . . . .
Filling Your Tank 6-5 . . . . . . . . . . . . . . . . . . . . . . . . . . . . . . . .
Filter/Cleaner, Air 6-15 . . . . . . . . . . . . . . . . . . . . . . . . . . . . . .
Finish Care 6-55 . . . . . . . . . . . . . . . . . . . . . . . . . . . . . . . . . . . .
Finish Damage 6-57 . . . . . . . . . . . . . . . . . . . . . . . . . . . . . . . . .
First Gear, Automatic Transaxle 2-26 . . . . . . . . . . . . . . . . . . .
Flashers, Hazard Warning 5-2 . . . . . . . . . . . . . . . . . . . . . . . . .
Flash-To-Pass Feature 2-37 . . . . . . . . . . . . . . . . . . . . . . . . . . .
Flat Tire, Changing 5-19 . . . . . . . . . . . . . . . . . . . . . . . . . . . . .
Fluid Capacities 6-70 . . . . . . . . . . . . . . . . . . . . . . . . . . . . . . . .
Fluids and Lubricants 7-20 . . . . . . . . . . . . . . . . . . . . . . . . . . . .
Fog Lamps 2-43 . . . . . . . . . . . . . . . . . . . . . . . . . . . . . . . . . . . .
Foreign Countries, Fuel 6-5 . . . . . . . . . . . . . . . . . . . . . . . . . . .
French Language Manual ii. . . . . . . . . . . . . . . . . . . . . . . . . . .
Front Storage Armrest 2
-51 . . . . . . . . . . . . . . . . . . . . . . . . . . .
ProCarManuals.com