steering wheel OLDSMOBILE AURORA 2003 Owners Manual
[x] Cancel search | Manufacturer: OLDSMOBILE, Model Year: 2003, Model line: AURORA, Model: OLDSMOBILE AURORA 2003Pages: 387, PDF Size: 18.05 MB
Page 57 of 387

If something is between an occupant and an
air bag, the bag might not inflate properly or
it
might force the object into that person causing
severe injury or even death. The path of an
inflating air bag must be kept clear. Don’t put
anything between an occupant and an air bag,
and don’t attach or put anything
on the
steering wheel hub or on or near any other air
bag covering. Don’t let seat covers block the
inflation path
of a side impact air bag.
The right front passenger’s side impact air bag is in the
side of the passenger’s seatback closest to the door.
1-50
ProCarManuals.com
Page 59 of 387

What Makes an Air Bag Inflate?
In an impact of sufficient severity, the air bag sensing
system detects that the vehicle is in a crash. For
both frontal and side impact air bags, the sensing
system triggers a release of gas from the inflator, which
inflates the air bag. The inflator, the air bag and
related hardware are all part of the air bag modules
inside the steering wheel, the instrument panel, and the
side of the front seatbacks closest to the door.
How Does an Air Bag Restrain?
In moderate to severe frontal or near frontal collisions,
even belted occupants can contact the steering wheel or
the instrument panel. In moderate to severe side
collisions, even belted occupants can contact the inside
of the vehicle. The air bag supplements the protection
provided by safety belts. Air bags distribute the force of
the impact more evenly over the occupant’s upper
body, stopping the occupant more gradually. But the
frontal air bags would not help you in many types
of collisions, including rollovers, rear impacts, and many
side impacts, primarily because an occupant’s motion
is not toward the air bag. Side impact air bags would not
help you in many types of collisions, including frontal
or near frontal collisions, rollovers, and rear impacts,
primarily because an occupant’s motion is not toward those air bags.
Air bags should never be regarded as
anything more than a supplement to safety belts,
and then only in moderate to severe frontal or
near-frontal collisions for the driver’s and right front
passenger’s frontal air bags, and only in moderate to
severe side collisions for the driver’s and right front
passenger’s side impact air bag.
What Will You See After an Air Bag
Inflates?
After the air bag inflates, it quickly deflates, so quickly
that some people may not even realize the air bag
inflated. Some components of the air bag module
- the
steering wheel hub for the driver’s air bag, the
instrument panel for the right front passenger’s bag, the
side of the seatback closest to the door for the driver
and right front passenger‘s side impact air
bags
- will be hot for a short time. The parts of the bag
that come into contact with you may be warm, but not
too hot to touch. There will be some smoke and
dust coming from the vents in the deflated air bags. Air
bag inflation doesn’t prevent the driver from seeing
or being able to steer the vehicle, nor does it stop
people from leaving the vehicle.
1-52
ProCarManuals.com
Page 61 of 387

Let only qualified technicians work on your air bag
systems. Improper service can mean that an air
bag system won’t work properly. See your dealer for
service.
Notice: If you damage the covering for the driver’s
or the right front passenger’s air bag, or the air
bag covering on the driver’s and right front
passenger’s seatback, the bag may not work
properly. You may have to replace the air bag
module in the steering wheel, both the air bag
module and the instrument panel for the right front
passenger’s air bag, or both the air bag module
and seatback for the driver’s and right front passenger’s side impact air bag. Do not open or
break the air bag coverings.
Servicing Your Air Bag-Equipped
Vehicle
Air bags affect how your vehicle should be serviced.
There are parts of the air bag systems in several places
around your vehicle. Your dealer and the service
manual have information about servicing your vehicle
and the air bag systems.
To purchase a service manual,
see
Service Publications Ordering Information on
page 7-9.
or up to IO seco s after tl lition y is
turned
off and the battery is disconnected, an
air bag can
still inflate during improper
service. You can be injured if you are close to
an air bag when
it inflates. Avoid yellow
connectors. They are probably part of the air
bag system. Be sure to follow proper service
procedures, and make sure the person
performing work for you is qualified to do
so.
The air bag systems do not need regular maintenance.
1-54
ProCarManuals.com
Page 86 of 387

Starting and Operating Your
Vehicle
New Vehicle Break-In
Notice: Your vehicle doesn’t need an elaborate
“break-in.” But
it will perform better in the long run
if you follow these guidelines:
e
e
e
Don’t drive at any one speed - fast or
slow
- for the first 500 miles (805 km). Don’t
make full-throttle starts.
Avoid making hard stops for the first
200 miles
(322 km) or so. During this time your new
brake linings aren’t yet broken in. Hard stops
with new linings can mean premature wear and
earlier replacement. Follow
this breaking-in
guideline every time you get new brake linings.
Don’t tnw a trailer during break-in. See “Tawing
a Trailer” in the Index for more information.
Ignition Positions
With the ignition key in the
ignition switch, you can
turn the switch to four different positions.
Notice: If your key seems stuck in OFF and you
can’t turn
it, be sure you are using the correct key;
if
so, is it all the way in? If it is, then turn the
steering wheel left and right while you turn the key
hard. Turn the key only with your hand. Using a
switch. If none of these works, then your vehicle needs service.
iooi io furce ii cuuid Gi-e“-k tiie key UI tijZ. iyr,itior,
OFF: This is the only position in which you can remove
the key. This position locks your ignition and transaxle.
It’s a thzft-de:e;;ent feature.
2-23
ProCarManuals.com
Page 87 of 387

ACC (Accessory): This position lets you use your
electrical accessories such as power windows, power
sunroof (option), radio and the windshield wipers.
ON: This is the position the switch returns to after you
start your engine and release the switch. This is the
position for normal driving. Even when the engine is not
running, you can use
ON to operate your electrical
accessories and
to display some instrument panel
warning lights.
START: This position starts your engine. When the
engine starts, release the key. The ignition switch will
return
to ON for normal driving.
Key Reminder Warning
If you leave your key in the OFF ignition position, you
will hear a warning chime when you open the
driver’s door.
Always leave your key in
OFF. If you leave it in any
other position, you will drain the battery power.
Retained Accessory Power (RAP)
After you turn the ignition off and remove the key, you
will still have power
to accessories such as the
power windows, audio steering wheel controls, clock,
sunroof (option), accessory power outlet and the
radio for up
to 10 minutes. The instrument panel cluster
lights will stay on for
a few seconds, then go out.
Once you open a door, the power will shut off.
Starting Your Engine
Move your shift lever to PARK (P) or NEUTRAL (N).
Your engine won’t start in any other position
- that’s a
safety feature. To restart when you’re already moving,
use NEUTRAL
(N) only.
Notice: Don’t try to shift to PARK (P) if your
vehicle is moving.
If you do, you could damage the
transaxle. Shift to PARK (P) only when your
vehicle is stopped.
1. With your foot off the accelerator pedal, turn your
ignition key
to START. When the engine starts, let
go of the key. The idle speed will go down as
your engine gets warm.
Notice: Holding your key in START for longer than
15 seconds at a time will cause your battery to
be drained much sooner. And the excessive heat
can damage your starter motor. Wait about
15
seconds between each try to help avoid draining
your battery
or damaging your starter.
2. If it doesn’t start within 10 seconds, hold your key in
START for about
10 seconds at a time until your
engine starts. Wait about
15 seconds between
each
try.
2-24
ProCarManuals.com
Page 114 of 387

3 Instrument Panel
Instrument Panel Overview .............................. -3-2
Hazard Warning Flashers
................................ 3-4
Other Warning Devices
................................... 3-5
Horn
............................................................. 3-5
Tilt Wheel
..................................................... 3-5
Turn SignaVMultifunction Lever
......................... 3-6
Exterior Lamps
............................................. 3-14
Interior Lamps
.............................................. 3-17
Accessory Power Outlets
............................... 3-21
Ashtrays and Cigarette Lighter
........................ 3-22
Climate Controls
............................................ 3.23
Automatic Climate Control System
.................. 3-23
Outlet Adjustment
......................................... 3-27
Steering Wheel Climate Controls
..................... 3-28
Climate Controls Personalization
..................... 3.29
Warning Lights, Gages and Indicators
............. 3-30
Instrument Panel Cluster
............................... -3-31
Speedometer and Odometer
........................... 3-32
I acnorneier .-..
Safety Belt Reminder Light ............................. 3-33
Air Bag Readiness Light
................................ 3-34
Battery Warning Light
.................................... 3.35
Brake System Warning Light
.......................... 3.35
Anti-Lock Brake System Warning Light
............. 3-36
- n no .................................................
Traction Control System (TCS) Warning Light ... 3.37
Traction Control System Active Light
............... 3.38
Engine Coolant Temperature Gage
.................. 3.38
Oil Pressure Light
......................................... 3.42
Cruise Control Light
...................................... 3.43
Fuel Gage
................................................... 3.44
Driver Information Center
(DIC) ....................... 3.45
DIC Warnings and Messages
......................... 3.50
DIC Vehicle Personalization
............................ 3.52
Audio System(s)
............................................. 3.59
Setting the Time
........................................... 3.59
Radio with Cassette and CD
.......................... 3.60
Navigation/Radio System
............................... 3.69
Trunk-Mounted CD Changer
........................... 3-70
Personal Choice Radio Controls
...................... 3.73
Theft-Deterrent Feature
.................................. 3.73
Audio Steering Wheel Controls
....................... 3.74
Care of Your Cassette Tape Player
................. 3-74
Care of Your CDs
......................................... 3-75
Care
of Your CD Player ................................ 3-76
Malfunction Indicator
Lamp
............................. 3.39
I I...I-.-L--A.- ... n,.-J:, n-, --+in- VI luel awl lull ty I laulu I IGL, G~LIUI I u 1 T '2 7A ......................
Diversity Antenna System .............................. 3.76
Chime Level Adjustment
............................... -3-76
3-
1
ProCarManuals.com
Page 116 of 387

The main components of your instrument panel are the
following:
A. Air Outlet
B. Turn SignaVMultifunction Lever
C. Steering Wheel Controls for Climate Control System
D. Steering Wheel Controls for Audio System
E. Windshield Wiperwasher Control
F. Driver information Center (DIC)
G. Hazard Warning Flasher Button
H. Climate Control System
I. Instrument Panel Brightness Knob
J. Trip Odometer Buttons
K. Hood Release
L. Parking Brake
M. Cruise Control Lever
N. ignition Switch
0. Audio System
P. Accessory Power Outlet
Q. Glove Box (Trunk Release Lockout Switch inside)
3-3
ProCarManuals.com
Page 118 of 387

Other Warning Devices
If you carry reflective triangles, you can set one up at
the side
of the road about 300 feet (100 m) behind your
vehicle.
worn
Press the center area of the steering wheel to sound
the horn.
Tilt Wheel
A tilt wheel allows you to adjust the steering wheel
before you drive. You can also raise it to the highest
level to give your legs more room when you exit
and enter the vehicle.
The lever that allows you to tilt the steering wheel is
located on the left side of the steering column.
To tilt the wheel, hold the
wheel and pull the lever
toward you. Then move the wheel to a comfortable
position and release
the lever to lock the wheel
in piace.
3-5
ProCarManuals.com
Page 141 of 387

Move the control between the rear outlets up to direct
airflow through the upper outlets. Move the control down
to direct airflow through the floor outlets. Adjust the
direction of the airflow with the levers located in
the center of each rear outlet.
Operation Tips
Clear away any ice, snow or leaves from the air
inlets at the base of the windshield that may
block the flow of air into your vehicle.
Use of non-GM approved hood deflectors may
adversely affect the performance of the system.
Keep the path under the front seats clear of objects
to help circulate the air inside
of your vehicle more
effectively.
Steering Wheel Climate Controls
With this feature some
heating and cooling
controls can be adjusted at
the steering wheel.
3-28
ProCarManuals.com
Page 187 of 387

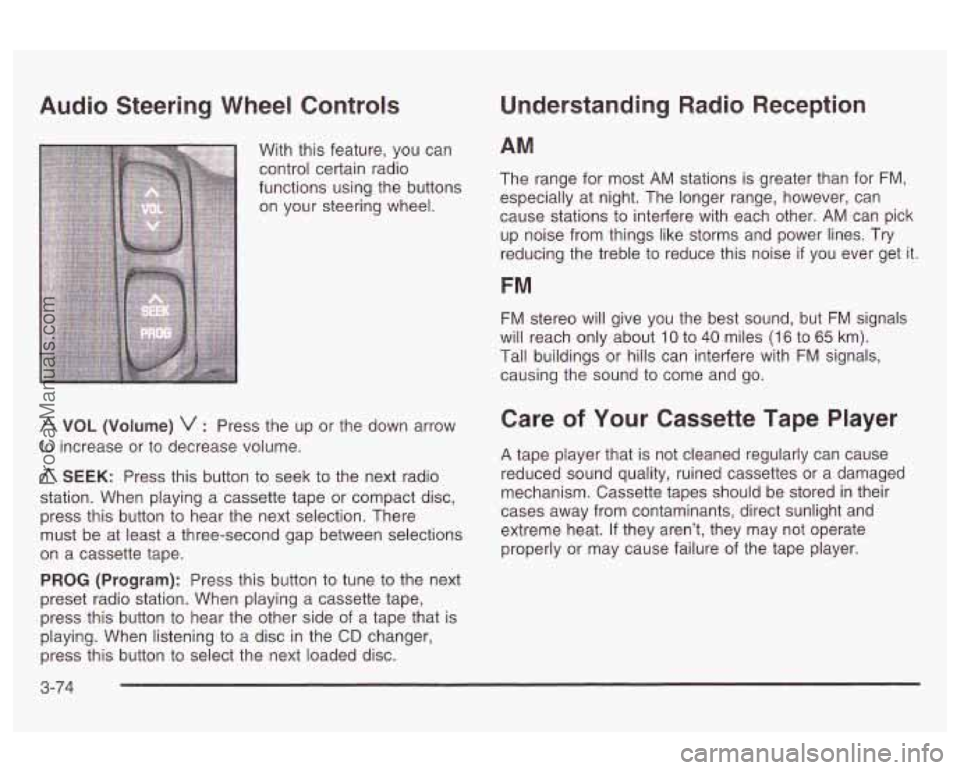
Audio Steering Wheel Controls
With this feature, you can
control certain radio
functions using the buttons
on your steering wheel.
A VOL (Volume) v : Press the up or the down arrow
to increase or to decrease volume.
A SEEK: Press this button to seek to the next radio
station. When playing a cassette tape or compact disc,
press this button to hear the next selection. There
must be at least a three-second gap between selections
on a cassette tape.
PROG (Program): Press this button to tune to the next
preset radio station. When playing a cassette tape,
press this button
to hear the other side of a tape that is
playing. When listening to a disc in the
CD changer,
press this button to select the next loaded disc.
Understanding Radio Reception
AM
The range for most AM stations is greater than for FM,
especially at night. The longer range, however, can
cause stations
to interfere with each other. AM can pick
up noise from things like storms and power lines.
Try
reducing the treble to reduce this noise if you ever get it.
FM
FM stereo will give you the best sound, but FM signals
will reach only about
10 to 40 miles (1 6 to 65 km).
Tall buildings or hills can interfere with
FM signals,
causing the sound to come and go.
Care of Your Cassette Tape Player
A tape player that is not cleaned regularly can cause
reduced sound quality, ruined cassettes or a damaged
mechanism. Cassette tapes should be stored in their
cases away from contaminants, direct sunlight and
extreme heat.
If they aren’t, they may not operate
properly or may cause failure of the tape player.
3-74
ProCarManuals.com