OLDSMOBILE BRAVADA 1997 Owners Manual
Manufacturer: OLDSMOBILE, Model Year: 1997, Model line: BRAVADA, Model: OLDSMOBILE BRAVADA 1997Pages: 358, PDF Size: 18.02 MB
Page 271 of 358

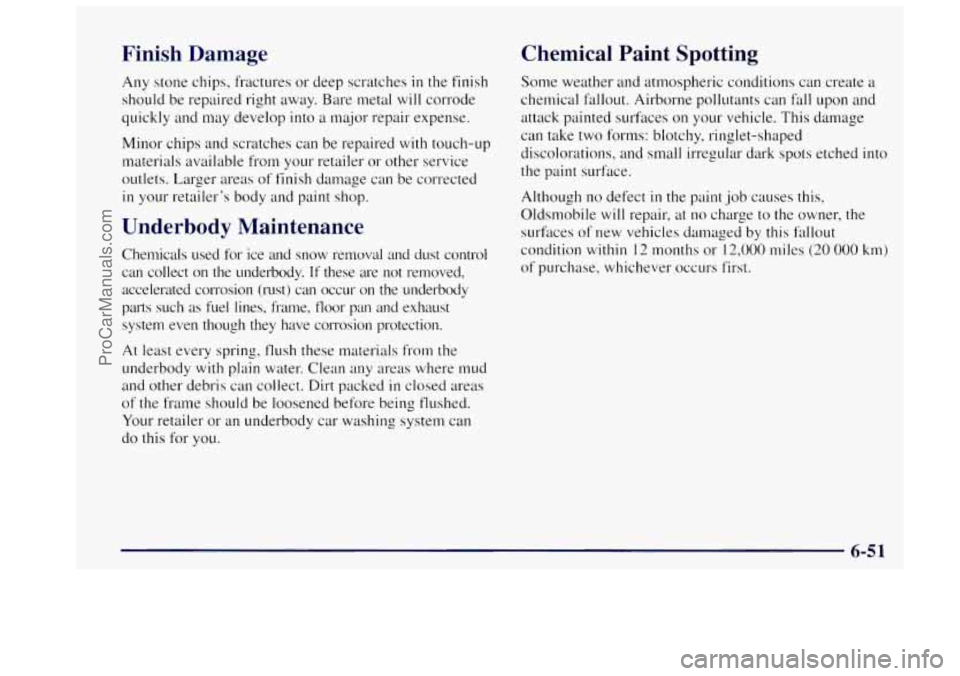
Finish Damage
Any stone chips, fractures or deep scratches in the finish
should be repaired right away. Bare metal will corrode
quickly and may develop
into a major repair expense.
Minor chips and scratches can be repaired with touch-up
materials available from
your retailer or other service
outlets. Larger areas of finish damage can be corrected
in your retailer’s body and paint shop.
Underbody Maintenance
Chemicals used for ice and snow removal and dust control
can collect on the underbody. If these are not removed,
accelemted corrosion (rust) can occur on the underbody
parts such as fuel lines, frame,
floor pan and exhaust
system even though they have corrosion protection.
At least every spring, flush these materials from the
underbody
with plain water. Clean any areas where mud
and other debris can collect. Dirt packed
in closed areas
of the frame should be loosened before being, flushed.
Your retailer
or an underbody car washing system can
do this for you.
Chemical Paint Spotting
Some weather and atmospheric conditions can create a
chemical fallout. Airborne pollutants can
fall upon and
attack painted surfaces on your vehicle. This damage
can take two forms: blotchy, ringlet-shaped
discolorations, and small irregular dark spots etched into
the paint surface.
Although no de.fect
in the paint job causes this,
Oldsmobile
will repair, at no charge to the owner, the
surfaces
of new vehicles damaged by this fallout
condition
within 12 months or 12,000 miles (20 000 km)
of purchase, whichever occurs first.
6-51
-
ProCarManuals.com
Page 272 of 358

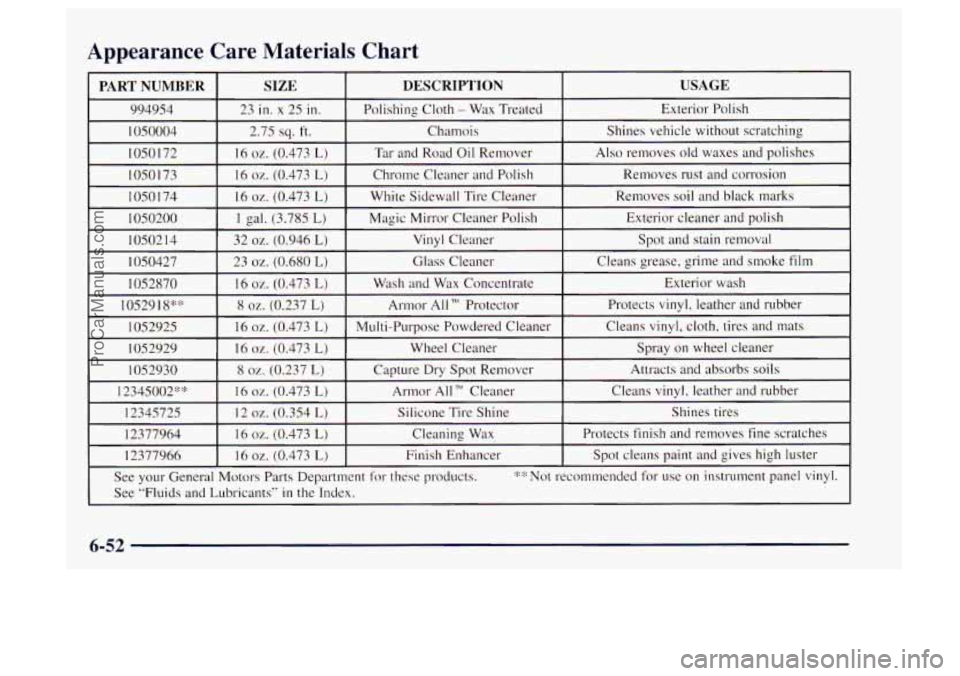
Appearance Care Materials Chart
6-52
ProCarManuals.com
Page 273 of 358

Vehicle Identification Number (VIN)
I I1 11111111 1111 111 111111 111 111111 I1 111111111111 111111111 II J 0
SAMPLE4UXVM072675 I
IIIIIIIIIIIII 11l11111111l11 IIIIIIIIIIIIIIIIIIIIIIIIIIIIIIII
CODE MODEL YEAR PLANT
This is the legal identifier for your Oldsmobile. It appears
on a plate in the front corner of the instrument panel, on
the driver’s side. You can see it if you look through the
windshield from outside your vehicle. The VIN also appears
on the Vehicle Certification and Service Parts
labels and the certificates of title and registration.
Engine Identification
The 8th character in your VIN is the engine code. This
code will help you identify your engine, specifications
and replacement parts.
Service Parts Identification Label
You’ll find this label on the driver’s door lock pillar. It’s very
helpful if you eves need to order parts.
On this label is:
your VIN,
the model designation,
paint information and
a list of all production options and
special equipment.
Be sure that this label is not removed from the vehicle.
6-53
ProCarManuals.com
Page 274 of 358

Electrical System
Add-on Electrical Equipment
I NOTICE:
Don’t add anything electrical to your Oldsmobile
unless you check with your retailer first. Some
electrical equipment can damage your vehicle
and the damage wouldn’t be covered by your
warranty. Some add-on electrical equipment can
keep other components from working
as
they should.
Your vehicle has an air bag system. Before attempting to
add anything electrical to your Oldsmobile, see
“Servicing Your Air Bag-Equipped Oldsmobile”
in
the index.
Headlamps
The headlamp wiring is protected by an internal circuit
breaker.
An electrical overload will cause the lamps to
go on and off, or in some cases to remain off.
If this happens, have your headlamp wiring checked
right away.
Windshield Wipers
The windshield wiper motor is protected by a circuit
breaker
and a fuse. If the motor overheats due to heavy
snow, etc., the wiper
will stop until the motor cools. If
the overload is caused by some electrical problem, be
sure
to get it fixed.
Power Windows and Other Power Options
Circuit breakers protect the power windows and other
power accessories. When the current load
is too heavy,
the circuit breaker opens and closes, protecting the
circuit
until the problem is fixed or goes away.
6-54
ProCarManuals.com
Page 275 of 358

Fuses and Circuit Breakers
The wiring circuits in your vehicle are protected from
short circuits by a combination of fuses, circuit breakers,
and fusible thermal links. This greatly reduces the
chance of fires caused by electrical problems.
Look at the silver-colored band inside the fuse.
If the
band
is broken or melted, replace the fuse. Be sure you
replace a bad fuse
with a new one of the identical size
and rating.
If you ever have a problem on the road and don’t have a
spare fuse, you can borrow one that has the
same
amperage. Just pick some feature of your vehicle that
you can get along without
-- like the radio or cigarette
lighter
-- and use its fuse, if it is the correct amperage.
Replace
it as soon as you can.
Instrument Panel Fuse Block
The fuse block is at the
driver’s end
of the
instrument panel.
Remove the cover by turning the fastener
counterclockwise. Extra fuses and
the fuse extractor are
provided
in the cover. To reinstall the fuse panel cover,
push
in and turn the fastener clockwise.
6-55
ProCarManuals.com
Page 276 of 358

I
ACCY
d
FuseKircuit Breaker
Usage
A
B
Power Door Locks, Power Seat,
Power Seat Lumbar, Remote
Keyless Entry
Power-Windows, Sunroof Module/Motor
FuseKircuit Breaker Usage
1
2
3
Stoplamps, Hazard Lamps, Chime,
Center High-Mounted Stoplamp
Relay, Center High-Mounted
Stoplamp
Dome Lamps, Cargo Lamps, Visor
Vanity Mirror, Cigarette Lighter,
Inside Rearview Mirror Lamp,
Overhead Console Lamps, Glove
Box
Lamp, Horns, Horn Relay, IP
Courtesy Lamps, Power Outside
Rearview Mirror, Liftglass Release
Motor, Illuminated Entry Module
Parking Lamps, License Plate Lamps, Electric Shift Transfer Case Module,
Underhood Lamp, Rear Wiper, Fog
Lamp Relay, Door Switch Lamp,
Ashtray Lamp, Headlamp Switch
ProCarManuals.com
Page 277 of 358

FuseKircuit Breaker Usage
4
5
6
7
A/C Compressor Relay, Cluster
Chime Module, DRL Relay Coil,
Four-Wheel-Drive Indicator Lamp,
DRL Module, Rear Defog Timer,
Transfer Case Control Module Ignition, SIR Redundant Ignition,
RKE Ignition, Fuel Sender Module
Oxygen Sensor Heater, Exhaust Gas
Recirculation, Cam Sensor, CANN.
Purge, Canister Vent Solenoid, Mass
Airflow Sensor, Cam Shaft Sensor
Blower Motor, Temperature Door
Motor, HI Blower Relay Coil
Power Auxiliary Outlets, Assembly
Line Diagnostic Link
FuseKircuit
Breaker Usage
8
9
10
11
12
13
14
15
Rear Window Defogger
PCMNCM Battery, Fuel Pump
PCMNCM Ignition, Injectors, Crank
Sensor, Coil Driver Module
Radio, Inside Rearview Mirror Map
Lamp, Overhead Console Reading
Lamps, Rear Wiper, Rear Washer,
Overhead Console Display
Anti-Lock Braking System,
VCM IGN-3
Clock, Radio Battery, CD Player
A/C Compressor Battery Feed
Daytime Running Lamps, Fog Lamps,
Fog Lamp Relay
6-57
ProCarManuals.com
Page 278 of 358

17
18
19
20
21
22
Fuse/Circuit Breaker Usage
16 Turn Signals and Back-up Lamps,
Brake-Transmission Shift
Interlock Solenoid
Windshield Washer, Windshield
Wiper Motor
Not Used
Electric Shift Transfer Case
Crank Relay, Air Bag Module
Not Used
Air Bag Module
FuseKircuit
Breaker Usage
23
24
Cluster Illurnination, Radio Illumination, Heater Lamp,
4WD
Illumination, Chime Module, Fog
Lamp Illumination, Rear Wiper
Switch Illumination, Rear Defogger
Switch Illumination, Liftglass Release
Switch Illumination, Overhead
Console Illumination
PRNDL Power,
4L6OE
Automatic Transmission
ProCarManuals.com
Page 279 of 358

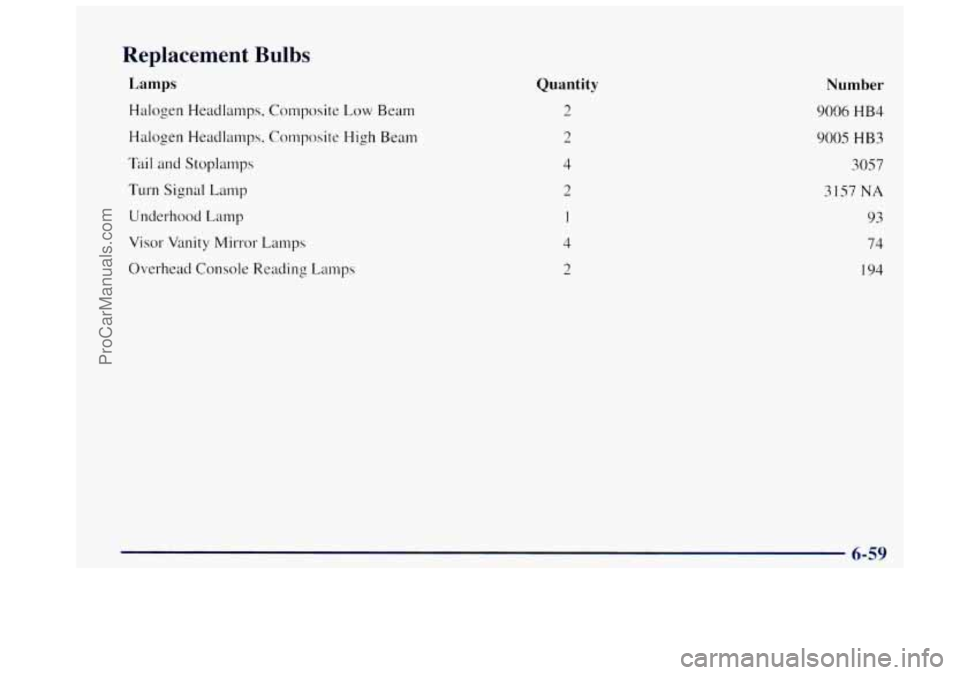
Replacement Bulbs
Lamps
Halogen Headlamps, Composite Low Beam
Halogen Headlamps, Composite
High Beam
Tail and Stoplamps
Turn Signal Lamp
Underhood
Lamp
Visor Vmity Mirror Lamps
Overhead Console Reading Lamps
Quantity
2
2
4
2
1
4
2
Number
9006 HB4
9005 HB3
3057
3157 NA
93
74
194
6-59
ProCarManuals.com
Page 280 of 358

Capacities and Specifications
Engine Description ............ “VORTEC” 4300
Type
.................................... V6
VINCode ................................. W
Horsepower
................... 190 at 4,400 rpm
Thermostat Specification
........... 195 “F (9 1 “C)
Spark Plug
Gap .......... 0.045 inches (0.1 I4 cm)
Firing Order
...................... 1-6-5-4-3-2
Wheels and Tires
Wheel Nut Torque ............ 95 lb-ft (130 N-m)
Tire Pressure ...................... Look at the
Certificationnire label. See
“Loading Your Vehicle” in the Index.
Normal Maintenance Replacement Parts
Replacement part numbers listed in this section are
based
on the latest information available at the time of
printing, and are subject to change.
If a part listed in this
manual is not the same as the part used in your vehicle
when
it was built, or if you have any questions, please
contact your retailer.
Oil Filter.
.............................. PFS2
Air Cleaner Filter ...................... A1163C
PCV Valve
.......................... CV746C
Automatic Transmission Filter Kit
...... 24200796
Spark Plugs
.......................... ,41-932
Fuel Filter
............................. GF48 1
Windshield Wiper Blade . . Trico (20 inched50.8 cm)
Backglass Wiper Blade
... Trico (14 inched35.6 cm)
6-60
ProCarManuals.com