clock Oldsmobile Bravada 2000 s User Guide
[x] Cancel search | Manufacturer: OLDSMOBILE, Model Year: 2000, Model line: Bravada, Model: Oldsmobile Bravada 2000Pages: 364, PDF Size: 2.6 MB
Page 223 of 364
5-16 How to Add Coolant to the Radiator
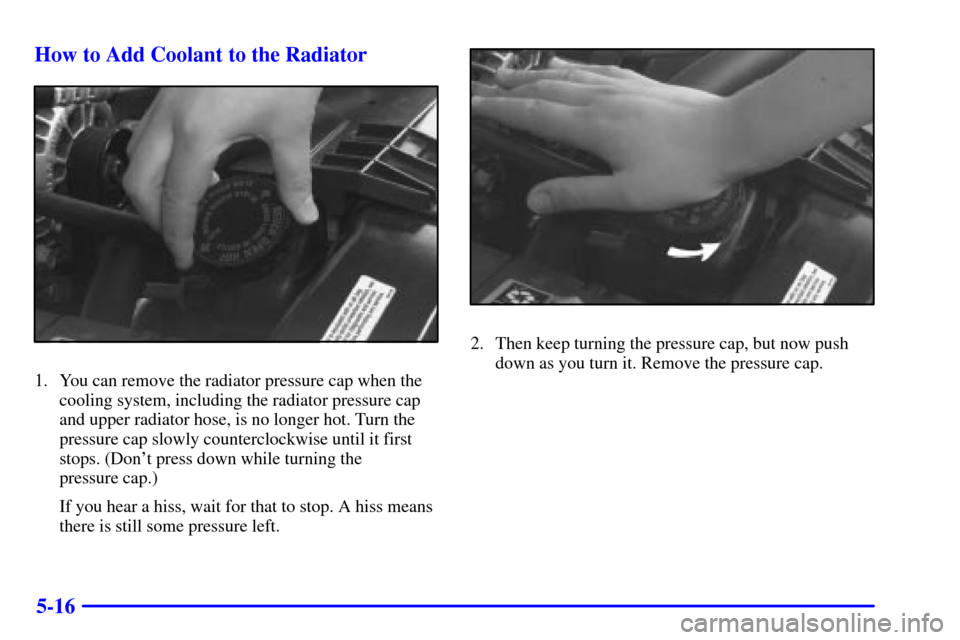
1. You can remove the radiator pressure cap when the
cooling system, including the radiator pressure cap
and upper radiator hose, is no longer hot. Turn the
pressure cap slowly counterclockwise until it first
stops. (Don't press down while turning the
pressure cap.)
If you hear a hiss, wait for that to stop. A hiss means
there is still some pressure left.
2. Then keep turning the pressure cap, but now push
down as you turn it. Remove the pressure cap.
Page 228 of 364
5-21
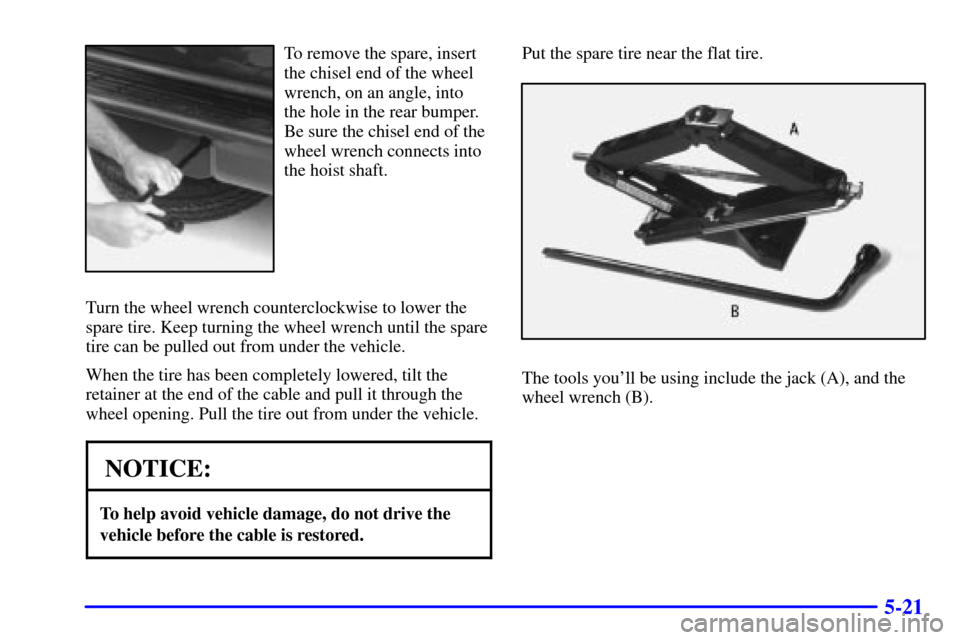
To remove the spare, insert
the chisel end of the wheel
wrench, on an angle, into
the hole in the rear bumper.
Be sure the chisel end of the
wheel wrench connects into
the hoist shaft.
Turn the wheel wrench counterclockwise to lower the
spare tire. Keep turning the wheel wrench until the spare
tire can be pulled out from under the vehicle.
When the tire has been completely lowered, tilt the
retainer at the end of the cable and pull it through the
wheel opening. Pull the tire out from under the vehicle.
NOTICE:
To help avoid vehicle damage, do not drive the
vehicle before the cable is restored.
Put the spare tire near the flat tire.
The tools you'll be using include the jack (A), and the
wheel wrench (B).
Page 229 of 364
5-22
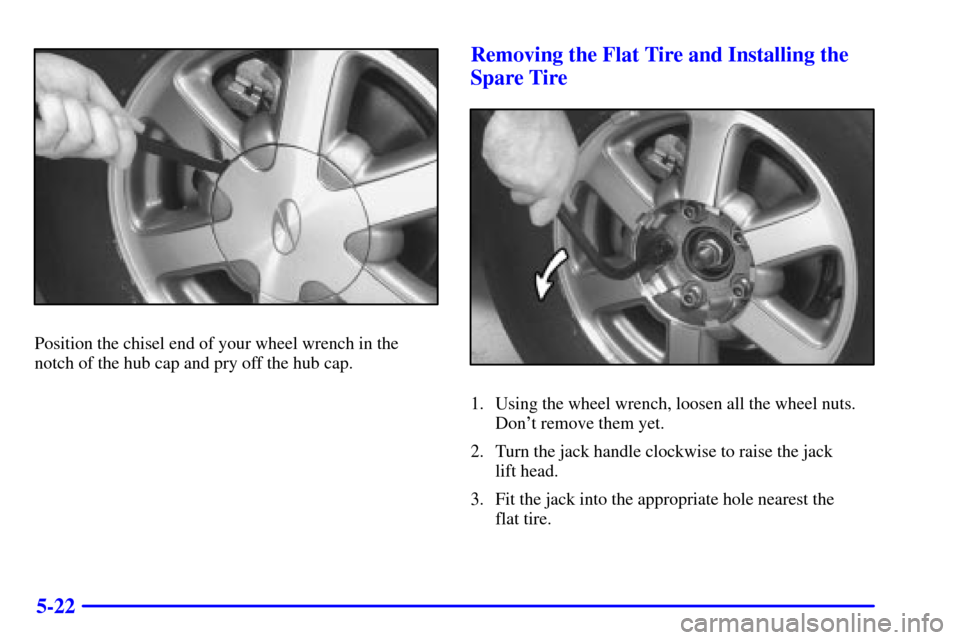
Position the chisel end of your wheel wrench in the
notch of the hub cap and pry off the hub cap.
Removing the Flat Tire and Installing the
Spare Tire
1. Using the wheel wrench, loosen all the wheel nuts.
Don't remove them yet.
2. Turn the jack handle clockwise to raise the jack
lift head.
3. Fit the jack into the appropriate hole nearest the
flat tire.
Page 231 of 364
5-24
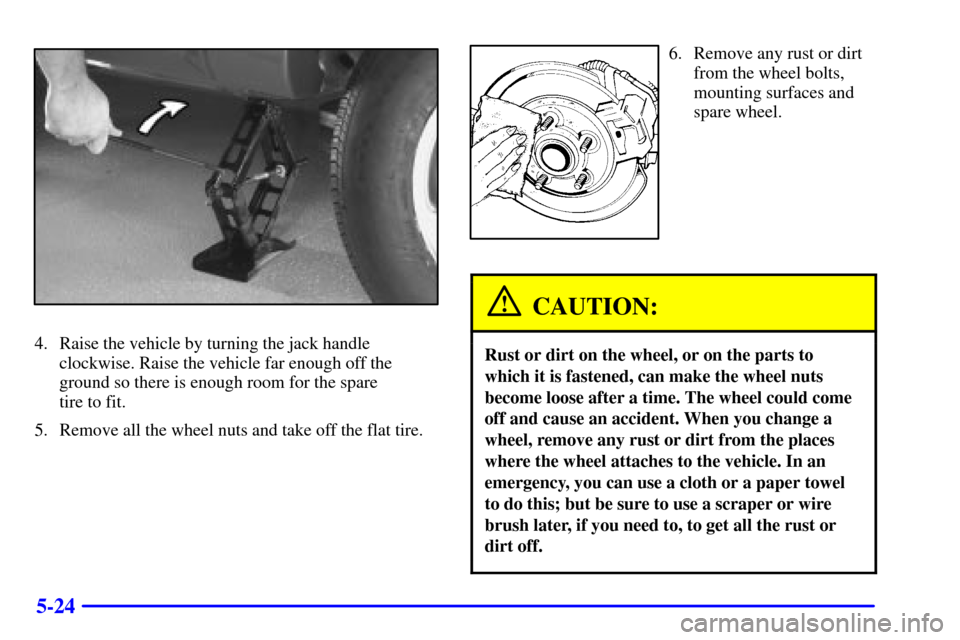
4. Raise the vehicle by turning the jack handle
clockwise. Raise the vehicle far enough off the
ground so there is enough room for the spare
tire to fit.
5. Remove all the wheel nuts and take off the flat tire.
6. Remove any rust or dirt
from the wheel bolts,
mounting surfaces and
spare wheel.
CAUTION:
Rust or dirt on the wheel, or on the parts to
which it is fastened, can make the wheel nuts
become loose after a time. The wheel could come
off and cause an accident. When you change a
wheel, remove any rust or dirt from the places
where the wheel attaches to the vehicle. In an
emergency, you can use a cloth or a paper towel
to do this; but be sure to use a scraper or wire
brush later, if you need to, to get all the rust or
dirt off.
Page 232 of 364
5-25
CAUTION:
Never use oil or grease on studs or nuts. If you
do, the nuts might come loose. Your wheel could
fall off, causing a serious accident.
7. Place the spare on the wheel mounting surface.
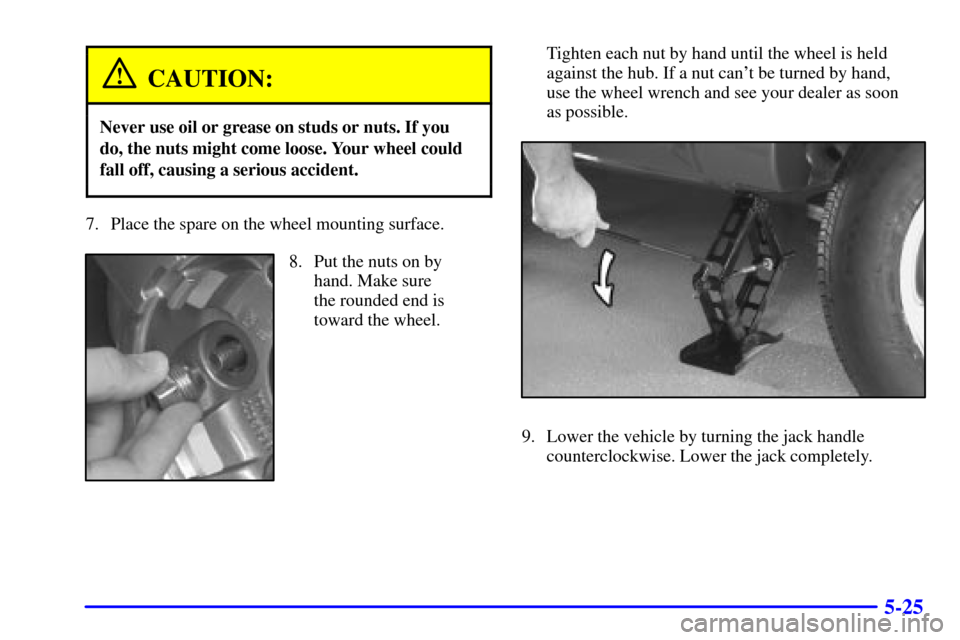
8. Put the nuts on by
hand. Make sure
the rounded end is
toward the wheel.Tighten each nut by hand until the wheel is held
against the hub. If a nut can't be turned by hand,
use the wheel wrench and see your dealer as soon
as possible.
9. Lower the vehicle by turning the jack handle
counterclockwise. Lower the jack completely.
Page 244 of 364
6-6
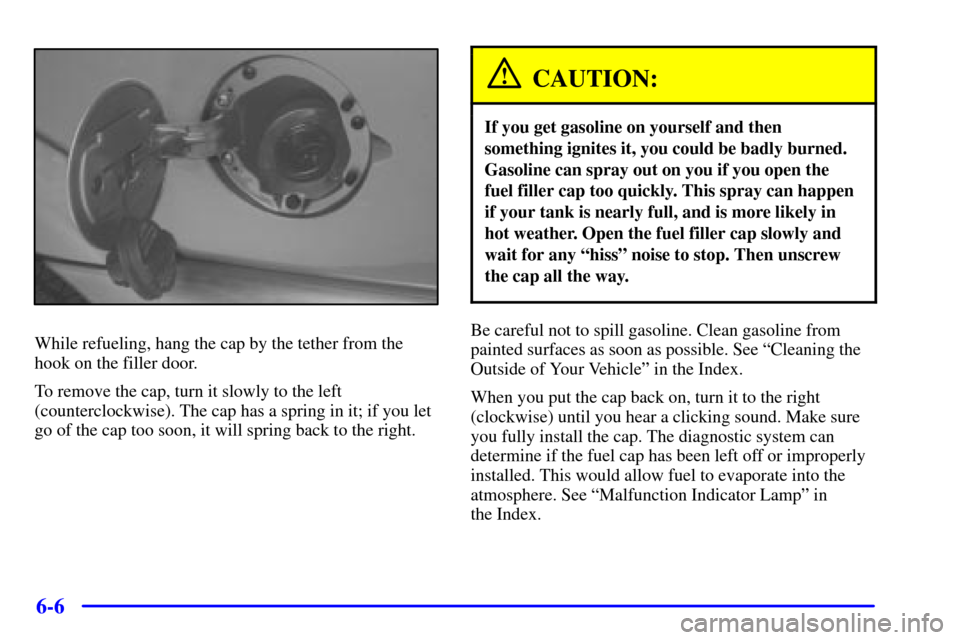
While refueling, hang the cap by the tether from the
hook on the filler door.
To remove the cap, turn it slowly to the left
(counterclockwise). The cap has a spring in it; if you let
go of the cap too soon, it will spring back to the right.
CAUTION:
If you get gasoline on yourself and then
something ignites it, you could be badly burned.
Gasoline can spray out on you if you open the
fuel filler cap too quickly. This spray can happen
if your tank is nearly full, and is more likely in
hot weather. Open the fuel filler cap slowly and
wait for any ªhissº noise to stop. Then unscrew
the cap all the way.
Be careful not to spill gasoline. Clean gasoline from
painted surfaces as soon as possible. See ªCleaning the
Outside of Your Vehicleº in the Index.
When you put the cap back on, turn it to the right
(clockwise) until you hear a clicking sound. Make sure
you fully install the cap. The diagnostic system can
determine if the fuel cap has been left off or improperly
installed. This would allow fuel to evaporate into the
atmosphere. See ªMalfunction Indicator Lampº in
the Index.
Page 271 of 364

6-33
5. Turn the bulb assembly counterclockwise to
remove it.
6. Put the new bulb assembly into the headlamp
assembly and turn it clockwise until it is tight.
7. Plug in the electrical connector.
8. Put the headlamp assembly back into the vehicle.
Install the two retaining clips.
Front Turn Signal Lamps
1. Remove the headlamp assembly as shown earlier in
this section.
2. Twist the bulb socket
counterclockwise to
remove it from the
headlamp assembly.
3. Pull the bulb straight out to remove it from
the socket.
4. Push the new bulb into the socket until it snaps
into place.
5. Put the bulb socket into the lamp assembly and twist
it clockwise until it is tight.
6. Put the headlamp assembly back into the vehicle.
Install the two retaining clips.
Page 272 of 364
6-34 Taillamps
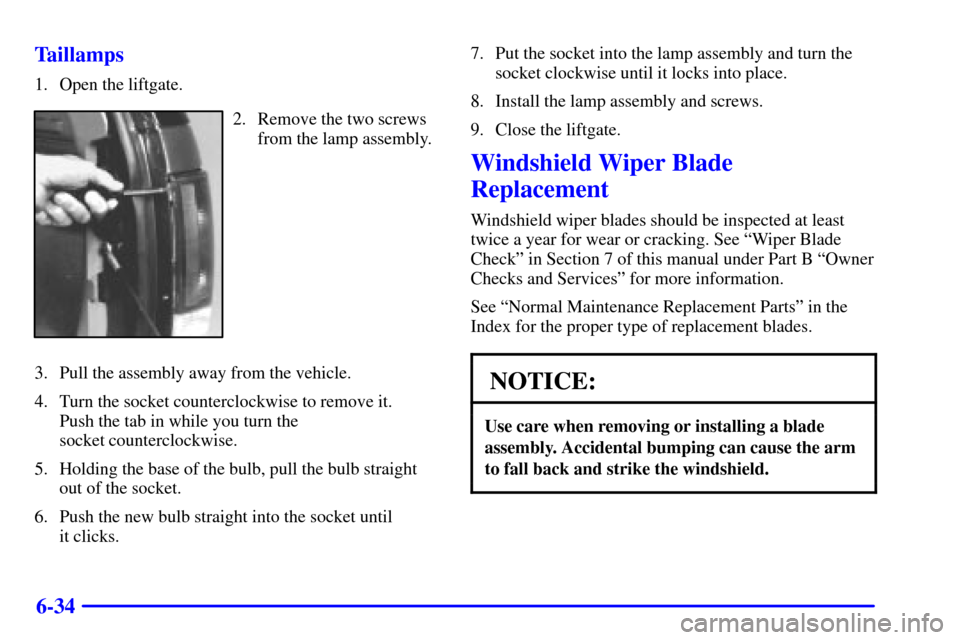
1. Open the liftgate.
2. Remove the two screws
from the lamp assembly.
3. Pull the assembly away from the vehicle.
4. Turn the socket counterclockwise to remove it.
Push the tab in while you turn the
socket counterclockwise.
5. Holding the base of the bulb, pull the bulb straight
out of the socket.
6. Push the new bulb straight into the socket until
it clicks.7. Put the socket into the lamp assembly and turn the
socket clockwise until it locks into place.
8. Install the lamp assembly and screws.
9. Close the liftgate.
Windshield Wiper Blade
Replacement
Windshield wiper blades should be inspected at least
twice a year for wear or cracking. See ªWiper Blade
Checkº in Section 7 of this manual under Part B ªOwner
Checks and Servicesº for more information.
See ªNormal Maintenance Replacement Partsº in the
Index for the proper type of replacement blades.
NOTICE:
Use care when removing or installing a blade
assembly. Accidental bumping can cause the arm
to fall back and strike the windshield.
Page 293 of 364
6-55
If you ever have a problem on the road and don't have
a spare fuse, you can borrow one that has the same
amperage. Just pick some feature of your vehicle that
you can get along without
-- like the radio or cigarette
lighter
-- and use its fuse, if it is the correct amperage.
Replace it as soon as you can.
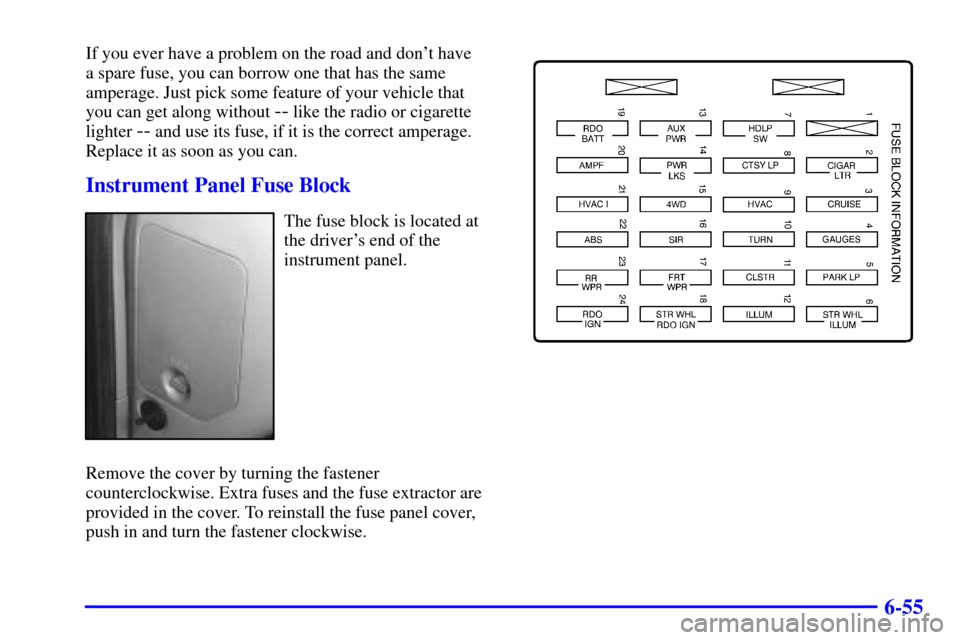
Instrument Panel Fuse Block
The fuse block is located at
the driver's end of the
instrument panel.
Remove the cover by turning the fastener
counterclockwise. Extra fuses and the fuse extractor are
provided in the cover. To reinstall the fuse panel cover,
push in and turn the fastener clockwise.
Page 295 of 364
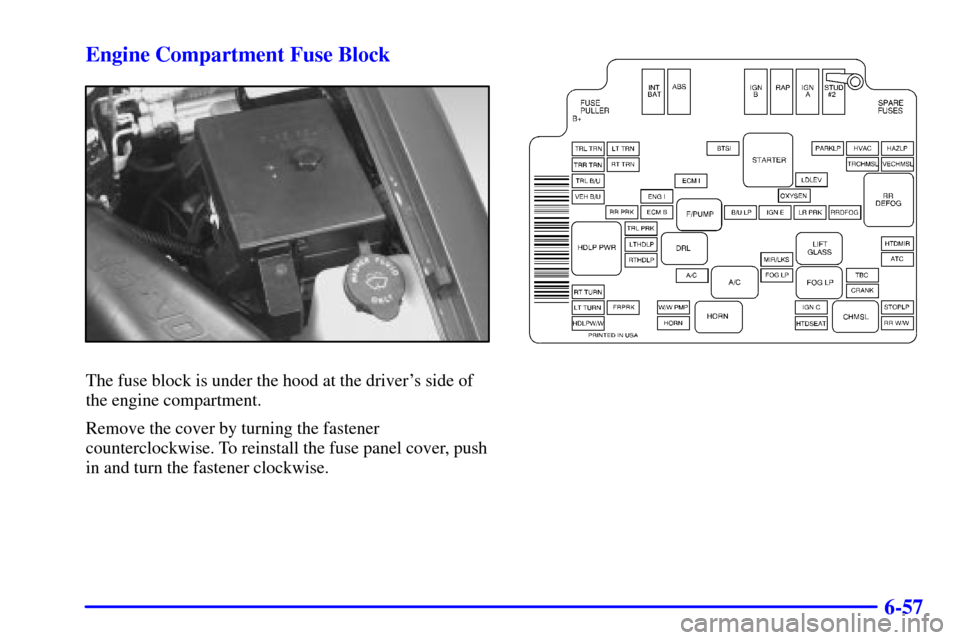
6-57 Engine Compartment Fuse Block
The fuse block is under the hood at the driver's side of
the engine compartment.
Remove the cover by turning the fastener
counterclockwise. To reinstall the fuse panel cover, push
in and turn the fastener clockwise.