clock Oldsmobile Bravada 2002 s Owner's Guide
[x] Cancel search | Manufacturer: OLDSMOBILE, Model Year: 2002, Model line: Bravada, Model: Oldsmobile Bravada 2002Pages: 393, PDF Size: 2.79 MB
Page 279 of 393
5-22
Secondary Latch System
The spare tire hoist assembly is equipped with a
secondary latch system. It's designed to stop the spare
tire from suddenly falling off your vehicle. For the
secondary latch to work, the spare tire must be stored
with the valve stem pointing up. See ªStoring a Flat or
Spare Tire and Toolsº in the Index for instructions on
storing the spare tire correctly.
CAUTION:
Before beginning this procedure read all the
instructions. Failure to read and follow the
instructions could damage the hoist assembly
and you and others could get hurt. Read and
follow the instructions listed below.
To release the spare tire from the secondary latch
do the following:
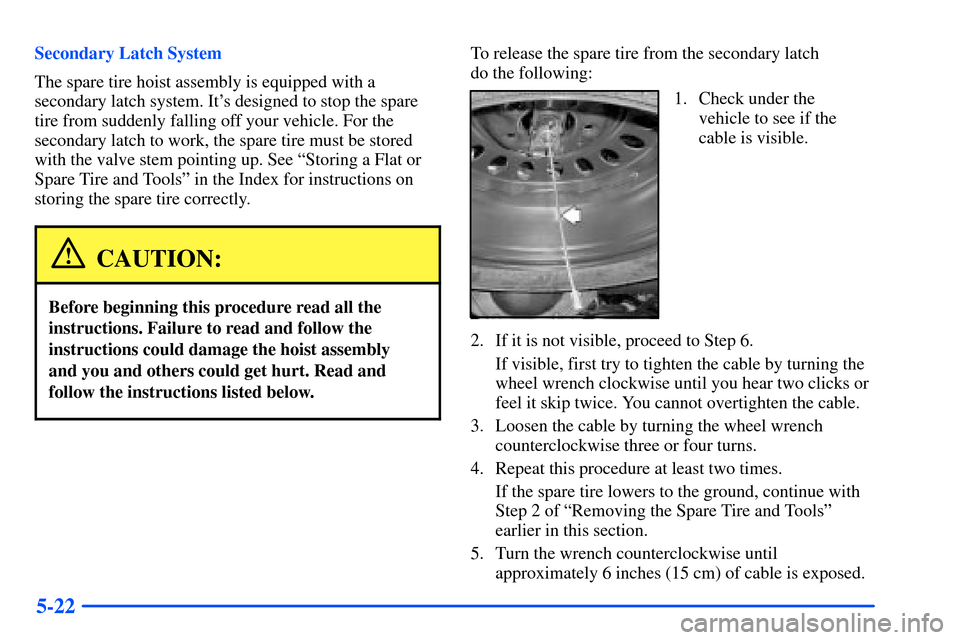
1. Check under the
vehicle to see if the
cable is visible.
2. If it is not visible, proceed to Step 6.
If visible, first try to tighten the cable by turning the
wheel wrench clockwise until you hear two clicks or
feel it skip twice. You cannot overtighten the cable.
3. Loosen the cable by turning the wheel wrench
counterclockwise three or four turns.
4. Repeat this procedure at least two times.
If the spare tire lowers to the ground, continue with
Step 2 of ªRemoving the Spare Tire and Toolsº
earlier in this section.
5. Turn the wrench counterclockwise until
approximately 6 inches (15 cm) of cable is exposed.
Page 280 of 393
5-23
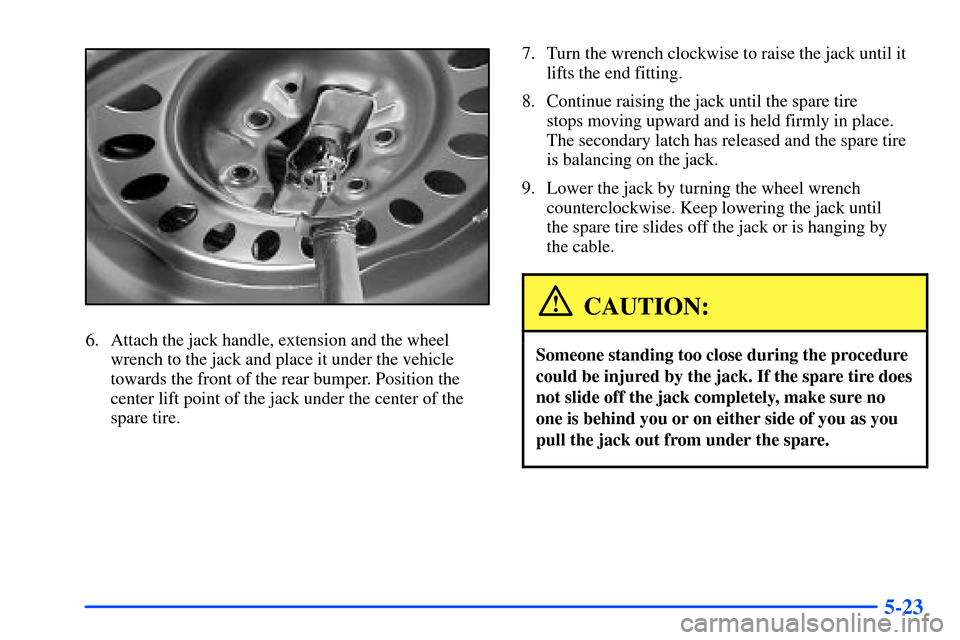
6. Attach the jack handle, extension and the wheel
wrench to the jack and place it under the vehicle
towards the front of the rear bumper. Position the
center lift point of the jack under the center of the
spare tire.7. Turn the wrench clockwise to raise the jack until it
lifts the end fitting.
8. Continue raising the jack until the spare tire
stops moving upward and is held firmly in place.
The secondary latch has released and the spare tire
is balancing on the jack.
9. Lower the jack by turning the wheel wrench
counterclockwise. Keep lowering the jack until
the spare tire slides off the jack or is hanging by
the cable.
CAUTION:
Someone standing too close during the procedure
could be injured by the jack. If the spare tire does
not slide off the jack completely, make sure no
one is behind you or on either side of you as you
pull the jack out from under the spare.
Page 281 of 393
5-24
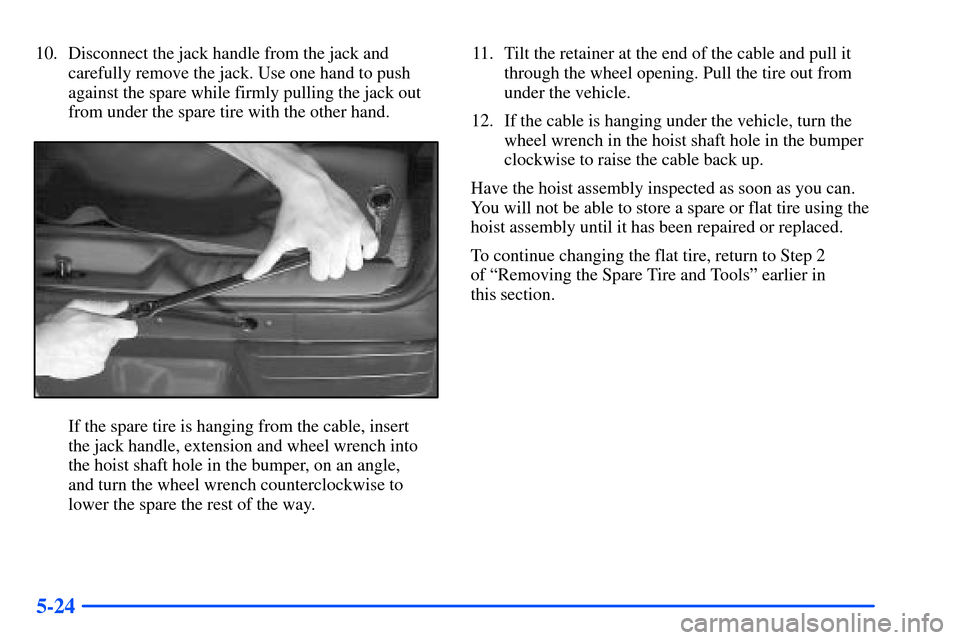
10. Disconnect the jack handle from the jack and
carefully remove the jack. Use one hand to push
against the spare while firmly pulling the jack out
from under the spare tire with the other hand.
If the spare tire is hanging from the cable, insert
the jack handle, extension and wheel wrench into
the hoist shaft hole in the bumper, on an angle,
and turn the wheel wrench counterclockwise to
lower the spare the rest of the way.11. Tilt the retainer at the end of the cable and pull it
through the wheel opening. Pull the tire out from
under the vehicle.
12. If the cable is hanging under the vehicle, turn the
wheel wrench in the hoist shaft hole in the bumper
clockwise to raise the cable back up.
Have the hoist assembly inspected as soon as you can.
You will not be able to store a spare or flat tire using the
hoist assembly until it has been repaired or replaced.
To continue changing the flat tire, return to Step 2
of ªRemoving the Spare Tire and Toolsº earlier in
this section.
Page 282 of 393
5-25 Removing the Flat Tire and Installing
the Spare Tire
1. Using the wheel wrench,
loosen all the wheel
nuts. Don't remove
them yet.
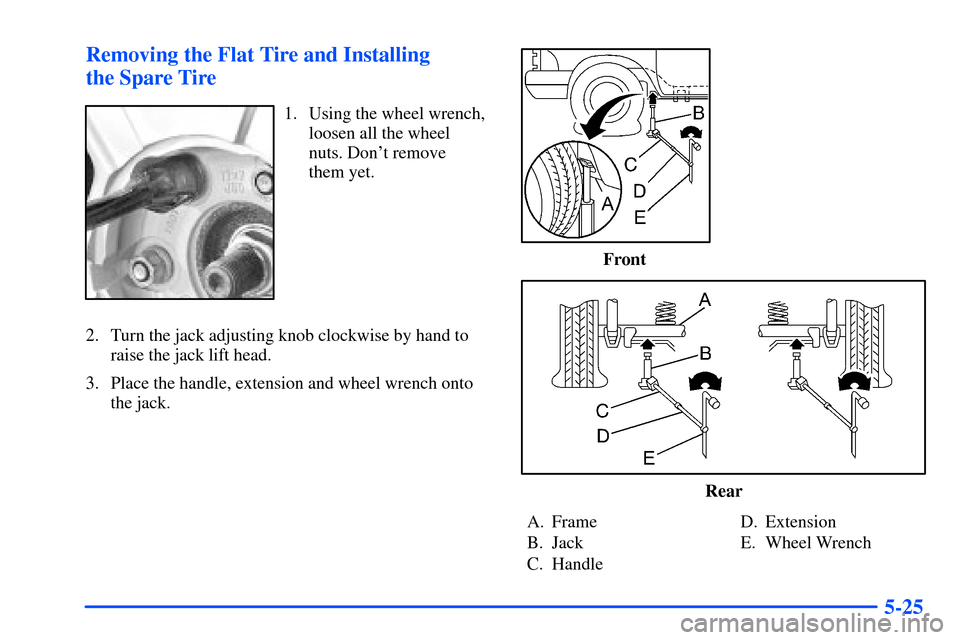
2. Turn the jack adjusting knob clockwise by hand to
raise the jack lift head.
3. Place the handle, extension and wheel wrench onto
the jack.
Front
Rear
A. Frame
B. Jack
C. HandleD. Extension
E. Wheel Wrench
Page 283 of 393
5-26
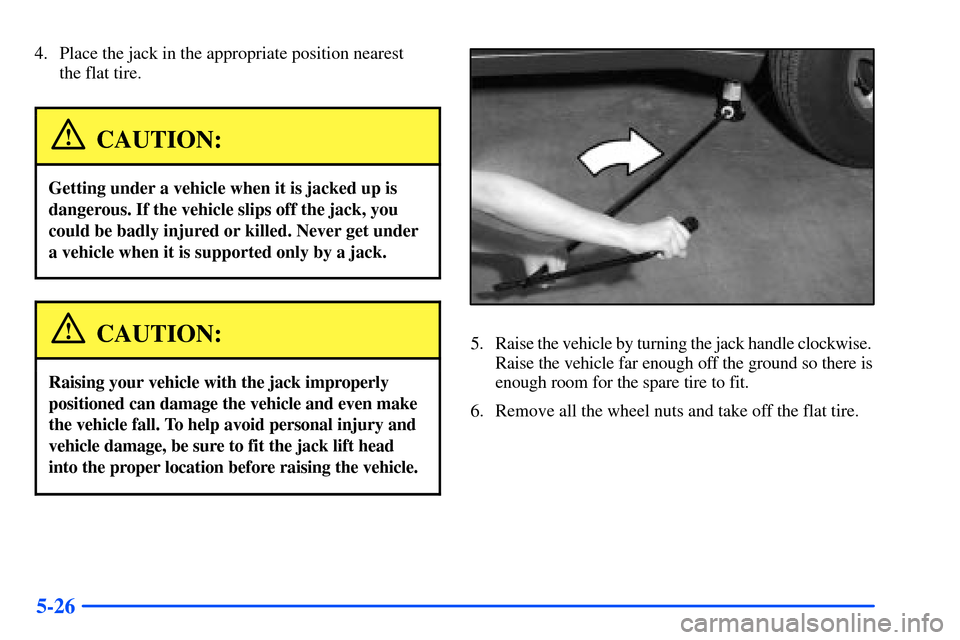
4. Place the jack in the appropriate position nearest
the flat tire.
CAUTION:
Getting under a vehicle when it is jacked up is
dangerous. If the vehicle slips off the jack, you
could be badly injured or killed. Never get under
a vehicle when it is supported only by a jack.
CAUTION:
Raising your vehicle with the jack improperly
positioned can damage the vehicle and even make
the vehicle fall. To help avoid personal injury and
vehicle damage, be sure to fit the jack lift head
into the proper location before raising the vehicle.
5. Raise the vehicle by turning the jack handle clockwise.
Raise the vehicle far enough off the ground so there is
enough room for the spare tire to fit.
6. Remove all the wheel nuts and take off the flat tire.
Page 285 of 393
5-28
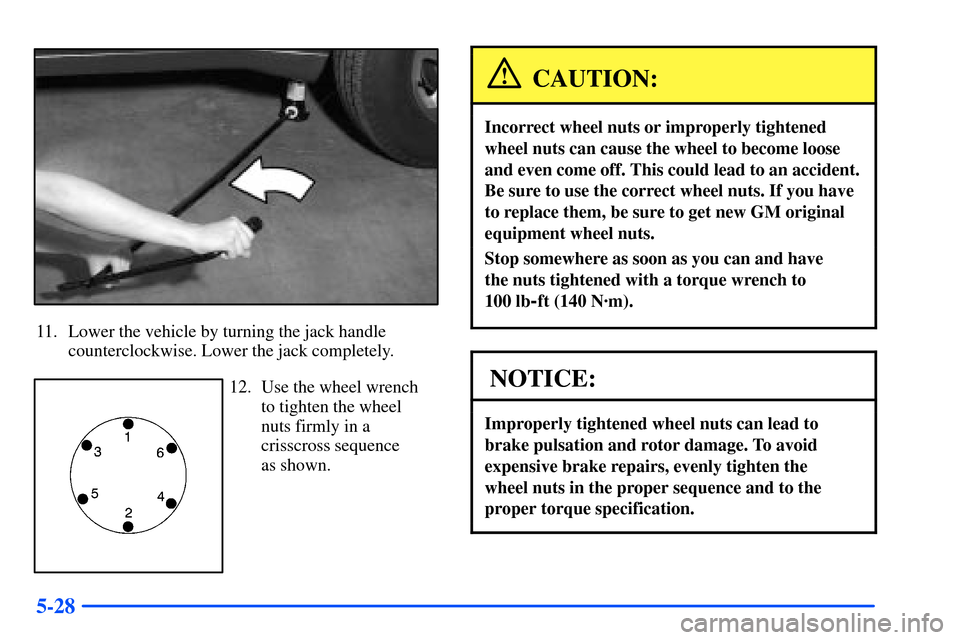
11. Lower the vehicle by turning the jack handle
counterclockwise. Lower the jack completely.
12. Use the wheel wrench
to tighten the wheel
nuts firmly in a
crisscross sequence
as shown.
CAUTION:
Incorrect wheel nuts or improperly tightened
wheel nuts can cause the wheel to become loose
and even come off. This could lead to an accident.
Be sure to use the correct wheel nuts. If you have
to replace them, be sure to get new GM original
equipment wheel nuts.
Stop somewhere as soon as you can and have
the nuts tightened with a torque wrench to
100 lb
-ft (140 N´m).
NOTICE:
Improperly tightened wheel nuts can lead to
brake pulsation and rotor damage. To avoid
expensive brake repairs, evenly tighten the
wheel nuts in the proper sequence and to the
proper torque specification.
Page 295 of 393

6-6
Filling Your Tank
CAUTION:
Gasoline vapor is highly flammable. It burns
violently, and that can cause very bad injuries.
Don't smoke if you're near gasoline or refueling
your vehicle. Keep sparks, flames and smoking
materials away from gasoline.
The fuel cap is located behind a hinged door on the
driver's side of your vehicle.
While refueling, hang the fuel cap by the tether using
the hook located on the inside of the filler door.
To remove the fuel cap, turn it slowly to the left
(counterclockwise). The fuel cap has a spring in it;
if you let go of the cap too soon, it will spring back
to the right.
Page 296 of 393
6-7
CAUTION:
If you get gasoline on yourself and then something
ignites it, you could be badly burned. Gasoline
can spray out on you if you open the fuel cap
too quickly. This spray can happen if your tank
is nearly full, and is more likely in hot weather.
Open the fuel cap slowly and wait for any ªhissº
noise to stop. Then unscrew the cap all the way.
Be careful not to spill gasoline. Clean gasoline from
painted surfaces as soon as possible. See ªCleaning the
Outside of Your Vehicleº in the Index.When you put the fuel cap back on, turn it to the right
(clockwise) until you hear a clicking sound. Make sure
you fully install the cap. The diagnostic system can
determine if the fuel cap has been left off or improperly
installed. This would allow fuel to evaporate into the
atmosphere. See ªMalfunction Indicator Lampº in
the Index.
NOTICE:
If you need a new fuel cap, be sure to get the
right type. Your dealer can get one for you.
If you get the wrong type, it may not fit properly.
This may cause your malfunction indicator lamp
to light and may damage your fuel tank and
emissions system. See ªMalfunction Indicator
Lampº in the Index.
Page 346 of 393

6-57 Fuses and Circuit Breakers
The wiring circuits in your vehicle are protected from
short circuits by a combination of fuses and circuit
breakers. This greatly reduces the chance of fires
caused by electrical problems.
Look at the silver
-colored band inside the fuse. If the
band is broken or melted, replace the fuse. Be sure you
replace a bad fuse with a new one of the identical size
and rating.
If you ever have a problem on the road and don't have
a spare fuse, you can borrow one that has the same
amperage. Just pick some feature of your vehicle that
you can get along without
-- like the radio or cigarette
lighter
-- and use its fuse, if it is the correct amperage.
Replace it as soon as you can.Engine Compartment Fuse Block
The fuse block is located under the hood in the
engine compartment on the driver's side of the vehicle.
See ªEngine Compartment Overviewº in the Index for
more information on location.
Remove the cover by turning the fastener
counterclockwise. To reinstall the fuse panel cover,
push in and turn the fastener clockwise.