language Oldsmobile Bravada 2003 Owner's Manuals
[x] Cancel search | Manufacturer: OLDSMOBILE, Model Year: 2003, Model line: Bravada, Model: Oldsmobile Bravada 2003Pages: 410, PDF Size: 20.1 MB
Page 159 of 410
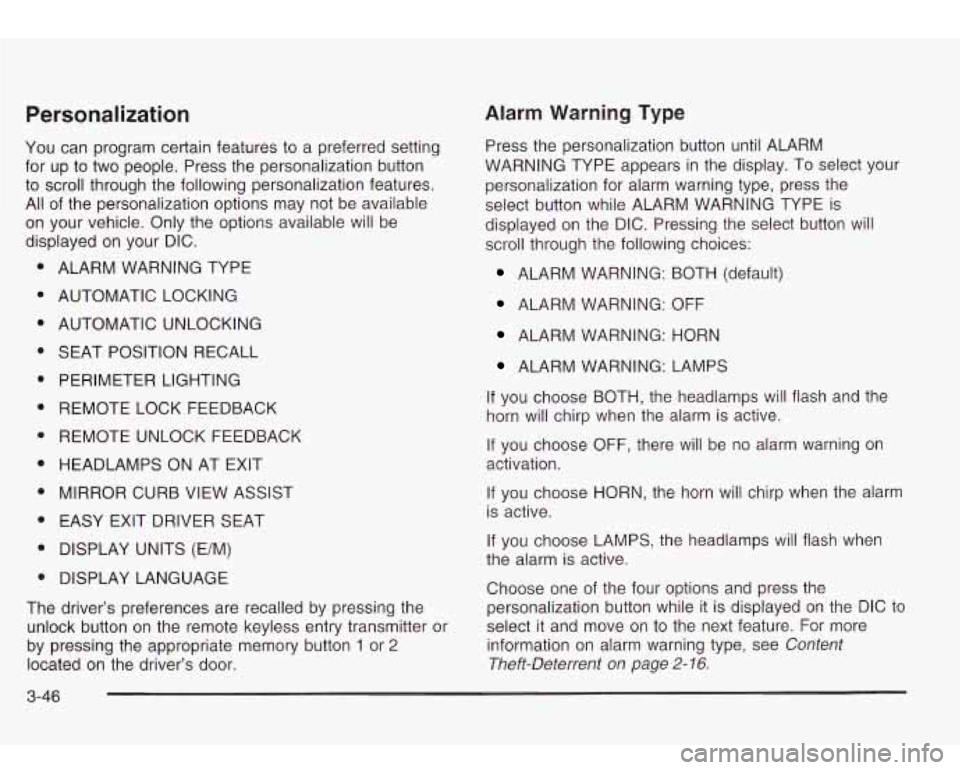
Personalization
You can program certain features to a preferred setting
for up to two people. Press the personalization button
to scroll through the following personalization features.
All of the personalization options may not be available
on your vehicle. Only the options available will be
displayed on your DIC.
ALARM WARNING TYPE
AUTOMATIC LOCKING
AUTOMATIC UNLOCKING
SEAT POSITION RECALL
PERIMETER LIGHTING
REMOTE LOCK FEEDBACK
REMOTE UNLOCK FEEDBACK
HEADLAMPS ON AT EXIT
MIRROR CURB VIEW ASSIST
EASY EXIT DRIVER SEAT
DISPLAY UNITS (E/M)
DISPLAY LANGUAGE
The driver’s preferences are recalled by pressing the
unlock button on the remote keyless entry transmitter or
by pressing the appropriate memory button
1 or 2
located on the driver’s door.
Alarm Warning Type
Press the personalization button until ALARM
WARNING TYPE appears in the display. To select your
personalization for alarm warning type, press the
select button while ALARM WARNING TYPE is
displayed on the DIC. Pressing the select button will
scroll through the following choices:
ALARM WARNING: BOTH (default)
ALARM WARNING: OFF
ALARM WARNING: HORN
ALARM WARNING: LAMPS
If you choose BOTH, the headlamps will flash and the
horn will chirp when the alarm is active.
If you choose OFF, there will be no alarm warning on
activation.
If you choose HORN, the horn will chirp when the alarm
is active.
If you choose LAMPS, the headlamps will flash when
the alarm is active.
Choose one of the four options and press the
personalization button while it is displayed
on the DIC to
select it and move on to the next feature. For more
information on alarm warning type, see
Content
Theft-Deterrent on page
2- 16.
3-46
Page 165 of 410
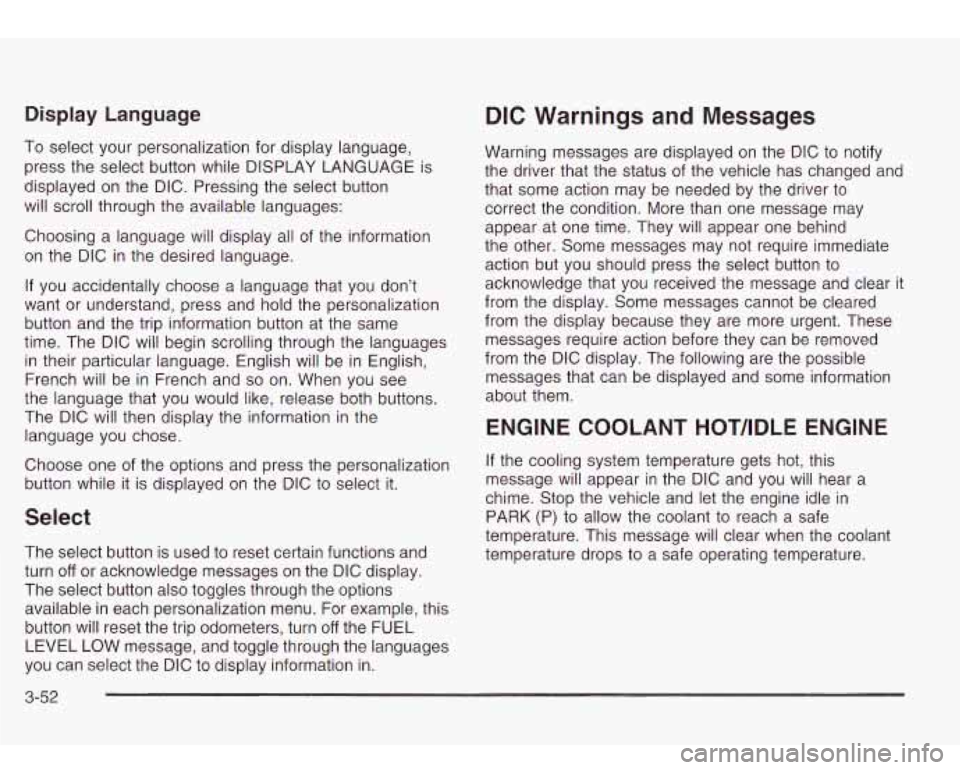
Display Language
To select your personalization for display language, press the select button while DISPLAY LANGUAGE is
displayed on the DIC. Pressing the select button
will scroll through the available languages:
Choosing a language will display all of the information
on the DIC in the desired language.
If you accidentally choose a language that you don’t
want or understand, press and hold the personalization
button and the trip information button at the same
time. The DIC will begin scrolling through the languages
in their particular language. English will be in English,
French will be in French and
so on. When you see
the language that you would like, release both buttons.
The DIC will then display the information in the language you chose.
Choose one of the options and press the personalization
button while it is displayed on the DIC to select it.
Select
The select button is used to reset certain functions and
turn
off or acknowledge messages on the DIC display.
The select button also toggles through the options
available in each personalization menu. For example, this
button will reset the trip odometers, turn
off the FUEL
LEVEL LOW message, and toggle through the languages
you can select the DIC to display information in.
DIC Warnings and Messages
Warning messages are displayed on the DIC to notify
the driver that the status of the vehicle has changed and
that some action may be needed by the driver to
correct the condition. More than one message may
appear at one time. They will appear one behind
the other. Some messages may not require immediate
action but you should press the select button to
acknowledge that you received the message and clear it
from the display. Some messages cannot be cleared
from the display because they are more urgent. These
messages require action before they can be removed
from the DIC display. The following are the possible
messages that can be displayed and some information
about them.
ENGINE COOLANT HOThDLE ENGINE
If the cooling system temperature gets hot, this
message will appear in the DIC and you will hear a
chime. Stop the vehicle and let the engine idle in
PARK (P) to allow the coolant to reach a safe
temperature. This message will clear when the coolant
temperature drops to a safe operating temperature.
3-52
Page 195 of 410
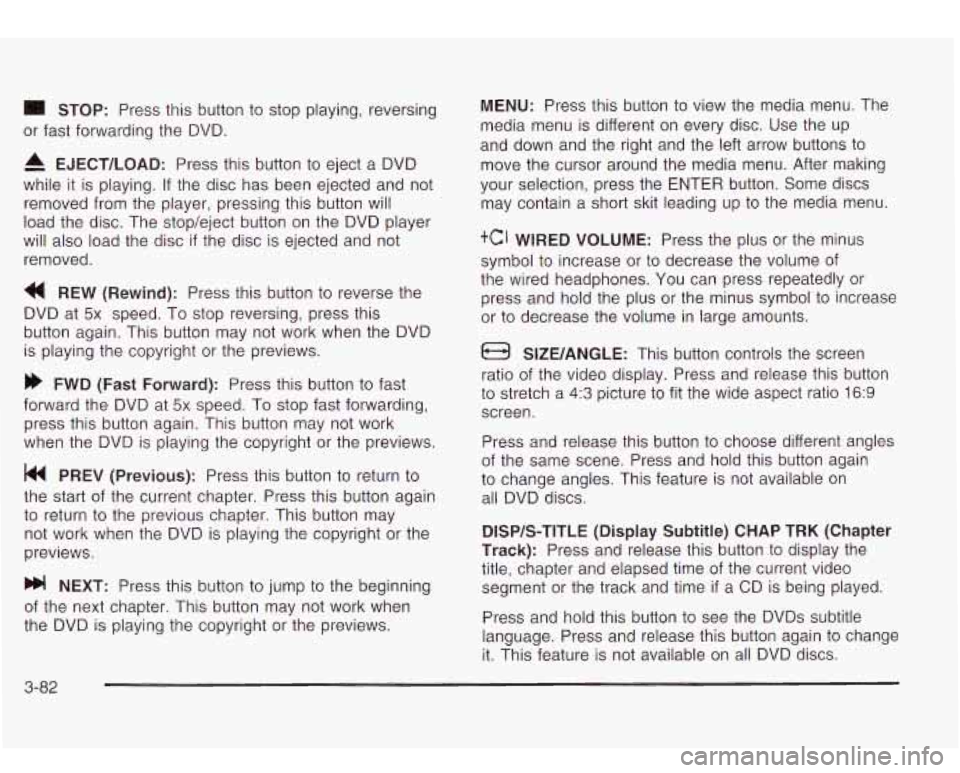
STOP: Press this button to stop playing, reversing
or fast forwarding the DVD.
A EJECT/LOAD: Press this button to eject a DVD
while it is playing. If the disc has been ejected and not
removed from the player, pressing this button will
load the disc. The stop/eject button on the DVD player
will also load the disc
if the disc is ejected and not
removed.
a REW (Rewind): Press this button to reverse the
DVD at
5x speed. To stop reversing, press this
button again. This button may not work when the DVD
is playing the copyright or the previews.
FWD (Fast Forward): Press this button to fast
forward the DVD at
5x speed. To stop fast forwarding,
press this button again. This button may not work
when the DVD is playing the copyright
or the previews.
PREV (Previous): Press this button to return to
the start of the current chapter. Press this button again
to return to the previous chapter. This button may
not work when the DVD is playing the copyright or the
previews.
bb! NEXT: Press this button to jump to the beginning
of the next chapter. This button may not work when
the DVD is playing the copyright or the previews.
MENU: Press this button to view the media menu. The
media menu is different on every disc. Use the up
and down and the right and the left arrow buttons
to
move the cursor around the media menu. After making
your selection, press the ENTER button. Some discs
may contain a short skit leading up
to the media menu.
+cI WIRED VOLUME: Press the plus or the minus
symbol
to increase or to decrease the volume of
the wired headphones.
You can press repeatedly or
press and hold the plus or the minus symbol
to increase
or
to decrease the volume in large amounts.
a SIZE/ANGLE: This button controls the screen
ratio of the video display. Press and release this button
to stretch a 4:3 picture to fit the wide aspect ratio 16.9
screen.
Press and release this button
to choose different angles
of the same scene. Press and hold this button again
to change angles. This feature is not available on
all DVD discs.
DISP/S-TITLE (Display Subtitle) CHAP TRK (Chapter
Track):
Press and release this button to display the
title, chapter and elapsed time of the current video
segment or the track and time
if a CD is being played.
Press and hold this button
to see the DVDs subtitle
language. Press and release this button again
to change
it. This feature is not available on all DVD discs.
3-82
Page 196 of 410
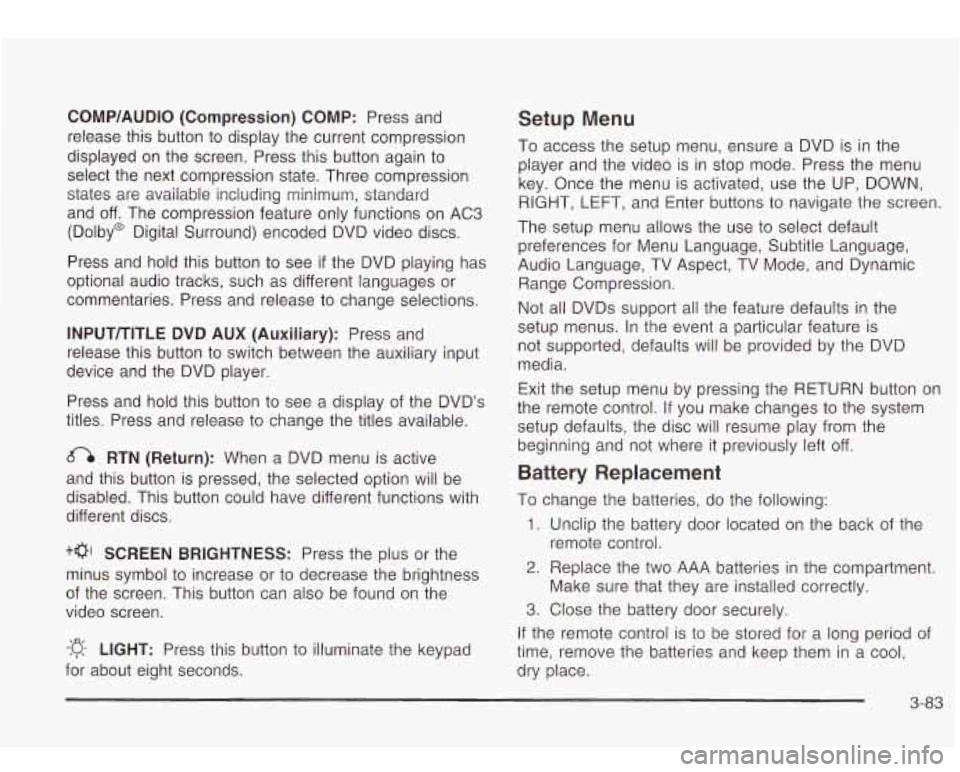
CQMP/AUDIO (Compression) CQMP: Press and
release this button
to display the current compression
displayed on the screen. Press this button again
to
select the next compression state. Three compression
states are available inciuding minimum, standard
and
off. The compression feature only functions on AC3
(Dolby@ Digital Surround) encoded DVD video discs.
Press and hold this button
to see if the DVD playing has
optional audio tracks, such as different languages or
commentaries. Press and release to change selections.
INPUT/TITLE DVD AUX (Auxiliary): Press and
release this button to switch between the auxiliary input
device and the DVD player.
Press and hold this button to see a display of the DVD’s
titles. Press and release
to change the titles available.
6-h RTN (Return): When a DVD menu is active
and this button is pressed, the selected option will be
disabled. This button could have different functions with
different discs.
SCREEN BRIGHTNESS: Press the plus or the
minus symbol
to increase or to decrease the brightness
of the screen. This button can also be found on the
video screen.
-:q- LIGHT: Press this button to illuminate the keypad
for about eight seconds.
Setup Menu
To access the setup menu, ensure a DVD is in the
player and the video is in stop mode. Press the menu
key. Once the menu is activated, use the UP, DOWN, RIGHT,
LEFT, and Enter buttons to navigate the screen.
The setup menu allows the use
to select default
preferences for Menu Language, Subtitle Language,
Audio Language, TV Aspect, TV Mode, and Dynamic
Range Compression.
Not all DVDs support all the feature defaults in the
setup menus. In the event a particular feature is
not supported, defaults will be provided by the DVD
media.
Exit the setup menu by pressing the RETURN button on
the remote control. If you make changes
to the system
setup defaults, the disc will resume play from the
beginning and not where it previously left off.
Battery Replacement
To change the batteries, do the following:
1. Unclip the battery door located on the back of the
2. Replace the two AAA batteries in the compartment.
3. Close the battery door securely.
remote control.
Make sure that they are installed correctly.
If the remote control is to be stored for a long period of
time, remove the batteries and keep them in a cool,
dry place.
3-83
Page 197 of 410
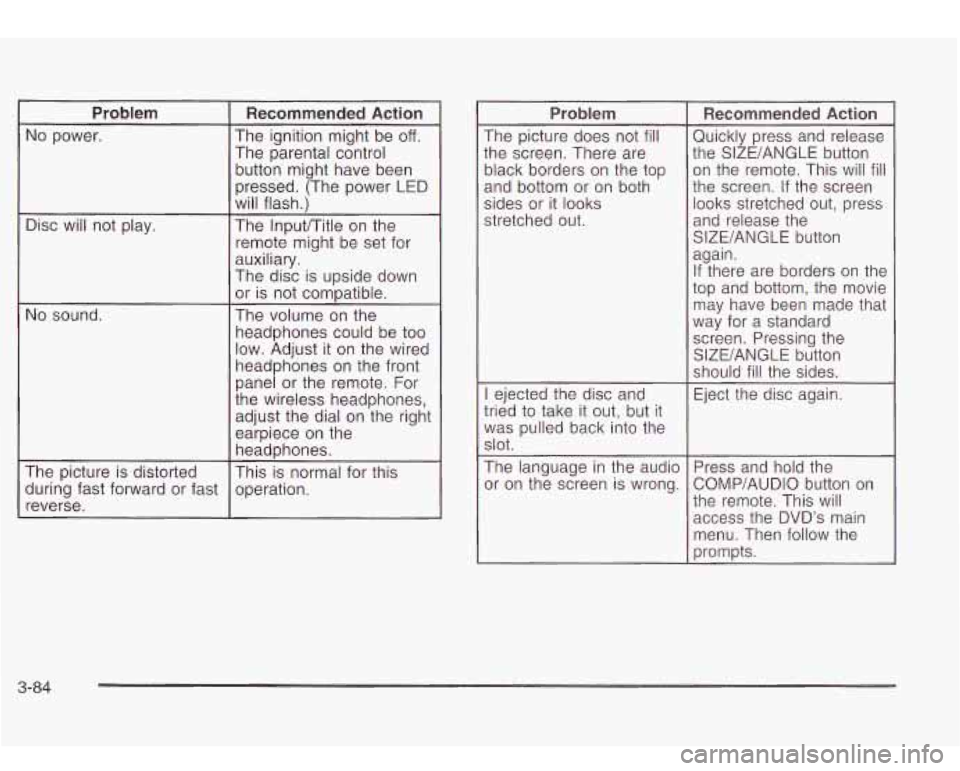
Problem
The ignition might be off. No power.
Recommended Action
The parental control
Disc will not play.
No sound. button
might have been
pressed. (The power
LED
will flash.)
The lnputrritle on the
remote might be set for
auxiliary.
The disc is upside down
or is not compatible.
The volume on the
headphones could be
too
low. Adjust it on the wired
headphones on the front
panel or the remote. For
the wireless headphones,
adjust the dial on the right
earpiece on the
headphones.
The picture is distorted
reverse. operation.
during
fast forward or fast This
is normal for this
Problem
The picture does not fill
the screen. There are
black borders on the top
and bottom or on both
sides or it looks
stretched out.
I ejected the disc and
tried
to take it out, but it
was pulled back into the
slot.
The language in the audio
or on the screen is wrong.
Recommended Action
Quickly press and release
the SIZE/ANGLE button
on the remote. This will
fill
the screen. If the screen
looks stretched out, press
and release the
SIZE/ANGLE button
again.
If there are borders on the
top and bottom, the movie
may have been made that
way for a standard
screen. Pressing the
SIZE/ANGLE button
should
fill the sides.
Eject the disc again.
Press and hold the
COMP/AUDlO button on
the remote. This will
access the
DVD’s main
menu. Then follow the
prompts.
3-84