remote start Oldsmobile Bravada 2003 Owner's Manuals
[x] Cancel search | Manufacturer: OLDSMOBILE, Model Year: 2003, Model line: Bravada, Model: Oldsmobile Bravada 2003Pages: 410, PDF Size: 20.1 MB
Page 66 of 410
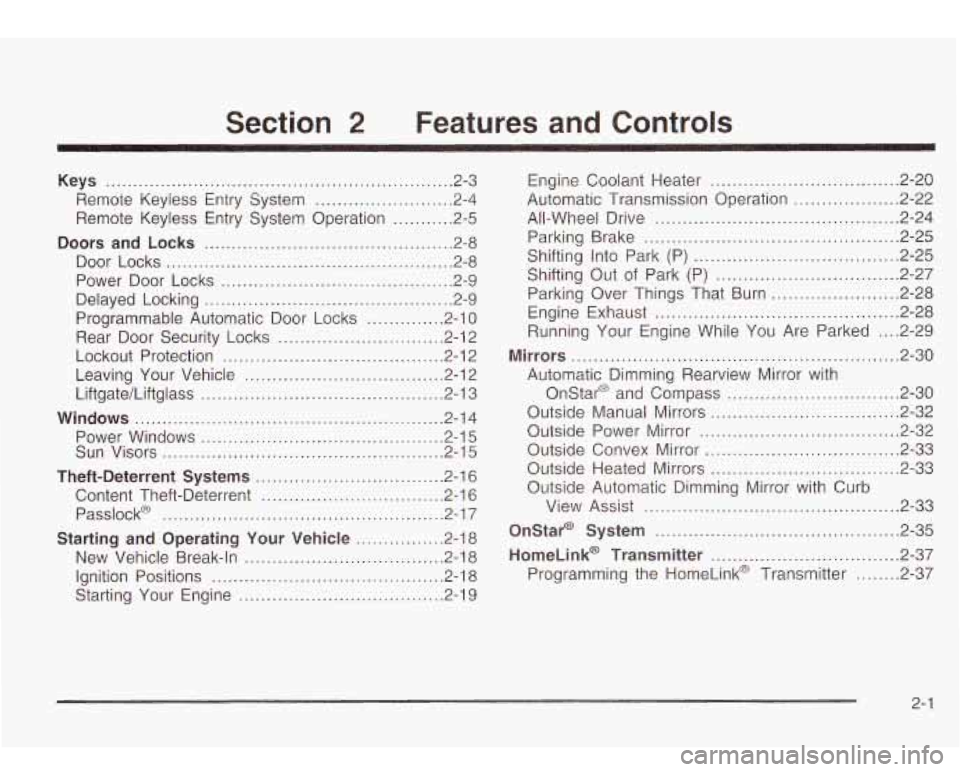
Section 2 Features and Controls
Keys ............................................................... 2-.
Remote Keyless Entry System
......................... 2-4
Remote Keyless Entry System Operation
........... 2-5
Doors and Locks ............................................. 2.8
Door Locks
.................................................... 2.8
Power Door Locks
.......................................... 2.9
Delayed Locking
............................................. 2.9
Programmable Automatic Door Locks
.............. 2.10
Rear Door Security Locks
.............................. 2-12
Lockout Protection
........................................ 2.12
Leaving Your Vehicle
.................................... 2.12
Liftgate/Liftglass
............................................ 2.13
Windows ........................................................ 2.14
Power Windows
............................................ 2.15
Sun Visors
................................................... 2.15
Theft-Deterrent Systems .................................. 2.16
Content Theft-Deterrent
................................. 2.16
Passlock@
................................................... 2.17
Starting and Operating Your Vehicle ................ 2.18
New Vehicle Break-In
.................................... 2.18
Ignition Positions
...................................... 2.18
Starting Your Engine
.............................. 2-19
~ ~~
Engine Coolant Heater .................................. 2.20
Automatic Transmission Operation
................... 2.22
All-Wheel Drive
............................................ 2.24
Parking Brake
.............................................. 2.25
Shifting Into Park (P)
..................................... 2-25
Shifting
Out of Park (P) ................................. 2-27
Parking Over Things That Burn
....................... 2-28
Engine Exhaust
............................................ 2-28
Running Your Engine While You Are Parked
.... 2-29
Mirrors ........................................................... 2-30
Automatic Dimming Rearview Mirror with Onstar@ and Compass
............................... 2-30
Outside Manual Mirrors
.................................. 2-32
Outside Power Mirror
.................................... 2-32
Outside Convex Mirror
................................... 2-33
Outside Heated Mirrors
.................................. 2-33
Outside Automatic Dimming Mirror with Curb
View Assist
.............................................. 2-33
Onstar@ System ............................................ 2-35
HomeLink@ Transmitter .................................. 2-37
Programming the HomeLink@ Transmitter
........ 2-37
2-1
Page 71 of 410
8 (Lock): Press lock to lock all the doors. Press lock
again within three seconds and the horn may chirp.
2 (Panic): When the button with the horn symbol on
the key transmitter is pressed, the horn will sound
and the headlamps and taillamps will flash for up
to
30 seconds. This can be turned off by pressing the horn
button again, or by waiting for
30 seconds, or by
starting the vehicle.
Matching Transmitter(s) to Your
Vehicle
Each remote keyless entry transmitter is coded to
prevent another transmitter from unlocking your vehicle.
If a transmitter is
lost or stolen, a replacement can
be purchased through your dealer. Remember to bring
any remaining transmitters with you when you go
to
your dealer. When the dealer matches the replacement
transmitter
to your vehicle, any remaining transmitters
must also be matched. Once your dealer has coded the
new transmitter, the
lost transmitter will not unlock
your vehicle. Each vehicle can have a maximum of four
transmitters matched to it.
Battery Replacement
Under normal use, the battery in your remote keyless
entry transmitter should last about two years.
You can tell the battery is weak if the transmitter won’t
work at the normal range in any location.
If you have
to get close to your vehicle before the transmitter works,
it’s probably time
to change the battery.
The Driver Information Center (DIC) will display a RFA
## BATTERY LOW message when the transmitter
battery is
low.
Nofice: When replacing the battery, use care not to
touch any of the circuitry. Static from your body
transferred to these surfaces may damage the
transmitter.
2-6
Page 81 of 410
Theft-Deterrent Systems
Vehicle theft is big business, especially in some cities.
Although your vehicle has a number of theft-deterrent
features, we know that nothing we put on it can make it
impossible
to steal. However, there are ways you
can help.
Content Theft-Deterrent
Your vehicle may be equipped with a content
theft-deterrent alarm system.
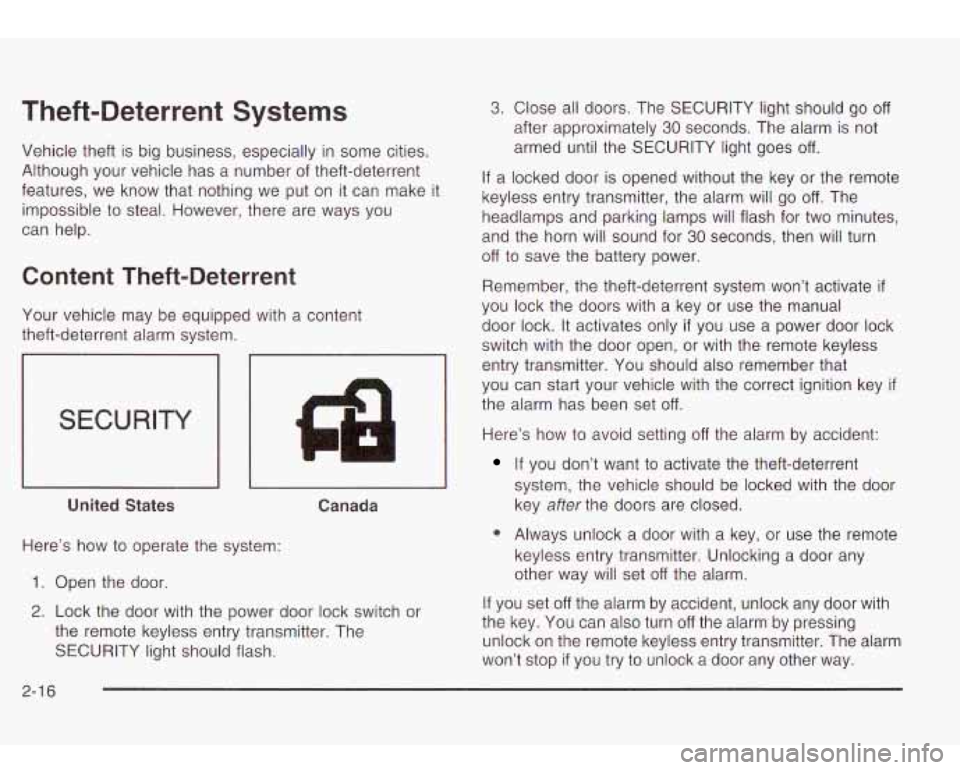
SECURITY
4 I1
I I I I
United States Canada
Here’s how to operate the system:
1. Open the door.
2. Lock the door with the power door lock switch or
the remote keyless entry transmitter. The
SECURITY light should flash.
3. Close all doors. The SECURITY light should go off
after approximately 30 seconds. The alarm is not
armed until the SECURITY light goes
off.
If a locked door is opened without the key or the remote
keyless entry transmitter, the alarm will go
off. The
headlamps and parking lamps will flash for two minutes,
and the horn will sound for
30 seconds, then will turn
off to save the battery power.
Remember, the theft-deterrent system won’t activate
if
you lock the doors with a key or use the manual
door lock.
It activates only if you use a power door lock
switch with the door open, or with the remote keyless
entry transmitter. You should also remember that
you can start your vehicle with the correct ignition key
if
the alarm has been set off.
Here’s how to avoid setting off the alarm by accident:
If you don’t want to activate the theft-deterrent
system, the vehicle should be locked with the door
key
after the doors are closed.
0 Always unlock a door with a key, or use the remote
keyless entry transmitter. Unlocking a door any
other way will set
off the alarm.
If you set
off the alarm by accident, unlock any door with
the key. You can also turn
off the alarm by pressing
unlock on the remote keyless entry transmitter. The alarm
won’t stop
if you try to unlock a door any other way.
2-1 6
Page 82 of 410
Testing the Alarm
The alarm can be tested by following these steps:
1. From inside the vehicle, lower the driver’s window
and open the driver’s door.
Passlock@
2. Activate the system by locking the doors with the
power door lock switch while the door is open, or
with the remote keyless entry transmitter.
3. Get out of the vehicle, close the door and wait for
the SECURITY light to go out.
4. Then reach in through the window, unlock the door
with the manual door lock and open the door. This
should set
off the alarm.
When the alarm is set the power door unlock switch
is
not operational.
If the alarm does not sound when it should but the
headlamps flash, check
to see if the horn works. The
horn fuse may be blown. To replace the fuse, see
Fuses
and Circuit Breakers on page
5-86.
If the alarm does not sound or the headlamps do not
flash, the vehicle should be serviced by your dealer. Your
vehicle is equipped with the
Passlock@ theft-deterrent system.
Passiock@
is a passive theit-deterrent system.
Passlock@ enables fuel
if the ignition lock cylinder is
turned with a valid key. If a correct key is not used or the
ignition lock cylinder is tampered with, the fuel system
is disabled and the vehicle will not start.
During normal operation, the SECURITY light will turn
off
approximately five seconds after the key is turned
to RUN.
If the engine stalls and the SECURITY light flashes,
wait about
10 minutes until the light stops flashing before
trying
to restart the engine. Remember to release the
key from START as soon as the engine starts.
If the engine does not start after three tries, the vehicle
needs service.
If the engine is running and the SECURITY light comes
on, you will be able
to restart the engine if you turn
the engine
off. However, your Passlock@ system is not
working properly and must be serviced by your
dealer. Your vehicle is not protected by Passlock@ at
this time. You may also want to check the fuse.
See
Fuses and Circuit Breakers on page 5-86. See your
dealer for service.
In an emergency, call the GM Roadside Assistance
Center. See
Roadside Assistance Program on page 7-5.
2-1 7
Page 192 of 410
When the video screen is not in use, push it up into its
locked position.
The DVD player and display will continue
to operate
when the display is in either the up or the down position.
Notice: Avoid directly touching the video screen,
as damage may occur. See “Cleaning the Video
Screen” in the Index for more information.
DVD Player
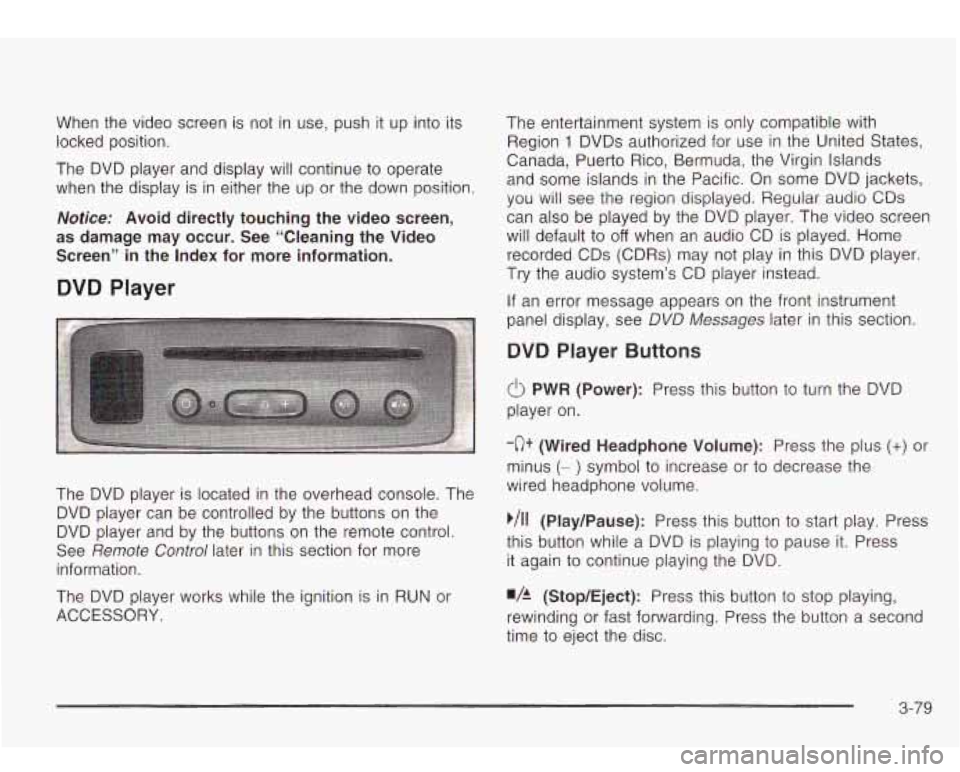
The DVD player is located in the overhead console. The
DVD player can be controlled by the buttons on the
DVD player and by the buttons on the remote control.
See
Remote Control later in this section for more
information.
The DVD player works while the ignition is in RUN or
ACCESSORY. The entertainment system is only compatible with
Region
1 DVDs authorized for use in the United States.
Canada, Puerto Rico, Bermuda, the Virgin Islands
and some islands in the Pacific. On some DVD jackets,
you will see the region displayed. Regular audio CDs
can also be played by the DVD player. The video screen
will default to
off when an audio CD is played. Home
recorded CDs (CDRs) may not play in this DVD player.
Try the audio system’s CD player instead.
If an error message appears on the front instrument
panel display, see DVD
Messages later in this section.
DVD Player Buttons
(I> PWR (Power): Press this button to turn the DVD
player on.
-c)+ (Wired Headphone Volume): Press the plus (+) or
minus (- ) symbol to increase or to decrease the
wired headphone volume.
,/I1 (Play/Pause): Press this button to start play. Press
this button while a DVD is playing
to pause it. Press
it again to continue playing the DVD.
w/h (StopIEject): Press this button to stop playing,
rewinding or fast forwarding. Press the button a second
time
to eject the disc.
3-79
Page 193 of 410
Playing a Disc
To play a disc, gently insert the disc with the label side
up into the loading slot. The DVD player will continue
loading the disc and the player will automatically start.
If a disc is already in the player, press the play/pause
button on the face of the player or on the remote control.
Some DVDs will not allow you
to fast forward or skip
the copyright or previews. Some DVDs will begin playing
after the previews have finished. If the DVD does not
begin playing, refer
to the on-screen instructions.
Stopping and Resume Playback
To stop a disc, press and release the stop/eject button
on the DVD player or the stop button on the remote.
To resume playback, press the play/pause button on the
DVD player or the remote. As long
as the disc has
not been ejected and the stop button has not been
pressed twice on the remote control, the movie should
resume play from where it was last stopped. If the
disc has been ejected or
if the stop button on the remote
has been pressed twice, the disc will resume play at
the beginning.
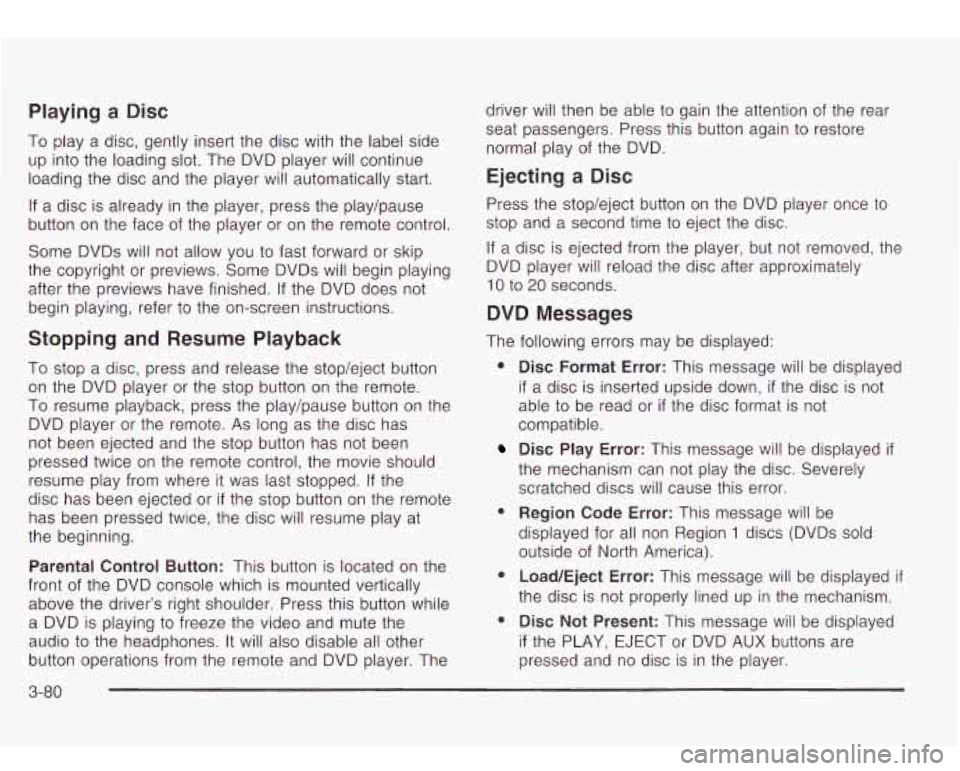
Parental Control Button: This button is located on the
front of the DVD console which is mounted vertically
above the driver’s right shoulder. Press this button while
a DVD is playing to freeze the video and mute the
audio
to the headphones. It will also disable all other
button operations from the remote and DVD player. The driver will
then be able to gain the attention of the rear
seat passengers. Press this button again
to restore
normal play of the DVD.
Ejecting a Disc
Press the stop/eject button on the DVD player once to
stop and a second time
to eject the disc.
If
a disc is ejected from the player, but not removed, the
DVD player will reload the disc after approximately
10 to 20 seconds.
DVD Messages
The following errors may be displayed:
8
8
Disc Format Error: This message will be displayed
if a disc is inserted upside down, if the disc is not
able to be read or
if the disc format is not
compatible.
Disc Play Error: This message will be displayed if
the mechanism can not play the disc. Severely
scratched discs
will cause this error.
Region Code Error: This message will be
displayed for all non Region
1 discs (DVDs sold
outside of North America).
Load/Eject Error: This message will be displayed if
the disc is not properly lined up in the mechanism.
Disc Not Present: This message will be displayed
if the PLAY, EJECT or DVD AUX buttons are
pressed and no disc is in the player.
3-80
Page 198 of 410
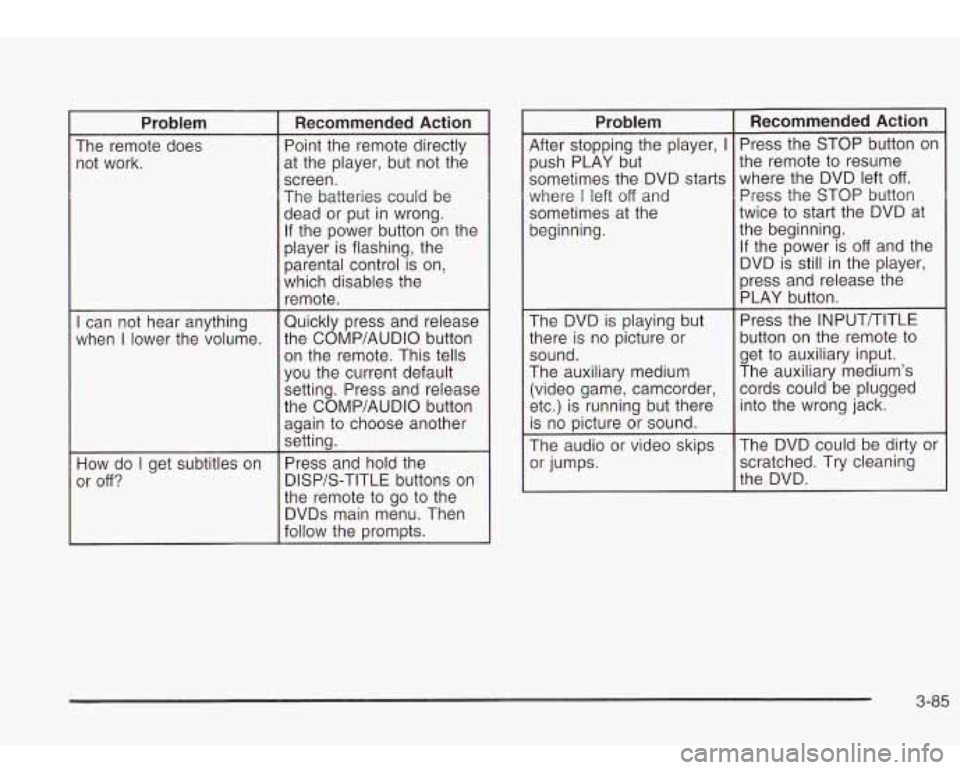
Problem
The remote does
not work.
I can not hear anything
when
I lower the volume.
How do
I get subtitles on
or
off?
Recommended Action
Point the remote directly
at the player, but not the
screen.
The batteries could be
dead or put in wrong.
If the power button on the
player is flashing, the
parental control
is on,
which disables the
remote.
Quickly press and release
the COMP/AUDIO button
on the remote. This tells
you the current default
setting. Press and release
the COMP/AUDIO button again to choose another
setting.
Press and hold the
DISP/S-TITLE buttons on
the remote to
go to the
DVDs main menu. Then
follow the prompts.
Problem Recommended Action
After stopping the player, I Press the STOP button on
push PLAY 6ut
sometimes the DVD starts
where
I left off and
sometimes at the
beginning.
.-
The DVD is playing but
there is no picture or
sound.
The auxiliary medium
(video game, camcorder,
etc.) is running but there
is no picture or sound.
The audio or video skips
I Or Jumps.
the remote to resume
where the DVD left
off.
Press the STOP button
twice to start the DVD at
the beginning.
If the power is
off and the
DVD is still
in the player,
press and release the
PLAY button.
Press the INPUTTTITLE
button on the remote to
get to auxiliary input.
The auxiliary medium’s
cords could be plugged
into the wrong jack.
The DVD could be dirtv or
‘I
scratched. Try cleaning
the DVD.
3-85
Page 199 of 410
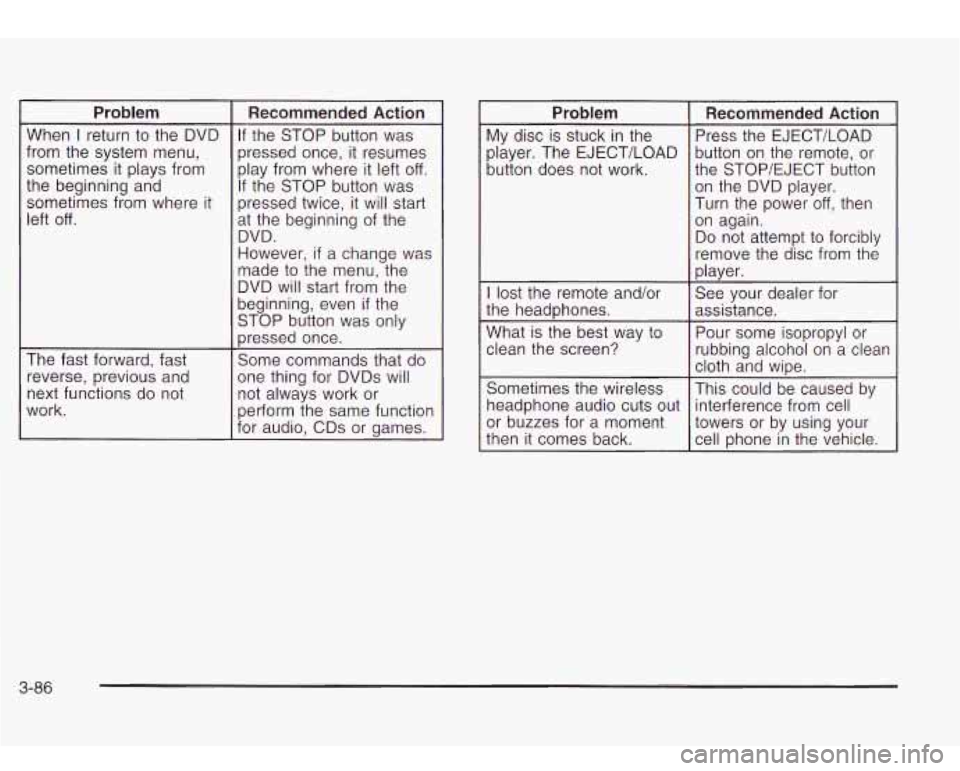
Problem
When I return to the DVD
from the system menu,
sometimes it plays from
the beginning and
sometimes from where it
left
off.
The fast forward, fast reverse, previous and
next functions do not
work.
Recommended Action
If the STOP button was
pressed once, it resumes
play from where it left
off.
If the STOP button was
pressed twice, it will start
at the beginning of the
DVD.
However,
if a change was
made to the menu, the
DVD will start from the
beginning, even
if the
STOP button was only
pressed once.
Some commands that do
one thing for DVDs will
not always work or
perform the same function
for audio, CDs or games.
- Problem
My disc is stuck in the
player. The EJECT/LOAD
button does not work.
Recommended Action
Press the EJECT/LOAD
button on the remote, or
the STOP/EJECT button
on the DVD player.
Turn the power
off, then
on again.
Do not attempt
to forcibly
remove the disc from the
player.
I lost the remote and/or
Pour some isopropyl or
What
is the best way
to
assistance.
the
headphones. See
your dealer for
clean the screen?
rubbing alcohol on
a clean
Sometimes the wireless
This could be caused by
headphone audio cuts out interference from cell
or buzzes for a moment
towers or by using your
then it comes back.
cell Dhone in the vehicle.
cloth and
wipe.
3-86
Page 299 of 410
4. Open both hoods and locate the batteries. Find the positive
(+) and negative (-) terminals on each
battery. Your vehicle has a remote negative
(-) jump
starting terminal. You should always use this
remote terminal instead of the terminal on the
battery. The remote negative
(-) terminal is located
on the front engine lift bracket and
is marked
“GND.” See Engine Compartment Overview on
page 5-72 for more information on location.
Using a match near
a battery can cause battery
gas to explode. People have been hurt doing
this, and some have been blinded. Use a flashlight
if you need more light.
Be sure the battery has enough water. You
don’t need to add water to the ACDelco@
battery installed in your new vehicle. But if a battery has filler caps, be sure the right
amount of fluid
is there. If it is low, add water
to take care of that first.
If you don’t, explosive
gas could be present.
CAUTION: (Continued) Battery fluid contains acid thal
~ m bul..
you.
Don’t get
it on you. If you accidentally get it in
your eyes or on your skin, flush the place with water and get medical help immediately.
Fans
or other moving engine parts can in,-.-’e
you badly. Keep your hands away from moving
parts once the engine is running.
5-40
Page 301 of 410
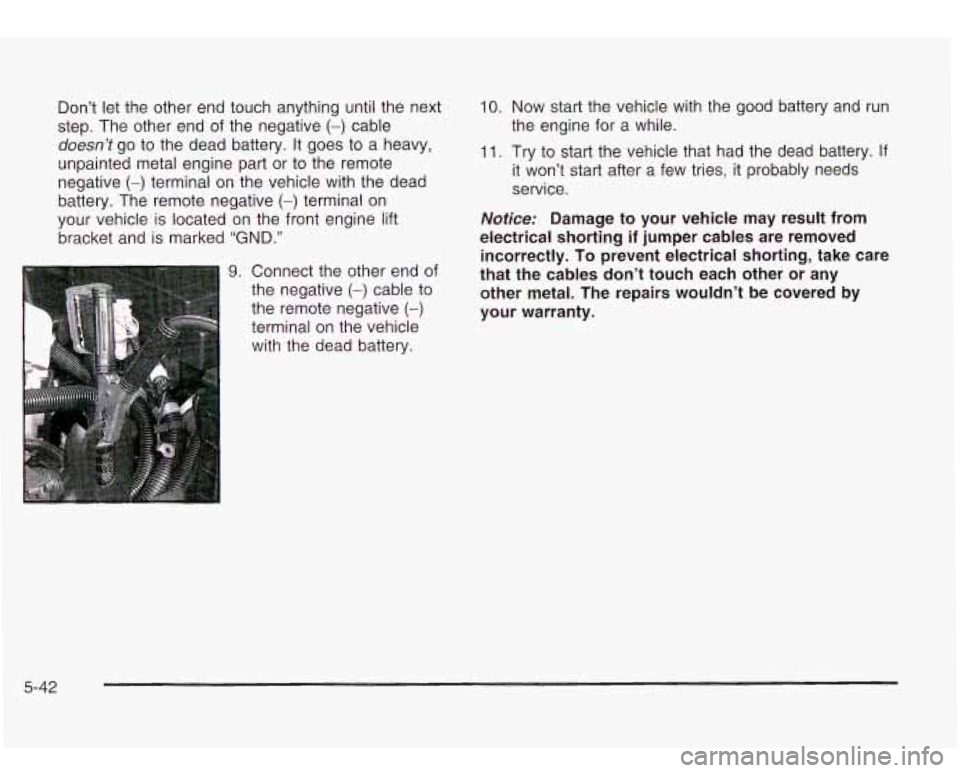
Don’t let the other end touch anything until the next
step. The other end of the negative
(-) cable
doesn’t go to the dead battery. It goes to a heavy,
unpainted metal engine part or to the remote
negative
(-) terminal on the vehicle with the dead
battery. The remote negative
(-) terminal on
your vehicle is located on the front engine lift
bracket and is marked
“GND.”
9. Connect the other end of
the negative
(-) cable to
1 the remote negative (-)
terminal on the vehicle
with the dead battery.
10. Now start the vehicle with the good battery and run
the engine for a while.
11. Try to start the vehicle that had the dead battery. If
it Won’t start after a few tries, it probably needs
service.
Notice: Damage to your vehicle may result from
electrical shorting
if jumper cables are removed
incorrectly. To prevent electrical shorting, take care
that the cables don’t touch each other or any
other metal. The repairs wouldn’t be covered by
your warranty.
5-42