service indicator Oldsmobile Bravada 2003 Owner's Manuals
[x] Cancel search | Manufacturer: OLDSMOBILE, Model Year: 2003, Model line: Bravada, Model: Oldsmobile Bravada 2003Pages: 410, PDF Size: 20.1 MB
Page 114 of 410
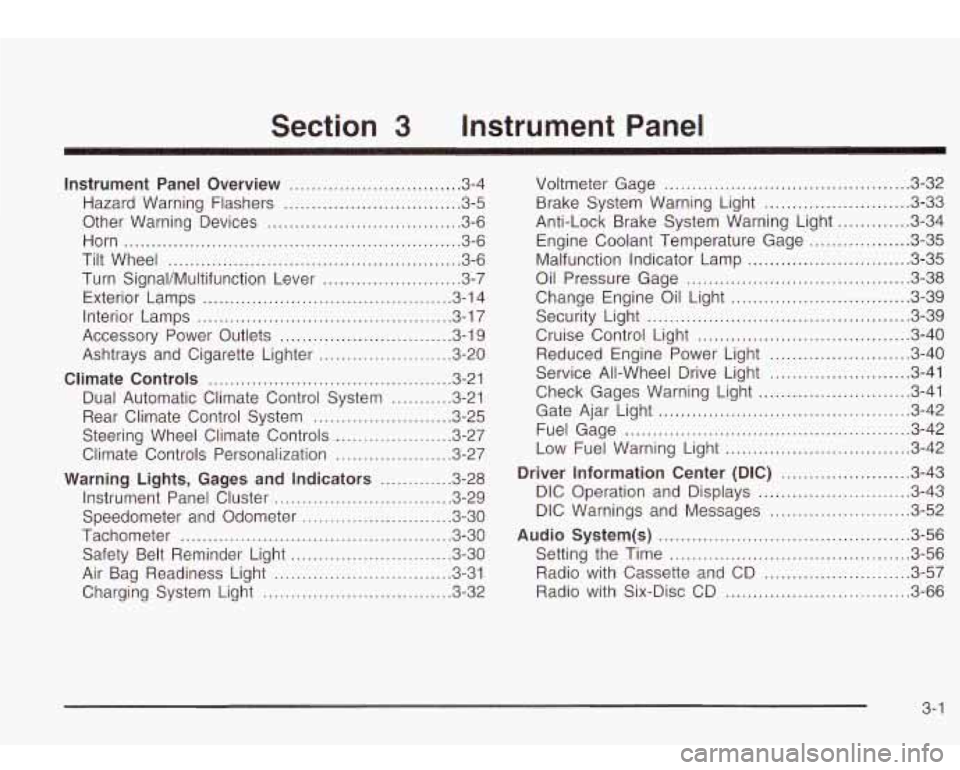
Section 3 Instrument Panel
Instrument Panel Overview ............................... 3.4
Hazard Warning Flashers
................................ 3.5
Other Warning Devices
................................... 3.6
Horn
............................................................. 3.6
Tilt Wheel
..................................................... 3.6
Turn SignaVMultifunction Lever
......................... 3.7
Exterior Lamps
............................................. 3.14
Interior Lamps
.............................................. 3.17
Accessory Power Outlets
............................... 3.19
Ashtrays and Cigarette Lighter
........................ 3.20
Climate Controls ......................................... 3.21
Dual Automatic Climate Control System
........ 3.21
Rear Climate Control System
......................... 3.25
Steering Wheel Climate Controls
..................... 3.27
Climate Controls Personalization
..................... 3.27
Warning Lights, Gages and Indicators ............. 3.28
Instrument Panel Cluster
................................ 3.29
Speedometer and Odometer
........................... 3.30
Tachometer
................................................. 3.30
Safety Belt Reminder Light
............................. 3.30
Air Bag Readiness Light
................................ 3-31
Charging System Light
.................................. 3.32 Voltmeter Gage
............................................ 3.32
Anti-Lock Brake System Warning Light
......... 3.34
Engine Coolant Temperature Gage
.............. 3.35
Malfunction Indicator Lamp
............................. 3.35
Oil Pressure Gage
........................................ 3.38
Change Engine Oil Light
................................ 3-39
Security Light
............................................... 3.39
Cruise Control Light
...................................... 3.40
Reduced Engine Power Light
......................... 3.40
Service All-Wheel Drive Light
......................... 3.41
Check Gages Warning Light
........................... 3.41
Gate Ajar Light
............................................. 3.42
Fuel Gage
................................................... 3.42
Low Fuel Warning Light
............................. 3.42
Driver information Center (DiC) .. .............. 3.43
DIC Operation and Displays
........................... 3.43
DIC Warnings and Messages
......................... 3.52
Audio System(s) ............................................. 3.56
Setting the Time
........................................... 3.56
Radio with Cassette and CD
.......................... 3.57
Radio with Six-Disc CD
................................. 3.66
Brake System Warning
Light
.......................... 3-33
3- 1
Page 148 of 410
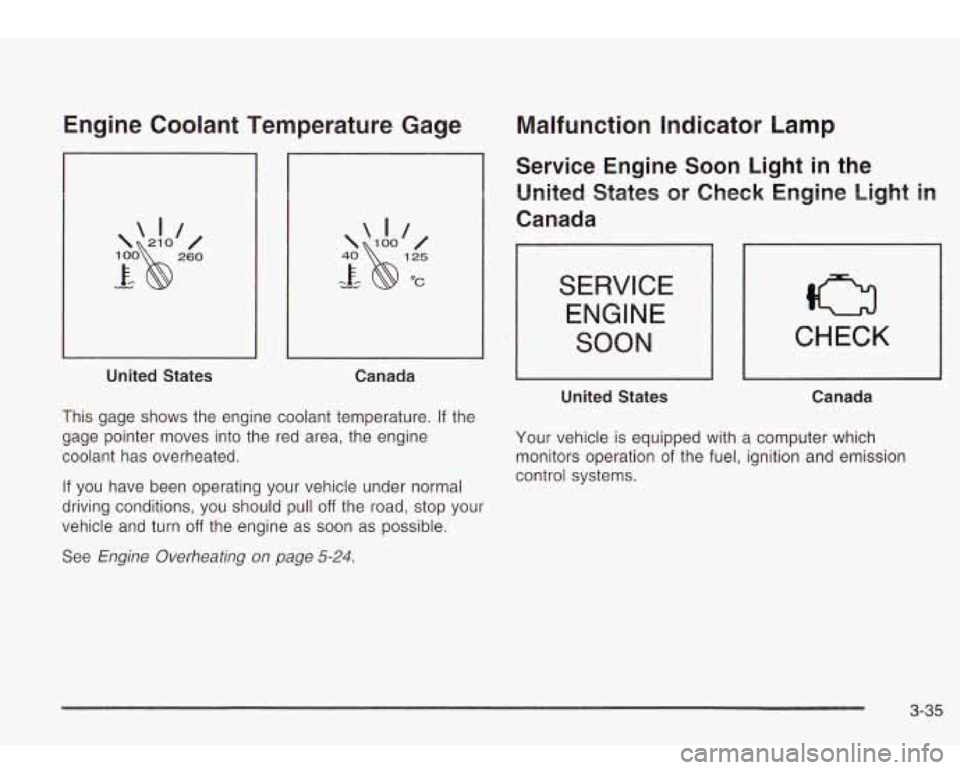
Engine Coolant Temperature Gage
L
United States
Malfunction Indicator Lamp
Service Engine Soon Light in the
United States
or Check Engine Light in
Canada
I SERVICE
II
- 'I
Canada
This gage shows the engine coolant temperature. If the
gage pointer moves into the red area, the engine
coolant has overheated.
If you have been operating your vehicle under normal
driving conditions, you should pull
off the road, stop your
vehicle and turn
off the engine as soon as possible.
See
Engine Overheating on page 5-24.
ENGINE
SOON
United States
CHECK
Canada
Your vehicle is equipped with a computer which
monitors operation
of the fuel, ignition and emission
control systems.
3-35
Page 203 of 410
Care of Your Cassette Tape Player
A tape player that is not cleaned regularly can cause
reduced sound quality, ruined cassettes or a damaged
mechanism. Cassette tapes should be stored in their
cases away from contaminants, direct sunlight and
extreme heat.
If they aren’t, they may not operate
properly or may cause failure of the tape player.
Your tape player should be cleaned regularly after every
50 hours of use. Your radio may display CLEAN
PLAYR
to indicate that you have used your tape player
for
50 hours without resetting the tape clean timer. If
this message appears on the display, your cassette tape
player needs
to be cleaned. It will still play tapes, but
you should clean it as soon as possible to prevent
damage
to your tapes and player. If you notice a
reduction in sound quality, try a known good cassette to
see
if the tape or the tape player is at fault. If this
other cassette has no improvement in sound quality,
clean the tape player.
For best results, use a scrubbing action, non-abrasive
cleaning cassette with pads which scrub the tape
head as the hubs of the cleaner cassette turn. The
recommended cleaning cassette is available through
your dealership.
The cut tape detection feature of your cassette tape
player may identify the cleaning cassette as a damaged
tape,
in error. To prevent the cleaning cassette from
being ejected, use the following steps.
I. Turn the ignition on.
2. Turn the radio off.
3. Press and hold the TP CD button for five seconds.
4. Insert the scrubbing action cleaning cassette.
5. Eject the cleaning cassette after the manufacturer’s
recommended cleaning time.
You may also choose a non-scrubbing action, wet-type
cleaner which uses a cassette with a fabric belt
to
clean the tape head. This type of cleaning cassette will
not eject on its own. A non-scrubbing action cleaner
may not clean as thoroughly as the scrubbing type
cleaner. The use
of a non-scrubbing action, dry-type
cleaning cassette is not recommended.
After you clean the player, press and hold the eject
button for five seconds to reset the CLEAN PLAYR
indicator. The radio will display CLEANED
to show the
indicator was reset.
Cassettes are subject
to wear and the sound quality
may degrade over time. Always make sure the cassette
tape
is in good condition before you have your tape
player serviced.
3-90
Page 249 of 410

Overload Protection Indicator Light
The air suspension system is equipped with overload
protection. Overload protection is designed
to protect the
air suspension system, and
it is an indicator to the
driver that the vehicle
is overloaded. When the overload
protection mode is on,
it will not allow damage to the
air compressor. However, do not overload the vehicle.
See
Loading Your Vehicle on page 4-4 1.
If the suspension remains at a low height, the rear axle
load has exceeded GAWR (Gross Axle Weight
Rating). When the overload protection mode is activated,
the compressor operates for about
30 seconds to one
minute without raising the vehicle depending on the
amount of overload. This will continue each time
the ignition
is turned on until the rear axle load is
reduced below GAWR. The indicator light
on the inflator switch in the rear
passenger compartment also serves as an indicator for
internal system error.
If the indicator light is flashing
without the load leveling function or the inflator being
active, turn
off the ignition. The next day turn on
the ignition and check the indicator light. The vehicle
can be driven with the light flashing, but
if it is you
should have the vehicle serviced as soon as possible.
Adding a Snow Plow or Similar
Equipment
Your vehicle was neither designed nor intended for a
snow plow.
Notice: Adding a snow plow or similar equipment
to your vehicle can damage it, and the repairs
wouldn’t be covered by warranty.
Do not install a
snow plow or similar equipment on your vehicle.
4-44
Page 265 of 410
California Fuel
If your vehicle is certified to meet California Emission
Standards (see the underhood emission control label), it
is designed
to operate on fuels that meet California
specifications. If this fuel is not available in states
adopting California emissions standards, your vehicle
will operate satisfactorily on fuels meeting federal specifications, but emission control system performance
may be affected. The malfunction indicator lamp may
turn on (see
Malfunction Indicator Lamp on page 3-35 )
and your vehicle may fail a smog-check test. If this
occurs, return
to your authorized GM dealer for
diagnosis. If it is determined that the condition is caused
by the type of fuel used, repairs may not
be covered
by your warranty.
Additives
To provide cleaner air, all gasolines in the United States
are now required
to contain additives that will help
prevent engine and fuel system deposits from forming,
allowing your emission control system
to work
properly. You should not have
to add anything to your
fuel. Gasolines containing oxygenates, such as
ethers and ethanol, and reformulated gasolines may be
available in your area
to contribute to clean air.
General Motors recommends
that you use these
gasolines, particularly
if they comply with the
specifications described earlier.
5-6
Notice: Your vehicle was not designed for fuel that
contains methanol. Don’t use fuel containing
methanol. It can corrode metal parts in your fuel
system and also damage the plastic and rubber
parts.
That damage wouldn’t be covered under your
warranty.
Some gasolines that are not reformulated for low
emissions may contain an octane-enhancing additive
called methylcyclopentadienyl manganese tricarbonyl
(MMT); ask the attendant where you buy gasoline
whether the fuel contains
MMT. General Motors does
not recommend the use
of such gasolines. Fuels
containing MMT can reduce the life of spark plugs and
the performance of the emission control system may
be affected. The malfunction indicator lamp may turn on.
If this occurs, return to your authorized GM dealer for
service.
Fuels in Foreign Countries
If you plan on driving in another country outside the
United States or Canada, the proper fuel may be hard
to find. Never use leaded gasoline or any other fuel
not recommended in the previous text on fuel. Costly
repairs caused by use of improper fuel wouldn’t be
covered by your warranty.
To check the fuel availability, ask an auto club, or
contact a major oil company that does business in the
country where you’ll be driving.
Page 278 of 410
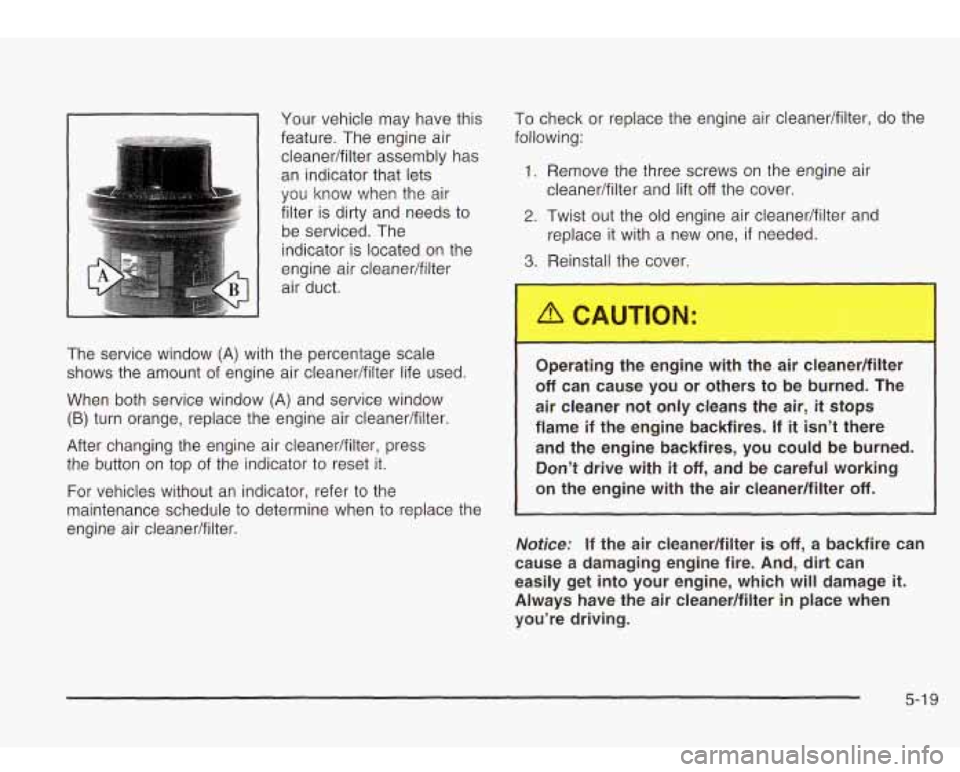
1-1 Your vehicle may have this
feature. The engine air cleanedfilter assembly has
an indicator that lets
you know when the air
filter is dirty and needs to
be serviced. The
indicator is located on the
engine air cleaner/filter
air duct.
The service window
(A) with the percentage scale
shows the amount of engine air cieanedfilter life used.
When both service window
(A) and service window
(B) turn orange, replace the engine air cleanedfilter
After changing the engine air cleaner/filter, press
the button on top of the indicator to reset it.
For vehicles without an indicator, refer
to the
maintenance schedule to determine when
to replace the
engine air cleaner/filter. To
check or replace the engine air cleaner/filter, do the
following:
1. Remove the three screws on the engine air
2. Twist out the old engine air cleaner/filter and
3. Reinstall the cover.
cleanedfilter and lift
off the cover.
replace it with a new one,
if needed.
per
______ ~ ---e eng.--> with the air cleaner/filter
off can cause you or others to be burned. The
air cleaner not only cleans the air,
it stops
flame if the engine backfires.
If it isn’t there
and the engine backfires, you could be burned. Don’t drive with
it off, and be careful working
on the engine with the air cleanedfilter
off.
Notice: If the air cleaner/filter is off, a backfire can
cause a damaging engine fire.
And, dirt can
easily get into your engine, which will damage
it.
Always have the air cleaner/filter in place when
you’re driving.
5-1 9
Page 392 of 410
E
Electrical System
Add-on Equipment
...................................... 5-86
Fuses and Circuit Breakers
........................... 5-86
Headlamps
................................................. 5-86
Power Windows and Other Power Options
...... 5-86
Windshield Wiper Fuses
............................... 5-86
Electronically Controlled Air Suspension
System
...................................................... 4-43
Emergency Release for Opening Liftgate
............ 2-13
Emissions Inspection and Maintenance Programs
................................................... 3-38
Engine Air Cleaner/Filter
......................................... 5-1 8
Battery
....................................................... 5-38
Change Engine Oil Light
............................... 3-39
Check and Service Engine Soon Light
............ 3-35
Coolant
...................................................... 5-22
Coolant Heater
............................................ 2-20
Cooling System Inspection
............................ 6-15
Engine Compartment Overview
...................... 5-1 2
Exhaust ..................................................... 2-28
Fan Noise
.................................................. 5-32
Oil ............................................................. 5-13
Overheating
................................................ 5-24
Reduced Power Light
................................... 3-40
Starting
...................................................... 2-1 9
Coolant Temperature
Gage
........................... 3-35 Engine
Air Cleaner Filter Restriction
Indicator Check
............................. ... 6-11
Engine Compartment Fuse Block
................... 5-87
Engine Coolant Level Check
............................. 6-10
Engine Oil Additives
........................................ 5-17
Engine Oil Level Check
................................... 6-10
Engine Oil Scheduled Maintenance
..................... 6-5
Entertainment System Cleaning the Video Screen
........................... 3-91
DVD Distortion
............................................ 3-89
Entry Lighting
.............................................. 3-18
Environmental Concerns
........................ ... 4-17
Erasing HomeLinkO Buttons
................... ... 2-39
Exit Lighting
................................................... 3-18
Express-Down Window
.................................... 2-15
Extender, Safety Belt
....................................... 1-26
Exterior Lamps
........................................... 3-14
ENGINE COOLANT HOT/IDLE ENGINE
............. 3-52
F
FabridCarpet ................................................. 5-77
Filter
Engine Air Cleaner
...................................... 5-18
Finding a PTY Station
............................. 3-60, 3-69
Finding a Station
.................................... 3-58, 3-66
Finish Care
.................................................... 5-81
Finish Damage
............................................... 5-82
Fixed Mast Antenna
........................................ 3-91
Flash-to-Pass
................................................... 3-8
5
Page 395 of 410
Key Lock Cylinders Service .............................. 6-12
Keyless Entry System ....................................... 2-4
Keys ............................................................... 2-3
L
Lamps Light (cont.)
Charging System
...............
Check Gages Warning .......
Cruise Control ...................
Gate Ajar .........................
Low Fuel Warning .............
Malfunction Indicator ..........
Reduced Engine Power ......
Safety Belt Reminder ......... -
.......................... 3-32
.......................... 3-41
.......................... 3-40
.......................... 3-42
.......................... 3-42
.......................... 3-35
.......................... 3-40
.......................... 3-30
Exterior 3-1 4
Interior 3-1 7
Security ..................................................... 3-39
Service All-Wheel-Drive ................................ 3-41 ......................................................
.......................................................
Lamps On Reminder ....................................... 3-15 Lighted Visor Vanity Mirror ............................... 2-15
Lap-Shoulder Belt ................................... 1-1 4, 1-22 Loading Your Vehicle ....................................... 4-41
Child Restraints ........................................... 1-38 Locking Rear Axle ........................................... 4-10
Securing a Child Restraint Designed for the
Lockout Protection .......................................... 2-12
LATCH System Loading Your Vehicle for Off-Road Driving .......... 4-16
LATCH System ........................................ 1-40 Locks
Leather
......................................................... 5-79
Leaving Your Vehicle ....................................... 2-12
Leaving Your Vehicle With the
Engine Running
.......................................... 2-26
Liftgate Release .............................................. 2-1 3
Liftgate/Liftglass .............................................. 2-1 3
LiftglassILiftgate .............................................. 2-1 3
Light
Air Bag Readiness
....................................... 3-31
Anti-Lock Brake System Warning ................... 3-34
Brake System Warning ................................. 3-33
Change Engine Oil ...................................... 3-39
LEFT REAR DOOR AJAR ................................ 3-54
Delayed Locking ........................................... 2-9
Door ........................................................... 2-8
Leaving Your Vehicle .................................... 2-12
Lockout Protection ....................................... 2-12
Power Door .................................................. 2-9
Programmable Automatic Door Locks ............. 2-10
Rear Door Security Locks ............................. 2-12
Loss of Control ............................................... 4-14
Low Fuel Warning Light ................................... 3-42
Luggage Carrier .............................................. 2-42
Lumbar
Power Controls
............................................. 1-2
8
Page 396 of 410
M
Maintenance. Normal Replacement Parts ............ 5-94
Maintenance Schedule
At Each Fuel Fill
......................................... 6-10
At Least Once a Month
................................ 6-10
At Least Once a Year
.................................. 6-12
At Least Twice a Year
.................................. 6-1 1
Brake System Inspection .............................. 6-16
Engine Cooling System Inspection
................. 6-15
Exhaust System Inspection
........................... 6-1 5
Fuel System Inspection ................................ 6-1 5
How This Section is Organized
....................... 6-3
Introduction
.................................................. 6-2
Maintenance Requirements
............................. 6-2
Part A
- Scheduled Maintenance Services ......... 6-4
Part
B - Owner Checks and Services ............. 6-10
Part C
- Periodic Maintenance Inspections ...... 6-1 5
Part D
- Recommended Fluids and
Lubricants
............................................... 6-1 7
Part
E - Maintenance Record ........................ 6-1 9
Scheduled Maintenance
................................. 6-5
Steering, Suspension and Front Drive Axle
Boot and Seal Inspection
.................. . 6-15
Transfer Case and Front Axle
(All-Wheel Drive) Inspection
....................... 6-1 6
Using Your
................................................... 6-4
Your Vehicle and the Environment
............... 6-2 Maintenance When
Trailer Towing
.... ......... 4-52
Making Turns
............................................. 4-51
Malfunction Indicator Light
................................ 3-35
Matching Transmitter(s)
to Your Vehicle ............... 2-6
Message
Mexico, Central America and Caribbean Islands/Countries (Except Puerto Rico
and U.S. Virgin Islands)
............................. 7-4
Memory Seat
................................................. 2-47
DIC Warnings and Messages
........................ 3-52
Mirror Operation
............................................. 2-30
Mirrors Automatic Dimming Rearview with Onstar@
and Compass
.......................................... 2-30
Outside Automatic Dimming Mirror with
Curb View Assist
...................................... 2-33
Outside Convex Mirror
................................. 2-33
Outside Heated Mirrors
................................ 2-33
Outside Manual Mirrors
................................ 2-32
Outside Power Mirror
................................... 2-32
MyGMLink.com
............................................ 7-3
N
New Vehicle Break-In ...................................... 2-18
Normal Maintenance Replacement Parts
............ 5-94
9
Page 402 of 410
Underbody Flushing Service ..... ..... 6-14
Understanding Radio Reception
..................... 3-89
Uniform Tire Quality Grading
............................ 5-57
United States ................................................... 7-4
Using
Using
Using
Using Cleaner
on Fabric
.................................. 5-78
HomeLinka
........................................... 2-39
Song List Mode
..................................... 3-75
RDS ............................................ 3-60, 3-69
v
Vehicle
Control
........................................................ 4-5
Damage Warnings
........................................... iv
Loading
...................................................... 4-41
Symbols ..................................................... iv
Number (VIN)
............................................. 5-85
Service Parts Identification Label
................... 5-85
Vehicle Personalization
Memory Seat
.............................................. 2-47
Vehicle Storage
.............................................. 5-38
Video Screen ................................................. 3-78
Vinyl
............................................................. 5-79
Visor Vanity Mirror
.......................................... 2-15
Visors
........................................................... 2-1 5
Voltmeter Gage .............................................. 3-32
Vehicle
Identification
W
Warning Lights. Gages and Indicators ................ 3-28
Warnings DIC Warnings and Messages
........................ 3-52
Hazard Warning Flashers
............................... 3-5
Other Warning Devices
.................................. 3-6
Safety and Symbols
......................................... III
Vehicle Damage .............................................. iv
Washing Your Vehicle
......................... ...... 5-80
Weatherstrip Lubrication ............................... 6-11
Weight of the Trailer
........................................ 4-47
Weight of the Trailer Tongue
............................. 4-48
What Kind of Engine Oil
to Use ........................ 5-16
What to Add
.................................................. 5-36
What
to Do with Used Oil ................................ 5-18
What
to Use .................................. 5-23, 5-33, 5-46
Wheels
...
Alignment and Tire Balance .......................... 5-58
Replacement
............................................... 5-58
When to Add Engine Oil .................................. 5-15
When to Change Engine Oil
(GM Oil Life System)
................................... 5-17
When to Check .............................................. 5-53
When
to Check and Change ............................ 5-20
When
to Check Lubricant ................................. 5-46
When
to Check Power Steering Fluid ................ 5-33
When
You Are Ready to Leave After
Parking on a Hill
......................................... 4-52
Where
to Put the Restraint ............................... 1-35
15