change time Oldsmobile Bravada 2004 s User Guide
[x] Cancel search | Manufacturer: OLDSMOBILE, Model Year: 2004, Model line: Bravada, Model: Oldsmobile Bravada 2004Pages: 420, PDF Size: 4.37 MB
Page 160 of 420
Display Language
To select your personalization for display language,
press the select button while DISPLAY LANGUAGE is
displayed on the DIC. Pressing the select button
will scroll through the available languages:
Choosing a language will display all of the information
on the DIC in the desired language.
If your vehicle is equipped with an Information Center,
press and hold the trip stem while the odometer is
displayed. While holding down the trip stem button, the
Information Center will begin to list the available
languages. The name of each language will be
displayed in its native language (ENGLISH for English,
FRANCAIS for French and ESPANOL for Spanish).
When you see the language that you would like, release
the trip stem. The Information Center will then display
the information in the language you chose.
If you accidentaly choose a language you do not want
or understand, press and hold the trip information button
and the personalization button at the same time. After
a short time, the display will begin cycling through
the available languages. Release the buttons when you
see a language you would like. This will also reset
all of the current driver’s personalization features to their
factory default settings.
For vehicles with redundant steering wheel controls, see
“Personalization” under the DIC.
Select
The select button is used to reset certain functions and
turn off or acknowledge messages on the DIC display.
The select button also toggles through the options
available in each personalization menu. For example, this
button will reset the trip odometers, turn off the FUEL
LEVEL LOW message, and toggle through the languages
you can select the DIC to display information in.
DIC Warnings and Messages
Messages are displayed on the DIC to notify the driver
that the status of the vehicle has changed and that
some action may be needed by the driver to correct the
condition. More than one message may appear at
one time. They will appear one behind the other. Some
messages may not require immediate action but you
should press the trip stem to acknowledge that you
received the message and clear it from the display.
Pressing any of the DIC steering wheel buttons
(Trip Information, Fuel Information, Personalization or
Select button) will also acknowledge any warnings
or service messages. Some messages cannot be
cleared from the display because they are more urgent.
These messages require action before they can be
removed from the DIC display. The following are
the possible messages that can be displayed and some
information about them.
3-54
Page 165 of 420
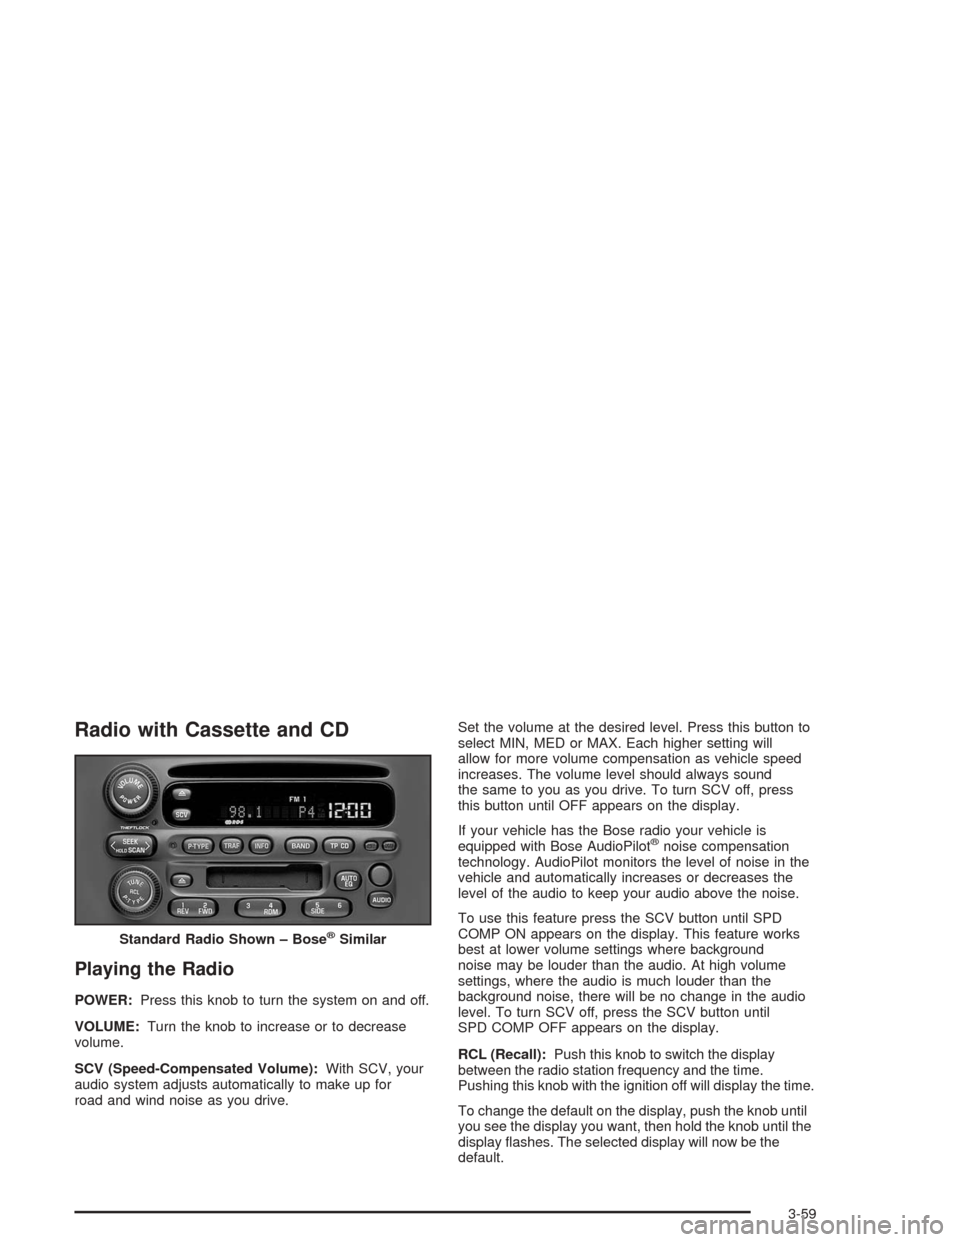
Radio with Cassette and CD
Playing the Radio
POWER:Press this knob to turn the system on and off.
VOLUME:Turn the knob to increase or to decrease
volume.
SCV (Speed-Compensated Volume):With SCV, your
audio system adjusts automatically to make up for
road and wind noise as you drive.Set the volume at the desired level. Press this button to
select MIN, MED or MAX. Each higher setting will
allow for more volume compensation as vehicle speed
increases. The volume level should always sound
the same to you as you drive. To turn SCV off, press
this button until OFF appears on the display.
If your vehicle has the Bose radio your vehicle is
equipped with Bose AudioPilot
®noise compensation
technology. AudioPilot monitors the level of noise in the
vehicle and automatically increases or decreases the
level of the audio to keep your audio above the noise.
To use this feature press the SCV button until SPD
COMP ON appears on the display. This feature works
best at lower volume settings where background
noise may be louder than the audio. At high volume
settings, where the audio is much louder than the
background noise, there will be no change in the audio
level. To turn SCV off, press the SCV button until
SPD COMP OFF appears on the display.
RCL (Recall):Push this knob to switch the display
between the radio station frequency and the time.
Pushing this knob with the ignition off will display the time.
To change the default on the display, push the knob until
you see the display you want, then hold the knob until the
display �ashes. The selected display will now be the
default. Standard Radio Shown – Bose
®Similar
3-59
Page 174 of 420
AUTO EQ (Automatic Equalizer):Press this button to
select the desired equalization setting while playing a
compact disc. The equalization will be automatically set
whenever you play a compact disc. See “AUTO EQ”
listed previously for more information.
SSEEKT:Press the left arrow to go to the start of
the current track if more than eight seconds have
played. Press the right arrow to go to the next track. If
you hold this button or press it more than once, the
player will continue moving backward or forward through
the disc.
SSCANT:Press and hold either arrow for more
than two seconds until you hear a beep and SCAN
appears on the display. The disc will go to the next
track, play for a few seconds, then go on to the
next track. SCAN and the track number will appear on
the display. Press this button again to stop scanning.RCL (Recall):Press this knob to see how long the
current track has been playing. To change the default
on the display (track or elapsed time), push the
knob until you see the display you want, then hold the
knob until the display �ashes. The selected display
will now be the default. While elapsed time is showing,
EL TM will appear on the display.
BAND:Press this button to listen to the radio when a
CD is playing.
TP CD (Tape):Press this button to play a cassette
tape or a CD when listening to the radio. Press TP CD
to switch between the tape and compact disc if both
are loaded. The inactive tape or CD will remain safely
inside the radio for future listening. The display will
show the TAPE and CD symbols.
Z(Eject):Press this button to eject a CD. Eject may
be activated with either the ignition or radio off. CDs
may be loaded with the radio and ignition off if this
button is pressed �rst.
3-68
Page 176 of 420

AUTO VOL (Automatic Volume):With automatic
volume, your audio system will adjust automatically to
make up for road and wind noise as you drive by
increasing the volume as vehicle speed increases.
Set the volume at the desired level. Press this button to
select LOW, MEDIUM or HIGH. AVOL will appear on
the display. Each higher setting will provide more
volume compensation as vehicle speed increases. The
volume level should always sound the same to you
as you drive. To turn automatic volume off, press this
button until AVOL OFF appears on the display.
If your vehicle has the Bose
®audio system your vehicle
has a feature called Bose AudioPilot®noise
compensation technology. AudioPilot®monitors the
level of noise in the vehicle and automatically increases
or decreases the level of the audio to keep it audible
above the noise.Press the AUTO VOL button until AVOL ON appears on
the display. This feature works best at lower volume
settings where background noise may be louder than the
audio. At high volume settings, where the audio is
much louder than the noise, there will be no change in
audio level. To turn this feature off, press the AUTO
VOL button until AVOL OFF appears in the display.
RCL (Recall):Push this knob to switch the display
between the time and the radio station frequency. Push
this knob with the ignition off to display the time.
To change the default on the display, push the knob
until you see the display you want, then hold the knob
for two seconds. The radio will produce one beep
and selected display will now be the default.
3-70
Page 185 of 420
AUTO EQ (Automatic Equalization):Press AUTO EQ
to select the desired equalization setting while playing
a compact disc. The equalization will be automatically
set whenever you play a compact disc. For more
information on AUTO EQ, see “AUTO EQ” listed
previously in this section.
sSEEKt:Press the left arrow to go to the start of
the current track, if more than ten seconds have passed.
Press the right arrow to go to the next track. If you
press the button more than once, the player will continue
moving backward or forward through the disc.
sSCANt:To scan one disc, press and hold either
SCAN arrow for more than two seconds until SCAN
appears on the display and you hear a beep. Use this
feature to listen to 10 seconds of each track of the
currently selected disc. SCAN will appear on the display.
Press either SCAN arrow again, to stop scanning.
To scan all loaded discs, press and hold either SCAN
arrow for more than four seconds until DISC SCAN
appears on the display and you hear a beep. Use this
feature to listen to 10 seconds of the �rst tracks of each
disc loaded. Press either SCAN arrow again, to stop
scanning.RCL (Recall):Push this knob to see how long the
current track has been playing. To change the default
on the display (track and elapsed time), push the
knob until you see the display you want, then hold the
knob until the display �ashes. The selected display
will now be the default.
AM FM:Press this button to play the radio when a
disc(s) is in the player.
Using Song List Mode
The integrated six-disc CD changer has a feature called
song list. This feature is capable of saving 20 track
selections.
To save tracks into the song list feature, perform the
following steps:
1. Turn the disc player on and load it with at least one
disc. See “LOAD CD” listed previously in this
section for more information.
2. Check to see that the disc changer is not in song
list mode. S-LIST should not appear in the display.
If S-LIST is present, press the SONG LIST
button to turn it off.
3. Select the desired disc by pressing the numbered
pushbutton and then use the SEEK SCAN right
arrow button to locate the track that you want
to save. The track will begin to play.
3-79
Page 193 of 420
1 through 0 (Numeric Keypad):The remote control
numeric keypad provides you with the capability of direct
chapter, title, and track number selection.
\:Press this button, within 3 seconds after inputting
a numeric selection to clear all numeric inputs. Press
this button before inputting the number.
}10:Press the button, to select chapter, title, and
track numbers greater than 9. Press this button before
inputting the number.
P(Illumination):Press this button to turn the remote
control backlight on. The backlight will time out after
about 7 to 10 seconds if no other button is pressed while
the backlight is on.
y(Main DVD Menu):Press this button to access the
DVD menu. The DVD menu is different on every
DVD. Use the up, down, left, and right arrow buttons to
move the cursor around the DVD menu. After making
a selection press the enter button. This button only
operates when using a DVD.
r(Enter):Press this button to select the choices
that are highlighted in any menu.
q(Return):Press this button to exit the current
active menu and return to the previous menu. This
button will operate only when a DVD is being played
and a menu is active.
|(Camera Angle):This button changes camera
angles on DVDs that have this feature when a DVD is
playing. The format and content of this function is
dependent on the disc.
{(Subtitle):This button turns on subtitles and moves
through subtitle options when a DVD is playing. The
format and content of this function is dependent on the
disc.
[(Fast Forward):Press this button to fast forward
the DVD or CD. To stop fast forwarding, press this
button again. This button may not work when the DVD
is playing the copyright information or the previews.
s(Play/Pause):Press this button to start play of a
DVD or CD. Press this button while a DVD or CD is
playing to pause it. Press this button again to continue
the play of the DVD or CD.
3-87
Page 194 of 420
Slow Play:When the DVD is playing, press the pause
button then press the fast forward button. The DVD
will continue playing in a slow play mode. To cancel slow
play mode, press the play/pause button.
u(Next Track/Chapter):Press this button to advance
to the beginning of the next track or chapter. This
button may not work when the DVD is playing the
copyright information or the previews.
Battery Replacement
To change the batteries, do the following:
1. Remove the battery compartment door located on
the bottom of the remote control.
2. Replace the two AA batteries in the compartment.
Make sure that they are installed correctly, using
the diagram on the inside of the battery
compartment.
3. Close the battery door securely.
Notice:Do not store the remote control in heat or
direct sunlight. This could damage the remote
control and it would not be covered by your vehicles
warranty. Keep the remote control stored in a
cool, dry place.
If the remote control is to be stored for a long period of
time, remove the batteries and keep them in a cool,
dry place.
Headphones
The RSE system includes two sets of wireless
headphones.
Each set of headphones has an ON/OFF control. An
indicator light will illuminate on the headphones
when they are on. If the light does not illuminate, the
batteries may need to be replaced. See “Battery
Replacement” following for more information.
Each set of headphones has a volume knob. To adjust
the volume, adjust this knob.
The headphones will automatically turn off if they lose the
infrared signal from the system after approximately four
minutes in order to preserve their battery power. The
signal may be lost if the system is turned off or if the
headphones are out of range of the infrared signal
transmitters that are located below the video display
screen.
When using the wired headphones, if the front seat
passengers play a CD in the Radio with Six-Disc CD
(if equipped) or use XM™ Satellite Radio Service
(48 contiguous US states, if equipped), you will hear the
audio for these sources, instead of the DVD or CD
that is currently playing through the RSE.
3-88
Page 195 of 420
Battery Replacement
To change the batteries, do the following:
1. Loosen the screw on the battery compartment door
located on the left side of the headphone earpiece.
2. Replace the two AAA batteries in the compartment.
Make sure that they are installed correctly, using
the diagram on the inside of the battery
compartment.
3. Tighten the screw to close the compartment door.
Notice:Do not store the headphones in heat or
direct sunlight. This could damage the headphones
and repairs would not be covered by your warranty.
Keep the headphones stored in a cool, dry place.
If the headphones are to be stored for a long period of
time, remove the batteries and keep them in a cool,
dry place.
Stereo RCA Jacks
The RCA jacks are located behind the video screen.
The RCA jacks allow you to connect audio and
video from an auxiliary device such as a camcorder or a
video game unit to your RSE system. Standard RCA
cables are needed to connect the auxiliary device to the
RCA jacks. The yellow connector inputs video and
the red and white connectors input right and left stereo
audio. Refer to the manufacturer’s instructions for
proper connection of your auxiliary device.To use the auxiliary inputs on the RSE system, connect
an external auxiliary device to the color-coded RCA
jacks and turn both the auxiliary device and the
RSE system power on. If the RSE system had been
previously in the DVD player mode, pressing the SRCE
button on the faceplate or the remote control will
toggle the RSE system between the auxiliary device
and the DVD player.
How to Change the Video Format when in
the Auxiliary Mode
The auxiliary input video format is preset to NTSC. In
some countries, the video format may be in PAL system.
To change the video format, perform the following:
1. Press the display menu button.
2. Press the down arrow button to highlight the Video
Format option.
3. Press the enter button to select Video Format.
4. Press the right or left arrow button to select
the desired video format.
5. Press the enter button to accept the change.
3-89
Page 213 of 420
Remember: Anti-lock does not change the time you need
to get your foot up to the brake pedal or always decrease
stopping distance. If you get too close to the vehicle in
front of you, you will not have time to apply your brakes if
that vehicle suddenly slows or stops. Always leave
enough room up ahead to stop, even though you have
anti-lock brakes.
Using Anti-Lock
Do not pump the brakes. Just hold the brake pedal
down �rmly and let anti-lock work for you. You may feel
the brakes vibrate, or you may notice some noise,
but this is normal.
Braking in Emergencies
With anti-lock, you can steer and brake at the same
time. In many emergencies, steering can help you more
than even the very best braking.
Traction Assist System (TAS)
Your vehicle has a Traction Assist System (TAS) that
limits wheel spin. This is especially useful in slippery
road conditions. The system operates only if it senses
that one or both of the rear wheels are spinning or
beginning to lose traction. When this happens,
the system reduces engine power to limit wheel spin.The low traction symbol next to the button will come on
when the TAS is limiting wheel spin. You may feel or
hear the system working, but this is normal.
The Traction Assist System may operate on dry roads
under some conditions. When this happens, you
may notice a reduction in acceleration. This is normal
and doesn’t mean there’s a problem with your vehicle.
Examples of these conditions include a hard
acceleration in a turn, an abrupt upshift or downshift of
the transmission or driving on rough roads.
If your vehicle is in cruise control when the TAS begins
to limit wheel spin, the cruise control will automatically
disengage. When road conditions allow you to safely
use it again, you may re-engage the cruise control. See
“Cruise Control” underTurn Signal/Multifunction
Lever on page 3-8. When the traction control off symbol
on the button is on, the TAS is off and will not limit
wheel spin. Adjust your driving accordingly.
The traction control off symbol on the button will come
on under the following conditions:The Traction Assist System is turned off, either by
pressing the TAS on/off button or by turning off
the automatic engagement feature of the TAS.
The transmission is in FIRST (1) gear; TAS will not
operate in this gear. This is normal.
4-9
Page 214 of 420
The vehicle is driven on an extremely rough road.
When the vehicle leaves the rough surface, slows
down or stops, the light will go off and TAS will
be on again. This is normal.
A Traction Assist System, Anti-Lock Brake System
or engine-related problem has been detected and
the vehicle needs service.
The Traction Assist System, as delivered from the
factory, will automatically come on whenever you start
your vehicle. To limit wheel spin, especially in
slippery road conditions, you should always leave the
system on. But you can turn the TAS off if you ever need
to. You should turn the TAS off if your vehicle ever
gets stuck in sand, mud or snow and rocking the vehicle
is required.
To turn the system on or off, press the TAS button
located near the shift lever. If you used the button to turn
the system off, the traction control off symbol on the
button will come on and stay on.
You can turn the system back on at any time by
pressing the button again. The traction control off symbol
on the button should go off.If desired, you can change the TAS automatic
engagement feature so that the system will not come on
automatically when the engine is started. To do so:
1. Turn the ignition to RUN.
2. Move the shift lever to NEUTRAL.
3. Apply the brake pedal and press the accelerator
pedal to the �oor.
4. Press and hold the TAS button for at least six
seconds.
5. Release the TAS button and both pedals.
6. Start the engine and wait a few seconds.
The next time you start your vehicle, the TAS will not
automatically come on. You can restore the automatic
feature by using the same procedure. Whether the TAS
is set to come on automatically or not, you can always
turn the system on or off by pressing the TAS button.
4-10