ignition Oldsmobile Cutlass 1998 Owner's Manuals
[x] Cancel search | Manufacturer: OLDSMOBILE, Model Year: 1998, Model line: Cutlass, Model: Oldsmobile Cutlass 1998Pages: 348, PDF Size: 17.46 MB
Page 38 of 348
NOTICE:
If you damage the covering for the driver’s or the
right front passenger’s air bag, the bag may not
work properly. You may have to replace the
air
bag module in the steering wheel or both the air
bag module and the instrument panel for the
right front passenger’s
air bag. Do not open or
break the
air bag coverings.
If your vehicle ever gets into a lot of water -- such as
water up to the carpeting or higher
-- or if water enters
your vehicle and soaks the carpet, the air bag controller
can be soaked and ruined. If this ever happens, and then
you start your vehicle, the damage could make the air
bags inflate, even
if there’s no crash. You would have to
replace the air bags as well as the sensors and related
parts. If your vehicle is ever in a flood, or if it’s exposed
to water that soaks the carpet, you can avoid needless
repair costs by turning off the vehicle immediately.
Don’t let anyone start the vehicle, even to tow it, unless \
the battery cables are first disconnected.
~~ ~~~
~~
Servicing Your Air Bag-Equipped Vehicle
Air bags affect how your vehicle should be serviced.
There are parts
of the air bag system in several places
around your vehicle. You don’t want the system to
inflate while someone is working on your vehicle. Your
retailer and the Cutlass Service Manual have
information about servicing your vehicle and the air bag
system. To purchase a service manual, see “Service and
Owner Publications” in the Index.
For up to 10 minutes after the ignition key is
turned off and the battery is disconnected, an air
bag can still inflate during improper service. You
can be injured
if you are close to an air bag when
it inflates. Avoid yellow connectors. They are
probably part of the air bag system. Be sure to
follow proper service procedures, and make sure
the person performing work for you
is qualified
to do
so.
The air bag system does not need regular maintenance.
1-26
Page 65 of 348
Section 2 Features and Controls
Here you can learn about the many standard and optional features on your vehicle, and inform\
ation on starting,
shifting and braking. Also explained are the instrument panel and the warning systems that tell you
if evewng is
working properly
-- and what to do if you have a problem.
2-2 2-4
2-6
2- 10
2- 12
2- 13
2-13
2- 14
2- 15
2- 16
2-18
2-22
2-23 2-25
2-26
Keys
Door Locks
Remote Lock Control
(If Equipped)
TrWnk
Theft Passlock'
New Vehicle "Break-In" Ignition Positions
Starting Your Engine
Engine Coolant Heater
(If Equipped)
Automatic Transaxle Operation
Parking Brake
Shifting
Into PARK (P)
Shifting Out of PARK (P)
Parking Over Things That Bum 2-26
2-27
2-28 2-28
2-29
2-29
2-36
2-38
2-40
2-4
1
2-45
2-46
2-48
2-50 Engine Exhaust
Running
Your Engine While You're Parked
Windows
Horn
Tilt Wheel
Turn Signal/Multifimction Lever
Exterior Lamps Interior Lamps
Mirrors Storage Compartments
Sunroof (If Equipped)
Instrument Panel Instrument Panel Cluster
Warning Lights, Gages and Indicators
2-1
Page 67 of 348
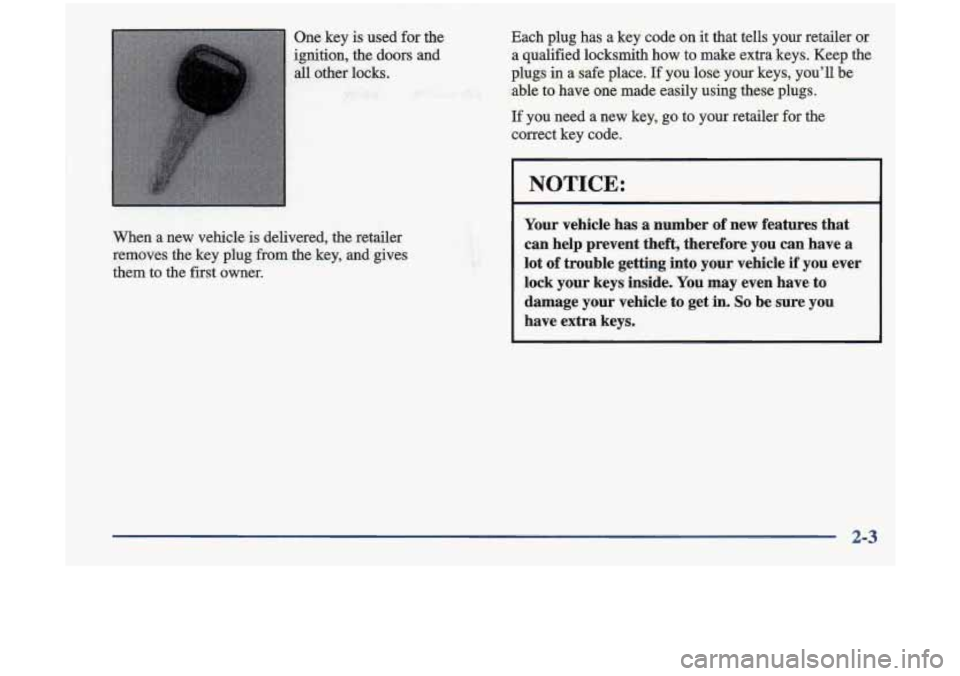
One key is used for the Each plug has a key code
on it that tells your retailer or
ignition,
the doors and a qualified locksmith how to make extra keys. Keep the
all other locks. plugs
in a
safe place. If you lose your keys, you’ll be
able to have one made easily using these plugs.
If you need a new key, go to your retailer for the
correct key code.
When a new vehicle
is delivered, the retailer
removes the key plug fiom
the key, and gives
them to the first owner.
NOTICE:
Your vehicle has a number of new features that
can help prevent theft, therefore you can have a
lot
of trouble getting into your vehicle if you ever
lock your keys inside.
You may even have to
damage your vehicle to get in.
So be sure you
have extra keys.
2-3
Page 77 of 348
Passlock@
Your vehicle is equipped with the passlock
theft-deterrent system.
Passlock
is a~passive theft-deterrent system. The system
is armed once the key is removed from the ignition.
Passlock enables fuel if the ignition lock cylinder is
turned with a valid key.
If a correct key is not used, fuel
is disabled.
During
normal operation, the THEFT SYSm light
will go
off after the engine is started.
If the THEFT SYSTEM light flashes, wait until the light
stops flashing before starting the engine.
If the THEFT SYSTEM light comes on while the engine
is running, a problem has been detected and the system
may need service. See your retailer
for service.
In an emergency, cal
Assistance Center at 1 the Oldsmobile Roadside
1-800-442-OLDS
(6537).
New Vehicle “Break-In”
NOTICE:
Your vehicle doesn’t need an elaborate
‘70reak-in.” But
it will perform better in the long
run if you follow these guidelines:
Don’t drive at any one speed -- fast or
slow -- for the first 500 miles (805 km).
Don’t make full-throttle starts.
200 miles (322 km) or so. During this time
your new brake linings aren’t yet broken
in. Hard stops with new linings can mean
premature wear and earlier replacement.
Follow this breaking-in guideline every
time you get new brake linings.
See
“Towing a Trailer’’ in the Index for
more information.
Avoid making hard stops for the first
0 Don’t tow a trailer during break-in.
2-13
Page 78 of 348
Ignition Positions
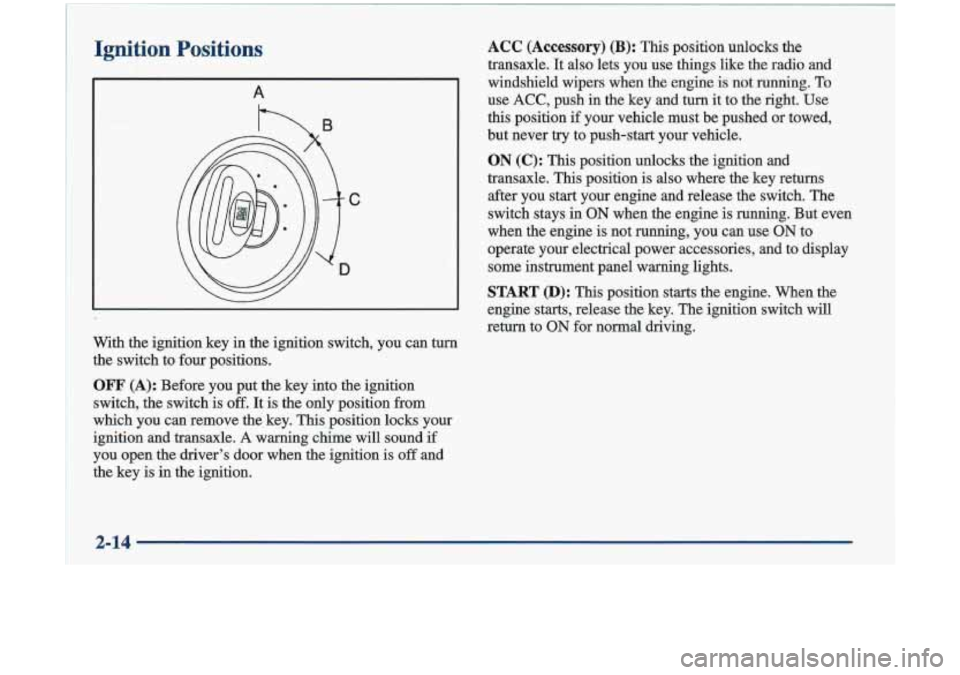
A
hB
ACC (Accessory) (B): This position unlocks the
transaxle. It also lets you use things like the radio and
windshield wipers when the engine is not running.
To
use ACC, push in the key and turn it to the right. Use
this position
if your vehicle must be pushed or towed,
but never try to push-start your vehicle.
ON (C): This position unlocks the ignition and
transaxle. This position is also where the key returns
after you
start your engine and release the switch. The
switch stays in
ON when the engine is running. But even
when the engine is not running, you can use
ON to
operate your electrical power accessories, and to display
some instrument panel warning lights.
START (D): This position starts the engine. When the
engine starts, release the key. The ignition switch will
return to
ON for normal driving.
With
the ignition key in the ignition switch, you can turn
the switch to four positions.
OFF (A): Before you put the key into the ignition
switch, the switch is
off. It is the only position from
which you can remove the key. This position locks your
ignition and transaxle.
A warning chime will sound if
you open the driver’s door when the ignition is off and
the key is in the ignition.
2-14
Page 83 of 348
Ensure the shift lever is fully in PARK (P) range before
starting the engine. Your Oldsmobile has a
Brake-Transaxle Shift Interlock (BTSI). You have to
apply your regular brake before you can shift from
PARK
(P) when the ignition key is in the RUN position.
If you cannot shift out of PARK (P), ease pressure on
the
shift lever -- push the shift lever all the way into
PARK (P)
-- as you maintain brake application. Then
move the shift lever into the gear you wish. (Press the
shift lever button before moving the shift lever.) See
“Shifting Out of PARK
(P)” later in this section.
REVERSE (R): Use this gear to back up.
NOTICE:
Shifting to REVERSE (R) while your vehicle is
moving forward could damage your transaxle.
Shift to
REVERSE (R) only after your vehicle
is stopped.
To rock your vehicle back and forth to get out of snow,
ice or sand without damaging your transaxle,
see “If
You’re Stuck: In Sand, Mud, Ice or Snow” in the Index.
NEUTRAL (N): In this position, your engine
doesn’t connect with the wheels.
To restart when you’re
already moving, use
NEUTRAL (N) only. Also, use
NEUTRAL (N) when your vehicle is being towed.
Shifting out of PARK (P) or NEUTRAL (N) while
your engine is “racings’ (running
at high speed) is
dangerous. Unless your foot is firmly on the
brake pedal; your vehicle cdd move very
rapidly. You could lose control and hit people or
objects. Don’t shift out
of PARK (P) or
NEUTRAL
(N) while your engine is racing.
NOTICE: I
Do not shift out of PARK (P) or NEUTRAL (N)
with the engine racing. Your transaxle can be
damaged
by doing this and will not be covered by
your warranty. Shift your transaxle according to
the instructions in this manual.
2-19
Page 86 of 348
Second-Gear Start
Your vehicle is equipped with a second-gear start
feature. Place the shift lever in SECOND
(2) gear to
provide more traction when you are starting on ice or
other slippery surfaces. The transaxle will be in
SECOND
(2) gear when the vehicle begins to move.
After starting in SECOND
(2) gear, place the shift lever
in THIRD
(3) or DRIVE (a).
This feature is for improved traction only when the road
surface is slippery
and is not intended for continuous use
or when the vehicle is stuck
in sand, mud, ice, snow
or gravel.
Parking Brake
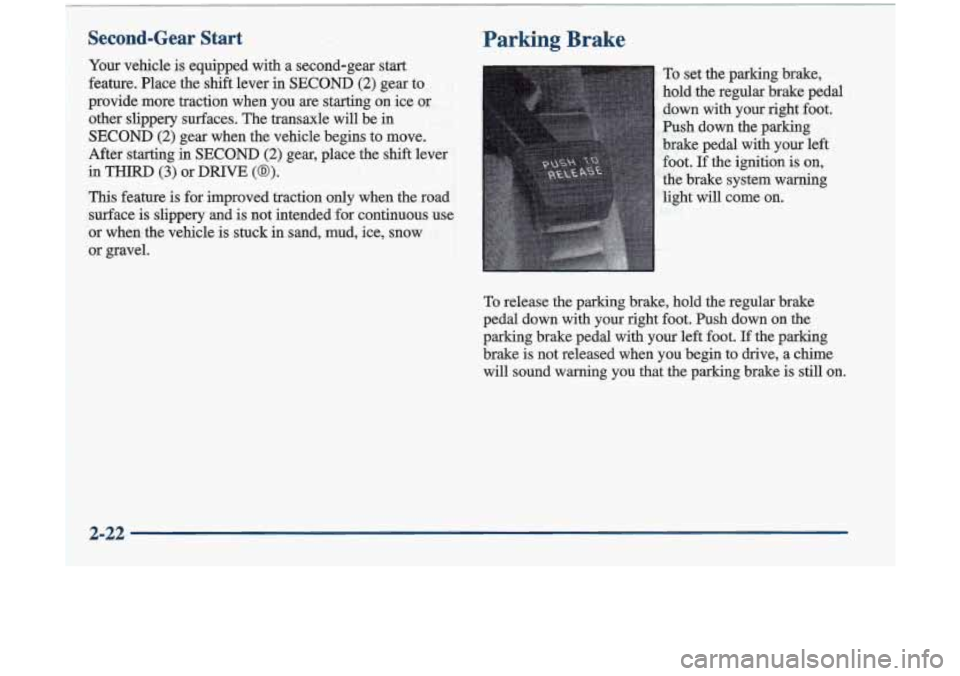
To set the parking brake,
hold the regular brake pedal
down with your right foot.
Push down the parking
brake pedal with your left foot.
If the ignition is on,
the brake system warning
light will come on.
To release the parking brake, hold the regular brake
pedal down with your right foot. Push down on the
parking brake pedal with your left foot.
If the parking
brake is not released when you begin to drive, a chime
will sound warning you that the parking brake is still on.
Page 88 of 348
Leaving Your Vehicle With the
.;Engine Running
I
~ , . .. . - ~~~ ~ ,.-‘.“~‘,’7 ,2-- .v7.! jT.-<--. , . ~ , -
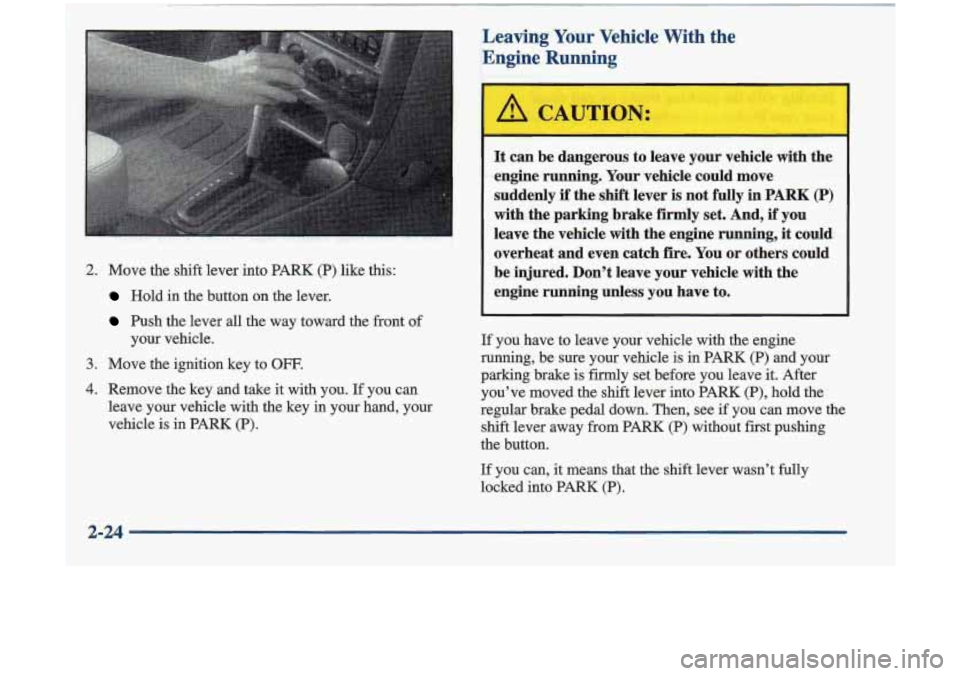
2. Move the shift lever into PARM (P) lilce this:
. . Hold jn the button on the lever.
Push the lever all the way toward the front of
your vehicle.
3. move the ignition key to OFF.
4. Remove the key and take it with you. If you can
leave your vehicle with the key in-your hand, your
veKcle
is in PARK (P).
It cm be dangerous to leave your vehicle with the
engine running. Your vehicle could move
suddenly if the shift lever
is not fully in PARK (P)
with the parking brake firmly set. And, if you
leave the vehicle
with the engine running, it could,
overheat and even catch fire. You
or others could
be.injured. Don’t leave your vehicle with the
engine
running unless you have to.
I
If you have to leave your vehicle with the engine
running, be sure your vehicle is in PARK (P) and your
parking brake is firmly set before
you leave it. After
you’ve moved the shift lever into
PARK (P), hold the
regular brake pedal down. Then, see
if you can move the
shift lever away from
PARK (P) without first pushing
the button.
If you can, it means that the shift lever wasn’t fully
locked into
PARK (p).
Page 100 of 348
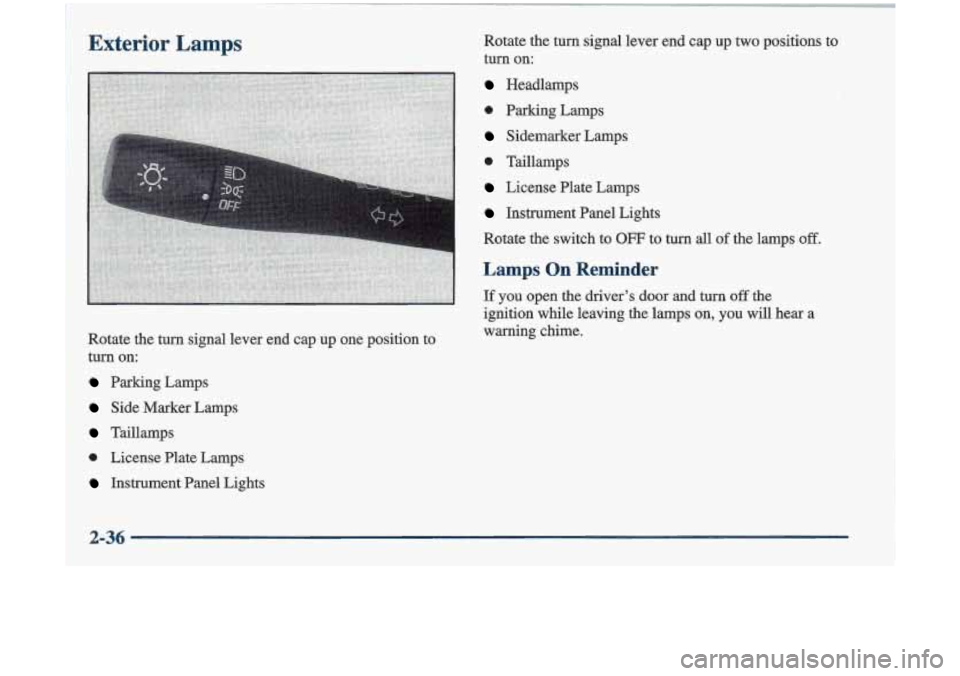
Exterior Lamps
Rotate the turn signal lever end cap up one position to
turn on:
Parking Lamps
Side Marker Lamps
Taillamps
0 License Plate Lamps
Instrument Panel Lights Rotate the
turn signal lever end cap up two positions to
turn on:
Headlamps
0 Parking Lamps
Sidemarker Lamps
License Plate Lamps
Instrument Panel Lights
Rotate the switch to
OFF to turn all of the lamps off.
Lamps On Reminder
If you open the driver’s door and turn off the
ignition while leaving the lamps on, you
will hear a
warning chime.
2-36
Page 101 of 348
Daytime Running Lamps
Daytune Running Lamps (DRL) can make it easier for
others to see the front of your vehicle during the day.
DRL
can be helpful in many different driving
conditions, but they can be especially helpful in the
short periods after dawn and before sunset.
The
DRL system will make your low-beam headlamps
come on at a reduced brightness when:
The ignition is on,
The headlamp switch is in the OFF position or you
have turned
on your parking lamps
The light sensor detects daytime light,
0 The parking brake is released and
The shift lever is not in PARK (P).
When the DRL system is on, the taillamps, sidemarker,
parking lamps and instrument panel lights will not
be illuminated.
The
DRL system will remain off any time your vehicle
is in
PARK (P) or the parking brake is engaged.
As with any vehicle, you should turn on the regular
headlamp system when you need it.