display Oldsmobile Cutlass Supreme 1993 s User Guide
[x] Cancel search | Manufacturer: OLDSMOBILE, Model Year: 1993, Model line: Cutlass Supreme, Model: Oldsmobile Cutlass Supreme 1993Pages: 340, PDF Size: 16.21 MB
Page 126 of 340
Comfort Controls &Audio Systems
I 124
AMIFM Stereo with Cassette
Player
and Music Search (CONT.)
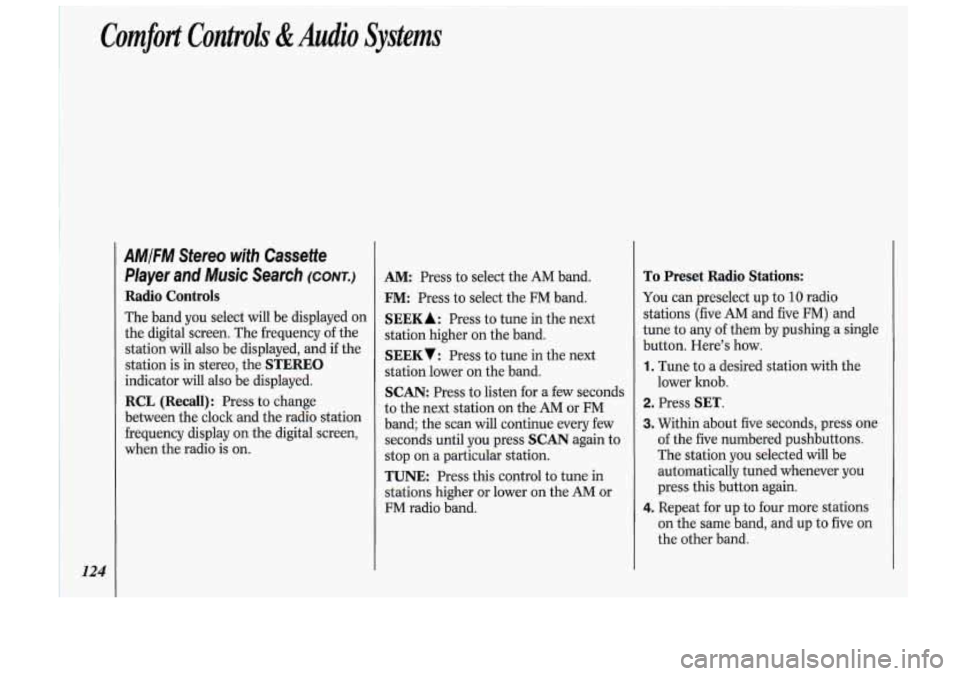
Radio Controls
The band you select will be displayed on
the digital screen. The frequency
of the
station will
also be displayed, and if the
station is in stereo, the
STEREO
indicator will also be displayed.
RCL (Recall): Press to change
between the clock and the radio station
frequency display on the digital screen,
when the radio is on.
AM: Press to select the AM band.
FM: Press to select the FM band.
SEEK A : Press to tune in the next
station higher on the band.
SEEKV: Press to tune in the next
station lower on the band.
SCAN: Press to listen for a few seconds
to the next station on the AM or FM
band; the scan will continue every few
seconds until you press
SCAN again to
stop on a particular station.
TUNE: Press this control to tune in
stations higher or lower on the
AM or
FM radio band.
To Preset Radio Stations:
You can preselect up to 10 radio
stations (five AM and five
FM) and
tune to any
of them by pushing a single
button. Here’s how.
1. Tune to a desired station with the
lower hob.
2. Press SET.
3. Within about five seconds, press one
of the five numbered pushbuttons.
The station you selected will be
automatically tuned whenever you
press this button again.
4. Repeat for up to four more stations
on the same band, and up to five on
the other band.
Page 128 of 340
Comfort Controls &Audio Systems
126
-
..^^L^ I
AMIFM Stereo with Cassette
Player and Graphic Equalizer
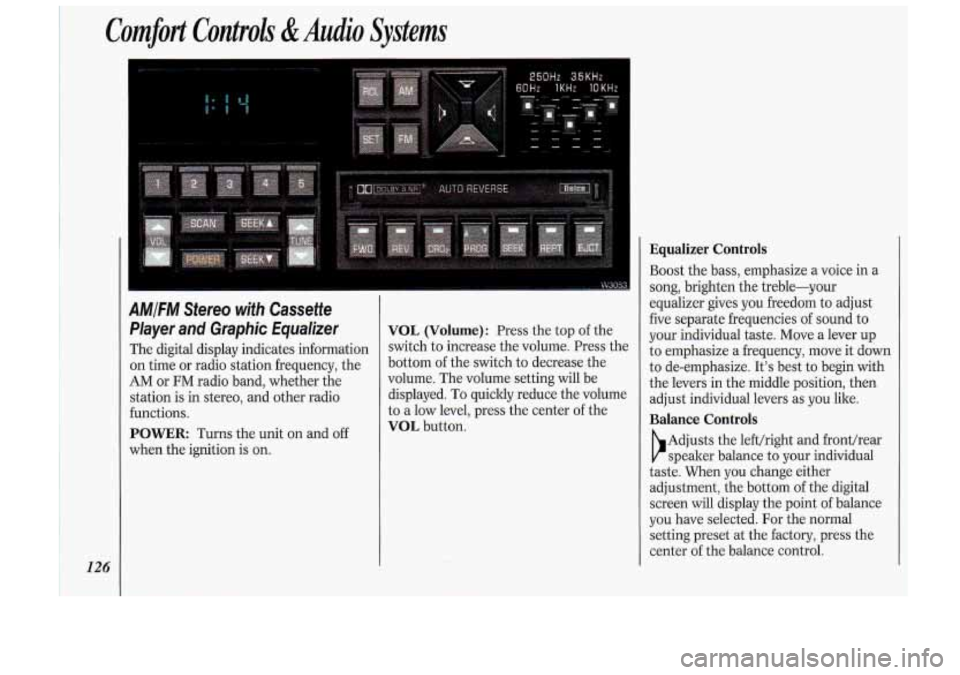
The digital display indicates information
on time or radio station frequency, the
AM or FM radio band, whether the
station is in stereo, and other radio
functions.
POWER Turns the unit on and off
when the ignition is on.
VOL (Volume): Press the top of the
switch to increase the volume. Press the
bottom of the switch to decrease the
volume. The volume setting will be
displayed. To quickly reduce the volume
to a low level, press the center of the
VOL button.
Equalizer Controls
Boost the bass, emphasize a voice in a
song, brighten the treble-your
equalizer gives you freedom to adjust
five separate frequencies
of sound to
your individual taste. Move a lever up
to emphasize a frequency, move it clown
to de-emphasize. It’s best to begin with
the levers in the middle position, then
adjust individual levers as you like.
Balance Controls
b
Adjusts the lefthight and front/rear
speaker balance to your individual
taste. When you change either
adjustment, the bottom of the digital
screen will display the point of balance
you have selected. For the normal
setting preset at the factory, press the
center of the balance control.
Page 131 of 340
i, DGlCO-l0C SI )
AM/FM Stereo with Compact Disc
Player
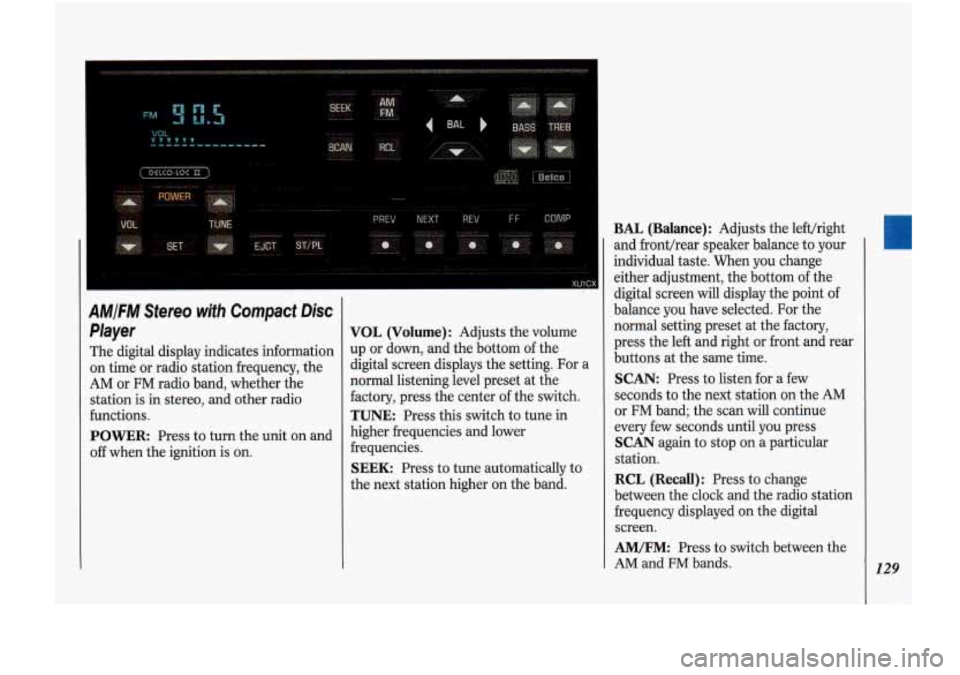
The digital display indicates information
on time or radio station frequency, the
AM or FM radio band, whether the
station
is in stereo, and other radio
functions.
POWER: Press to turn the unit on and
off when the ignition is on.
VOL (Volume): Adjusts the volume
up or down, and the bottom of the
digital screen displays the setting. For a
normal listening level preset at the
factory, press the center of the switch.
TUNE: Press this switch to tune in
higher frequencies and lower
frequencies.
SEEK: Press to tune automatically to
the next station higher on the band.
BAL (Balance): Adjusts the lefthight
and fronthear speaker balance to your
individual taste. When you change
either adjustment, the bottom of the
digital screen
will display the point of
balance you have selected.
For the
normal setting preset at the factory,
press the left and right or front and rear
buttons at the same time.
SCAN: Press to listen for a few
seconds to the next station on the AM
or
FM band; the scan will continue
every few seconds until you press
SCAN again to stop on a particular
station.
RCL (Recall): Press to change
between the clock and the radio station
frequency displayed on the digital
screen.
AM/FM: Press to switch between the
AM and
FM bands. 129
Page 132 of 340
Comfort Controls &Audio Systems
130
AMIFM Stereo with Compact Disc
Player
(CONT.)
To Preset Radio Stations:
The five pushbuttons in the lower right
corner can be used to preset up to ten
radio stations (five
AM and five FM) .
The buttons have other uses when you
are playing a compact disc.
1. Tune the digital display to the station
you want.
2. Press SET. The SET indicator will
appear on the digital screen for five
seconds.
3. While the SET indicator is displayed,
press one
of the five pushbuttons.
4. Repeat steps 1-3 for each of five AM
and five FM stations.
To Play a Compact Disc:
Many of the controls for the radio also
have functions for the compact disc
player, as explained here.
Don’t use mini-discs that are called
singles. They won’t eject. Use only hll-
size compact discs.
1. Press POWER to turn the unit on.
2. Insert a disc part-way into the slot,
with the label side
up. The player will
pull it in. In a few seconds, the disc
should play.
If the disc comes back out:
The disc may be upside down.
The disc may be dirty, scratched or
wet.
There may be too much moisture in
the air (wait about one hour and try
again).
The player may be too hot, or the road
may be too rough
for the disc to play.
While a disc is playing, the CD indicator
is displayed on the digital screen, as is
the clock.
RCL (Recall): Press once 10 see which
track is playing. Press again within five
seconds to see how long your selection
has been playing. The track number
also will be displayed when the volume
is changed or a new track starts to play.
PREV (Previous): Press to play a
track again. If you hold the
PREV
button, the disc will keep backing up to
previous tracks.
NEXT: Press when you want to hear
the next track.
If you hold the NEXT
button, the disc will keep advancing to
other tracks.
REV (Reverse): Press and hold to
rapidly back up to a favorite passage.
Release to resume playing.
FF (Fast Forward): Press and hold to
rapidly advance the disc. Release to
resume playing.
COMP (Compression) : Depressing
this button makes
soft and loud
Page 133 of 340
When Finished with the Compact
Disc Player:
If you press POWER or turn off the
ignition, the disc will stay in the player
and start again when you turn on the
ignition or power switch. The disc will
begin playing
at the point where it had
been stopped.
ST/PL (Stop/Play): Press to stop the
disc player; the radio will play. Press
again to play the disc (the player will
start playing the disc where it was
stopped earlier).
EJCT (Eject): Press to eject the disc;
the radio will play.
CD Player Anfi-Theft Feature
Delco LOC II@ is a security feature that
can be used or ignored. If you ignore it,
your system will play normally. If you
use it, your system cannot be turned
on
if it is stolen. These instructions will tell
you how to enter a secret code into your
system. Then,
if battery power is lost for
any reason, the secret code must be
entered again before the system can be
turned on.
To Set:
1. Write down any six-digit number and
keep it in a safe place. This is your
secret code.
Run.
radio off.
the same time and hold until
--- ” shows on the display.
You now have only
15 seconds
between each of the following steps.
2. Turn the ignition to Accessory or
3. Press the POWER button to turn the
4. Press the PREV and FF buttons at
;<
5. Press SET and 000 appears on the
6. Press and hold SEEK until the first
7. Press and hold SCAN until the
display.
digit of your code appears.
second and third digits of your code
appear.
8. Press AM-FM (000 appears).
9. Press and hold SEEK until the
fourth digit of your code appears.
IO. Press and hold SCAN until the fifth
and sixth digits of your code appear.
11. Press AM/FM (rEP will appear for
five seconds, then
000).
12. Repeat steps 6 through 10. Then
press the
AM/FM button again.
SEC will appear, indicating that
Delco
LOC II@ is set, and your
radio is secure. If
‘‘ ” appears,
the steps were not successful and
you must repeat the entire
procedure.
131
Page 134 of 340
Comfort Controls &Audio Systems
132
CD Player Anti-Theft Feature
(CONT.)
To Disable the Anti-Theft System:
Enter your secret code by following
these steps (you will have only
15
seconds between each step).
1. Turn the ignition to Accessory or
Run and the radio off, then press the
PREV and FF buttons of the station
presets.
SEC will appear, showing the
radio is secure.
2. Press SET and 000 appears on the
display.
3. Press and hold SEEK until the first
digit of your secret code appears.
4. Press and hold SCAN until the
second and third digits of your code
appear.
the display).
5. Press AM-FM (000 will appear on
6. Press and hold SEEK until the fourth
digit of your code appears.
7. Press and hold SCAN until the fifth
and sixth digits of your code appear.
8. Press AM/FM. If the display shows
--- ” the radio is unsecured and
will play again. If the display shows
SEC, the steps were not successful
and the numbers did not match the
secret code.
If you lose or forget your code, see your
dealer.
If you lose battery power, when the
battery is reconnected, the system will
not turn on and
LOC will appear.
Follow steps
1-8 for disabling your
system (the time will appear if you are
successful). If
SEC appears, the
numbers did not match and your unit is
still locked.
((
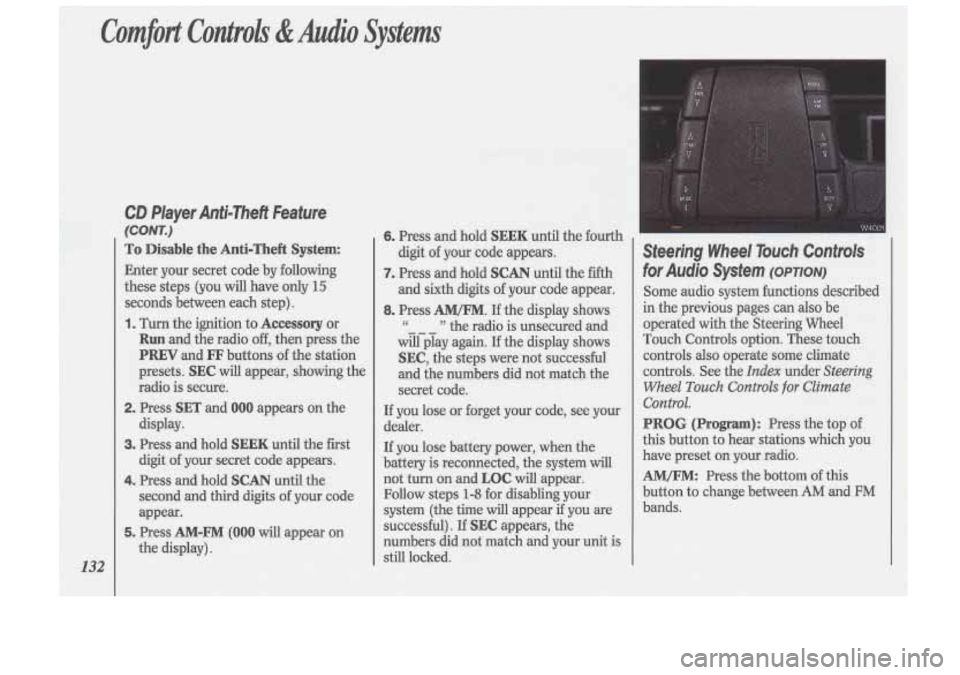
Steering Wheel Touch Controls
for Audio System (OPTION)
Some audio system functions described
in the previous pages can also be
operated with the Steering Wheel
Touch Controls option. These touch controls
also operate some climate
controls. See the
Index under Steering
Wheel
Touch Controls for Climate
Control.
PROG (Program): Press the top of
this button to hear stations which you
have preset on your radio.
AM/FM: Press the bottom of this
button to change between
AM and FM
bands.
Page 230 of 340
Whaf Kind of Oil to Use (CONT.)
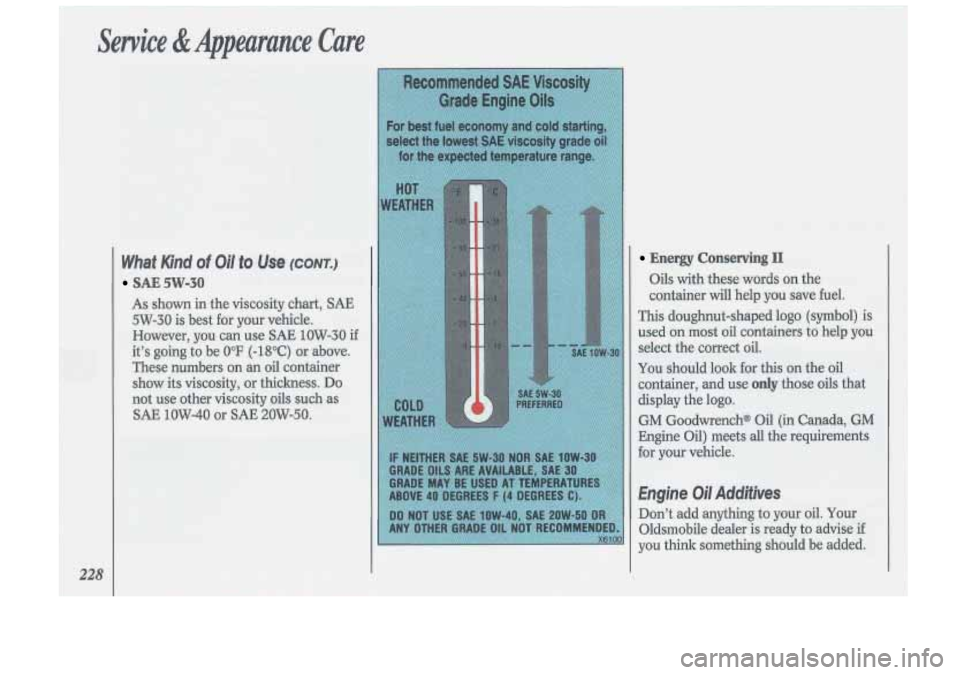
SAE 5W-30
As shown in the viscosity chart, SAE
5W-30 is best for your vehicle.
However, you can use
SAE 1OW-30 if
it’s going to be
0°F (-18°C) or above.
These numbers on
an oil container
show its viscosity, or thickness. Do
not use other viscosity oils such as
SAE 1OW-40 or SAE 20W-50.
Energy Conserving I1
Oils with these words on the
container
will help you save fuel.
This doughnut-shaped logo (symbol) is
used on most oil containers to help you
select the correct oil.
You should look for this on the oil
container, and use
only those oils that
display the logo.
GM Goodwrench@ Oil (in Canada, GM
Engine Oil) meets all the requirements
for your vehicle.
Engine Oil Additives
Don’t add anything to your oil. Your
Oldsmobile dealer is ready to advise
if
you think something should be added.
Page 328 of 340
Index
326
Brake System Warning Light Anti-Lock Brake System
................. 99
Standard Brakes
............................... 98
Brakes. Anti-Lock
........................... 149
Warning Light
.................................. 99
Braking
in Emergencies ................... 153
Braking Technique ........................... 148
Break.Tn. New Vehicle
Normal Driving
............................... 54
When Towing a Trailer
.................. 177
Braking
............................................. 148
Buckling Up (see
Safety Belts)
Bulb Replacement
Center High-Mounted
Stoplight
.............................. 263. 280
Fog Lights
..................................... 249
Taillight
................................. 247. 280
Headlight
............................... 243. 280
Capacities and Specifications
....... 276
Carbon Monoxide
in Exhaust ............ 66
Cassette Tape Holder
........................ 83
Cassette Tape Player
(see
Audio Systems)
Center Lap Belts (see Safety Belts)
Chains. Tire ............................. 212. 258
Changing a Flat Tire
......................... 205
Checking Aim
of the Headlights .................... 241
Automatic Transaxle Fluid
............................................. 231
Brake Fluid
.................................... 238
Engine Coolant
............................. 235
Engine Oil
..................................... 226
Power Steering Fluid
.................... 237
Safety Belt Systems
.......................... 42
Things Under the Hood
................. 222
Child Restraints
.................................. 31
Children
............................................. 30
Cigarette Lighter
................................ 84
Circuit Breakers
& Fuses ................ 270
City Driving
..................................... 165
Cleaner, Air
.............................. 230, 283
Cleaning Aluminum Wheels
........................ 265
Antenna
......................................... 135
Cassette Player and Tapes
............ 134
Compact Discs
.............................. 135
Fabric .............................................. 260 Fiberglass Springs
......................... 268
Glass
............................................... 263
HUD (Head-Up Display)
............. 104
Inside
of Your Vehicle ................... 260
Leather and Vinyl
.......................... 262
Outside
of Your Vehicle ............... 265
Safety Belts
................................... 262
Special Problems
........................... 261
Underbody Maintenance
.............. 267
Warnings
........................................ 259
Weatherstrips
................................ 266
White Sidewall Tires
..................... 266
Windshield
.................................... 264
Clock, Setting the
............................. 118
Clusters. Instrument Panel ................ 90
Coin Holder ....................................... 83
Comfort Controls
Climate Control
.............................. 110
Electronic Climate Control
............ 113
Steering Wheel Touch Controls
.... 116
Ventilation ..................................... 111
Compact Disc Player
(see
Audio Systems)
Compact Spare Tire ......................... 211
Compartments, Storage
............... 83, 84
Page 331 of 340
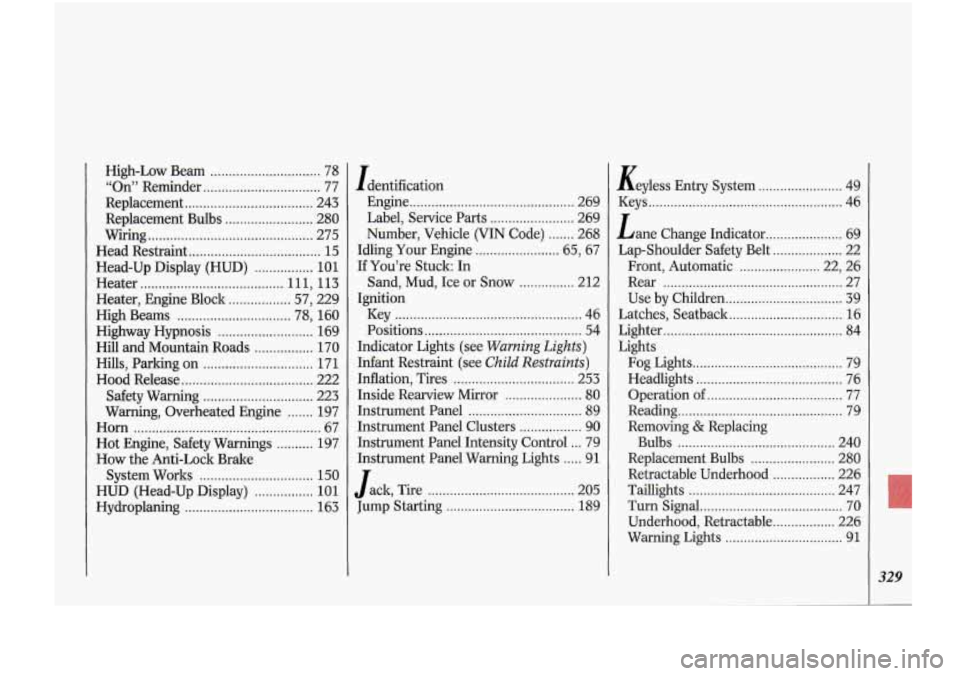
High-Low Beam .............................. 78
Replacement
................................... 243
Wiring
............................................. 275
Head-Up Display (HUD)
................ 101
Heater ....................................... 111, 113
Heater, Engine Block ................. 57, 229
High Beams
............................... 78, 160
Highway Hypnosis
.......................... 169
Hill and Mountain Roads
................ 170
Hills. Parking on
.............................. 171
Hood Release
.................................... 222
Safety Warning
.............................. 223
Warning, Overheated Engine
....... 197
Horn
................................................... 67
Hot Engine, Safety Warnings
.......... 197
How the Anti-Lock Brake
System Works
............................... 150
HUD (Head-Up Display) ................ 10 1
(6 On” Reminder ................................ 77
Replacement Bulbs
........................ 280
Head Restraint
.................................... 15
Hydroplaning ................................... 163
Identification Englne
............................................. 269
Label. Service Parts
....................... 269
Number. Vehicle (VIN Code)
....... 268
Idling Your Engine
....................... 65. 67
If You’re Stuck: In
Ignition Sand.
Mud. Ice or Snow
............... 212
Key
................................................... 46
Positions
........................................... 54
Indicator Lights (see
Warning Lights)
Infant Restraint (see Child Restraints)
Inflation. Tires ................................. 253
Inside Rearview Mirror
..................... 80
Instrument Panel ............................... 89
Instrument Panel Clusters
................. 90
Instrument Panel Intensity Control
... 79
Instrument Panel Warning Lights
..... 91
Jump Starting
................................... 189
Jack.
Tire
........................................ 205 Keyless
Entry System
....................... 49
Keys
..................................................... 46
Lane Change Indicator
..................... 69
Lap-Shoulder Safety Belt
................... 22
Front, Automatic
...................... 22, 26
Rear
................................................. 27
Use by Children
................................ 39
Latches, Seatback
............................... 16
Lighter
................................................. 84
Lights
Fog Lights
......................................... 79
Headlights
........................................ 76
Operation
of ..................................... 77
Reading ............................................. 79
Removing
& Replacing
Bulbs
........................................... 240
Replacement Bulbs
....................... 280
Retractable Underhood
................. 226
Taillights
........................................ 247
Turn Signal
....................................... 70
Underhood, Retractable
................. 226
Warning Lights
................................ 91
329