headlamp Oldsmobile Cutlass Supreme 1995 Owner's Manuals
[x] Cancel search | Manufacturer: OLDSMOBILE, Model Year: 1995, Model line: Cutlass Supreme, Model: Oldsmobile Cutlass Supreme 1995Pages: 340, PDF Size: 16.68 MB
Page 83 of 340
c
Tilt Steering Wheel
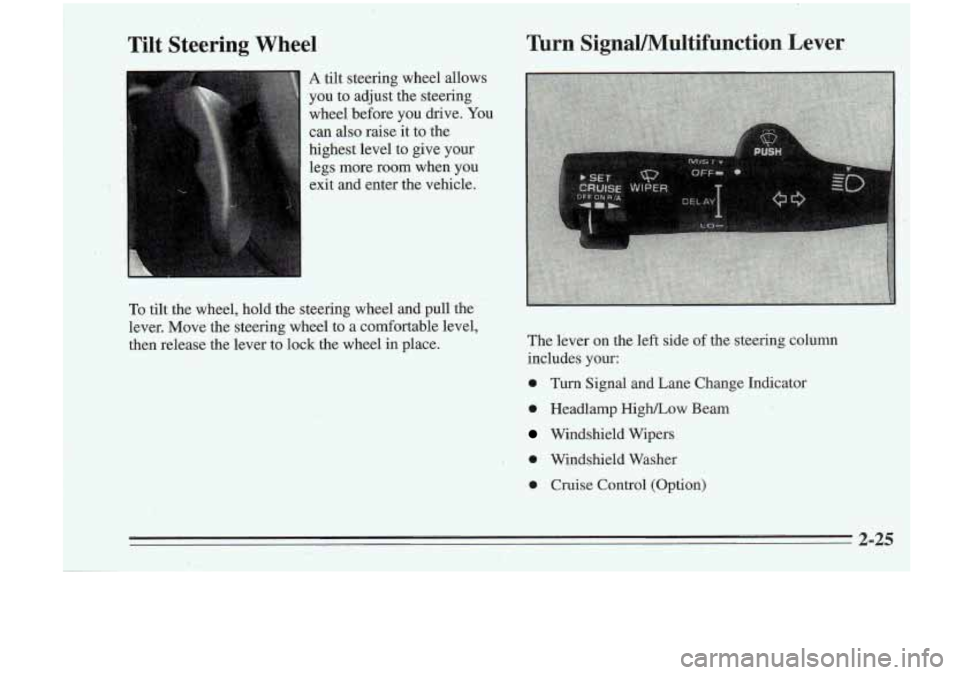
A tilt steering wheel allows
you to adjust the steering
wheel before you drive. You
can also raise it to the
highest .level to give your
legs more room when you
e& and enter the vehicle.
To tilt the wheel, hold the steering wheel and pull, the
lever. Move the steering wheel to
a comfortable level,
then release the lever to lock the wheel in place.
Turn SignaVMultifunction Lever
The lever on the left side of the steering column
includes your:
"
0 Turn Signal and Lane Change Indicator
0 Headlamp HighLLow Beam
Windshield Wipers
0 Windshield Washer
0 Cruise Control (Option)
2-25
Page 84 of 340
.,’
I
nrn Signal and Lane Change Indicator
The turn signal has two upward (for,Right) and two
downward (for Left) positions. These positions allow
you to signal a turn or a lane, ch&ge.
To signal a turn, move the lever all the way up or down.
When the turn
is finished, the lever will return
automatically.
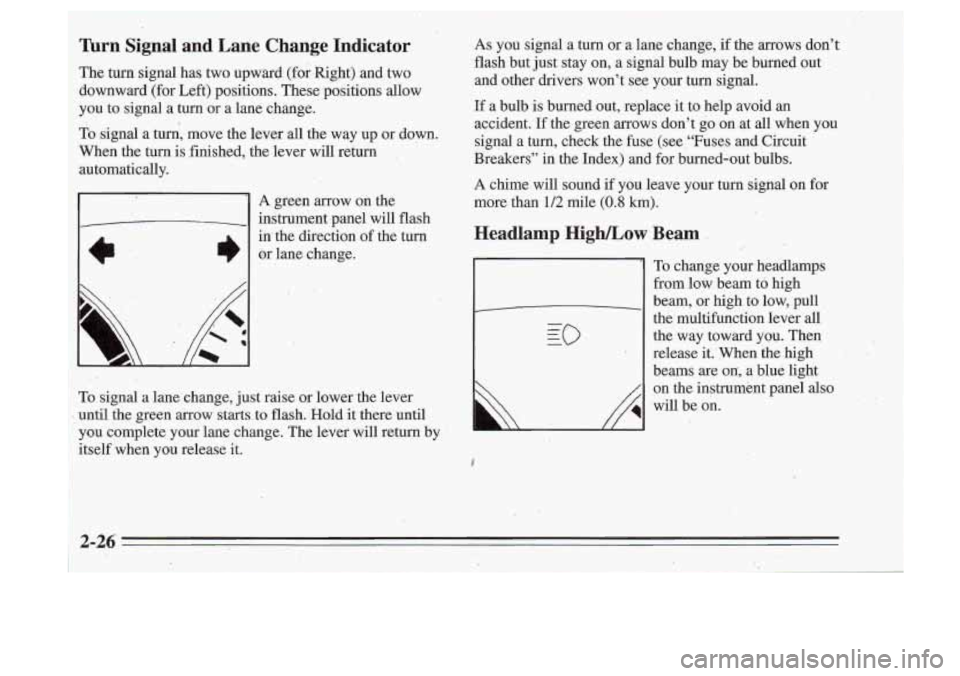
’ A green arrow on the
- instrument panel will flash
in’the direction
of the turn
e br lane change.
,* I I. ..
To signal a lane change, just raise or lower the lever
until the green
arrow starts. to flash. Hold it there until
you complete your lane change. The lever will return
by
itself when you release it.
..
As you signal a turn or a lane change, if the arrows don’t
flash but Just stay on, a signal bulbmay be burned out
and other drivers won’t see your turn signal.
If a bulb is burned out, replace it to help avoid an
accident. If the green arrows don’t go on at all when you
signal
a turn, check the fuse (see “Fuses and Circuit
Breakers” in the Index) and for burned-out bulbs.
A chime will sound if you leave your turn signal on for
more than,
1/2 mile (0.8 km):
Headlamp HighLow Beam
I
I
To change your headlamps
from low beam to high
beam, or high
to low, pull
the multifunction lever all
the way toward you. Then
release it.’When the high
beams are
oni, a blue light
on the instrument panel also
will be on.
2-26
..
’. . .-. -..
Page 90 of 340
Instrument Panel Lamps
You can brighten or dim the instrument panel lamps by
moving the dial. If you turn the dial all the way to INT,
your courtesy or interior lamps will come on.
Daytime Running Lamps (Canada Only)
Daytime Running Lamps (DRL) can make it easier for
others to see the front of your vehicle during the day.
DRL can be helpful in many different driving
conditions, but they can be especially helpful in the
short periods after dawn and before sunset.
A light sensor makes the DRL work, so be sure the light
sensor hole on top
of the instrument panel isn't covered. The
DRL system will make your low-beam headlamps
come on
at reduced brightness in daylight when:
0 The ignition is on,
0 The headlamp switch is off, and
0 The parking brake is released.
When the
DRL are on, only your low-beam headlamps
will be on. The taillamps, sidemarker and,other lamps
won't
be on. Your instrument panel won't be lit up
either.
When it's dark enough outside, your low-beam
headlamps will change
fo full brightness. The other
lamps that come on with your headlamps will also come
on.
When it's bright enough outside, the regular lamps will
.go
off, and your low-beam headlamps change to the
reduced brightness of
DRL.
; To idle your vehicle with the DRL off, set the parking
brake while the ignition is in
OFF or LOCK. Then start
your vehicle. The
DRL will stay off until you release the
parking brake.
As with any vehicle, you should turn on the regular
headlamp system any time you need it.
. 3 13
Page 91 of 340
Interior Lamps
When any door is opened, several lamps come on. These
lamps are courtesy lamps. They make it easy fo_r you to
enter and leave your vehicle. You can also turn these
lamps on by moving the dial near the headlamp knob all
the way up to INT.
Some of the lamps have switches
so you can turn them
on, even when the doors are closed. These lamps are
reading lamps: To avoid draining your battery, be sure to
turn
off all reading lamps when leaving your vehicle.
Battery Saver
Your vehicle has a feature to help prevent you from
draining the battery, in case you accidentally leave the
courtesy lamps on.
If you leave the dial turned all the
way up to
INT, or if you leave a door open, the lamps
will automatically turn
off after 10 minutes if the
ignition is
off.
This feature will not turn off the reading lamps, only .the
lamps controlled by the dial. Be sure to
turn off ‘my reading
lamps using
the switch before you leave the vehicle.
Illuminated Entry
Your courtesy lamps will come on and stay on for a set
time whenever you:
Pull a front door handle.
Press UNLOCK on the Remote Lock Control
0 Press DOOR on the Remote Lock Control
(if equipped).
’
(if equipped).
If you open a door, the
lamps will stay on while it’s open
I and then turn off automatically about 18 seconds after 1
you close it. If you don’t open a door, the lamps will ’
turn off after about 18 seconds, unless you pressed
UNLOCK on the Remote Lock Control.
If you pressed
UNLOCK and don’t open a door, the lamps will turn off
after about
55 seconds.
Illuminated entry includes a feature called theater
dimming. With theater dimming, the lamps don’t just
turn off at the end of the delay time. Instead, they slowly
dim during the delay time until they go out. The delay
time is cancelled
if you turn the ignition key to RUN or
START,
so the lamps will go out right away.
When the ignition is on, Illuminated Entry is inactive,
which means the courtesy
lamps won’t come on.
r
Page 114 of 340
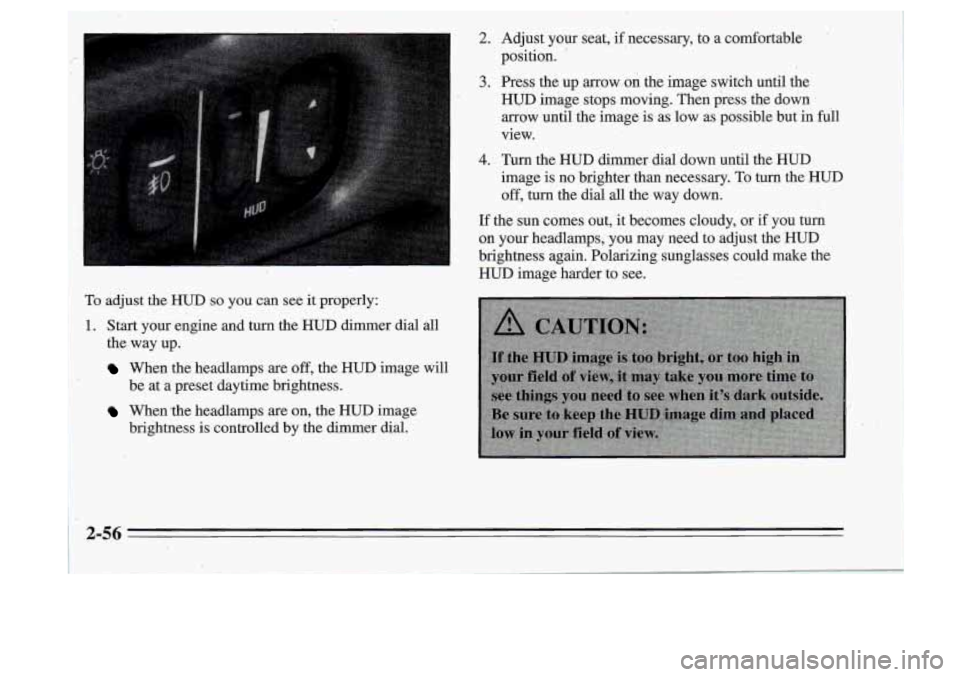
To adjust the HUD so you can see it properly:
1~. Start your engine and turn the HUD dimer dial all
I the, way up.
When the headlamps are off, the HUD image will
When the headlamps are on, the HUD image
be at
a preset daytime brightness.
brightness
is controlled by the dimmer dial.
2. Adjust your seat, if necessary, to a comfortable
position.
'
3. Press the up arrow on the image switch until the
HUD image stops moving. Then press the down
arrow until the image is as low as possible but in full
view.
4. Turn the HUD dimmer dial down until the HUD
image is no brighter than necessary. To turn the HUD
off, turn the dial all the way down.
If the sun comes out, it becomes cloudy, or if you turn
on your headlamps, you may need to adjust the HUD
brightness again. Polarizing sunglasses could make the
HUD image harder to see.
2-56
Page 152 of 340
Adjust your inside rearview mirror to reduce the
. glare from headlamps behind you.
,e Since you can’t see as well, you may need to slow
down and keep more space between you .and other
. .. : vehicles.
Slow down, especially
on higher speed roads. Your
beadlpps can light up only
so much road ahead.
In remote areas, watch for animals.
If you’re tired, pull off the road in a safe place and
Night, Vision
No :one can see as well at night as in the daytime. But as
we get older these differences increase. A 50-year-old
driver may require at. least twice as much light to see the
same thing at night as a 20-year-old.
What you do
in the daytime can also affect your night
vision.
For example, if you spend the day in bright .
sunshine you are wise to wear sunglasses. Your eyes will
have less trouble adjusting to night.
Bat if you’re
driving, don’t wear sunglasses at night. They may cut
down on glare from headlamps, but they also make a lot
of things invisible. rest.
You
can be temporarily blinded by approaching lights. It
can take a second or two, or even several seconds, for
your eyes to readjust to the dark. When you are faced
with severe glare (as from a driver who doesn’t lower
the high beams, or a vehicle with misaimed headlamps), slow down a little. Avoid staring directly into the
approaching lights.
Keep your windshield and all
the glass on your vehicle
clean
-- inside and out. Glee at night is made much
worse by dirt on the glass. Even the inside of the glass
can build up a film caused by dust. Dirty glass makes
lights dazzle and flash more than clean glass would,
making the pupils
of your eyes contract repeatedly.
Remember that your headlamps light up far less of
a
roadway when you are in a turn or curve. Keep your
eyes moving; that way, ips easier to pick out dimly
lighted objects. Just as your headlamps should be checked regularly for proper aim,
SO should your eyes
be examined regularly. Some drivers suffer from night
blindness
3- the inability to see in dim light -- and aren’t
even aware of it.
4-14 .. .. .
Page 232 of 340
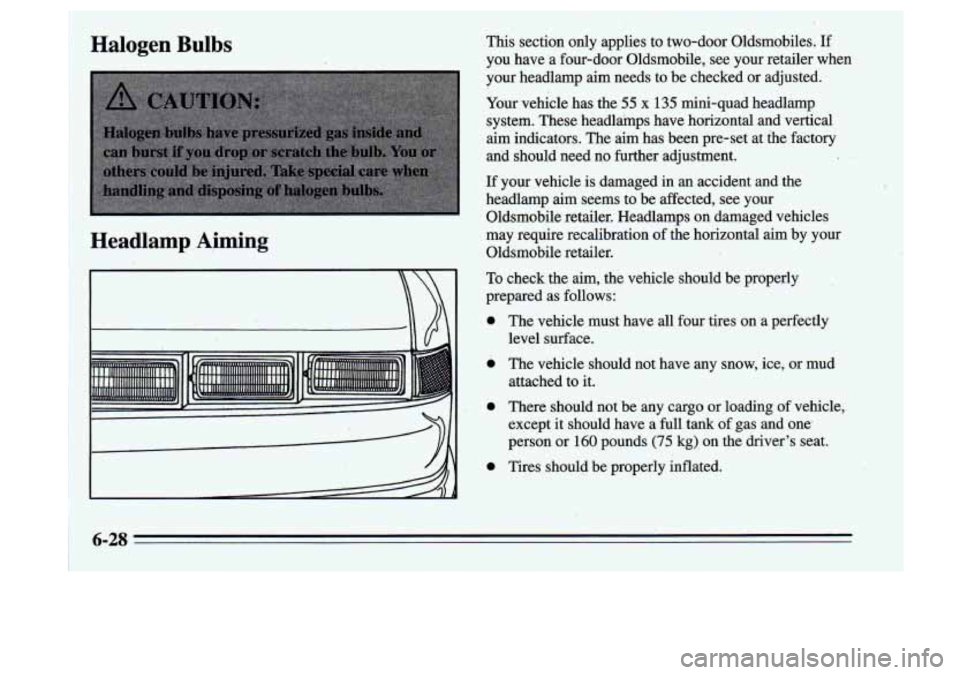
Halogen Bulbs
Headlamp
.A,jming
r ...... ';. ......... :.:..:..:..,.:. ............... ....... ........... .......... : ........... ......... : ............. ................ ........ .i ll
This section only applies to two-door Oldsmobiles. If
you have a four-door Oldsmobile, see your retailer when
your headlamp aim needs to be checked
or adjusted.
Your vehicle has the 55 x 135 mini-quad headlamp
system. These headldmps have horizontal and vertical
aim indicators. The aim has been pre-set at the factory
and should need no further adjustment.
If your vehicle is damaged in an accident and the
headlamp aim seems to be affected, see your
Oldsmobile. retailer. Headlamps on damaged vehicles
may require recalibration
of the horizontal aim by your
Oldsmobile retailer.
,
To check the aim, the vehicle should be properly
mepared
as follows:
The vehicle must have all four tires on
a perfectly
level surface.
The v'ehicle should not have any snow, ice, or mud
attached to it.
There should not be any cargo or loading
of vehicle,
except it should have a
full tank of gas and one
person or
160 pounds (75 kg) on the driver's seat.
Tires should be properly inflated.
6-28 .,
Page 234 of 340
~~
~~ ~ ~~~ ‘1 ~ ~~
I
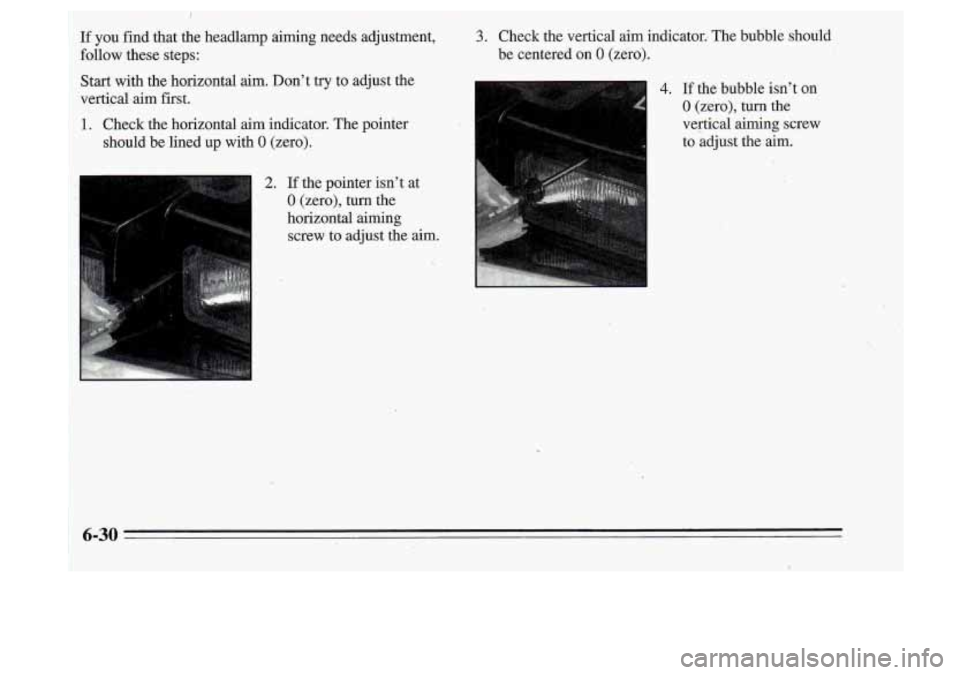
If you fid that the headlamp aiming needs adjustment, 3. Check the vertical aim indicator. The bubble should
follow these steps:
Start with the horizontal aim. Don’t try to adjust the
vertical aim first.
1. Check the horizontal aim indicator. The pointer
should be lined up with
0 (zero). be
centered on
0 (zero).
4. If the bubble isn’t on
0 (zero), turn the
vertical aiming screw
to adjust the aim.
2. If the pointer isn’t at
0 (zero), turn the
horizontal aiming screw to adjust the
aim. I
i
6-30
Page 236 of 340
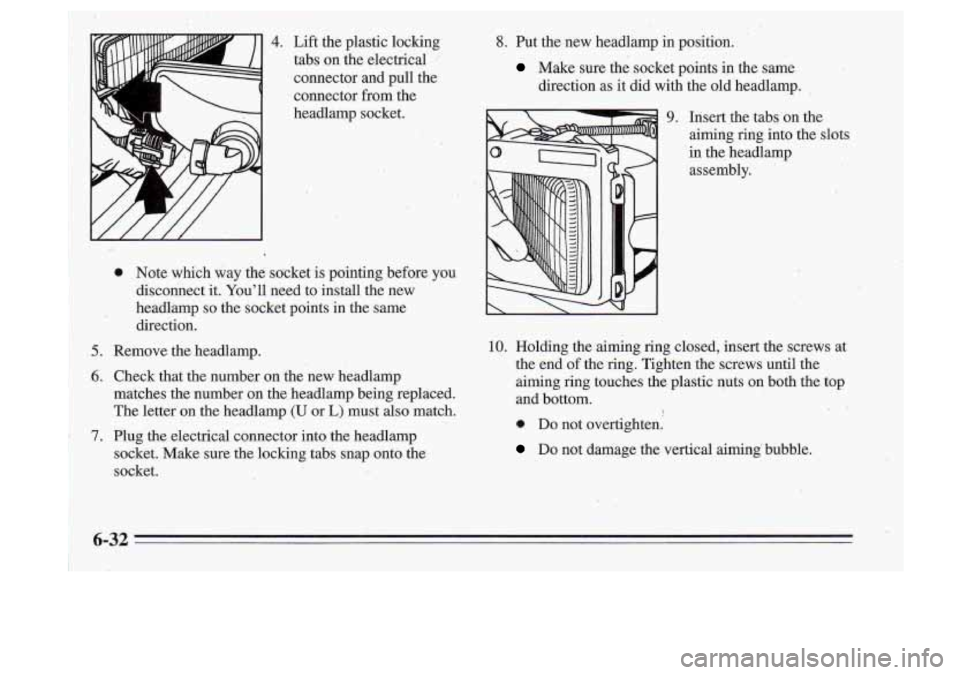
*.
4. 8. Put the new headlamp in position.
Make sure the socket points in the same
direction
as it did with the old headlamp.
9. Insert the tabs on the
aiming
ring into the slots
in the headlamp
assembly.
10. Holding the aiming ring closed, insert the screws at
the end
of the ring. Tighten the screws until the
aiming ring touches the plastic nuts on both the
top
and bottom.
0. Do not overtighten.
Do not damage the vertical aiming bubble.
1
1 6-32
Page 237 of 340
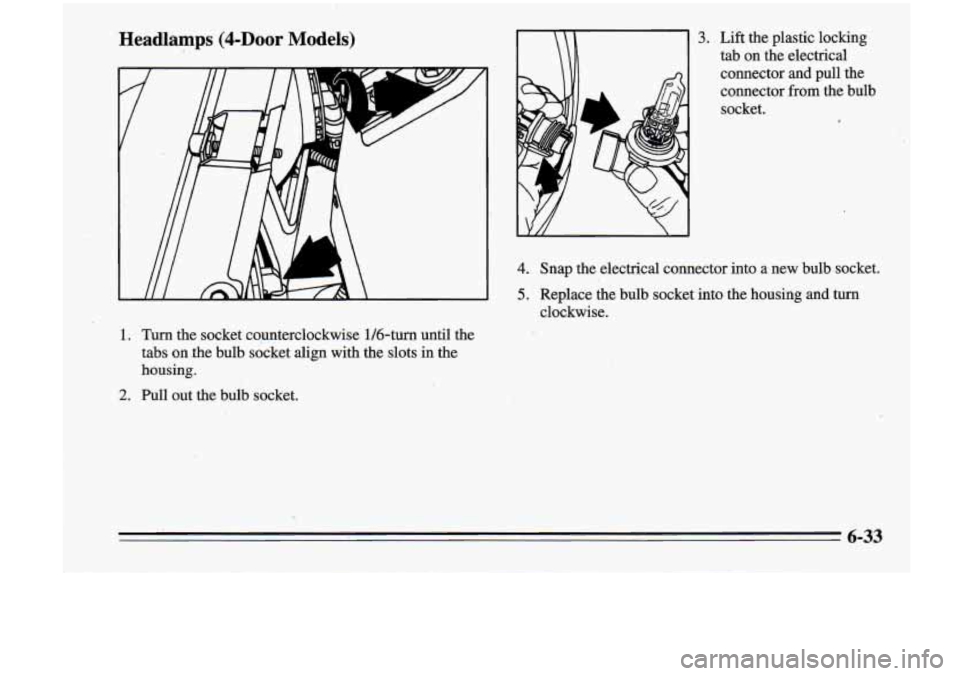
'Headlamps (4-DOOr Models)
1. Turn the socket c0,unterclockwise 1/6-turn until the tabs
on jhe bulb socket align with the slots in the
housing.
2. Pull out the bulb socket.
3. Lift the plastic locking
tab on the electrical
connector and pull the
connector from the bulb
socket.
1
4. Snap the electrical connector into a new bulb socket.
5. Replace the bulb socket into the housine and turn
clockwise.
6-33