run flat Oldsmobile Cutlass Supreme 1996 Owner's Manuals
[x] Cancel search | Manufacturer: OLDSMOBILE, Model Year: 1996, Model line: Cutlass Supreme, Model: Oldsmobile Cutlass Supreme 1996Pages: 356, PDF Size: 18.48 MB
Page 3 of 356
The 1996 Oldsmobile Cutlass Supreme Owner’s Manual
Seats and Restraint Systems .............................................................
This section tells you how to use your seats and safety belts properly. It also explains the “SRS” system.
This section explains how to
start and operate your Oldsmobile.
This section tells you how to adjust the ventilation and comfort controls and how to operate your
audio system.
Here you’ll find information and tips about the road and how to drive under different conditions.
This section tells you what to do
if you have a problem while driving, such as a flat tire or
overheated engine, etc.
ServiceandAppearanceCare ............................................................
Here the manual tells you how to keep your Oldsmobile running properly and looking good.
Maintenance Schedule ..................................................................
This section tells you when to perform vehicle maintenance and what fluids and lubricants to use.
Customer Assistance Information ........................................................
This section tells you how to contact Oldsmobile for assistance and \
how to get service and owner publications.
It also gives you information.on “Reporting Safety Defects” on page\
8-7.
Index ........................................................................\
..........
Here’s an alphabetical listing of almost every subject in this manual. You can use it to quickly find
something you want to read.
FeaturesandControls ..................................................................
Comfort Controls and Audio Systems .................. ’. ..................................
YourDrivingandtheRoad ..............................................................
ProblemsontheRoad ..................................................................
1-1
2-1
3-1
4-1
5-1
6- 1
7-1
8-1
9-1
i
Page 54 of 356
1
To remove the child restraint, just unbuckle the vehicle’s
safety belt. It
will be ready to work for an adult or larger
child passenger.
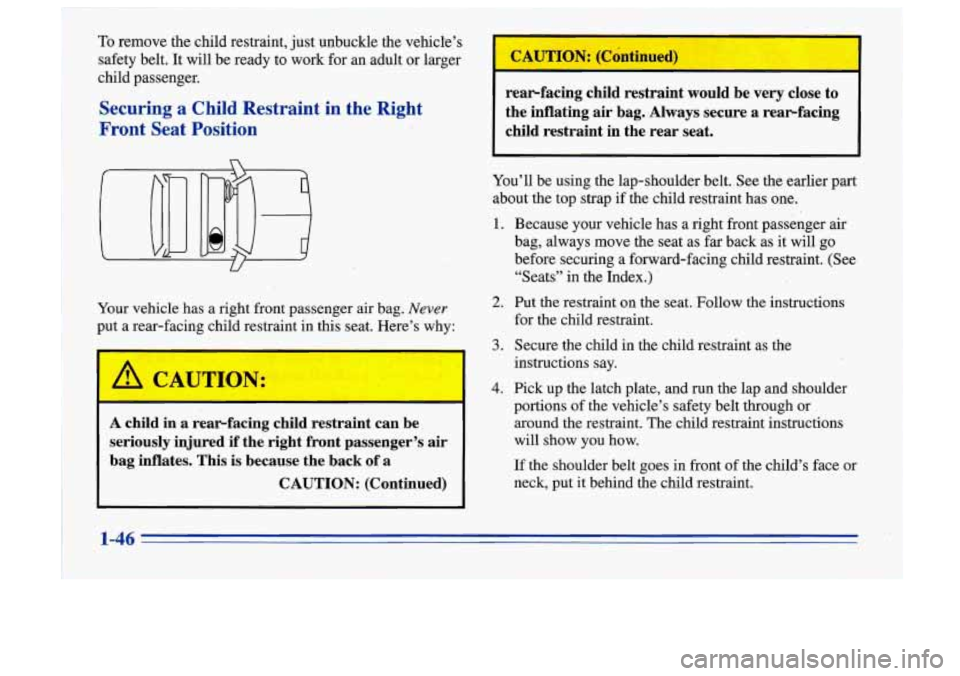
Securing a Child Restraint in the Right
Front Seat Position
1 Your vehicle has a right front,passenger air bag. Never
put a rear-facing child restraint in this seat. Here’s why:
L
A CAUTION:
A child in a rearfacing child restraint can be
seriously injured if the right front passenger’s air
bag inflates. This is because the back of a
CAUTION: (Continued) rear-facing child restraint would be very close to
the inflating air bag. Always secure a rear-facing
child restraint in the rear seat.
You’ll be using the lap-shoulder belt. See the earlier part
about the top strap if the child restraint has one.
1.
2.
3.
4 ..
Because your vehicle has a right front passenger air
bag, always move the seat as far back as it will go
before securing a forward-facing child restraint. (See
“Seats” in the Index.)
Put
the restraint on the seat. Follow the instructions
for the child restraint.
Secure the child in the child restraint as the
instructions say.
Pick up the latch plate, and run the lap and shoulder
portions of the vehicle’s safety belt through or
around the restraint. The child restraint instructions
will show you how.
If the shoulder belt goes in front of the child’s face or
neck, put it behind the child restraint.
1-46
Page 66 of 356
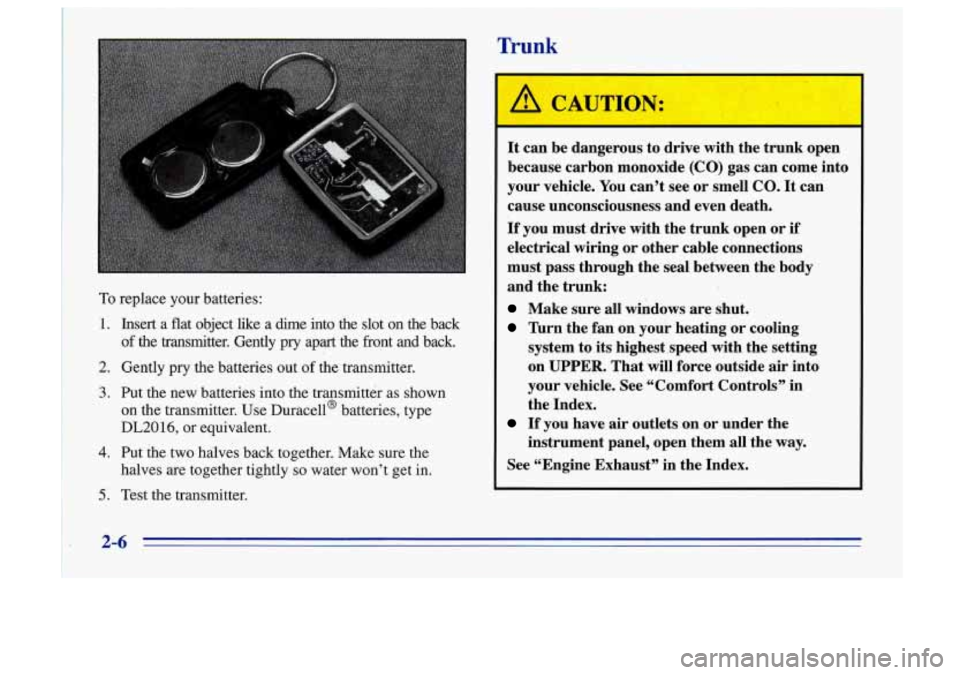
To replace your batteries:
1. . Insert a flat object like a dime into the slot on the back
of the transmitter. Gently pry apart the front and back.
2. Gently pry the batteries out of the transmitter.
3. Put the new batteries into the transmitter as shown
on the transmitter.
Use Duracell@ batteries, type
DL20 16, or equivalent.
4. Put the two halves back together. Make sure the
halves are together tightly
so water won’t get in.
5. Test the transmitter.
Trunk
It can be dangerous to drive with the trunk open
because carbon monoxide (CO) gas
can come into
your vehicle. You can’t see or smell CO.
It can
cause unconsciousness and even death.
If you must drive with the trunk open or if
electrical wiring or other cable connections
must pass through the seal between the body
and the trunk:
Make sure all windows are shut.
Turn the fan on your heating or cooling
system to its highest speed with the setting
on
UPPER. That will force outside air into
your vehicle. See “Comfort Controls” in
the Index.
instrument panel, open them all the way.
If you have air outlets on,or under the
See “Engine Exhaust” in the Index.
Page 98 of 356

Center Console Convenience Net (Option)
To open the storage area, press
up on the latch on the
front edge and lift the cover. The console has a
cupholder, cassette tape and compact disc storage
and a coinholder.
Rear Door Cupholders
You may have a cupholder in each rear door. Your
vehicle may have a convenience net. You’ll see it
on the back wall of the trunk.
Put small loads, like grocery bags, behind the net. It can
help keep them from falling over during sharp turns or
quick starts and stops.
The net isn’t for larger, heavier loads. Store them in the
trunk as far forward as you can.
You can unhook the net so that it will lie flat when
you’re not using it.
You can also push the net down and
hook it under the plastic hooks.
2-38
Page 175 of 356
. Loading ' Your' Vehicle
Tm OCCUPANTS VEHICLE .CAP. WT,
TIRE-LOADING INFORMATION
FRT. CTR. RR. TOTAL LBS. KG
MAX. LOADING & GVWR SAME AS VEHICLE
CA.PAClTY WEIG'HT
XXX COLD TIRE
TIRE
SIZE SPEED PRESSURE.
RTG
PSI/KPa
FRT.
RR.
SPA.
IF TIRES ARE HOT, ADD 4PSV28KPa.
SEE OWNER'S MANUAL FOR ADDITIONAL
INFORMATION
i
A
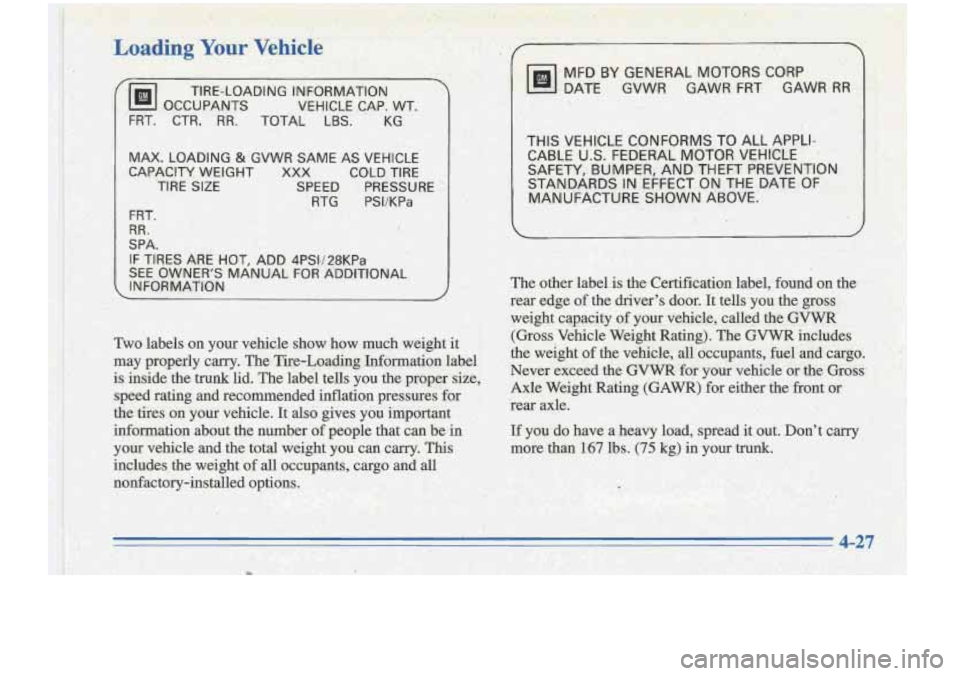
Two labels on your vehicle show how much wei.ght it
may properly carry. The Tire-Loading Information label is inside the
trunk lid. The label tells you the proper size,
speed rating and recommended inflation pressures'for
the tiies on your vehicle. It also gives you important
.
information about the number of people that can be in
your vehicle and the total weight you, can carry. This
includes, the weight 'of all occupants, ,cargo and all
nonfactory-installed options.
r I
mi
I.
MFD'BY GENERAL MOTORS CORP
DATE GVW8 GAWR FRT
. GAWR RR
'THIS VEHICLE C-ONFORMS TO ALL APPLI-
CABLE U.S. FEDERAL
MOTOR VEHICLE
SAFETY, BUMPER, AND THEFT PREVENTION
STANDARDS
IN EF,FECT ON THE DATE Of
MANUFACTURE SHOWN ABOVE.
L 1
The other label is the Certification label, found on the
rear edge
of the driver's door. It tells .you the gross
weight aqacity of your vehicle, called the GVWR
(Gross\Vehicle Weight Rating). The GVWR includes
the weight
of the vehicle, all occupantS, fuel and cargo.
Never: exceed the
GVWR for your vehicie or the Gross
Axle Weight Rating (GAWR) for either, the front or
'rear axle.
If you do have a heavy bad, spread it out. Don't carry
more than 167 lbs. (75 kg) in your trunk:
Page 180 of 356
Total Weight on Your Vehicle’s Tires
Be sure your vehicle’s tires are inflated to the
recommended pressure for cold tires. You’ll find these
numbers on the Tire-Loading Information label (found
inside the
trunk lid) or see “Loading Your Vehicle”
in the Index. Then be sure you don’t go over the
GVW limit for your vehicle, including the weight of
the trailer tongue.
Hitches
It’s important to have the correct hitch equipment.
Crosswinds, large trucks going by and rough roads are a
few reasons why you’ll need the right hitch. Here are
some rules to follow:
0
a
Will you have to make any holes in the body of your
vehicle when you install a trailer hitch? If you do,
then be sure to seal the holes later when you remove
the hitch.
If you don’t seal them, deadly carbon
monoxide
(CO) from your exhaust can get into your
vehicle (see “Carbon Monoxide” in the Index). Dirt
,and water can, too.
The bumpers on your vehicle are not intended for
hitches.
Do not’attach rental hitches or other
bumper-type hitches to them. Use only a
frame-mounted hitch that does not attach to
the bumper.
Safety Chains
You should always attach chains between your vehicle
and your trailer. Cross the safety chains under the tongue
of the trailer
so that the tongue will not drop to the road
if it becomes separated from the hitch. Instructions
about safety chains may be provided by the hitch
manufacturer or by the trailer manufacturer. Follow the
manufacturer’s recommendation for attaching safety
chains and do not attach them to the bumper. Always
leave just enough slack
so you can turn with your rig.
And, never allow safety chains to drag on the ground.
Trailer Brakes
Because you have anti-lock brakes, do not try to tap into
your vehicle’s brake system. If you do, both brake
systems won’t work well, or at all.
Driving with a Trailer
Towing a trailer requires a certaifi amount of experience.
Before setting out for the open road, you’ll want to get
to know your rig. Acquaint yourself with the feel of
handling and braking with the added weight of the
trailer. And always keep in mind that the vehicle you are
driving is now a good deal longer and not nearly as
responsive as your vehicle
is by itself.
Page 214 of 356
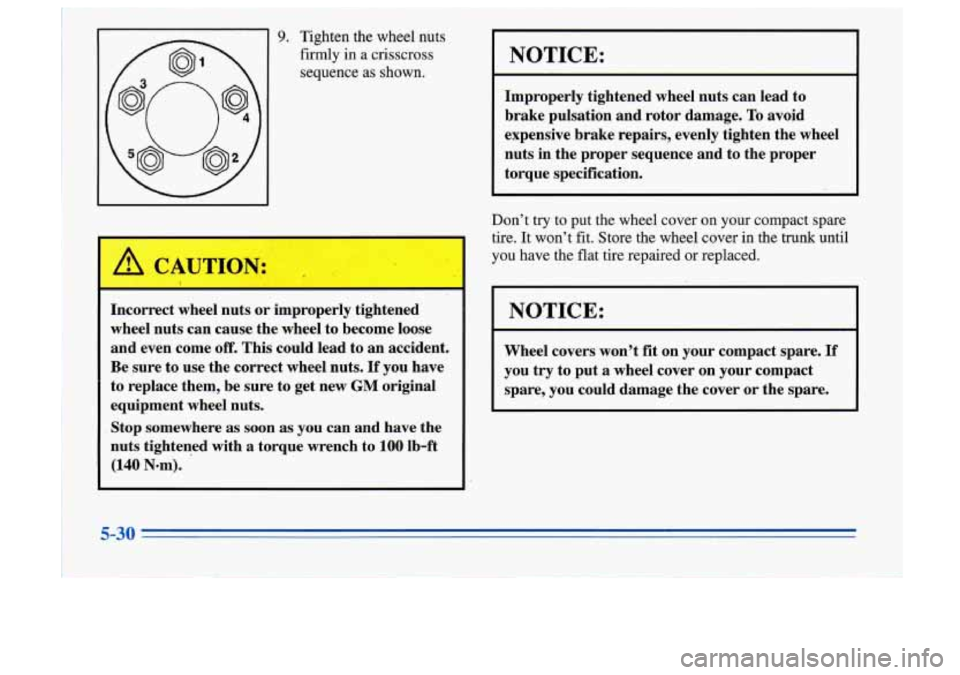
9. Tighten the wheel nuts
firmly in a crisscross
sequence
as shown.
Incorrect wheel nuts or improperly tightened
wheel nuts can cause the wheel to become loose
and even come
off. This could lead to an accident.
Be sure to use the correct wheel nuts. If you have
to replace them, be sure to get new
GM original
equipment wheel nuts.
Stop somewhere as soon
as you can and have the
nuts tightened with
a torque wrench to 100 lb-ft
(140 Nom).
NOTICE:
Improperly tightened wheel nuts can lead to
brake pulsation and rotor damage.
To avoid
expensive brake repairs, evenly tighten the wheel
nuts in the proper sequence and to the proper
torque specification.
Don’t try to put the wheel cover
on your compact spare
tire. It won’t fit. Store the wheel cover in the trunk unt\
il
you have the flat tire repaired or replaced.
NOTICE:
Wheel covers won’t fit on your compact spare. If
you try to put
a wheel cover on your compact
spare, you could damage the cover or the spare.
5-30 -
Page 215 of 356
Storing the Flat Tire and Tools
b
Storing a jack, a tire or other equipment in the
passenger compartment
of the vehicle could
cause injury.
In a sudden stop or collision, loose
equipment could strike someone. Store all these
in the proper place.
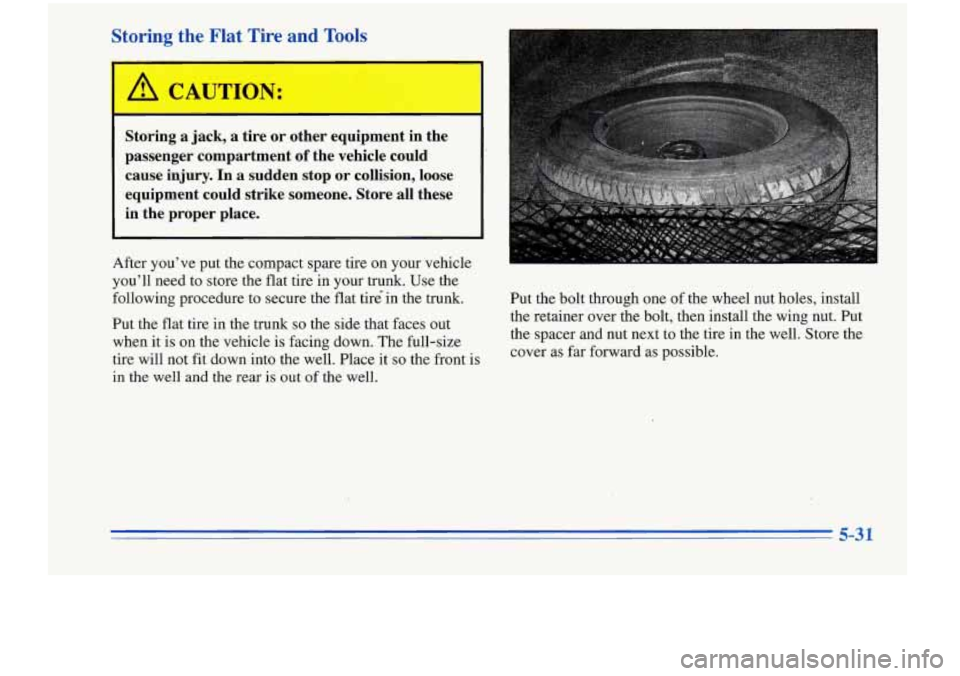
After you’ve put the compact spare tire on your vehicle
you’ll need to store the flat tire in your trunk. Use the
following procedure to secure the flat tir6in the trunk.
Put the flat tire in the trunk
so the side that faces out
when it is on the vehicle is facing down. The full-size
tire will not fit down into the well. Place it’so the front is
in the well and the rear is out of the well. Put the bolt through
one of the wheel nut holes, install
the retainer over the bolt, then install the wing nut. Put
the spacer and nut next to the tire in the well. Store the
cover as far forward as possible.
5-31
Page 263 of 356
Inflation -- Tire Pressure
The Tire-Loading Information label, located on
the inside of the trunk lid, shows the correct inflation
pressures for your tires when they’re cold. “Cold”
means your vehicle has been sitting for at least
three hours or driven no more than
1 mile (1.6 km).
NOTICE:
Don’t let anyone tell you that underinflation or
overinflation is all right.
It’s not. If your tires
don’t have enough
air (underinflation), you can
get the following:
Too much flexing
Too much heat
Tire overloading
Bad wear
Bad handling
Bad fuel economy.
NOTICE: (Continued) NOTICE: (Continued)
If your tires have too much
air (overinflation),
you can get the following:
Unusual wear
Bad handling
Rough ride
Needless damage from road hazards.
When to Check
Check your tires once a month or more.
Don’t ‘forget your compact spare tire. It should be at
60 psi (420 kPa).
How to Check
Use a good quality pocket-type gage to check tire
pressure. You can’t tell
if your tires are properly inflated
simply by looking at them. Radial tires may look
properly inflated even when they’re underinflated.
Be sure to put
the valve caps back on the valve stems.
They help prevent leaks by keeping out
dirt and moisture.
6-43
Page 349 of 356
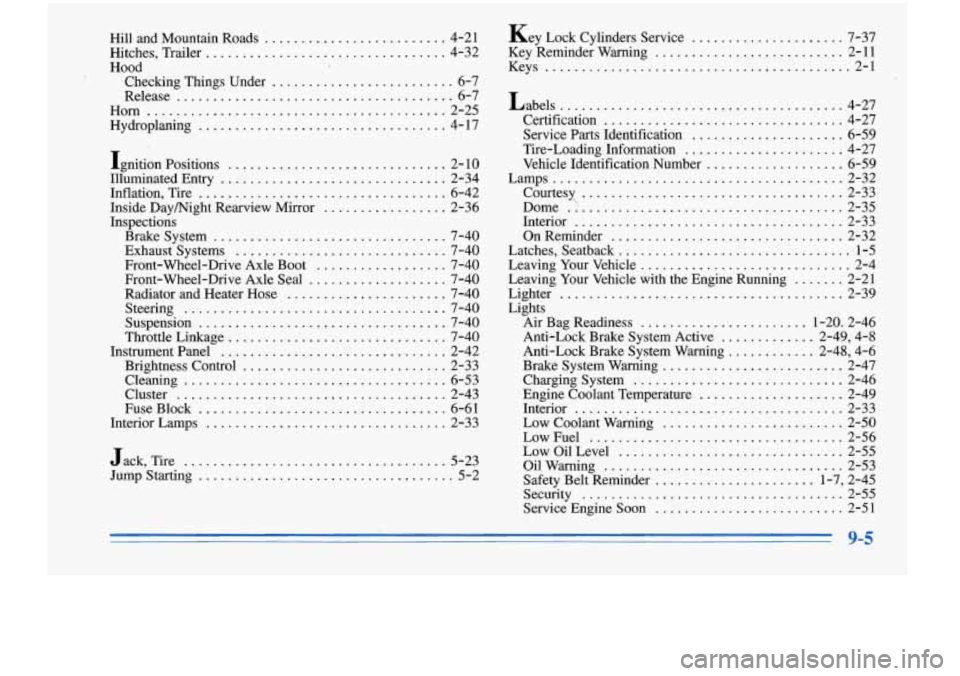
Hill and Mountain Roads ......................... 4-21
Hitches. Trailer
................................. 4-32
Hood Checking Things Under
......................... 6-7
Release
...................................... 6-7
Ho~
......................................... 2-25
Hydroplaning
.................................. 4- 17
Ignition Positions
.............................. 2. 10
Illuminated Entry
............................... 2-34
Inflation. Tire
.................................. 6-42
Inside Daymight Rearview Mirror
.................. 2-36
Inspections
Brakesystem
................................. 7-40
Exhaust Systems
............................. 7-40
Front-Wheel-Drive Axle Boot
.................. 7-40
Front-Wheel-Drive Axle Seal
................... 7-40
Radiator and Heater Hose
...................... 7-40
Steering
.................................... 7-40
Suspension
.................................. 7-40
Throttle Linkage
.............................. 7-40
Instrumentpanel
............................... 2-42
Brightness Control
............................ 2-33
Cluster
..................................... 2-43
FuseBlock
.................................. 6-61
Interior Lamps
................................. 2-33
Jack, Tire
.................................... 5-23
Jump Starting
.................................... 5-2
Cleaning
.................................... 6-53 Key
Lock Cylinders Service
..................... 7-37
Key Reminder Warning
.......................... 2-11
Keys
.......................................... 2-1
Labels
....................................... 4-27
Certification
................................. 4-27
Service Parts Identification
..................... 6-59
Tire-Loading Information
...................... 4-27
Vehicle Identification Number
................... 6-59
Courtesy
..................................... 2-33
Dome
.I .................................... 2-35
Interior
..................................... 2-33
OnReminder
................................ 2-32
Latches, Seatback
................................ 1-5
Leaving Your Vehicle
............................. 2-4
Leaving Your Vehicle with the Engine Running
....... 2-21
Lighter
....................................... 2-39
Lights Air Bag Readiness
....................... 1-20.2-46
Anti-Lock Brake System Active
............. 2-49, 4-8
Anti-Lock Brake System Warning
............ 2-48, 4-6
Brake System Warning
......................... 2-47
Charging System
............................. 2-46
Engine Coolant Temperature
.................... 2-49
Interior
..................................... 2-33
Low Coolant Warning
......................... 2-50
LowFuel
................................... 2-56
LowOilLevel
............................... 2-55
Oilwarning
................................. 2-53
Safety Belt Reminder
...................... 1-7, 2-45
Security
.................................... 2-55
Service Engine
Soon .......................... 2-51
Lamps
........................................ 2-32
9-5