low beam OLDSMOBILE INTRIGUE 1998 Owners Manual
[x] Cancel search | Manufacturer: OLDSMOBILE, Model Year: 1998, Model line: INTRIGUE, Model: OLDSMOBILE INTRIGUE 1998Pages: 340, PDF Size: 17.93 MB
Page 91 of 340

Turn SignaVMultifunction Lever
The lever on the left side of the steering column
includes your:
Turn Signal and Lane Change Indicator
Headlamp High/Low Beam Changer
Headlamps
Taillamps
0 Parking Lamps
nrn Signal and Lane Change Indicator
The turn signal lever has two upward (for right) and two
downward (for left) positions. These positions allow you
to signal a turn or lane change.
To signal a turn, move the lever
all the way up or
down. When the turn is finished, the lever will
return automatically.
11 An arrow on the instrument
1
A panel will flash in the
direction of the
turn or
lane change.
2-31
ProCarManuals.com
Page 92 of 340

To signal a lane change, just raise or lower the lever
until the arrow starts to flash. Hold it there until you
complete your lane change. The lever will return by
itself when you release it.
As you signal a turn or lane change, if the arrow flashes
faster than normal, a signal bulb may be burned out and
other drivers won’t see your turn signal.
If a bulb is burned out, replace it to help avoid an
accident.
If the arrows don’t go on at all when you
signal a turn, check for burned-out bulbs and then check
the fuse (see “Fuses and Circuit Breakers” in the Index).
A chime will sound if you leave your turn signal on for
more than
3/4 mile (1.2 km).
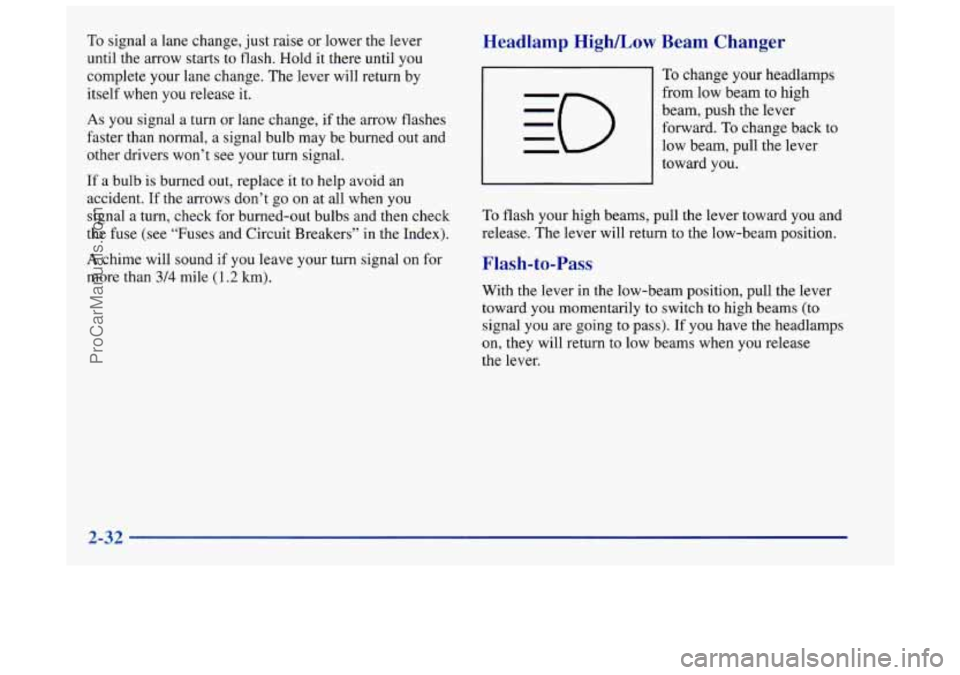
Headlamp High/Low Beam Changer
To change your headlamps
from low beam
to high
beam, push the lever
forward.
To change back to
low beam, pull the lever
toward you.
To flash your high beams, pull the lever toward you and
release. The lever will return to the low-beam position.
Flash-to-Pass
With the lever in the low-beam position, pull the lever
toward you momentarily to switch to high beams
(to
signal you are going to pass). If you have the headlamps
on, they will return
to low beams when you release
the lever.
2-32
ProCarManuals.com
Page 99 of 340

Daytime Running Lamps / Automatic
Headlamp Control
Daytime Running Lamps (DRL) can make it easier for
others to see the front of your vehicle during the day.
DRL can be helpful in many different driving
conditions, but they can be especially helpful in the
short periods after dawn and before sunset.
A light sensor on top of the instrument panel makes the
DRL work, so be sure it isn’t covered.
The DRL system will make your front turn signal lamps
come on when:
The ignition is on,
0 The headlamp switch is off and
0 The parking brake is released.
When the
DRL are on, only your front turn signal lamps
will be on.
The headlamps, taillamps, sidemarker and
other lamps won’t be on. Your instrument panel won’t
be lit up either.
When it’s dark enough outside, your front turn signal
lamps will turn off and your headlamps and parking
lamps will turn on.
When it’s bright enough outside, your headlamps will
go
off and your front turn signal lamps will come on.
To idle your vehicle with the DRL off, set the parking
brake while the ignition is in
OFF. Then start your
vehicle. The DRL, headlamps and parking lamps will
stay off until
you release the parking brake.
As with any vehicle, you should turn on the regular
headlamp system when you need it.
Fog Lamps
To turn the fog lamps on,
press the fog lamp switch.
A light will glow on the
switch
to let you know that
they are on. (Your parking
lamps must be on, or your
fog lamps won’t come on.)
Press the switch again to
turn the fog lamps off.
The fog lamps will go
off whenever you change to
high-beam headlamps. When you return to low beams,
the fog lamps will come on again.
2-39
ProCarManuals.com
Page 171 of 340

have less trouble adjusting to night. But if you’re
driving, don’t wear sunglasses at night. They may cut
down on glare from headlamps, but they also make a
lot of things invisible.
You can be temporarily blinded by approaching
headlamps. It can take a second or two, or even several
seconds, for your eyes to readjust to the dark. When
you are faced with severe glare (as from a driver
who doesn’t lower the high beams, or a vehicle with
misaimed headlamps), slow down a little. Avoid
staring directly into the approaching headlamps.
Keep your windshield and all the glass on your vehicle
clean
-- inside and out. Glare at night is made much
worse by dirt on the glass. Even the inside of the glass
can build up a film caused by dust. Dirty glass makes
lights dazzle and flash more than clean glass would,
making the pupils of your eyes contract repeatedly.
Driving in Rain and on Wet Roads
Remember that your headlamps light up far less of a
roadway when you are in a turn or curve. Keep your
eyes moving; that way, it’s easier to pick out dimly
lighted objects. Just as your headlamps should be
checked regularly for proper aim,
so should your eyes
be examined regularly. Some drivers suffer from night
blindness
-- the inability to see in dim light -- and
aren’t even aware
of it. Rain
and wet roads can
mean driving trouble. On a wet
road, you can’t stop, accelerate or turn as well because
your tire-to-road traction isn’t as good as on dry roads.
4-17
~
ProCarManuals.com
Page 262 of 340

To check the aim, the vehicle should be properly
prepared as follows: For the vertical adjustment, state inspection stations
will generdy dhw areading of plus 0.76 degrees or
minus 0.76 degrees from the center of the bubble. 0
0 Place the vehicle on a level pad or surface.
The vehicle should not have any snow, ice or mu(
attached to it.
0
0
0
0
0
1
The vehicle should be fully assembled and all other
work stopped while headlamp aiming is being done.
There should not be any cargo or loading of the
vehicle, except it should have a
full tank of gas and
one person
or 160 lbs. (75 kg) on the driver's seat.
Close
all doors.
Tires should be properly inflated.
Rock the vehicle to stabilize the suspension.
NOTICE:
To make sure your headlamps are aimed
properly, read all the instructions before
beginning. Failure to follow these instructions could cause damage to headlamp parts.
Dl .2" .4"
It is recommended that the
upper limit not exceed
plus
0.4 degrees from the
center of the bubble.
Other drivers may flash
their high beams at you
if
your adjustment is much
above plus
0.4 degrees.
6-34
ProCarManuals.com
Page 290 of 340

Fuse
30 31
32
33
34
35
36
37
38 39
40
41
42
43
Description
Engine Emissions
Not Used
Headlamp (Right)
Rear Compartment Release
Parking Lamp
Fuel Pump
Headlamp (Left) Spare
Spare
Spare
Spare
Spare Spare
Fuse Puller
Replacement Bulb Numbers
Exterior Lamps Number
Back-up ............................... 3057
Center High-Mounted Stop
In Spoiler ............................. 891
OnShelf
............................. 1141
Fog
.................................... 893
Front Parking/Turn Signal
............. 4 157NAK
Headlamp. High Beam
.................... 9005
Headlamp.
Low Beam .................... 9006
License Plate
............................ 194
Sidemarker. Front
......................... 194
Sidemarker. Rear
......................... 194
Stopmail
............................... 3057
Turn Signal (Rear)
....................... 3057
Cornering
.............................. 3156
6-62
ProCarManuals.com
Page 331 of 340

GAWR ....................................... 4-30
Gear Positions. Automatic Transaxle
................ 2-20
GloveBox
.................................... 2-46
Gross Axle Weight Rating
........................ 4-30
Gross Vehicle Weight Rating
...................... 4-30
Guide en Francais
11 .. .................................
GVWR ....................................... 4-30
Halogen Bulbs
................................ 6-31
Hazard Warning Flashers
.......................... 5-2
Head Restraints
................................. 1-5
Headlamps Aiming
..................................... 6-33
Wiring
..................................... 6-56
Hearing Impaired. Customer Assistance
.............. 8-4
Bulb Replacement
............................ 6-3 1
High/Low Beam Changer ...................... 2-32
Heating
........................................ 3-4
High-Beam Headlamps
.......................... 2-32
Highway Hypnosis
.............................. 4-23
Hill and Mountain Roads
......................... 4-23
Hitches. Trailer
................................. 4-34
Hood
if Steam Is Coming From Your Engine .............. 5- 15
Ignition Positions ............................... 2-16
Ignition Transaxle Lock Check
.................... 7-16
Illuminated Entry
............................... 2-40
Illumination on Door Handle Activation
............. 2-41
Illumination on Remote Activation ................. 2-11
Inflation. Tire
.................................. 6-40
Inside Daymight Rearview Mirror
................. 2-43
Inspections
.................................... 7-17
Brake System
................................ 7-17
Engine Cooling System
........................ 7-17
Exhaust Systems
............................. 7-17
Front-Wheel-Drive Axle Boot
.................. 7-17
Front-Wheel-Drive Axle Seal
................... 7-17
Steering
.................................... 7-17
Suspension
.................................. 7-17
Throttle System
.............................. 7-17
Instrument Panel
............................... 2-50
Brightness Control
............................ 2-40
Cleaning
.................................... 6-49
Cluster
..................................... 2-52
FuseBlock
.................................. 6-57
Interior Lamps
................................. 2-40
Checking Things Under
......................... 6-8
Release
...................................... 6-9 .................................... J ack. Tire 5-27
How to Reset the Change Oil Light
................. 6-15 Jump Starting ................................... 5-3
Hydroplaning
.................................. 4-19 Key in the Ignition ............................. 2-14
Key Lock Cylinders Service
...................... 7-14
If a Tire Goes Flat .............................. 5-24 Keyless Entry System ............................ 2-8
If No Steam Is Coming From Your Engine ........... 5- 16 Keys .......................................... 2-2
How
to Reset the Engine Oil Life Monitor
........... 6- 15
ProCarManuals.com