turn signal bulb OLDSMOBILE INTRIGUE 1998 Owners Manual
[x] Cancel search | Manufacturer: OLDSMOBILE, Model Year: 1998, Model line: INTRIGUE, Model: OLDSMOBILE INTRIGUE 1998Pages: 340, PDF Size: 17.93 MB
Page 92 of 340

To signal a lane change, just raise or lower the lever
until the arrow starts to flash. Hold it there until you
complete your lane change. The lever will return by
itself when you release it.
As you signal a turn or lane change, if the arrow flashes
faster than normal, a signal bulb may be burned out and
other drivers won’t see your turn signal.
If a bulb is burned out, replace it to help avoid an
accident.
If the arrows don’t go on at all when you
signal a turn, check for burned-out bulbs and then check
the fuse (see “Fuses and Circuit Breakers” in the Index).
A chime will sound if you leave your turn signal on for
more than
3/4 mile (1.2 km).
Headlamp High/Low Beam Changer
To change your headlamps
from low beam
to high
beam, push the lever
forward.
To change back to
low beam, pull the lever
toward you.
To flash your high beams, pull the lever toward you and
release. The lever will return to the low-beam position.
Flash-to-Pass
With the lever in the low-beam position, pull the lever
toward you momentarily to switch to high beams
(to
signal you are going to pass). If you have the headlamps
on, they will return
to low beams when you release
the lever.
2-32
ProCarManuals.com
Page 190 of 340

Turn Signals When Towing a Trailer
When you tow a trailer, your vehicle may need a
different turn signal flasher and/or extra wiring. Check
with your Oldsmobile retailer. The green arrows
on your
instrument panel will flash whenever you signal a turn
or lane change. Properly hooked up, the trailer lamps
will also flash, telling other drivers you’re about to turn,
change lanes or stop.
When towing a trailer, the green arrows on your
instrument panel will flash for turns even if the bulbs on
the trailer are burned out. Thus, you may think drivers
behind you are seeing your signal when they are not. It’s
important to check occasionally to be sure
the trailer
bulbs are still working.
Driving On Grades
Reduce speed and shift to a lower gear before you
start down a long or steep downgrade. If you don’t
shift down, you might have to use your brakes
so much
that they would get hot and no longer work well.
On a long uphill grade, shift down and reduce your
speed to around
45 mph (70 Mh) to reduce the
possibility of engine and transaxle overheating. If
you have overdrive, you may have to drive in
THIRD
(3) instead of DRIVE (D) (or , as you need
to a lower gear).
Parking on Hills
You really should not park your vehicle, with a trailer
attached, on a hill. If something goes wrong, your rig
could start to move. People can be injured, and both
your vehicle and the trailer can be damaged.
But if you ever have to park your rig on a hill, here’s
how to do it:
1.
2.
3.
4.
5.
Apply your regular brakes, but don’t shift into
PARK
(P) yet.
Have someone place chocks under the trailer wheels.
When the wheel chocks are in place, release the
regular brakes until the chocks absorb the load.
Reapply the regular brakes. Then apply your parking
brake, and then shift
to PARK (P).
Release the regular brakes.
4-36
ProCarManuals.com
Page 264 of 340

2. Using an E8 torx socket, turn the horizontal aiming
adjustment screw
(A) until the “0” (zero) on the
pointer
is lined up with the center marking on the
3.
1.
-
horizontal block index plate (C).
To adjust the vertical aim, use an E8 torx socket
and turn the vertical aiming adjustment screw
(B)
until the bubble inside the level (D) is centered at
“0” (zero).
Front Parking, Sidemarker and Turn Signal
Cornering Lamp
Remove the headlamp assembly. Refer to the
removal procedure earlier in this section.
2.
3.
4.
5.
6.
Remove the rubber bulb access cover.
Twist and pull each bulb socket from the
headlamp assembly.
Holding the base
of the bulb, pull the bulb from
the socket.
Push the new bulb into the socket.
Put the bulb socket back into the headlamp assembly
and
turn it to the right until it is secure.
Redace the rubber bulb access cover.
I
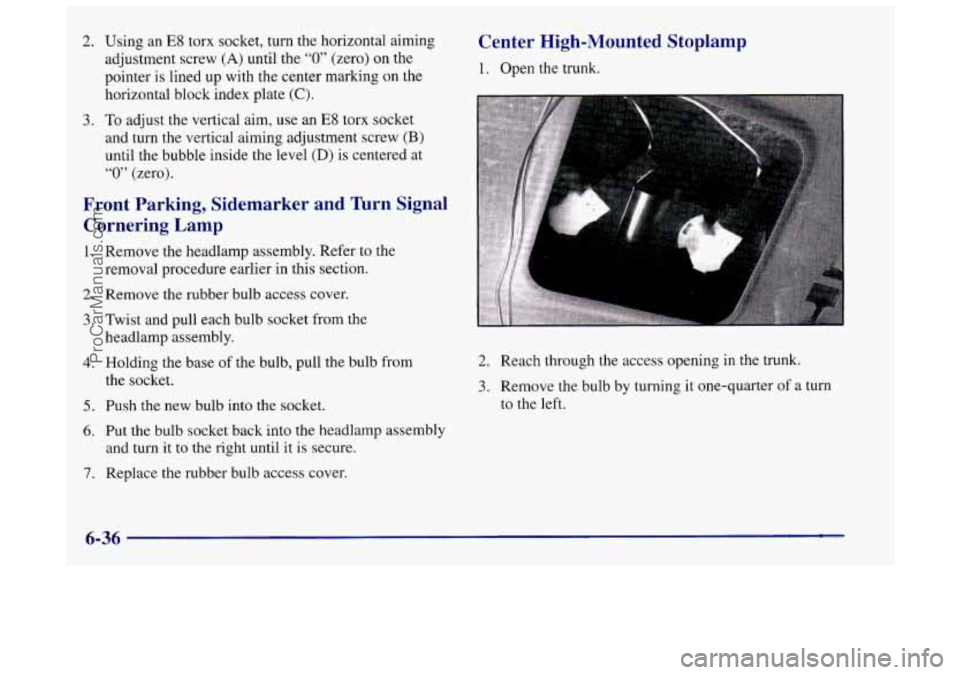
Center High-Mounted Stoplamp
1. Open the trunk.
Lr
2. Reach through the access opening in the trunk.
3. Remove the bulb by turning it one-quarter of a turn
to the left.
6-36
ProCarManuals.com
Page 265 of 340

4. Place the new bulb into the socket.
5. Turn the bulb one-quarter of a turn to the right
to replace.
6. Close the trunk.
TaiVStopDbrn Signal lamp
A A
B
1. Remove the plastic wing nuts (A). (Pliers may be
required to remove the wing nuts.)
6-37
ProCarManuals.com
Page 290 of 340

Fuse
30 31
32
33
34
35
36
37
38 39
40
41
42
43
Description
Engine Emissions
Not Used
Headlamp (Right)
Rear Compartment Release
Parking Lamp
Fuel Pump
Headlamp (Left) Spare
Spare
Spare
Spare
Spare Spare
Fuse Puller
Replacement Bulb Numbers
Exterior Lamps Number
Back-up ............................... 3057
Center High-Mounted Stop
In Spoiler ............................. 891
OnShelf
............................. 1141
Fog
.................................... 893
Front Parking/Turn Signal
............. 4 157NAK
Headlamp. High Beam
.................... 9005
Headlamp.
Low Beam .................... 9006
License Plate
............................ 194
Sidemarker. Front
......................... 194
Sidemarker. Rear
......................... 194
Stopmail
............................... 3057
Turn Signal (Rear)
....................... 3057
Cornering
.............................. 3156
6-62
ProCarManuals.com
Page 328 of 340

Brake (Continued) Replacing System Parts
........................ 6-30
System Warning Light
......................... 2-56
Trailer
...................................... 4-34
Transaxle Shift Interlock
.................. 2-27, 7-15
Transaxle Shift Interlock Check
.................. 7-15
Brakes, Anti-Lock
............................... 4-7
Braking in Emergencies
.......................... 4- 10
Break-In, New Vehicle
.......................... 2-15
BTSI
.................................... 2-27, 7-15
Bulb Replacement
.............................. 6-3 1
Center High-Mounted ......................... 6-36
Front Parking and Turn Signal Lamp
.............. 6-36
Tail/Stop/Turn Signal Lamp
..................... 6-37
Bulbs, Replacement Numbers
..................... 6-62
Wear
....................................... 6-29
WhattoAdd
................................. 6-28
Braking
........................................ 4-6
BTSICheck
................................... 7-15
Headlamps
.................................. 6-31
Capacities and Specifications
.................... 6-63
Carbon Monoxide
............... 2.13.2.28.4.28. 4.34
Care of Your Cassette Tape Player
.................. 3-27
Care of Your Compact Disc Player
................. 3-28
Care of Your Compact Discs
...................... 3-28
Cassette Deck Service
........................... 7-13
Cassette Tape Player
....................... 3.10. 3.14
CD Player
..................................... 3-14
CD Player Theft-Deterrent Feature
................. 3-23
Center Console
................................. 2-47
Center Passenger Position
........................ 1-32
CareofYourTapePlayer
......................... 3-27 Certification
Label
.............................. 4-30
Chains. Safety
................................. 4-34
Chains. Tire
................................... 6-46
Change Oil Light
............................... 2-64
Changing a Flat Tire
............................. 5-25
Charging System Light
.......................... 2-56
Checking Your Restraint Systems
.................. 1-51
Chemical Paint Spotting .......................... 6-53
Child Restraints
................................ 1-37
Securing in a Rear Outside Seat Position
........... 1-42
Securing
in the Center Rear Seat Position .......... 1-44
Securing in the Right Front Seat Position .......... 1-46
TopStrap
................................... 1-42
WheretoPut
..........,..................... l-41
Children ,,...........,........................ l-34
Cleaner. Air ................................... 6-16
Cleaning Circuit
Breakers and Fuses
....................... 6-56
Interior Plastic Components
..................... 6-49
Exterior Lamphnses
......................... 6-51
Glass
....................................... 6-50
Inside of
Your Vehicle ......................... 6-47
Instrument Panel
............................. 6-49
Outside
of Your Vehicle ........................ 6-50
Special Problems ............................. 6-48
Vinyl
....................................... 6-49
Windshield and Wiper Blades
................... 6-50
AluminumWheels
............................ 6-52
Fabric
...................................... 6-48
Leather
..................................... 6-49
Tires
....................................... 6-52
Wheels
..................................... 6-52
9-2
ProCarManuals.com