check engine light OLDSMOBILE SILHOUETTE 1994 Owners Manual
[x] Cancel search | Manufacturer: OLDSMOBILE, Model Year: 1994, Model line: SILHOUETTE, Model: OLDSMOBILE SILHOUETTE 1994Pages: 276, PDF Size: 15.82 MB
Page 29 of 276
Q;;=
LOW
SERVICE
ENGINE SOON (BRAI
la
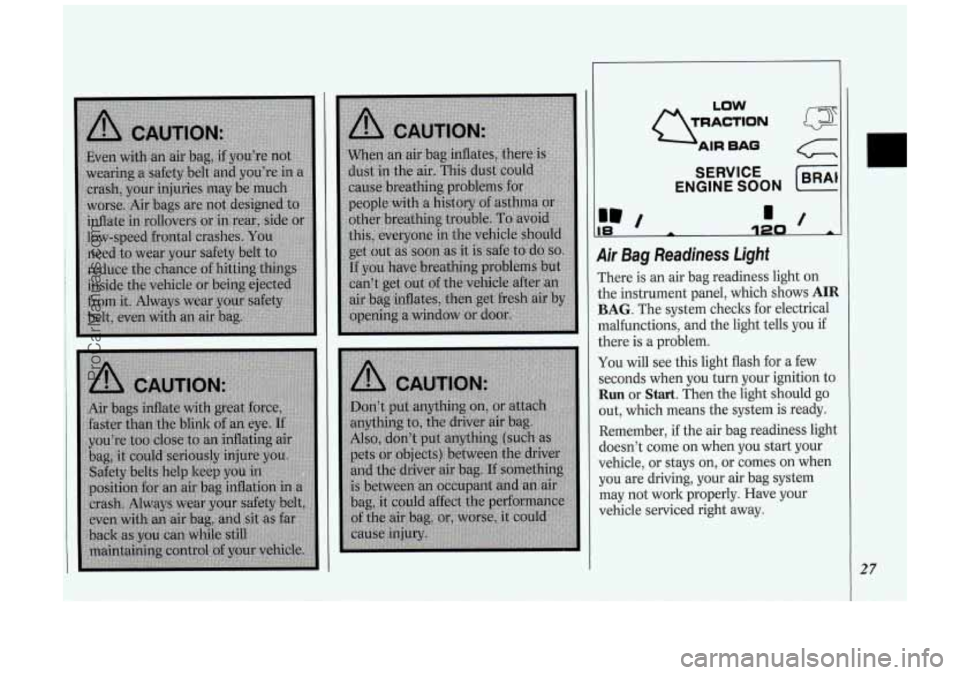
Air Bag Readiness Light
There is an air bag readiness light on
the instrument panel, which shows
AIR
BAG. The system checks for electrical
malfunctions, and the light tells you
if
there is a problem.
You will see this light flash for a few
seconds when you turn your ignition to
Run or Start. Then the light should go
out, which means the system is ready.
Remember,
if the air bag readiness light
doesn’t come
on when you start your
vehicle, or stays
on, or comes on when
you are driving, your air bag system
may not work properly. Have your
vehicle serviced right away.
27
ProCarManuals.com
Page 107 of 276
(J LOW
TRACTION -'I
AIR BAG
SERVICE
ENGINE
SOON
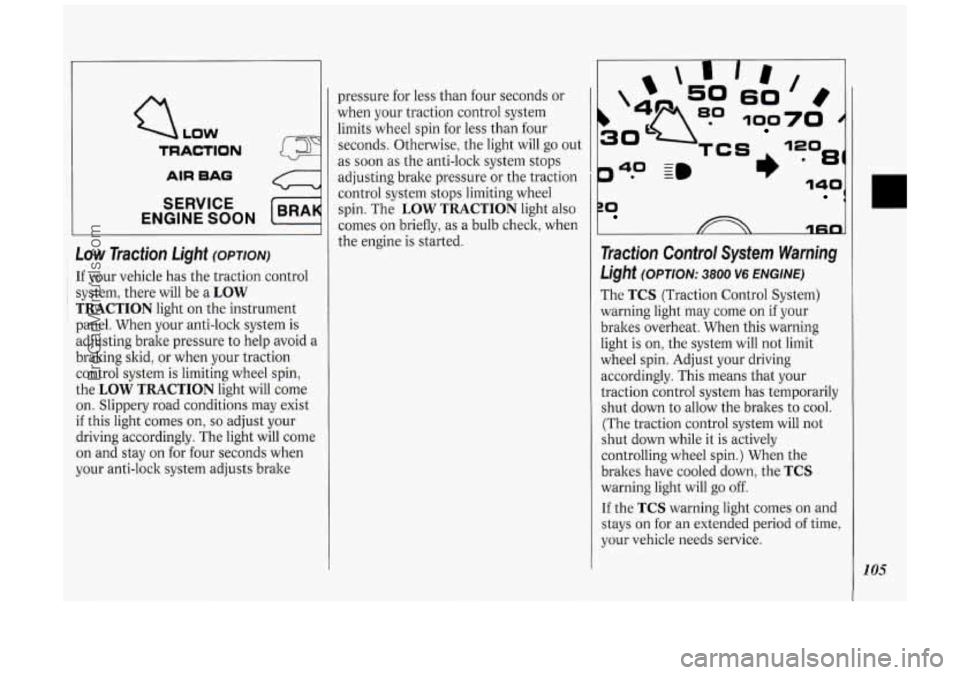
Low Traction Light (OPTION)
: If your vehicle has the traction control
~ i system, there will be a LOW
TRACTION light on the instrument
panel. When your anti-lock system is
adjusting brake pressure to help avoid a
braking skid, or when your traction
control system is limiting wheel spin,
the
LOW TRACTION light will come
on. Slippery road conditions may exist
if this light comes on, so adjust your
driving accordingly. The light will come
on and stay on for four seconds when
your anti-lock system adjusts brake pressure
for less than four seconds or
when your traction control system
limits wheel spin for less than four
seconds. Otherwise, the light will go out
as soon as the anti-lock system stops
adjusting brake pressure or the traction
control system stops limiting wheel
spin. The
LOW TRACTION light also
comes on briefly,
as a bulb check, when
the engine is started.
P* -
40 ~m
rn
60
100
81)
ZO 1
1fin
Traction Control System Warning
Light (OPTION: 3800 V6 ENGINE)
The TCS (Traction Control System)
warning light may come on if your
brakes overheat. When this warning
light is on, the system will not limit
wheel spin. Adjust your driving
accordingly. This means that your
traction control system has temporarily
shut down to allow the brakes to cool.
(The traction control system will not
shut down while it is actively
controlling wheel spin.) When the
brakes have cooled down, the
TCS
warning light will go off.
If the TCS warning light comes on and
stays on for an extended period of time,
your vehicle needs service.
105
ProCarManuals.com
Page 108 of 276
I
Features & Controls
-
NOTICE:
Spinning your wheels when the
TCS warning light is on can
destroy parts of your vehicle as well
as the tires.
If you spin your wheels
too fast while shifting your
transaxle back and forth, you can
destroy your transaxle. When
you're stuck, spin the wheels as
little as possible.
106
LOW
TRACTION
AIR BAO
SERVICE
ENGINE SOON
c
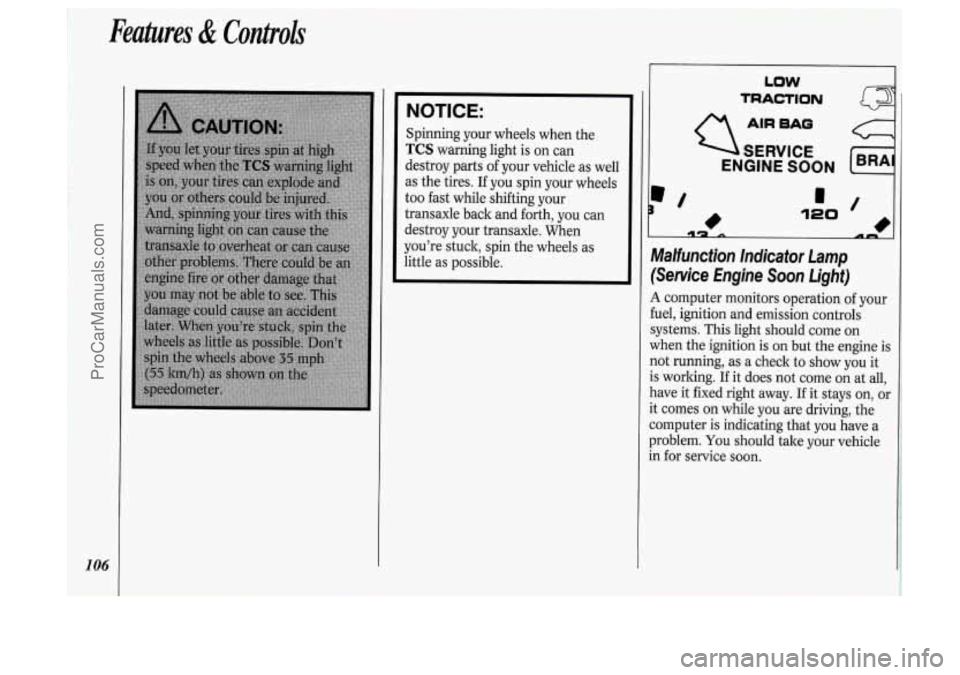
Malfunction Indicator Lamp
(Service Engine Soon Light)
A computer monitors operation of your
fuel, ignition and emission controls
systems. This light should come on
when the ignition is on but the engine is
not running, as a check to show you it
is working.
If it does not come on at all,
have it fixed right away.
If it stays on, or
it comes on while you are driving, the
computer is indicating that you have a
problem.
You should tale your vehicle
in for service soon.
ProCarManuals.com
Page 148 of 276
Your Driving and the Road
146
flow. Try to merge into the gap at close
to the prevailing speed. Switch on your
turn signal, check your mirrors and
glance over your shoulder as often as
necessary. Try to blend smoothly with
the traffic flow.
Once
you are on the freeway, adjust
your speed to the posted limit or to the
prevailing rate
if it’s slower. Stay in the
right lane unless you want to pass.
Before changing lanes, check your
mirrors. Then use your turn signal.
Just before you leave the lane, glance
quickly over your shoulder to make sure
there isn’t another vehicle in your
“blind” spot.
Once you are moving
on the freeway,
make certain you allow a reasonable
following distance. Expect to move
slightly slower at night.
When you want to leave the freeway,
move to the proper lane well in
advance. If you
miss your exit do not,
under any circumstances, stop and back
up. Drive on to the next exit.
The exit ramp can be curved, sometimes quite sharply. The exit
speed
is usually posted.
Reduce your speed according to your
speedometer, not to your sense of
motion. After driving for any distance at
higher speeds, you may tend to think
you are going slower than you actually
are.
I Before Leaving on a Long
Trip
Make sure you’re ready. Try to be well
rested. If you must start when you‘re
not fresh
- such as after a day’s work
- don’t plan to make too many miles
that first part of the journey. Wear
comfortable clothing and shoes you can
easily drive in.
Is your vehicle ready for a long trip? If
you keep it serviced and maintained, it’s
ready to go. If
it needs service, have it
done before starting out. Of course,
you’ll find experienced and able service
experts in Oldsmobile dealerships all
across North America. They‘ll be ready
and willing to help
if you need it.
Here are some things you can check
before a trip:
Windshield Washer Fluid: Is the
reservoir full? Are
all windows clean
inside and outside?
shape?
you checked all levels?
lenses clean?
safe, trouble-free trip.
Is the tread
good enough for long-distance
driving? Are the tires all inflated to
the recommended pressure?
weather outlook along your route?
Should you delay your trip a short
time to avoid a major storm system?
Maps: Do you have up-to-date maps?
Wiper Blades: Are they in good
Fuel, Engine Oil, Other Fluids: Have
Lights: Are they all working? Are the
Tires: They are vitally important to a
Weather Forecasts: What’s the
Highway Hypnosis
Is tbere actually such a condition as
“highway hypnosis”? Or is it just plain
falling asleep at the wheel? Call it
highway hypnosis, lack of awareness, or
whatever.
ProCarManuals.com
Page 157 of 276
During your trip, check occasionally to
be sure that the load is secure, and that
the lights and
any trailer brakes are still
working.
Following Distance
Stay at least twice as far behind the
vehicle ahead as you would when
driving your vehicle without a trailer.
This can help you avoid situations that
require heavy braking and sudden
turns.
Passing
You’ll need more passing distance up
ahead when you’re towing a trailer.
And, because you’re a good deal longer,
you’ll need to go much farther beyond
the passed vehicle before you can return
to your lane.
Backing Up
Hold the bottom of the steering wheel
with one hand. Then, to move the
trailer to the left, just move that hand to
the left.
To move the trailer to the right,
move your hand to the right. Always back up
slowly and, if possible, have
someone guide you.
Making Turns
When you’re turning with a trailer,
make wider turns than normal. Do this
so your trailer won’t strike soft
shoulders, curbs, road signs, trees, or
other objects. Avoid jerky or sudden
maneuvers. Signal well in advance.
Turn Signals When Towing a
Trailer
When you tow a trailer, your vehicle has
to have a different turn signal flasher
and extra wiring. The green arrows on
your instrument panel will flash
whenever you signal a turn or lane
change. Properly hooked up, the trailer
lights will
also flash, telling other
drivers you’re about to turn, change
lanes or stop.
When towing a trailer, the green arrows
on your instrument panel will flash for
turns even
if the bulbs on the trailer are
burned out. Thus, you may think
drivers behind you are seeing your signal
when they are not.
It’s important
to check occasionally to be sure the
trailer bulbs are still working.
Driving On Grades
Reduce speed and shift to a lower gear
before you start down a long or steep
downgrade. If you don’t
shift down, you
might have to use your brakes
so much
that they would get hot and
no longer
work well.
On a long uphill grade, shift down and
reduce your speed to around
45 mph
(70 lwh) to reduce the possibility of
engine and transaxle overheating.
If you are towing a trailer that weighs
more than
1,000 pounds (454 kg), and
you have an automatic transaxle with
Overdrive, you may prefer to drive in
D
instead of Overdrive (or, as you need to,
a lower gear). This will minimize heat
build-up and extend the life of your
transaxle.
n
ProCarManuals.com
Page 192 of 276
Service &Appearance Care
190
Underhood Light
Your underhood light will go on when
you open the hood.
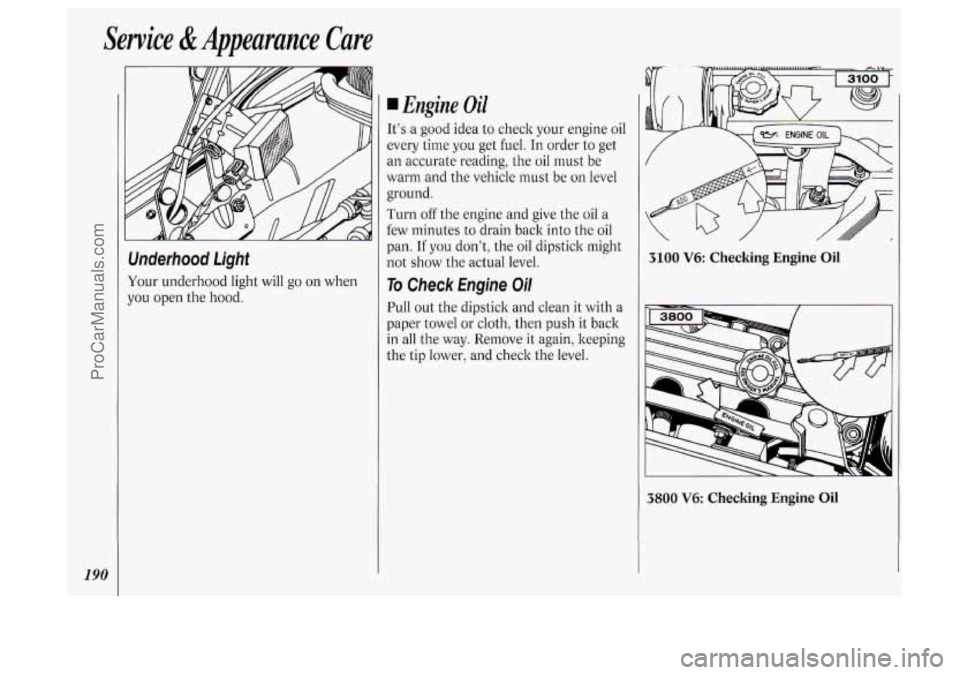
Engine Oil
It’s a good idea to check your engine oil
every time you get fuel. In order to get
an accurate reading, the oil must be
warm and the vehicle must be on level
ground.
Turn off the engine and give the oil a
few minutes to drain back into the oil
pan.
If you don’t, the oil dipstick might
not show the actual level.
To Check Engine Oil
Pull out the dipstick and clean it with a
paper towel or cloth, then push it back
in all the way. Remove it again, keeping
the tip lower, and check the level.
3100 V6: Checking Engine Oil
3800 V6: Checking Engine Oil
ProCarManuals.com
Page 199 of 276
How to Add Fluid
Refer to the Maintenance Schedule to
determine what kind of transaxle fluid
to use. See
Recommended Fluids and
Lubricants
in the Index.
If the fluid level is low, add only enough
of the proper fluid to bring the level into
the cross-hatched area
on the dipstick.
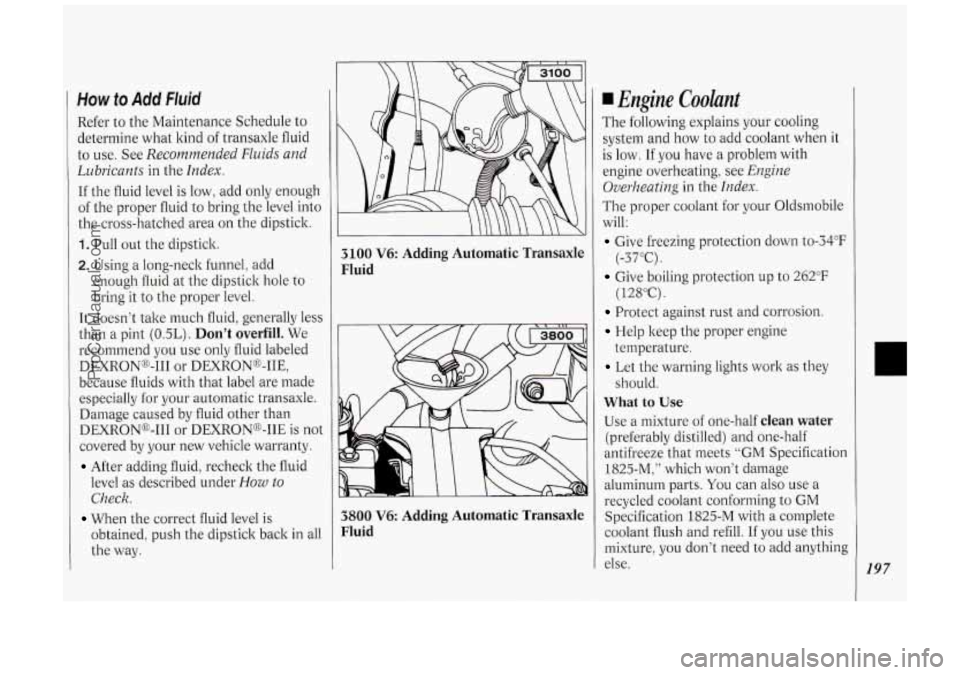
1. Pull out the dipstick.
2. Using a long-neck funnel: add
enough fluid at the dipstick hole to
bring it to the proper level.
It doesn’t take much fluid, generally less
than a pint
(OSL). Don’t overfill. We
recommend you use only fluid labeled
DEXRONo-I11 or DEXRON@-IIE,
because fluids with that label are made
especially for your automatic transaxle.
Damage caused by fluid other than
DEXRONo-I11 or DEXRONB-IIE is not
covered by your new vehicle warranty.
After adding fluid, recheck the fluid
level as described under
How to
Check.
obtained, push the dipstick back in all
the way.
When the correct fluid level is
3100 V6: Adding Automatic Transaxle
Fluid
3800 V6: Adding Automatic Transaxle
Fluid
Engine Coolant
The following explains your cooling
system and how to add coolant when it
is
low. If you have a problem with
engine overheating, see
Engine
Overheating
in the Index.
The proper coolant for your Oldsmobile
will:
Give freezing protection down to-34”F
Give boiling protection up to 262°F
Protect against rust and corrosion.
Help keep the proper engine
Let the warning lights work as they
What to Use
Use a mixture of one-half clean water
(preferably distilled) and one-half
antifreeze that meets
“GM Specification
1825-M:” which won’t damage
aluminum parts.
You can also use a
recycled coolant conforming to
GM
Specification 1825-M with a complete
coolant flush and refill.
If you use this
mixture,
you don’t need to add anything
else.
(-37°C).
( 12SoC).
temperature. should.
197
ProCarManuals.com
Page 225 of 276
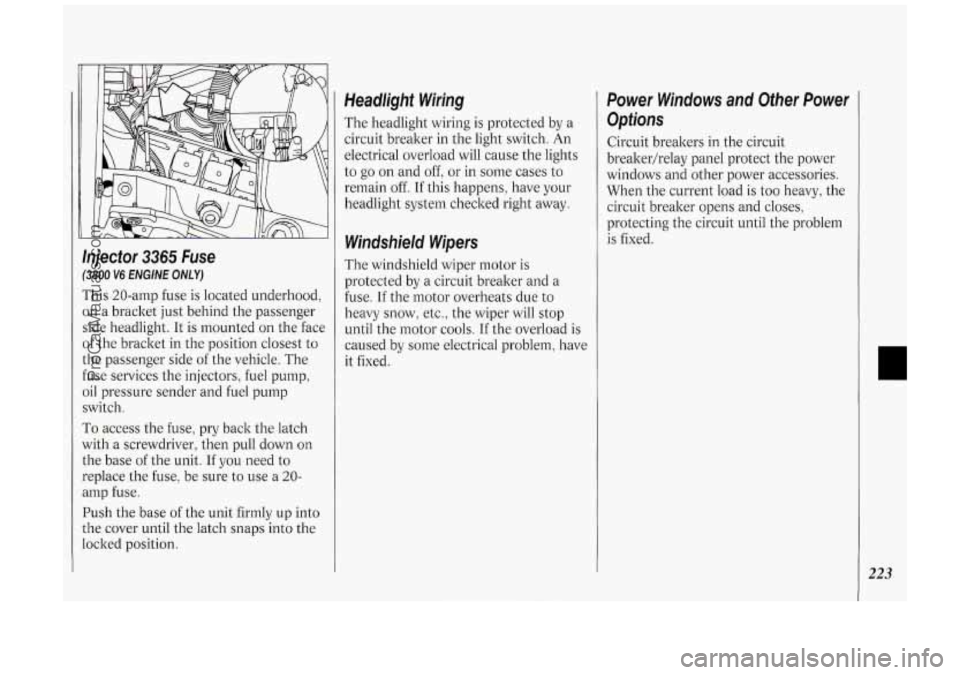
Injector 3365 Fuse
(3800 V6 ENGINE ONLY)
This 20-amp fuse is located underhood,
on a bracket just behind the passenger
side headlight. It is mounted on the face
of the bracket in the position closest to
the passenger side of the vehicle. The
fuse services the injectors, fuel pump,
oil pressure sender and fuel pump
switch.
To access the fuse, pry back the latch
with a screwdriver, then pull down on
the base
of the unit. If you need to
replace the fuse, be sure to use a 20-
amp fuse.
Push the base of the unit firmly up into
the cover until the latch snaps into the
locked position.
Headlight Wiring
The headlight wiring is protected by a
circuit breaker in the light switch. An
electrical overload will cause the lights
to go on and off: or
in some cases to
remain off. If this happens, have your
headlight system checked right away.
Windshield Wipers
The windshield wiper motor is
protected by a circuit breaker and a
fuse.
If the motor overheats due to
heavy snow, etc., the wiper will stop
until the motor cools.
If the overload is
caused by some electrical problem, have
it fixed.
Power Windows and Other Power
Options
Circuit breakers in the circuit
breakerhelay panel protect the power
windows and other power accessories.
When the current load is too heavy, the
circuit breaker opens and closes,
protecting the circuit until the problem
is fixed.
223
ProCarManuals.com
Page 245 of 276

Section C: Periodic Maintenance Inspections fall). You should let your GM dealer’s service department or
other qualified service center do these jobs. Make sure any
Listed below are inspections and services which should be necessary repairs are completed at once.
performed at least twice a year (for instance, each spring and
Restraint Systems
Steering, Suspension
and Front-Wheel-
Drive Axle Boot and
Seal Inspection
Exhaust System
Inspection
Throttle Linkage
Inspection
Brake System Inspection
~~ ~
WHAT SHOULD BE DONE
~ ~~~
Now and then, make sure all your belts, buckles, latch plates, retractors, anchorages and
reminder systems are working properly. Look for any loose parts or damage.
If you see anything
that might keep
a restraint system from doing its job, have it repaired.
Inspect the front and rear suspension
and steering system for damaged, loose or missing parts,
signs of wear, or lack of lubrication. Inspect the power steering lines and hoses for proper
hookup, binding, leaks, cracks, chafing, etc. Clean and then inspect the drive axle boot seals for
damage, tears or leakage. Replace seals if necessary.
Inspect the complete exhaust system. Inspect the body near the exhaust system. Look for broken,
damaged, missing or out-of-position parts as well
as open seams, holes, loose connections, or
other conditions which could cause a heat build-up in the floor pan or could let exhaust fumes
into the vehicle. See
Engine Exhaust in the Index.
Inspect the throttle linkage for interference or binding, and for damaged or missing parts.
Replace parts as needed.
Inspect the complete system. Inspect brake lines and hoses for proper hook-up, binding, leaks,
cracks, chafing, etc. Inspect disc brake pads for wear and rotors for surface condition. Also inspect
drum brake linings for wear and cracks. Inspect other brake parts, including drums, wheel
cylinders, calipers, parking brake, etc. Check parking brake adjustment.
You may need to have
your brakes inspected more often
if your driving habits or conditions result in frequent braking.
NOTE:
A low brake fluid level can indicate worn disc brake pads which may need to be serviced.
Also, if the brake system warning light stays on or comes on, something may be wrong with the
brake system. See the
Index under Brake System Warning Light. If your anti-lock brake system
warning light stays on or comes on, something may be wrong with the anti-lock brake system.
See the
Index under Anti-Lock Brake System Wawing Light.
ProCarManuals.com
Page 265 of 276

lndex
Accessory Power Outlet ................... 84
Adding Brake Fluid
............................. 201. 227
Electrical Equipment
........ .60. 117 . 2 19
Engine Coolant
.......... 167.197.224. 227
Engine Oil
.............................. 190. 224
Power Steering Fluid
..... 199.225. 227
Sound Equipment
.......................... 11 7
Transaxle Fluid
.............. 195. 224. 227
Windshield Washer Fluid
...... 200. 227
Air Bag Readiness Light
..................... 27
Air Bags
............................................... 26
Air Cleaner
............................... 194. 226
Air Conditioner
................................ 11 1
Air Inflator System ............................. 85
Alcohol. Driving Under the
Influence
of ..................................... 132
Alcohol in Gasoline
.......................... 183
Aluminum Wheels .................... 21 1. 216
Antenna
............................................ 129
Anti-Lock
.......................................... 135
Anti-Lock Brake System
................... 135
Brake Master Cylinder ................... 201
Junction Block Fuse
...................... 222
Warning Light
................................ 104
Appearance Care
.............................. 212
Adjusting
Rear Seats
.......................... 17
Antifreeze
......................... 197. 224. 227
Ashtrays and Lighter
.................... 89. 90 Audio
Systems
.................................. 117
AM/FM Stereo Radio
.................... 1 19
AM/FM Stereo Radio with Compact
Disc Player
..................................... 124
Care
of Audio Systems .................. 128
Setting the Clock
........................... 117
Steering Wheel Touch Controls
.... 127
Adding Fluid
.................. 197. 225. 227
Checking Fluid
............................... 195
Shifting
............................................. 62
Battery
............................................ 203
Jump Starting
................................. 158
Battery Warning Gage ...................... 103
Blizzard
............................................. 149
Brake Cassette
Player
...................... 120. 122
Radio Reception. For the Best
...... 128
Automatic Transaxle
(( Blowout. .. Tire ................................ 172
Adjustment
.................................... 202
Anti-Lock Brakes
.......................... 135
Anti-Lock Brake System Warning
Light
............................................ 104
Fluid
....................................... 201. 227
Parking
............................................. 65
Pedal Travel
................................... 202
Rear
Drums .................................... 202
Junction
Block Fuse
...................... 222
Master Cylinder
............................. 201 Warning Light
................................ 103
Wear Indicators
............................. 202
Brake System Warning Light
........... 103
Braking
............................................. 134
Braking in Emergencies
................... 138
Braking Technique
........................... 134
“Break.1n.
.. New Vehicle ............. 57. 152
Bucket Seats. Removable Rear
.......... 15
Buckling Up (see
Safety Belts)
Bulb Replacement
Headlight
....................................... 203
Taillight
.......................................... 204
Bulbs, Replacement
.......................... 228
Capacities
81 Specifications ............ 224
Carbon Monoxide in
Exhaust
...................... 57, 68. 150. 154
Cassette Tape Player
(see
Audio Systems )
Center Passenger Position
(see
Safety Belts)
Chains. Safety ................................... 154
Chains. Tire
.............................. 179, 212
Changing a Flat Tire
......................... 172
Checking
Brake Fluid
.................................... 201
Engine Coolant
.............................. 197
Engine Oil ...................................... 190
Power Steering Fluid
..................... 199
Safety Belt Systems
......................... 41
.
263
ProCarManuals.com