radio controls OLDSMOBILE SILHOUETTE 1994 Owners Manual
[x] Cancel search | Manufacturer: OLDSMOBILE, Model Year: 1994, Model line: SILHOUETTE, Model: OLDSMOBILE SILHOUETTE 1994Pages: 276, PDF Size: 15.82 MB
Page 86 of 276

Features & Controls
84
Center Dome Light
Located in the center of your vehicle,
this light has no switch of its
own. It
will go on each time you open the
doors, unless you turn the interior lights
override switch in the center instrument
panel console to
OFF.
If you have the optional rear climate
control, you will not have a center dome
light.
Rear lnterior Lights
The rear dome light also has two
reading lights.
The dome light will go
on each time you
open the doors, unless you turn the
interior lights override switch in the
center instrument panel console to
OFF.
To turn on either reading light, press
the switch next to it.
There are also
two lights in the liftgate
to light the rear cargo area. These will
come
on each time you open the
liftgate, unless the interior lights
override switch is in the
OFF position.
Accessory Power Outlet
The power outlet is located in the rear
compartment on the driver’s side. To
open, slide the latch down and remove
the cover.
The power outlet can be used to plug in
electrical equipment such as a cellular
telephone,
CB radio, etc. Follow the
proper installation instructions that are
included with any electrical equipment
you install.
ProCarManuals.com
Page 111 of 276
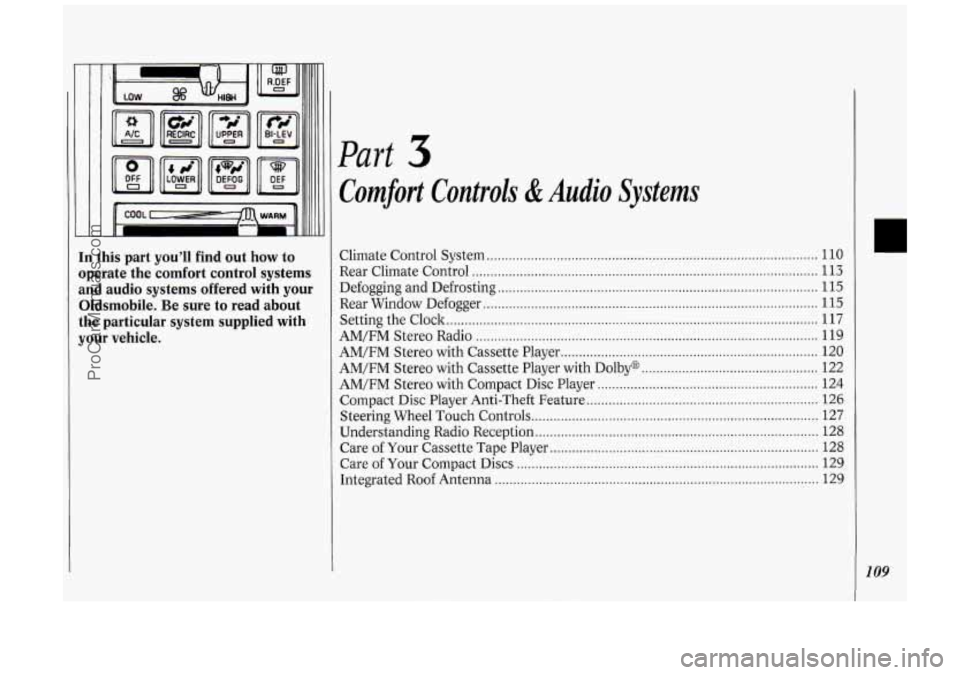
In this part you’ll find out how to
operate the comfort control systems
and audio systems offered with your
Oldsmobile
. Be sure to read about
the particular system supplied with
your vehicle
.
Part
Comfort Controls & Audio Systems
Climate Control System ........................................................................\
.................. 110
Rear Climate Control ........................................................................\
...................... 113
Defogging and Defrosting
........................................................................\
............... 115
Rear Window Defogger
........................................................................\
................... 115
AM/FM Stereo Radio
........................................................................\
..................... 119
Setting the
Clock
........................................................................\
............................. 117
AM/FM Stereo with Cassette Player
...................................................................... 120
AM/FM Stereo with Cassette Player with Dolby@
................................................ 122
AM/FM Stereo with Compact Disc Player ............................................................ 124
Compact Disc Player Anti-Theft Feature ............................................................... 126
Steering Wheel Touch Controls ........................................................................\
...... 127
Understanding Radio Reception ........................................................................\
..... 128
Care of Your Compact Discs
........................................................................\
.......... 129
Integrated Roof Antenna
........................................................................\
................ 129
Care
of Your Cassette Tape Player
........................................................................\
. 128
ProCarManuals.com
Page 122 of 276
120
Comfort Controls &Audio Systems
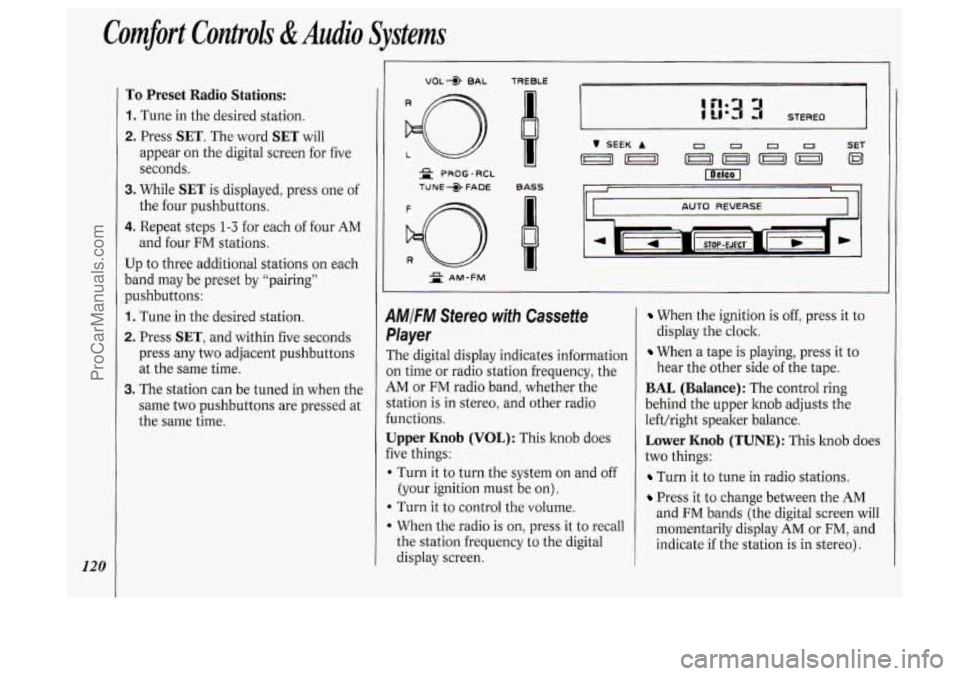
To Preset Radio Stations:
1. Tune in the desired station.
2. Press SET. The word SET will
appear on the digital screen for five
seconds.
3. While SET is displayed, press one of
the four pushbuttons.
4. Repeat steps 1-3 for each of four AM
and four
FM stations.
Up to three additional stations
on each
band may be preset by “pairing”
pushbuttons:
1. Tune in the desired station.
2. Press SET, and within five seconds
press any two adjacent pushbuttons
at the same time.
3. The station can be tuned in when the
same two pushbuttons are pressed at
the same time.
VOL* BAL TREBLE I= - -
= PROG-RCL
TUNE +> FADE BASS
d
AUTO REVERSE
2 AM-FM
1MIFM Stereo with Cassette
,layer
The digital display indicates information
)n time or radio station frequency, the
iM or FM radio band, whether the
‘tation is in stereo, and other radio
unctions.
Jpper Knob (VOL): This knob does
ive things:
I Turn it to turn the system on and off
(your ignition must be on).
b Turn it to control the volume.
When the radio is on, press it to recall
the station frequency to the digital
display screen.
When the ignition is off, press it to
display the clock.
When a tape is playing, press it to
hear the other side
of the tape.
BAL (Balance): The control ring
behind the upper knob adjusts the
left/right speaker balance.
Lower Knob (TUNE): This knob does
two things:
Turn it to tune in radio stations.
Press it to change between the AM
and FM bands (the digital screen will
momentarily display
AM or FM, and
indicate if the station is in stereo).
ProCarManuals.com
Page 124 of 276
Comfort Controls &Audio Systems
122
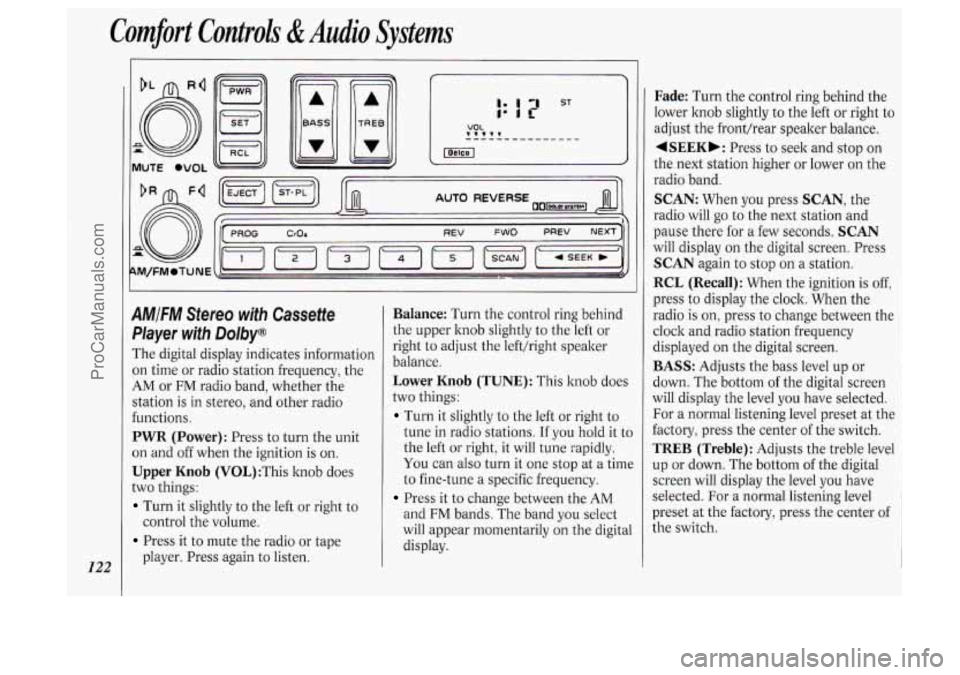
AMIFM Stereo with Cassette
Pkyer with Dolby@
The digital display indicates information
on time or radio station frequency, the
AM or FM radio band, whether the
station
is in stereo, and other radio
functions.
PWR (Power): Press to turn the unit
on and off when the ignition
is on.
Upper Knob (V0L):This knob does
two things:
Turn it slightly to the left or right to
Press it to mute the radio or tape
control the
volume.
player. Press again to listen.
Balance: Turn the control ring behind
the upper knob slightly to the left or
right to adjust the lefthight speaker
balance.
Lower Knob (TUNE): This knob does
two things:
Turn it slightly to the left or right to
tune in radio stations. If you hold it to
the left or right, it will tune rapidly.
You can also turn it one stop at a time
to fine-tune a specific frequency.
Press it to change between the AM
and FM bands. The band you select
will appear momentarily on the digital
display.
Fade: Turn the control ring behind the
lower knob slightly to the left or right to
adjust the fronthear speaker balance.
4SEEKb: Press to seek and stop on
the next station higher or lower on the
radio band.
SCAN: When you press SCAN, the
radio will
go to the next station and
pause there for a few seconds.
SCAN
will display on the digital screen. Press
SCAN again to stop on a station.
RCL (Recall): When the ignition is off,
press to display the clock. When the
radio
is on, press to change between the
clock and radio station frequency
displayed on the digital screen.
BASS: Adjusts the bass level up or
down. The bottom
of the digital screen
will display the level you have selected.
For a normal listening level preset at the
factory, press the center of the switch.
TREB (Treble): Adjusts the treble level
up or down. The bottom of the digital
screen will display the level you have
selected. For a normal listening level
preset at the factory, press the center of
the switch.
ProCarManuals.com
Page 126 of 276

Comfort Controls di Audio Systems
124
A
F
T
A
s1
fl
P
0
u
1
0
SI
li
P
M/FM Stereo with Compact Disc
'layer
'he digital display indicates information
n time or radio station frequency, the
,M or FM radio band, whether the
tation is in stereo, and other radio
mctions.
'OWER: Turns the unit on and off
Then the ignition
is on.
'OL (Volume): Adjusts the volume up
r down, and the bottom of the digital
Ereen displays the setting. For a normal
stening level preset at the factory,
ress the center of the switch.
TUNE: Press the top of the switch to
tune in radio stations higher on the AM
or FM band. Press the bottom to tune in
stations lower on the band.
BASS: Adjusts the bass level up or
down. The bottom of the digital screen
will display the level you have selected.
For a normal listening level preset at the
factory, press the center of the switch.
TREB (Treble): Adjusts the treble level
up or down. The bottom of the digital
screen will display the level you have
selected. For a normal listening level
preset at the factory, press the center of
the switch.
BAL (Balance): Adjusts the left/right
and fronthear speaker balance to your
individual taste. When you change
either adjustment, the bottom
of the
digital screen will display the point
of
balance you have selected. For the
normal setting preset at the factory,
press the left and right or front and rear
buttons
at the same time.
Radio Controls
AM/FM: Press to select either the AM
or FM radio band. The band you select
will be displayed
on the digital screen.
The frequency of the station will be
displayed, and if the station is in stereo,
the
ST (Stereo) indicator will also be
displayed.
Your radio has AMAX. With an AMAX-
certified receiver, your radio can
produce quality AM sound comparable
to
FM stereo. AMAX reduces noise
without reducing the high frequencies
you need for the best sound. In addition
to improved sound quality, AMAX
includes more stations
on the AM band.
You don't have to do anything to your
Delco/GM radio because AMAX is
automatic.
ProCarManuals.com
Page 127 of 276

SEEK: Press SEEK to tune in and stop
on the next station on the
AM or FM
radio band.
SCAN: When you press SCAN, the
radio will go to the next station and
pause there for a few seconds.
SCAN
will display on the digital screen. Press
SCAN again to stop on a station.
RCL (Recall) : When the ignition is off,
press to display the clock. When the
radio is on, press to change between the
clock and the radio station frequency
displayed on the digital screen.
The five pushbuttons in the lower right
corner can be used to preset up to ten
radio stations (five AM and five FM
stations). These buttons have other
uses when you are playing a compact
disc (see
Compact Disc Controls later
in this section).
To Preset Radio Stations:
1. Tune the digital display to the station
you want.
2. Press SET. The SET indicator will
appear on the digital screen for five
seconds.
3. While the SET indicator is displayed,
press one of the five pushbuttons.
4. Repeat steps 1-3 for each of five AM
and five FM stations.
Compact Disc Controls
Many of the controls for the radio also
have functions for the compact disc
player, as explained here.
To Play a Compact Disc:
Don’t use mini-discs that are called
singles. They won’t eject. Use only full-
size compact discs.
1. Press POWER to turn the radio on.
2. Insert a disc part-way into the slot,
with the label side up. The player will
pull it in. In a few seconds, the disc
should play.
If the disc comes back out:
The disc may be upside down.
The disc may be dirty, scratched or
wet.
There may be too much moisture in
the air (wait about one hour and
try
again).
The player may be too hot, or the road
may be too rough for the disc to play.
If the word
HOT appears on the
display, the player is too hot. Press
RCL to remove HOT from the
display. As soon as things get back to
normal, the disc should play.
While a disc is playing, the
CD
indicator is displayed on the digital
screen, as is the clock.
RCL (Recall): Press once to see which
track is playing. Press again within five
seconds to see how long your selection
has been playing. The track number
also will be displayed when the volume
is changed or a new track starts to play.
PREV (Previous): Press to play a track
again. If you hold or keep pressing the
PREV button, the disc will keep
backing up to previous tracks.
NEXT: Press when you want to hear
the next track before the track you are
listening to has finished. If you hold or
keep pressing the
NEXT button, the
disc will keep advancing to other tracks.
REV (Reverse): Press and hold to
rapidly back up to a favorite passage.
Release to resume playing.
FF (Fast Forward): Press and hold to
rapidly advance the disc. Release to
resume playing.
r
125
ProCarManuals.com
Page 129 of 276

1. Turn the ignition on. (Radio off.)
2. Press the SET button. The display
will show 000.
3. Enter the six digits of the code
following steps
6-9 above. The
display will show the numbers as
entered.
4. Press the AM/FM button and the
time appears, indicating that the
disabling sequence was successful. If
the display indicates
SEC, the
numbers did not match and the unit
is still secured.
Disabling the Anti-Theft System:
1. Press PREV and FF together for five
seconds with the ignition on and
radio power
off. The display will
show
SEC, indicating the unit is in
the secure mode. (If
"- - -" appears on
the display, the anti-theft system has
already been disabled.)
2. Press the SET button. The display
will show
000.
3. Enter the first three digits of the code
following steps
6 and 7 of the
preceding paragraphs. The display will
show the numbers
as entered.
4. Press AM/FM. The radio will display
000.
5. Repeat steps 6 and 7 to enter the
second three digits of the code. The
display will show the numbers as
entered.
6. Press AM/FM. If "- - -" then the time
appears, the disabling sequence was
successful (the numbers matched the
secret code) and the unit
is in the
UNSECURED mode. If the display
shows
SEC, the disabling sequence
was unsuccessful (the numbers did
not match) and the unit will remain
in the
SECURED mode.
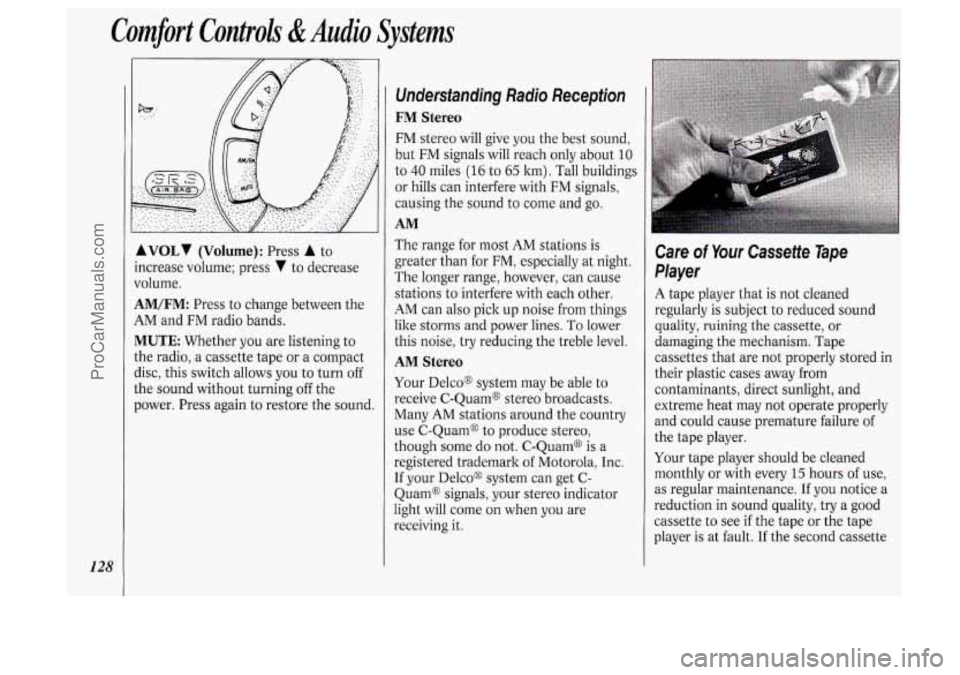
Steering Wheel Touch Controls
(OPTION)
Some audio system functions can be
operated with these controls.
ASEEKV: Press A to seek and stop
on the next station higher on the radio
band; press
V to seek and stop on the
next station lower on the radio band.
If you are listening to a cassette tape or
compact disc, press
A to skip to the
next selection; press
V to return to the
previous selection.
ATUNEV: Press A to tune in radio
stations higher on the
AM or FM band;
press
V to tune in stations lower on the
band.
127
ProCarManuals.com
Page 130 of 276
Comfort Controls &Audio Systems
128
AVOLI (Volume): Press A to
ncrease volume; press
V to decrease
Jolume.
4M/FM: Press to change between the
4M and FM radio bands.
MUTE Whether you are listening to
:he radio, a cassette tape or a compact
lisc, this switch allows
you to turn off
;he sound without turning off the
lower. Press again to restore the sound.
Undersfanding Radio Reception
FM Stereo
FM stereo will give you the best sound,
but FM signals will reach only about
10
to 40 miles (16 to 65 km). Tall buildings
or hills can interfere with FM signals,
causing the sound to come and go.
AM
The range for most AM stations is
greater than for
FM, especially at night.
The longer range, however, can cause
stations to interfere with each other.
AM can also pick up noise from things
like storms and power lines.
To lower
this noise, try reducing the treble level.
AM Stereo
Your Delcoo system may be able to
receive C-Quam@ stereo broadcasts.
Many
AM stations around the country
use C-Quam@ to produce stereo,
though some
do not. C-Quam@ is a
registered trademark of Motorola, Inc.
If your Delco@ system can get C-
Quam@ signals, your stereo indicator
light will come
on when you are
receiving it.
Care of Your Cassette Tape
Player
A tape player that is not cleaned
regularly is subject to reduced sound
quality, ruining the cassette, or
damaging the mechanism. Tape
cassettes that are not properly stored in
their plastic cases away from
contaminants, direct sunlight, and
extreme heat may not operate properly
and could cause premature failure
of
the tape player.
Your tape player should be cleaned
monthly or with every
15 hours of use,
as regular maintenance. If you notice a
reduction in sound quality, try a good
cassette to see
if the tape or the tape
player is at fault.
If the second cassette
ProCarManuals.com
Page 265 of 276

lndex
Accessory Power Outlet ................... 84
Adding Brake Fluid
............................. 201. 227
Electrical Equipment
........ .60. 117 . 2 19
Engine Coolant
.......... 167.197.224. 227
Engine Oil
.............................. 190. 224
Power Steering Fluid
..... 199.225. 227
Sound Equipment
.......................... 11 7
Transaxle Fluid
.............. 195. 224. 227
Windshield Washer Fluid
...... 200. 227
Air Bag Readiness Light
..................... 27
Air Bags
............................................... 26
Air Cleaner
............................... 194. 226
Air Conditioner
................................ 11 1
Air Inflator System ............................. 85
Alcohol. Driving Under the
Influence
of ..................................... 132
Alcohol in Gasoline
.......................... 183
Aluminum Wheels .................... 21 1. 216
Antenna
............................................ 129
Anti-Lock
.......................................... 135
Anti-Lock Brake System
................... 135
Brake Master Cylinder ................... 201
Junction Block Fuse
...................... 222
Warning Light
................................ 104
Appearance Care
.............................. 212
Adjusting
Rear Seats
.......................... 17
Antifreeze
......................... 197. 224. 227
Ashtrays and Lighter
.................... 89. 90 Audio
Systems
.................................. 117
AM/FM Stereo Radio
.................... 1 19
AM/FM Stereo Radio with Compact
Disc Player
..................................... 124
Care
of Audio Systems .................. 128
Setting the Clock
........................... 117
Steering Wheel Touch Controls
.... 127
Adding Fluid
.................. 197. 225. 227
Checking Fluid
............................... 195
Shifting
............................................. 62
Battery
............................................ 203
Jump Starting
................................. 158
Battery Warning Gage ...................... 103
Blizzard
............................................. 149
Brake Cassette
Player
...................... 120. 122
Radio Reception. For the Best
...... 128
Automatic Transaxle
(( Blowout. .. Tire ................................ 172
Adjustment
.................................... 202
Anti-Lock Brakes
.......................... 135
Anti-Lock Brake System Warning
Light
............................................ 104
Fluid
....................................... 201. 227
Parking
............................................. 65
Pedal Travel
................................... 202
Rear
Drums .................................... 202
Junction
Block Fuse
...................... 222
Master Cylinder
............................. 201 Warning Light
................................ 103
Wear Indicators
............................. 202
Brake System Warning Light
........... 103
Braking
............................................. 134
Braking in Emergencies
................... 138
Braking Technique
........................... 134
“Break.1n.
.. New Vehicle ............. 57. 152
Bucket Seats. Removable Rear
.......... 15
Buckling Up (see
Safety Belts)
Bulb Replacement
Headlight
....................................... 203
Taillight
.......................................... 204
Bulbs, Replacement
.......................... 228
Capacities
81 Specifications ............ 224
Carbon Monoxide in
Exhaust
...................... 57, 68. 150. 154
Cassette Tape Player
(see
Audio Systems )
Center Passenger Position
(see
Safety Belts)
Chains. Safety ................................... 154
Chains. Tire
.............................. 179, 212
Changing a Flat Tire
......................... 172
Checking
Brake Fluid
.................................... 201
Engine Coolant
.............................. 197
Engine Oil ...................................... 190
Power Steering Fluid
..................... 199
Safety Belt Systems
......................... 41
.
263
ProCarManuals.com
Page 269 of 276
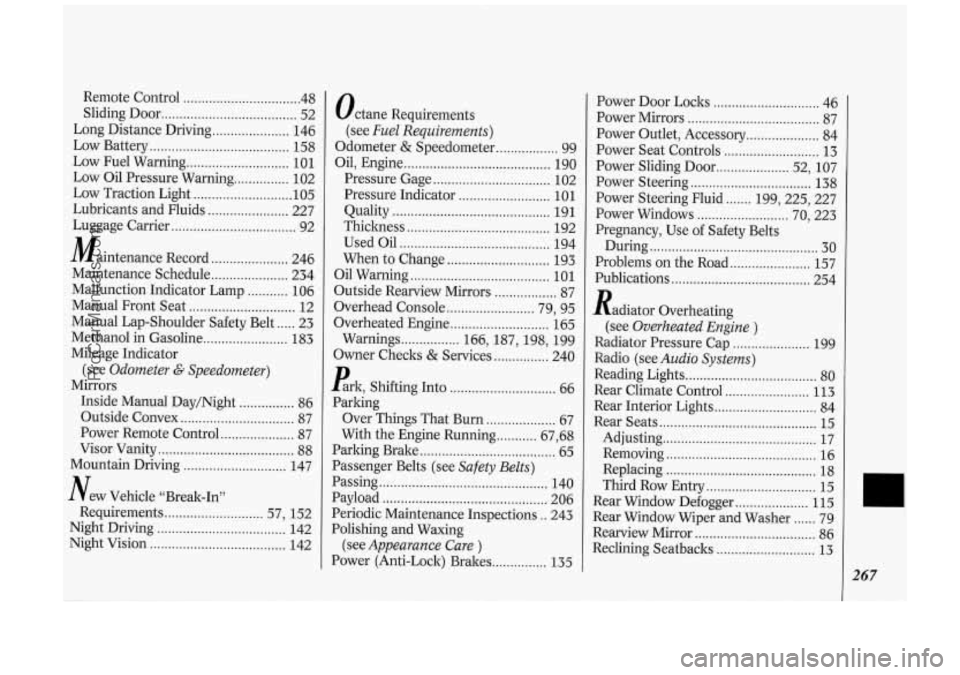
Remote Control ................................ 48 .. Sliding Door ..................................... 52
Long Distance Driving
..................... 146
Low Battery
...................................... 158
Low Fuel Warning ............................ 101
Low Oil Pressure Warning
............... 102
Low Traction Light
........................... 105
Lubricants and Fluids ...................... 227
Luggage Carrier
.................................. 92
Maintenance Record
..................... 246
Maintenance Schedule
..................... 234
Malfunction Indicator Lamp
........... 106
Manual Front Seat
............................. 12
Manual Lap-Shoulder Safety Belt
..... 23
Methanol in Gasoline
....................... 183
Mileage Indicator
Mirrors (see
Odometer G. Speedometer)
Inside
Manual Day/Night ............... 86
Outside Convex
............................... 87
Power Remote Control
.................... 87
Mountain Driving
............................ 147
New Vehicle “Break-In”
Night Driving
................................... 142
Night Vision
..................................... 142
Visor Vanity
..................................... 88
Requirements ........................... 57.
152 Octane
Requirements
(see
Fuel Requirements)
Odometer & Speedometer ................. 99
Oil. Engine
........................................ 190
Pressure Gage
................................ 102
Pressure Indicator
......................... 101
Quality
........................................... 19 1
Thickness ....................................... 192
Used Oil
......................................... 194
When to Change
............................ 193
Oil Warning
...................................... 101
Outside Rearview Mirrors ................. 87
Overhead Console
........................ 79. 95
Overheated Engine
........................... 165
Warnings ................ 166. 187. 198. 199
Owner Checks
& Services ............... 240
Rrk. Shifting Into
............................. 66
Parking Over Things That Burn
................... 67
Parking Brake
..................................... 65
Passenger Belts (see
Safety Belts)
Passing .............................................. 140
Periodic Maintenance Inspections
.. 243
Polishing and Waxing
With
the Engine Running
........... 67. 68
Payload
............................................. 206
(see
Appearance Care )
Power (Anti-Lock) Brakes ............... 135 Power
Door Locks
............................. 46
Power Mirrors
.................................... 87
Power Outlet. Accessory
.................... 84
Power Seat Controls
.......................... 13
Power Sliding Door .................... 52. 107
Power Steering
................................. 138
Power Steering Fluid ....... 199.225. 227
Power Windows
......................... 70. 223
During
.............................................. 30
Problems on the Road
...................... 157
Publications
...................................... 254
Pregnancy.
Use
of Safety Belts
Radiator Overheating
(see
Overheated Engine )
Radiator Pressure Cap ..................... 199
Radio (see
Audio Systems)
Reading Lights .................................... 80
Rear Climate Control
....................... 113
Rear Interior Lights ............................ 84
Rear Seats
........................................... 15
Removing ......................................... 16
Replacing
......................................... 18
Third Row Entry .............................. 15
Rear Window Defogger .................... 115
Rear Window Wiper and Washer
...... 79
Rearview Mirror
................................. 86
Reclining Seatbaclts
........................... 13
.. Ad~ustmg .......................................... 17
267
ProCarManuals.com