tire size OLDSMOBILE SILHOUETTE 1994 Owners Manual
[x] Cancel search | Manufacturer: OLDSMOBILE, Model Year: 1994, Model line: SILHOUETTE, Model: OLDSMOBILE SILHOUETTE 1994Pages: 276, PDF Size: 15.82 MB
Page 155 of 276
I
I I
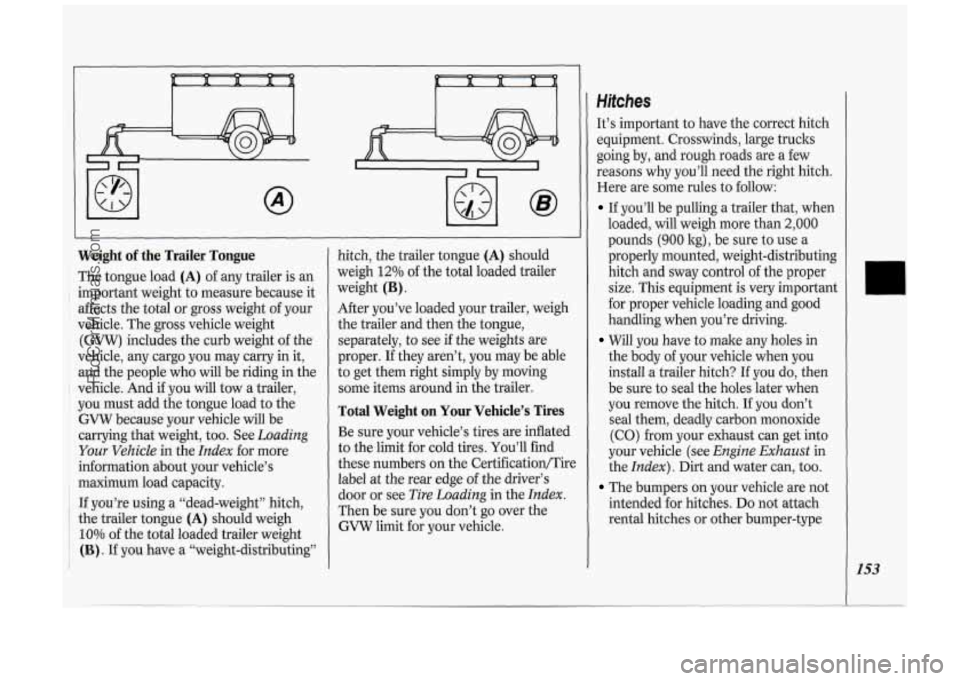
Weight of the Trailer Tongue
The tongue load (A) of any trailer is an
important weight to measure because it
affects the total
or gross weight of your
vehicle. The
gross vehicle weight
(GVW) includes the curb weight of the
vehicle, any cargo you may carry in it,
and the people who will be riding in the
vehicle. And if you will tow a trailer,
you must add the tongue load to the
GVW because your vehicle will be
carrying that weight, too. See
Loading
Your Vehicle in the Index for more
information about your vehicle’s
maximum load capacity.
I If you’re using a “dead-weight’’ hitch, 1 the trailer tongue (A) should weigh
i 10% of the total loaded trailer weight
’ (B). If you have a “weight-distributing”
I
hitch, the trailer tongue (A) should
weigh
12% of the total loaded trailer
weight
(B) .
After you’ve loaded your trailer, weigh
the trailer and then the tongue,
separately, to see
if the weights are
proper. If they aren’t, you may be able
to get them right simply by moving
some items around in the trailer.
Total Weight on Your Vehicle’s Tires
Be sure your vehicle’s tires are inflated
to the limit for cold tires. You’ll find
these numbers on the Certification/Tire
label at the rear edge
of the driver’s
door or see
Tire Loading in the Index.
Then be sure you don’t go over the
GVW limit for your vehicle.
Hifches
It’s important to have the correct hitch
equipment. Crosswinds, large trucks
going by, and rough roads are a few
reasons why you’ll need the right hitch.
Here are some rules to follow:
If you’ll be pulling a trailer that, when
loaded, will weigh more than
2,000
pounds (900 kg), be sure to use a
properly mounted, weight-distributing
hitch and sway control of the proper
size. This equipment is very important
for proper vehicle loading and good
handling when you’re driving.
Will you have to make any holes in
the body of your vehicle when you
install a trailer hitch? If you do, then
be sure to seal the holes later when
you remove the hitch. If you don’t
seal them, deadly carbon monoxide
(CO) from your exhaust can get into
your vehicle (see
Engine Exhaust in
the
Index). Dirt and water can, too.
The bumpers on your vehicle are not
intended for hitches.
Do not attach
rental hitches or other bumper-type
153
ProCarManuals.com
Page 180 of 276

Problems on the Road
1 78
17. Lay the flat tire near the rear of the
vehicle with the valve stem down.
Slide the cable retainer through the
center of the wheel and raise the flat
tire until you hear the hoist
mechanism click twice. This means
the wheel is firmly stored against
the underside of the vehicle. When
storing the spare tire, be certain to
turn the spare
so the valve stem is
near the rear of the vehicle. This
will help you to check and maintain
tire pressure in the spare.
Push against the tire to be certain it
is stored firmly.
18. Replace all jacking tools as they were
stored in the storage compartment and
replace the compartment cover. Be
sure to also store the nylon nut caps.
When
you replace the compact spare
tire with a full-size tire, replace the
nylon nut caps over the wheel nuts.
Tighten them “hand tight” using the
folding wrench (see step
7).
Compact Spare Tire
Although the compact spare was fr .Ill!
inflatedwhen you; vehiile was new, :
can lose air after a time. Check the
jr
it
inflation pressure regularly. It should be
60 psi (420 1tPa). After installing the
compact spare on your vehicle, you
should stop as soon as possible and
make sure your spare tire is correctly
inflated. The compact spare is made to
perform well at posted speed limits for
distances up to
3,000 miles (5 000 ltm).
The compact spare
is made to go up to
3,000 miles (5 000 ltm), so you can
finish your trip and have your full-size
tire repaired
or replaced where you
want. Of course, it’s best to replace
your spare with
a full-size tire as soon
as you can. Your spare will last longer
and be in good shape in case you need it
again.
ProCarManuals.com
Page 208 of 276
Service &Appearance Care
206
GVWR CAWR FRT CAWR RR
THIS VEHICLE CONFORMS TO ALL APPLICABLE US. FEDERAL
MOTOR VEHICLE SAFETY STANDARDS IN EFFECT ON THE DATE
OF MANUFALTURESHOWN ABOVE.
.MODEL.
M.P.V.
MPHY FRT TlRESlZE
RTG RIM WliKP, (COLD1
RR SPA MFD
fly GENERAL MOTORS CORP XWXX
LWKG
SERIAI. NUMBER SPEED
SEE
OWNERS MANUAL FOR ADDI'TIONAL INFORMATlOh
Loading Your Vehicle
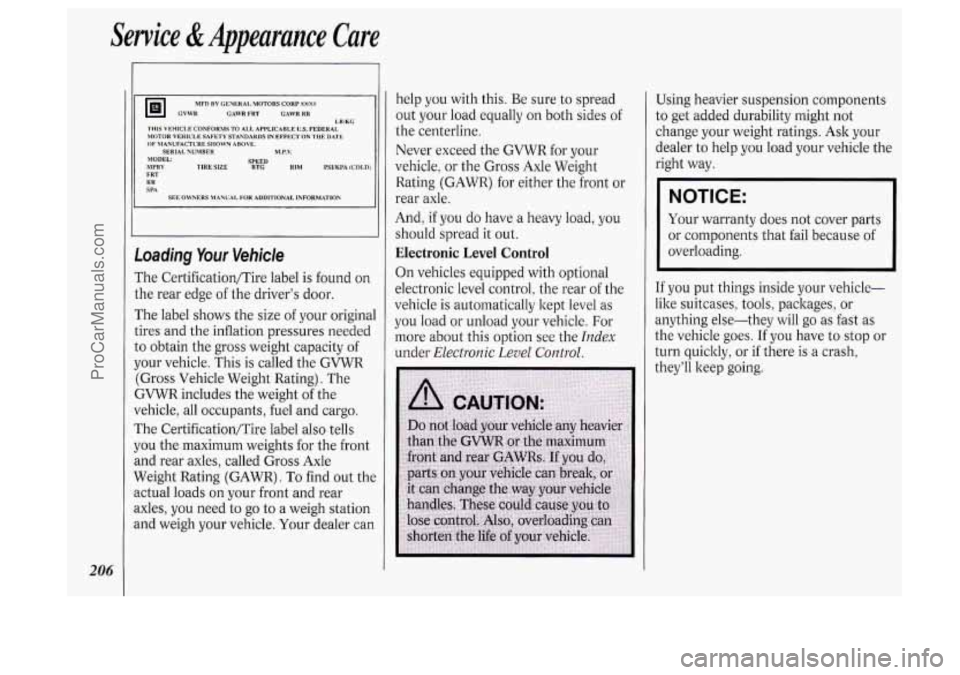
The Certification/Tire label is found on
the rear edge of the driver's door.
The label shows the size
of your original
tires and the inflation pressures needed
to obtain the gross weight capacity
of
your vehicle. This is called the GVWR
(Gross Vehicle Weight Rating). The
GVWR includes the weight of the
vehicle, all occupants, fuel and cargo.
The Certification/Tire label also tells
you the maximum weights for the front
and rear axles, called Gross Axle
Weight Rating (GAWR).
To find out the
actual loads
on your front and rear
axles, you need to go to a weigh station
and weigh your vehicle, Your dealer can help
you with
this. Be sure to spread
out your load equally on both sides
of
the centerline.
Never exceed the
GVWR for your
vehicle, or the Gross Axle Weight
Rating (GAWR) for either the front or
rear axle.
And,
if you do have a heavy load, you
should spread it out.
Electronic Level Control
On vehicles equipped with optional
electronic level control, the rear
of the
vehicle is automatically kept level as
you load or unload your vehicle. For
more about this option see the
Index
under Electronic Level Control.
Using heavier suspension components
to get added durability might not
change your weight ratings. Ask your
dealer to help you load your vehicle the
right way.
NOTICE:
Your warranty does not cover parts
or components that fail because
of
overloading.
If you put things inside your vehicle-
like suitcases, tools, packages, or
anything else-they will go
as fast as
the vehicle goes.
If you have to stop or
turn quickly! or if there is a crash,
they'll keep going.
ProCarManuals.com
Page 211 of 276
i TREAD WEAR INDICATORS
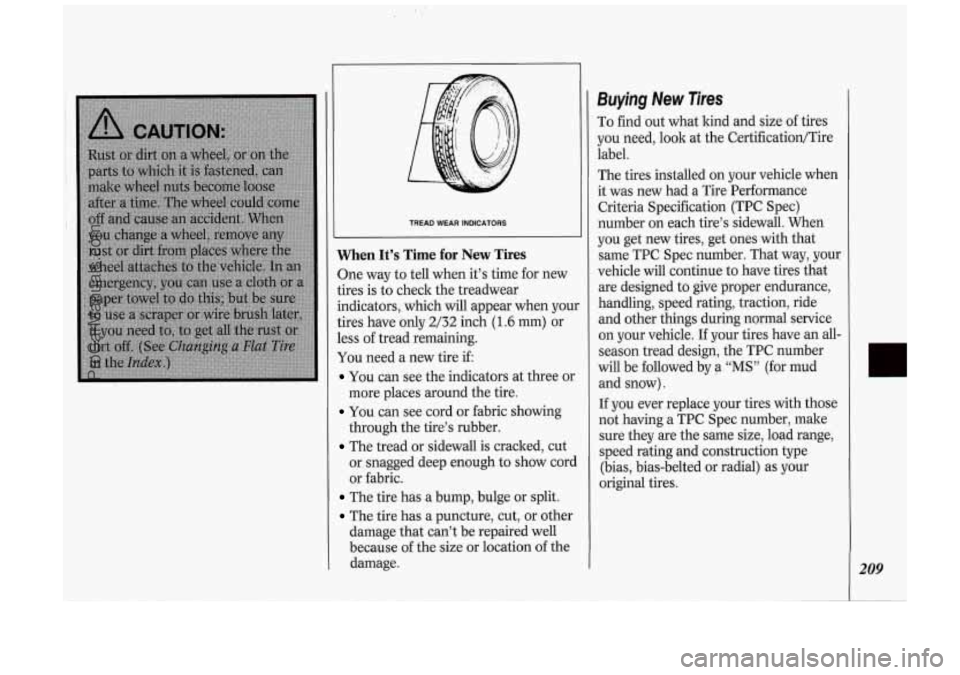
When It’s Time for New Tires
One way to tell when it’s time for new
tires is to check the treadwear
indicators, which will appear when you.
tires have only
2/32 inch (1.6 mm) or
less
of tread remaining.
You need a new tire if:
You can see the indicators at three or
You can see cord or fabric showing
The tread or sidewall is cracked, cut
more places
around the tire.
through the tire’s rubber.
or snagged deep enough to show cord
or fabric.
The tire has a bump, bulge or split.
The tire has a puncture, cut, or other
damage that can’t be repaired well
because
of the size or location of the
damage.
Buying New Tires
To find out what kind and size of tires
you need, look at the Certification/Tire
label.
The tires installed on your vehicle when
it was new had a Tire Performance
Criteria Specification (TPC Spec)
number on each tire’s sidewall. When
you get new tires, get ones with that
same TPC Spec number. That way, your
vehicle will continue to have tires that
are designed to give proper endurance,
handling, speed rating, traction, ride
and other things during normal service
on your vehicle.
If your tires have an all-
season tread design, the TPC number
will be followed by
a “MS” (for mud
and snow).
If you ever replace your tires with those
not having a TPC Spec number, make
sure they are the same size, load range,
speed rating and construction type
(bias, bias-belted or radial) as your
original tires. Iz
209
ProCarManuals.com
Page 214 of 276
Service &Appearance Cure
212
Tire Chains
NOTICE:
Use tire chains only where legal and
only when you must. Use only SAE
Class
“S” type chains that are the
proper size for your tires. Install
them on the front tires and tighten
them as tightly as possible with the
ends securely fastened. Drive
slowly and follow the chain
manufacturer’s instructions. If you
can hear the chains contacting your
vehicle, stop and retighten them,
If
the contact continues, slow down
until it stops. Driving too fast with
chains on will damage your vehicle.
Appearance Care
Remember, cleaning products can be
hazardous. Some are toxic. Others can
burst into flame if you strike
a match or
get them on a hot part
of the vehicle.
Some are dangerous
if you breathe their
fumes in a closed space. When you use
anything from a container to clean your
Oldsmobile, be sure to follow the
manufacturer’s warnings and instructions.
And always open your
doors or windows when you’re cleanin,
the inside.
Never use these to clean your vehicle:
Gasoline
Benzene
Naphtha
Carbon Tetrachloride
Acetone
Paint Thinner
Turpentine
Lacquer Thinner
Nail Polish Remover
They can all be hazardous
- some
more than others
- and they can all
damage your vehicle, too.
NOTICE:
Don’t use any of these unless this
manual says you can. In many uses,
these will damage
your vehicle:
Laundry Soap
Bleach
Reducing Agents
Cleaning the Inside of Your
Oldsmobile
Use a vacuum cleaner often to get rid of
dust and loose dirt. Wipe vinyl or
leather with a clean, damp cloth.
Your Oldsmobile dealer has two
GM
cleaners, a solvent-type spot lifter and a
foam-type powdered cleaner. They will
clean normal spots and stains very well.
Do not use them on vinyl or leather.
Here are some cleaning tips:
Always read the instructions on the
cleaner label.
Clean up stains as soon as you can - I
before they set.
Use a clean cloth or sponge, and
change to
a clean area often. A soft
brush may be used
if stains are
stubborn.
Use solvent-type cleaners in a well-
ventilated area only. If you use them,
don’t saturate the stained area.
If a ring forms after spot cleaning,
clean the entire area immediately or it
will set.
ProCarManuals.com
Page 227 of 276
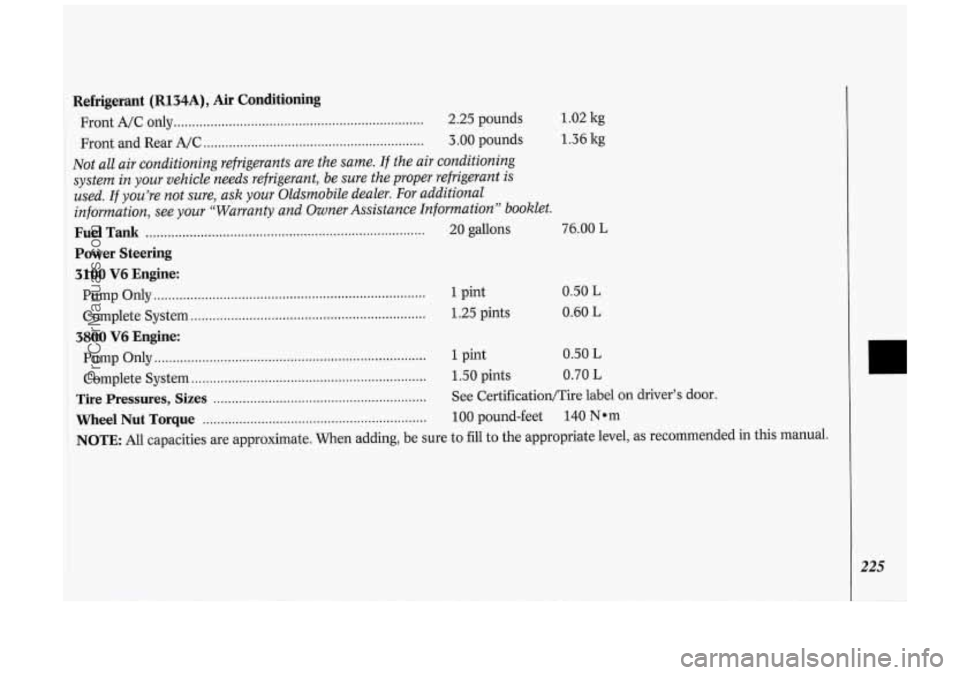
1.02 kg
1.36 kg
Refrigerant (R134A), Air Conditioning
Front A/C only .................................................................... 2.25 pounds
Front and Rear A/C
............................................................ 3.00 pounds
Not all air conditioning refrigerants are the same. If the air conditioning
system in your vehicle needs refrigerant, be sure the proper refrigerant
is
used. If you’re not sure, ask your Oldsmobile dealer. For additional
infomation, see your “Warranty and Owner Assistance Information
” booklet.
Fuel Tank ........................................................................\
..... 20 gallons 76.00 L
Power Steering
3100
V6 Engine:
Pump Only ........................................................................\
..
Complete System ................................................................
1 pint
1.25 pints 0.50 L
0.60 L
3800 V6 Engine:
Pump Only ........................................................................\
.. 1 pint 0.50 L
Complete System ................................................................ 1.50 pints 0.70 L
Tire Pressures, Sizes .......................................................... See CertificatiorVTire label on driver’s door.
Wheel Nut Torque ............................................................. 100 pound-feet 140 Nom
NOTE: All capacities are approximate. When adding, be sure to fill to the appropriate level, as recommended in this manual.
r
ProCarManuals.com