window OLDSMOBILE SILHOUETTE 1995 User Guide
[x] Cancel search | Manufacturer: OLDSMOBILE, Model Year: 1995, Model line: SILHOUETTE, Model: OLDSMOBILE SILHOUETTE 1995Pages: 390, PDF Size: 20.27 MB
Page 162 of 390
Rear Climate Control (Option)
If you have this option, you will have a master control
for the rear fan on the center instrument panel console,
and a rear control next to the rear seat, on the driver’s
side of the vehicle.
To maintain a comfortable temperature in the rear, use
either rear fan control to adjust the force
of air coming
through the rear outlets. See “Rear Fan
-- Master
Control” and “Rear Fan
-- Rear Control” later in
this section.
Select the desired climate control mode using the
directional controls on the instrument panel (see
“Directional Controls” earlier in the section). The mode
you choose will regulate both the front and rear climate
control systems. The temperature of heated or cooled air
directed to the rear
of the vehicle cannot be adjusted
with the temperature control
lever.
Select RECIRC, UPPER, BI-LEV or LOWER when
outside temperatures are warm or moderate. In
the RECIRC mode,
or if you press A/C when the
system is in the UPPER or BI-LEV modes, cooled air
will be directed to the rear
of the vehicle through the
overhead and third-row air conditioning outlets. If
you
select NC in the LOWER mode, cooled air will be
directed through the rear
floor vent (see “Rear Air
Vents“ later in this section) unless the temperature
control lever
is set approximately 30% from the full
cold setting. Heated air will result with the temperature
control
lever setting above 30% from the full cold
setting. Temperature adjustment of the heated air is
not possible. Cooled air will again return when the
temperature control lever setting is returned to
approximately
25% from the full cold setting.
If you do not select A/C in the UPPER or BI-LEV
modes, air directed to the rear of the vehicle will be
cabin temperature.
Select LOWER,
DEFOG or DEF when outside
temperatures are cool. In these modes, heated air will be
directed to the rear
of the vehicle through the rear side
window vents and the rear floor heater vent.
3-4
ProCarManuals.com
Page 164 of 390
LOW MED
REAR FAN
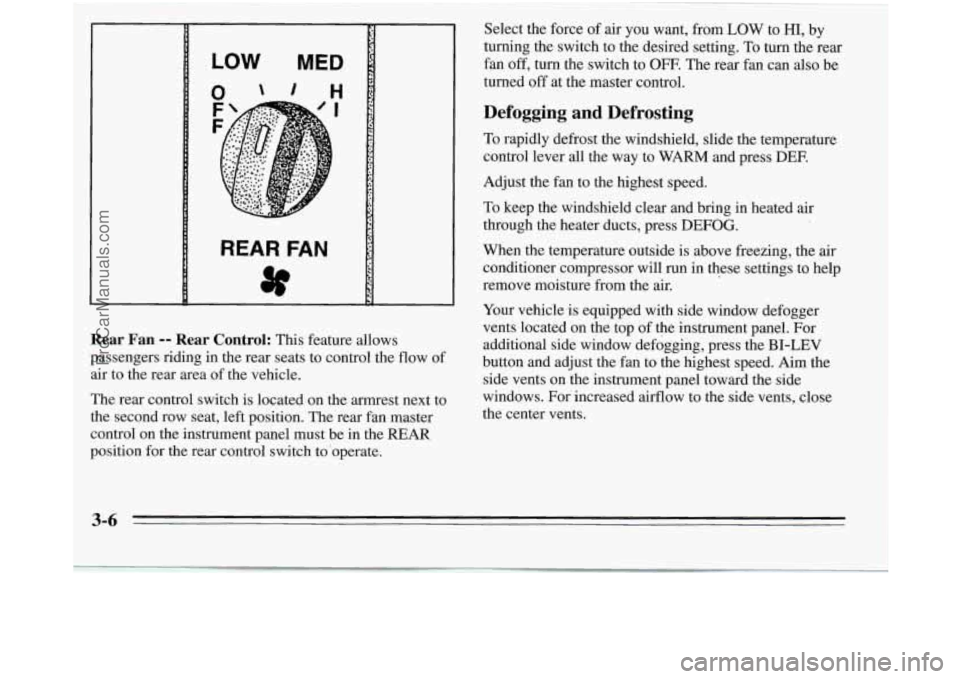
Rear Fan -- Rear Control: This feature allows
passengers riding in the rear seats to control the flow
of
air to the rear area of the vehicle.
The rear control switch is located on the armrest next to
the second row seat, left position. The rear fan master
control on the instrument panel must
be in the REAR
position for the rear control switch to'operate.
~~
Select the force of air you want, from LOW to HI, by
turning the switch
to the desired setting. To turn the rear
fan off, turn the switch to
OFF. The rear fan can also be
turned off at the master control.
Defogging and Defrosting
To rapidly defrost the windshield, slide the temperature
control lever all the way to WARM and press DEE
Adjust the fan to the highest speed.
To keep the windshield clear and bring
in heated air
through the heater ducts, press
DEFOG.
When the temperature outside is above freezing, the air
conditioner compressor will run in these settings to help
remove moisture from the air.
Your vehicle is equipped with side window defogger
vents located on the top of the instrument panel. For
additional side window defogging, press the
BI-LEV
button and adjust the fan to the highest speed. Aim the
side vents on the instrument panel toward the side
windows. For increased airflow to the side vents, close
the center vents.
3-6 -
ProCarManuals.com
Page 165 of 390
Rear Window Defogger
Press R.DEF (Rear Defog) to warm the defogger grid
on the rear window. The indicator light will glow while
the rear window defogger is operating. The rear
window defogger will turn off automatically after about
10 minutes of use. If you turn it on again, the defogger
will operate for about five minutes only.
You can also
turn the defogger off by turning off the ignition or
pressing the switch again.
Do not attach a temporary vehicle license across the
defogger grid on the rear window.
Flow-Through Ventilation System
Your vehicle’s flow-through ventilation system supplies
outside air into the vehicle when
it is moving. Outside
air will also enter the vehicle when the heater or the air
conditioning fan is running.
Ventilation Tips
0
1 NOTICE:
Don’t use a razor blade or something else sharp
on the inside
of the rear window. If you do, you
could cut or damage the warming grid, and the
repairs wouldn’t
be covered by your warranty. 0
Keep the hood and front air inlet free of ice, snow, or
any other obstruction (such as leaves). This will
allow
the heater and defroster to work much better,
reducing the chance of fogging the i.nside of your
windows.
When
you enter a vehicle in cold weather, turn the
blower fan to
HIGH for a few moments before
driving off. This helps clear the intake ducts of snow
and moisture, and reduces the chance
of fogging the
inside of your windows.
Keep the area around the base
of the center
instrument panel console and the air path under the
front seats clear of objects. This helps air to circulate
throughout your vehicle.
3-7
ProCarManuals.com
Page 204 of 390
Is your vehicle ready for a long trip? If you keep it
serviced and maintained, it’s ready to go. If it needs
service, have
it done before starting out. Of course,
you’ll find experienced and able service experts in
Oldsmobile retail facilities all across North America.
They’ll be ready and willing
to help if you need it.
Here are some things you can check before a trip:
0
a
a
0
a
a
0
Windshield WLzslzer Fluid: Is the reservoir full? Are
all windows clean inside and outside?
Wiper Blades: Are they in good shape?
Fuel, Engine OiL, Other Fluids: Have you checked
all levels?
Lcmys: Are they all working? Are the lenses clean?
Tires: They are vitally important to a safe,
trouble-free trip.
Is the tread good enough for
long-distance driving? Are
the tires all inflated to the
recommended pressure?
Weather Forecasts: What’s the weather outlook
along your route? Should
you delay your trip a short
time to avoid a major storm system‘?
Maps: Do you have up-to-date maps‘?
Highway Hypnosis
Is there actually such a condition as “highway hypnosis?’
Or is it just plain falling asleep at the wheel? Call it
highway hypnosis, lack
of awareness, or whatever.
There
is something about an easy stretch of road with the
same scenery, along with the hum of the tires on the road,
the drone of the engine, and the rush
of the wind against
the vehicle that can make you sleepy. Don’t
let it happen
to you! If
it does, your vehicle can leave the road in less
than u second, and you could crash and be injured.
What can you do about highway hypnosis? First, be
aware that it can happen.
Then here are some tips:
0
0
0 Make sure your vehicle is well ventilated, with a
comfortably cool interior.
Keep your eyes moving. Scan the road ahead and
to
the sides. Check your mirrors and your instruments
frequently.
If you get sleepy, pull
off the road into a rest, service,
or parking area and take
a nap, get some exercise, or
both. For safety, treat drowsiness on the highway as
an emergency.
4-22
ProCarManuals.com
Page 210 of 390
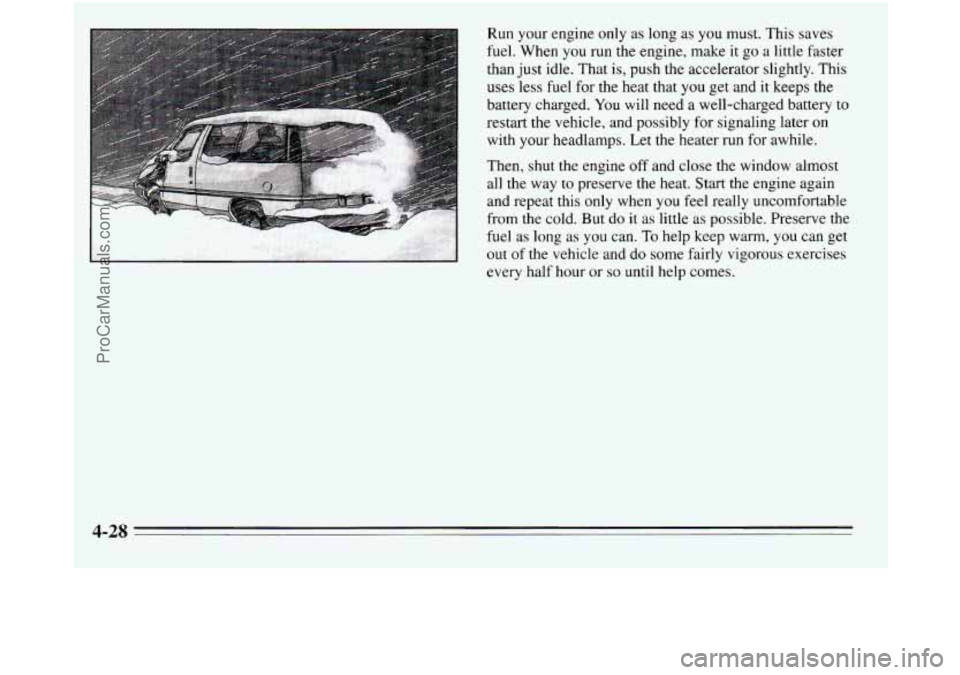
Run your engine only as long as you must. This saves
fuel. When
you run the engine, make it go a little faster
than just idle. That is, push the accelerator slightly. This
uses less fuel for the heat that you get and it keeps the
battery charged.
You will need a well-charged battery to
restart the vehicle, and possibly for signaling later
on
with your headlamps. Let the heater run for awhile.
Then, shut the engine off and close the window almost
all the way
to preserve the heat. Start the engine again
and repeat this only when you feel really uncomfortable
from the cold. But do it as little as possible. Preserve the
fuel as long as you can.
To help keep warm, you can get
out of the vehicle and
do some fairly vigorous exercises
every half hour or
so until help comes.
4-28
ProCarManuals.com
Page 238 of 390
If No Steam Is Coming From Your Engine
If you get the overheat warning but see or hear no
steam, the problem may not be too serious. Sometimes
the engine can get
a little too hot when you:
Climb a long hill on a hot day.
Stop after high speed driving.
Idle for long periods in traffic.
Tow a trailer.
If you get the overheat warning with no sign
of steam,
try this for a minute or
so:
1. Turn off your air conditioner.
2. Turn on your heater to full hot at the highest fan
speed and open the window as necessary.
3. If you’re in a traffic jam, shift to NEUTRAL (N);
otherwise, shift to the highest gear while driving --
AUTOMATIC OVERDRIVE (a) or THIRD (D) for
automatic transaxles.
If you no longer have the overheat warning, you can drive.
Just to be safe, drive slower for about
10 minutes. If the
warning doesn’t come back on, you can drive normally.
If the warning continues, pull over, stop, and park your
vehicle right away.
If there’s still no sign of steam, you can idle the engine
for two or three minutes while you’re parked, to see if
the warning stops. But then, if you still have the
warning,
turn off the engine and get everyone out of the
vehicle
until it cools down.
You may decide not to lift the hood but to get service
help right away.
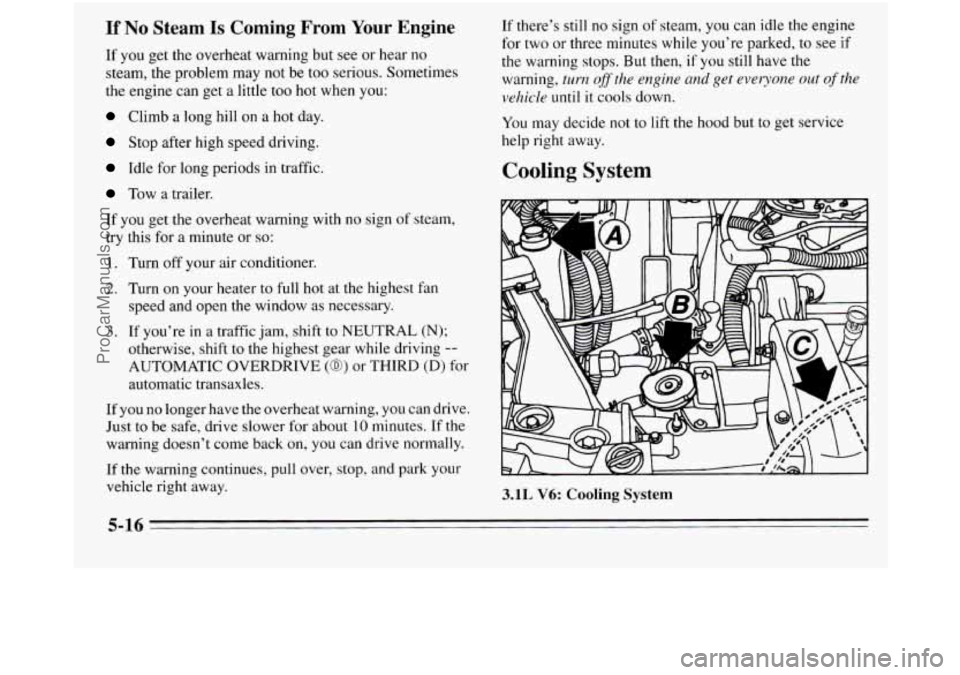
Cooling System
3.1L V6: Cooling System
5-16
ProCarManuals.com
Page 292 of 390
t- 1 1
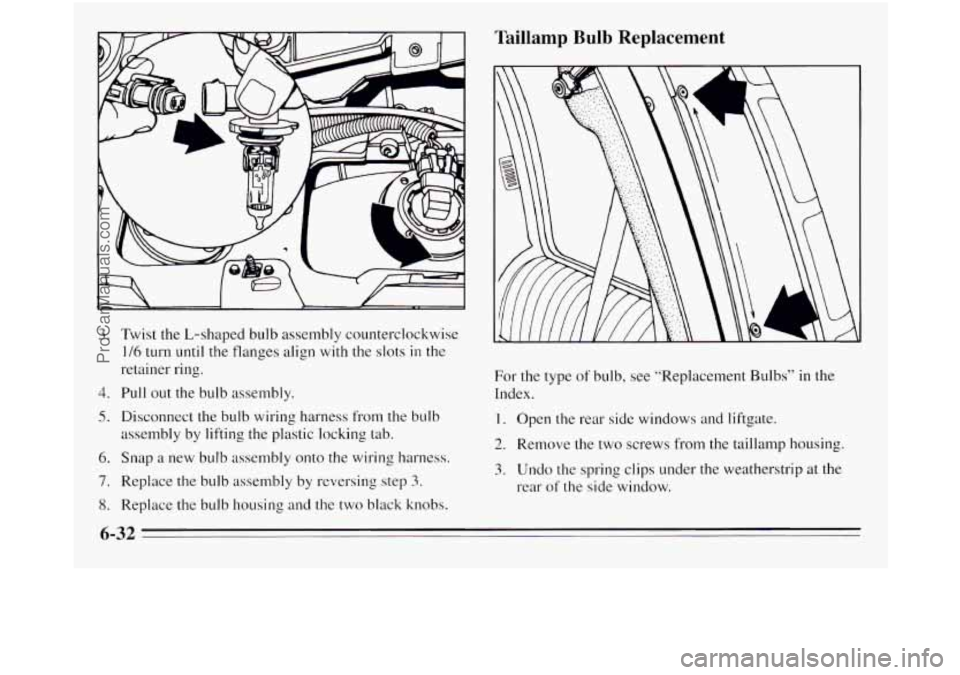
3. Twist the L-shaped bulb assembly counterclockwise
1/6 turn until the flanges align with the slots in the
retainer ring.
4. Pull out the bulb assembly.
5. Disconnect the bulb wiring harness from the bulb
assembly by lifting
the plastic locking tab.
6. Snap a new bulb assembly onto the wiring harness.
7. Replace the bulb assembly by reversing step 3.
8. Replace the bulb housing and the two black knobs.
Taillamp Bulb Replacement
For the type of bulb, see “Replacement Bulbs” in the
Index.
1. Open the rear side windows and liftgate.
2. Remove the two screws from the taillamp housing.
3. Undo the spring clips under the weatherstrip at the
rear
of the side window.
6-32
ProCarManuals.com
Page 293 of 390
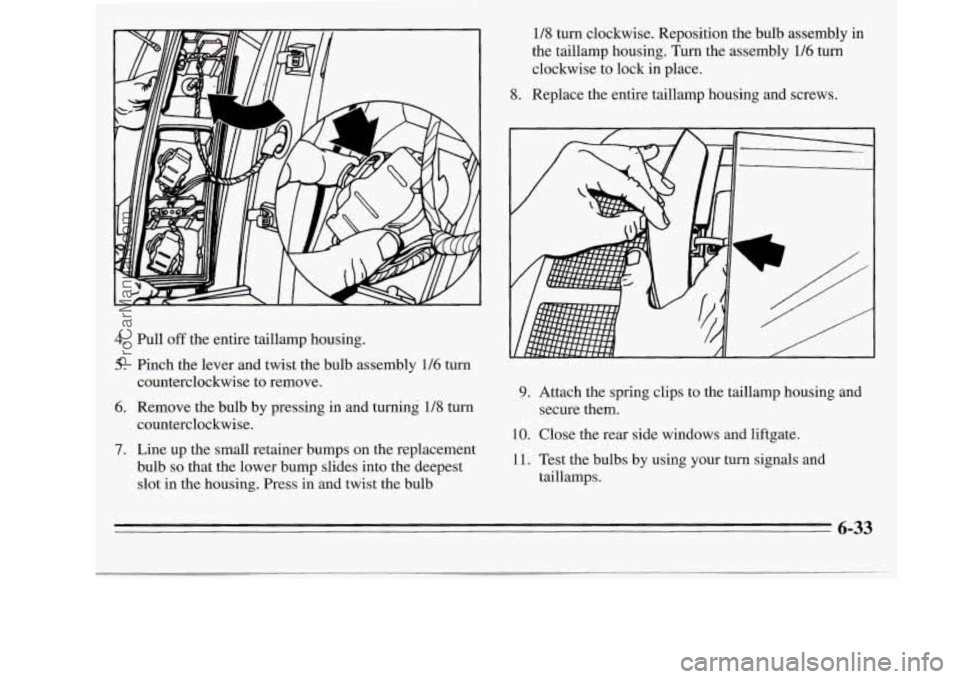
4.
5.
6.
Pull off the entire taillamp housing.
Pinch the lever and twist the bulb assembly
116 turn
counterclockwise to remove.
Remove the bulb by pressing in and turning 1/8 turn
counterclockwise.
Line up the small retainer bumps on the replacement
bulb
so that the lower bump slides into the deepest
slot in the housing. Press in and twist the bulb 1/8 turn clockwise. Reposition
the bulb assembly in
the taillamp housing.
Turn the assembly 116 turn
clockwise to lock in place.
8. Replace the entire taillamp housing and screws.
9. Attach the spring clips to the taillamp housing and
secure them.
10. Close the rear side windows and liftgate.
11. Test the bulbs by using your turn signals and
taillamps.
6-33
ProCarManuals.com
Page 302 of 390
Appearance Care
Remember, cleaning products can be hazardous. Some
are toxic. Others can burst into flame if
you strike a
match or get them on a
hot part of the vehicle. Some are
dangerous if you breathe their fumes in a closed space.
When you use anything from a container to clean your
Oldsmobile, be sure to follow the manufacturer’s
warnings and instructions. And always open your doors
or windows when you’re cleaning the inside.
Never use these to clean your vehicle:
0
0
0
0
0
0
0
0
0
Gasoline
Benzene
Naphtha
Carbon Tetrachloride
Acetone
Paint Thinner
Turpentine
Lacquer Thinner
Nail Polish Remover
They can all be hazardous
-- some more than
others
-- and they can all damage your vehicle, too. Don’t use any
of these unless this manual says you can.
In many uses, these will damage your vehicle:
Alcohol
Laundry Soap
0 Bleach
0 Reducing Agents
Cleaning the Inside of Your Oldsmobile
Use a vacuum cleaner often to get rid of dust and loose
dirt. Wipe vinyl or leather with a clean, damp cloth.
Your Oldsmobile retailer has two GM cleaners, a
solvent-type spot lifter and a foam-type powdered
cleaner. They will clean normal spots and stains very
well.
Do not use them on vinyl or leather.
Here are some cleaning tips:
0 Always read the instructions on the cleaner label.
0 Clean up stains as soon as you can -- before they set.
0 Use a clean cloth or sponge, and change to a clean area
often. A soft brush may be used if stains are stubborn.
0 Use solvent-type cleaners in a well-ventilated area
only. If you use them, don’t saturate the stained area.
If a ring forms after spot cleaning, clean the entire
area immediately or it will set.
6-42
ProCarManuals.com
Page 306 of 390
Glass
Glass should be cleaned often. GM Glass Cleaner
(GM Part No. 1050427) or a liquid household glass
cleaner will remove normal tobacco smoke and
dust films.
Don’t use abrasive cleaners on glass, because they may
cause scratches. Avoid placing decals on the inside rear
window, since they may have to be scraped off later. If
abrasive cleaners are used on the inside of the rear
window, an electric defogger element may be damaged.
Any temporary license should not be attached across the
defogger grid.
Cleaning the Outside of the
Windshield, Backglass and Wiper
Blades
If the windshield is not clear after using the windshield
washer, or if the wiper blade chatters when running, wax
or other material may be on the blade or windshield. Clean the outside
of the windshield with
GM
Windshield Cleaner, Bon-Ami Powder@ (GM Part
No. 105001 1). The windshield is clean if beads do not
form when you rinse it with water.
Clean the blade by wiping vigorously with a cloth
soaked in full strength windshield washer solvent. Then
rinse the blade with water.
Wiper blades should be checked on a regular basis and
replaced when worn.
Weatherstrips
Silicone grease on weatherstrips will make them last
longer, seal better, and not stick or squeak. Apply
silicone grease with a clean cloth at least every six
months. During very cold, damp weather more frequent
application may be required. (See “Recommended
Fluids and Lubricants” in the Index.)
6-46
ProCarManuals.com