fuel cap OLDSMOBILE SILHOUETTE 1995 Owners Manual
[x] Cancel search | Manufacturer: OLDSMOBILE, Model Year: 1995, Model line: SILHOUETTE, Model: OLDSMOBILE SILHOUETTE 1995Pages: 390, PDF Size: 20.27 MB
Page 156 of 390
Fuel Gage
1
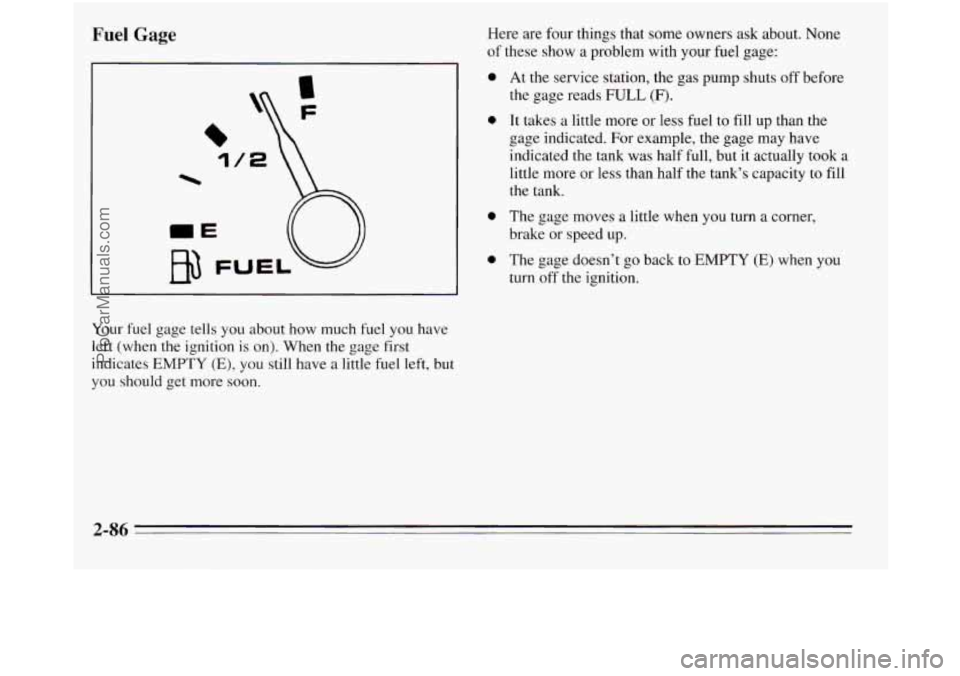
Your fuel gage tells you about how much fuel you have
left (when the ignition
is on). When the gage first
indicates
EMPTY (E), you still have a little fuel left, but
you should get more soon. Here
are four things that some owners ask about.
None
of these show a problem with your fuel gage:
0
0
0
0
At the service station, the gas pump shuts off before
the gage reads
FULL (F).
It takes a little more or less fuel to fill up than the
gage indicated. For example, the gage may have
indicated the tank was half full, but it actually took a
little more or less than half the tank’s capacity to fill
the tank.
The gage moves a little when you turn a comer,
brake
or speed up.
The gage doesn’t go back to
EMPTY (E) when you
turn off the ignition.
2-86
ProCarManuals.com
Page 160 of 390
Air Conditioner
When the temperature outside is above freezing, the air
conditioner compressor will automatically condition the air when you press RECIRC (the A/C indicator light will glow),
DEFOG or DEF (the A/C indicator light will not glow).
Press A/C (the
A/C indicator light will glow) to condition
the air when you press UPPER, BI-LEV or
LOWER. To
turn off the air conditioner compressor
in these settings,
press A/C again (the indicator light will go off).
Each time
you turn on the ignition, the air conditioner
will default
to the setting you had selected before last
turning off the ignition.
When the air conditioner compressor is
on, you may
sometimes notice slight changes in your vehicle’s engine
performance and power. This
is normal. The system is
designed to help fuel economy while
it maintains the
desired cooling level.
The air conditioner removes moisture from the air,
so
you may sometimes notice water dripping from under
your vehicle when it is idling or after it has been turned
off. This is normal.
On very hot days,
your vehicle will cool down more
quickly and economically if you open the windows long
enough
to let hot, inside air escape. For all settings, adjust
the temperature control lever and fan speed as desired.
Directional Controls
RECIRC: Press to get maximum cooling or quick
cool-down
on very hot days. This setting recirculates
much of the air inside your vehicle. It should not be
used for long periods
of time because the air may
become too cold and dry.
Slide the temperature control lever down to the coolest
setting and adjust the fan speed as desired.
UPPER: For normal cooling on hot days, press A/C
along with UPPER. This setting cools outside air and
directs it through the instrument panel outlets. Adjust
the temperature of the air with the temperature control
lever.
BI-LEV: This setting is designed for use on sunny days
when the air is only moderately warm or cool. On days
like these, the sun may adequately warm your upper
body, but your lower body may
not be warm enough.
The BI-LEV setting directs outside air into your vehicle
in two ways. Cooler air is directed toward your upper
body through the front instrument panel outlets, while
warmed air is directed through the heater ducts at your
feet. At times this temperature difference may be more
apparent than others. For best results, slide the
temperature control lever to the middle position, and
then adjust for comfort.
3-2
ProCarManuals.com
Page 211 of 390
Loading Your Vehicle
11BI CVWR
MFD BY GENERAL MOTORS CORP XWXX
GAWR FRT GAWR RR LB/KG
THIS VEHICLE CONFORMS TO ALL APPLICABLE U.S. FEDERAL
MOTOR VEHICLE SAFETY STANDARDS IN EFFECT ON THE DATE
OF MANUFACTURE SHOWN ABOVE.
SERIAL NUMBER M.P.V.
MODEL:
MPBY
FRT
RR
SPA
SPEED
TIRE SIZE RTG RIM PSI/KPA (COLD
SEE OWNERS MANUAL FOR ADDITIONAL INFORMATION
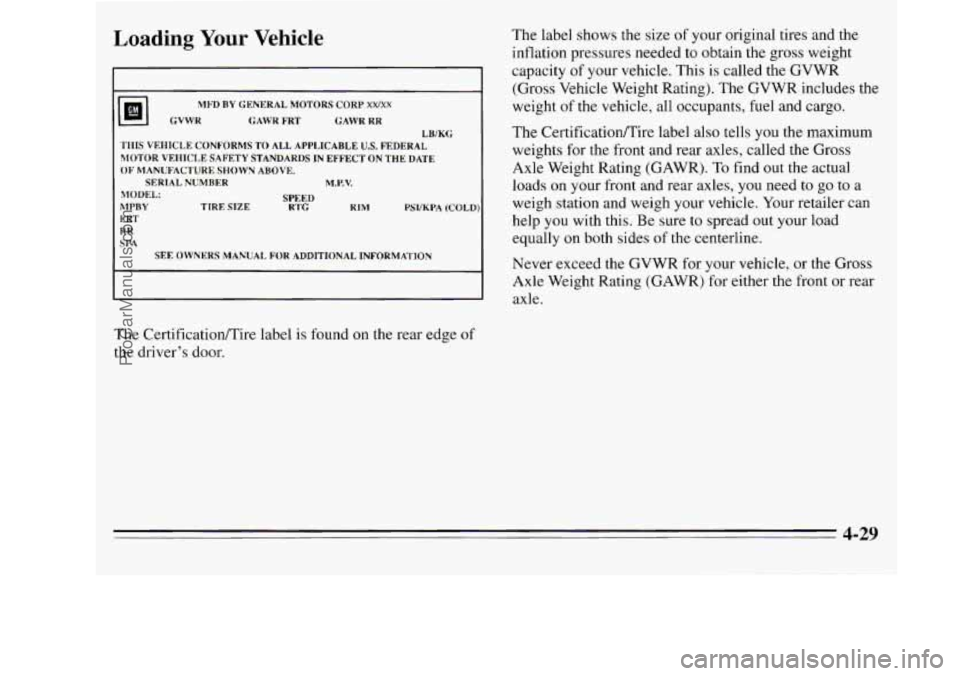
The CertificatiodTire label is found on the rear edge of
the driver's door. The label
shows the size
of your original tires and the
inflation pressures needed to obtain the gross weight
capacity of your vehicle. This is called the GVWR
(Gross Vehicle Weight Rating). The GVWR includes the
weight
of the vehicle, all occupants, fuel and cargo.
The CertificatiodTire label also tells you the maximum
weights for the front and rear axles, called the Gross
Axle Weight Rating (GAWR). To find out the actual
loads on your front and rear axles,
you need to go to a
weigh station and weigh your vehicle. Your retailer can
help you with this. Be sure to spread out your load
equally on both sides of the centerline.
Never exceed the GVWR for your vehicle,
or the Gross
Axle Weight Rating (GAWR) for either the front or rear
axle.
4-29
ProCarManuals.com
Page 213 of 390
Towing a Trailer
NOTICE:
Pulling a trailer improperly can damage your vehicle and’result in costly repairs not covered by
your warranty.
To pull a trailer correctly, follow
the advice‘in this part, and see your Oldsmobile
retailer for important information about towing a trailer with your vehicle.
Your vehicle can tow a trailer. To identify what the
vehicle trailering capacity is for your vehicle, you
should read the information in “Weight of the Trailer”
that appears later in this section. But trailering is
different than just driving your vehicle by itself.
Trailering means changes in handling, durability, and
fuel economy. Successful, safe trailering takes correct
equipment, and it has to be used properly.
That’s the reason for this section. In it are many
time-tested, important trailering tips and safety rules.
Many of these are important for your safety and that of
your passengers.
So please read this section carefully
before you pull a trailer.
Load-pulling components such as the engine, transaxle,
wheel assemblies, and tires are forced to work harder
against the drag of the added weight. The engine is
required
‘to operate ai relatively highei speeds and under
greater loads, generating extra heat. What’s more, the
trailer adds considerably to wind resistance, increasing
the pulling requirements.
4-31
ProCarManuals.com
Page 264 of 390
~~~ Fuels in Foreign Countries
If
you plan on driving in another country outside the
United States or Canada, unleaded
fuel may be hard to
find. Do not use leaded gasoline.
If you use even one
tankful, your emission controls won’t work well or at
all. With continuous use, spark plugs can get fouled, the
exhaust system can corrode, and your engine oil can
deteriorate quickly. Your vehicle’s oxygen sensor will be
damaged. All of that means costly repairs that wouldn’t
be covered by your warranty.
To check on fuel availability, ask an auto club, or
contact a major oil company that does business in the
country where you’ll be driving.
You can also write us at the following address for
advice. Just tell us where you’re going and give your
Vehicle Identification Number (VIN).
General Motors Overseas Distribution Corporation,
North American Export Sales (NAES)
1908 Colonel Sam Drive
Oshawa, Ontario
L1H 8P7
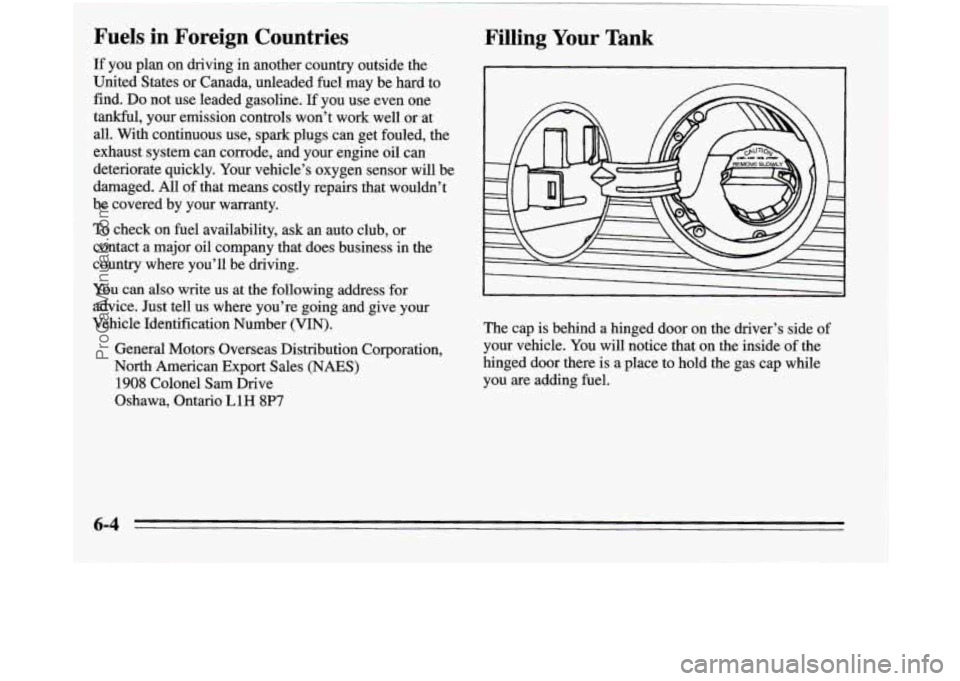
Filling Your Tank
The cap is behind a hinged door on the driver’s side of
your vehicle.
You will notice that on the inside of the
hinged door there is a place to hold
the gas cap while
you are adding fuel.
6-4
ProCarManuals.com
Page 265 of 390
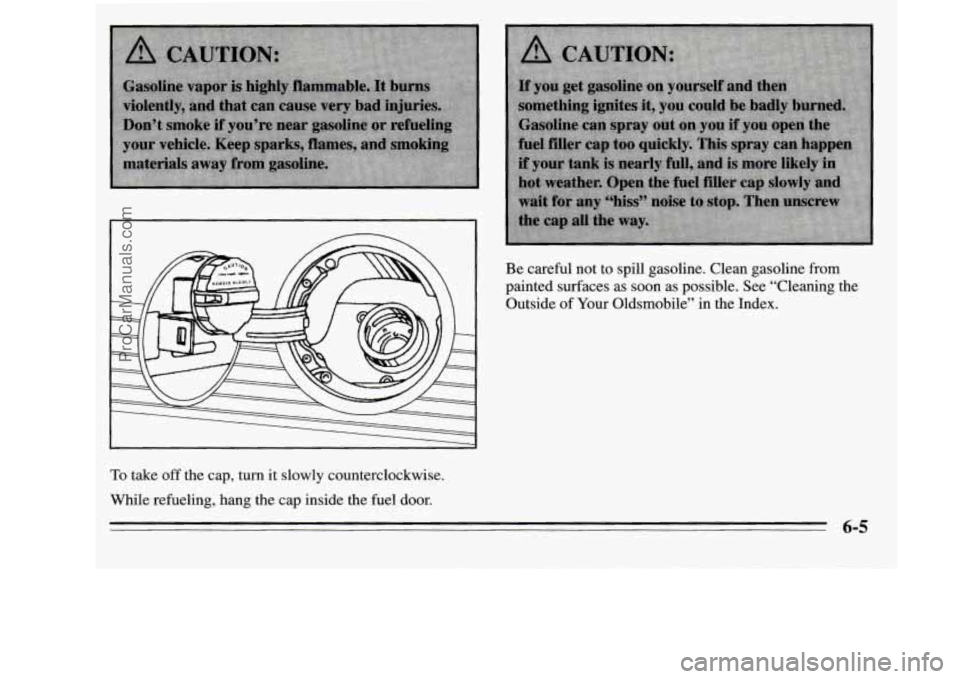
Be careful not to spill gasoline. Clean gasoline from
painted surfaces as
soon as possible. See “Cleaning the
Outside
of Your Oldsmobile” in the Index.
To take off the cap, turn it slowly counterclockwise.
While refueling, hang the cap inside the fuel door.
6-5
ProCarManuals.com
Page 266 of 390
When you put the cap back on, turn it to the right until
you hear a clicking noise.
Checking Things Under the Hood
Hood Release
NOTICE:
If you need a new cap, be sure to get the right
type. Your retailer can get one for you. If you get
the wrong type, it may not fit or have proper
venting, and your fuel tank and emissions system
might be damaged.
t
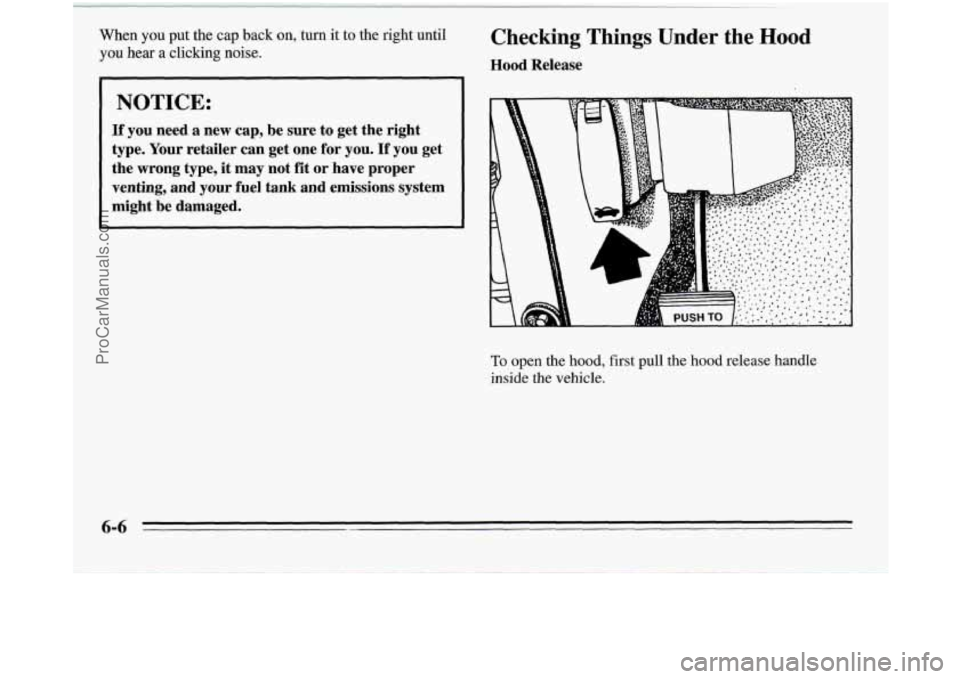
To open the hood, first pull the hood release handle
inside the vehicle.
ProCarManuals.com
Page 319 of 390
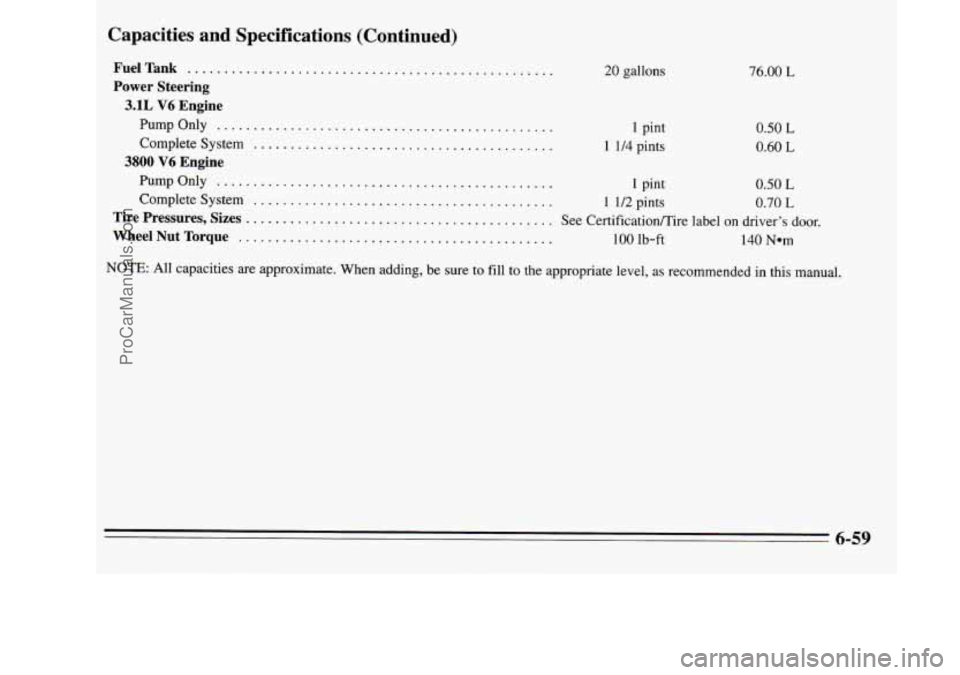
Capacities and Specifications (Continued)
FuelTank ..................................................
Power Steering
3.1L V6 Engine
PumpOnly ..............................................
Complete System .........................................
PumpOnly ..............................................
Complete System .........................................
Tire Pressures, Sizes ..........................................
WheelNutTorque ...........................................
3800 V6 Engine
20 gallons
1 pint
I 1/4 pints
76.00 L
0.50 L
0.60 L
1 pint 0.50 L
1 1/2 pints 0.70 L
See CertificatiodTire label on driver’s door.
100 lb-ft 140 Nom
NOTE: All capacities are approximate. When adding, be sure to fill to the appropriate level, as recommended in this manual.
6-59
ProCarManuals.com
Page 326 of 390
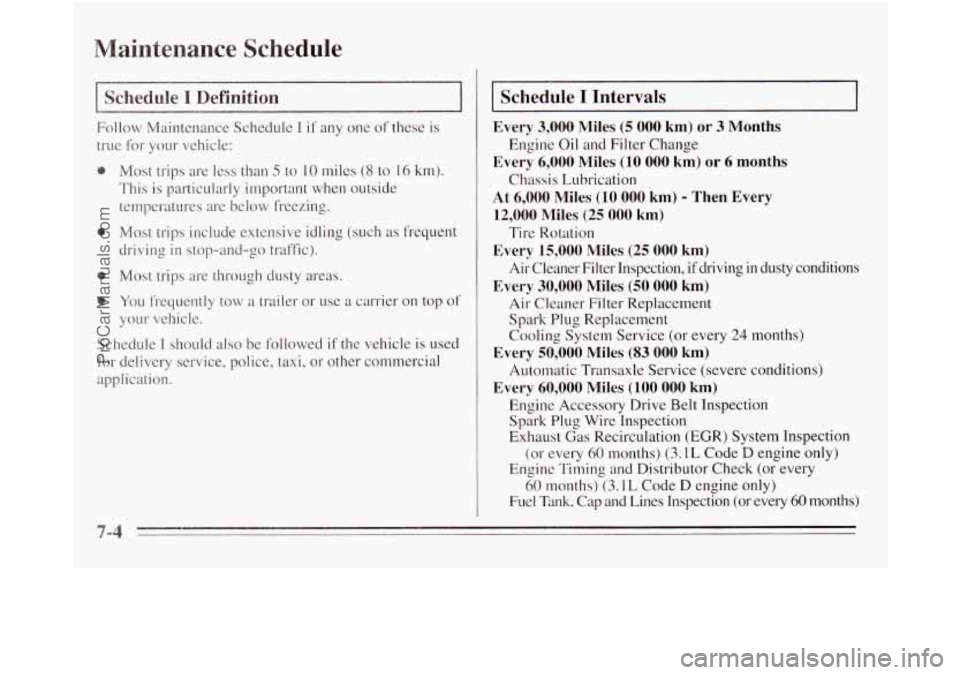
Maintenance Schedule
I Schedule I Definition I
Follow Maintenance Schedule I if any one of these is
true for your vehicle:
0 Most trips are less than 5 to 10 miles (8 to 16 km).
This is particularly important when outside
temperatures are below freezing.
0 Most trips include extensive idling (such as frequent
driving in stop-and-go traffic).
0 Most trips are through dusty areas.
0 You frequently tow a trailer or use a carrier on top 0.f
your vehicle.
Schedule
I should also be followed if the vehicle is used
for delivery service, police, taxi, or other commercial
application.
Schedule I Intervals
Every 3,000 Miles (5 000 km) or 3 Months
Engine Oil and Filter Change
Every 6,000 Miles (10 000 km) or 6 months
Chassis Lubrication
At 6,000 Miles (10 000 km) - Then Every
12,000 Miles (25 000 km)
Tire Rotation
Every 15,000 Miles (25 000 km)
Air Cleaner Filter Inspection, if driving in dusty conditions
Every 30,000 Miles (50 000 km)
Air Cleaner Filter Replacement
Spark Plug Replacement
Cooling System Service (or every
24 months)
Automatic Transaxle Service (severe conditions)
Engine Accessory Drive Belt Inspection
Spark
Plug Wire Inspection
Exhaust
Gas Recirculation (EGR) System Inspection
(or every
60 months) (3.1L Code D engine only)
Engine Timing and Distributor Check (or every
60 months) (3.1 L Code D engine only)
Fuel Tank, Cap and Lines Inspection
(or every 60 months)
Every 50,000 Miles (83 000 km)
Every
60,000 Miles (100 000 km)
7-4
ProCarManuals.com
Page 327 of 390
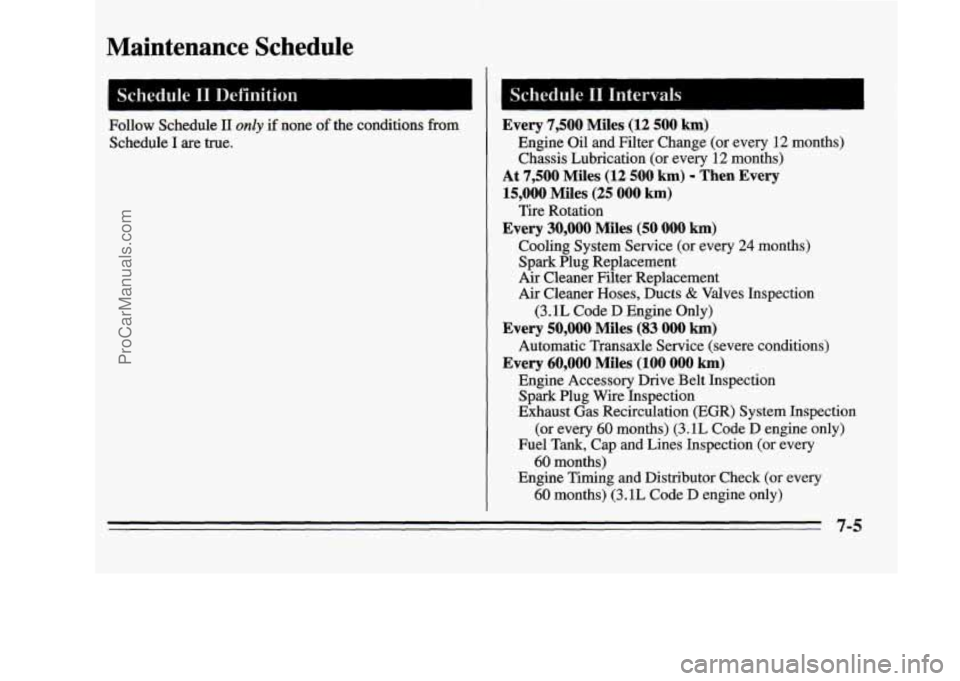
Maintenance Schedule
I Schedule I1 Definition
Follow Schedule I1 only if none of the conditions from
Schedule
I are true.
Every 7,500 Miles (12 500 km)
Engine Oil and Filter Change (or every 12 months)
Chassis Lubrication (or every
12 months)
At 7,500 Miles (12 500 km) - Then Every
15,000 Miles (25 000 km)
Every 30,000 Miles (50 000 km)
Tire Rotation
Cooling System Service (or every
24 months)
Spark Plug Replacement
Air Cleaner Filter Replacement
Air Cleaner Hoses, Ducts
& Valves Inspection
(3.1L Code D Engine Only)
Every 50,000 Miles (83 000 km)
Every 60,000 Miles (100 000 km)
Automatic Transaxle Service (severe conditions)
Engine Accessory Drive Belt Inspection
Spark Plug Wire Inspection
Exhaust Gas Recirculation (EGR) System Inspection
(or every
60 months) (3.1L Code D engine only)
Fuel Tank, Cap and Lines Inspection (or every
60 months)
Engine Timing and Distributor Check (or every
60 months) (3.1L Code D engine only)
7-5
ProCarManuals.com