audio OLDSMOBILE SILHOUETTE 1996 Owners Manual
[x] Cancel search | Manufacturer: OLDSMOBILE, Model Year: 1996, Model line: SILHOUETTE, Model: OLDSMOBILE SILHOUETTE 1996Pages: 372, PDF Size: 19.39 MB
Page 3 of 372
The 1996 Oldsrnobile Silhouette Owner’s Manual
Seats and Restraint Systems ............................................................. 1-1
Features and Controls .................................................................. 2-1
Comfort Controls and Audio Systems ..................................................... 3-1
This section tells you how to use your seats and safety belts properly. It also explains the “SIR” system.
This section explains how to start and operate your Oldsmobile.
This section tells you how to adjust the ventilation and comfort controls and how to operate your
audio system.
YourDrivingandtheRoad .............................................................. 4-1
Here you’ll find helpful information and tips about the road and how to drive under different conditions.
ProblemsontheRoad .................................................................. 5-1
This section tells you what to do if you have a problem while driving, such as a flat tire or
overheated engine, etc.
Here the manual tells you how to keep your Oldsmobile running properly and looking good.
This section tells you when to perform vehicle maintenance and what fluids and lubricants to use.
This section tells you how to contact Oldsmobile for assistance\
and how to
get service and owner publications.
It also gives you information on “Reporting Safety Defects”\
on page
8-7.
Here’s an alphabetical listing of almost every subject in this manual. You can use it to quickly find
something you want to read.
ServiceandAppearanceCare ............................................................ 6-1
Maintenanceschedule............ ...................................................... 7-1
Customer Assistance Information ........................................................ 8-1
Index ........................................................................\
........ 9-1
i
ProCarManuals.com
Page 133 of 372

Your instrument panel is designed to let you know at a
glance how your vehicle is running. You’ll know how fast
you’re going, how much fuel you’re using, and many
other things you’ll need to drive safely and economically.
Refer to the accompanying diagram
of your instrument
panel to locate
the components listed below.
1. Side Vents
2. Lamp Controls
3. Turn Signal/Multifunction Lever
4. Tilt Steering Wheel Lever
5. Instrument Cluster
6. Gearshift Lever
7. Wiper/Washer Controls
8. Center Vents
9. Storage Compartment
10. Side Vents
1 1. Circuit Breaker/Relay Panel
12. Glove Box/Fuse Panel
13. Audio System
14. Rear Fan Controls
15. CupholdedAshtray
16. Locking Storage Bin
1 7. Lighter
18. Interior Lights Override Switch
19. Climate Controls
20. Hazard Warning Flashers Switch
21. Ignition Switch
22. Horn
23. Steering Wheel Touch Controls (Option)
2-69
ProCarManuals.com
Page 149 of 372
Section 3 Comfort Controls and Audio Systems
In this section you’ll find out how to operate the comfort
control and audio systems offered with your Oldsmobile.
Be sure
to read about the particular systems supplied with
your vehicle.
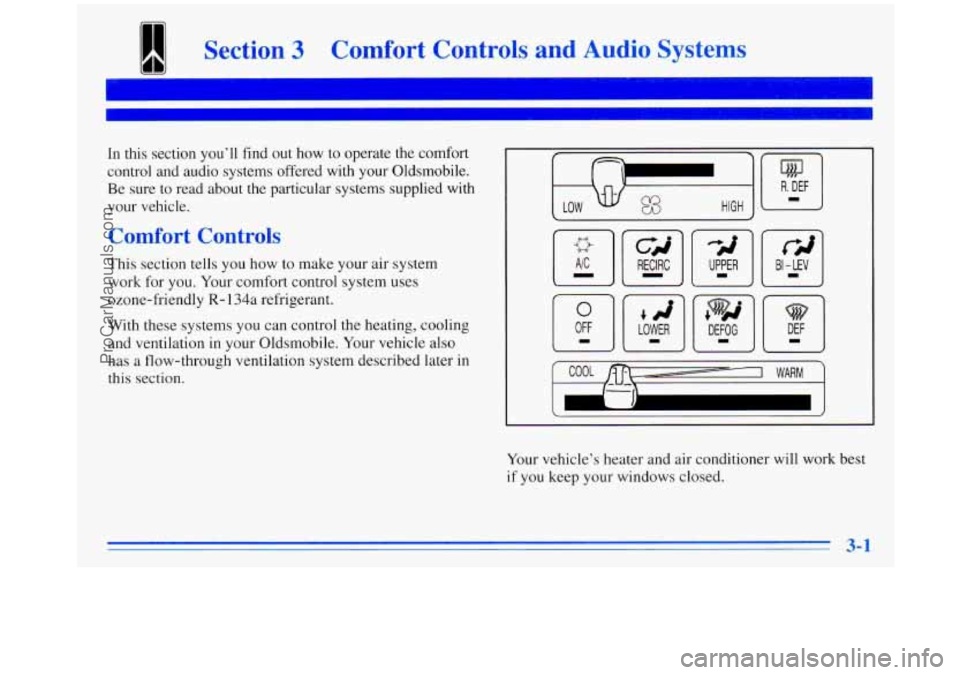
Comfort Controls
This section tells you how to make your air system
work for you. Your comfort control system uses
ozone-friendly
R- 134a refrigerant.
With these systems you can control the heating, cooling
and ventilation in your Oldsmobile. Your vehicle also
has a flow-through ventilation system described later in
this section.
rii
BI - LEV I
Your vehicle’s heater and air conditioner will work best
if you keep your windows closed.
3-1
ProCarManuals.com
Page 153 of 372
Please keep the area around the base of the center
instrument panel console and the area between and
under the front seats free of objects that could obstruct
airflow
to the rear.
The control for the rear fan is located below the audio
system. Select
LOWER, BI-LEV or DEFOG to direct
airflow to the rear air outlet and to the rear side windows.
Use
the temperature control lever to adjust the temperature
setting. Select the force of air
you want, from LO to HI,
by sliding the rear fan control to the desired setting.
To maintain a comfortable temperature in the rear area
without making the front passengers uncomfortable,
adjust the front fan speed first, then adjust the
temperature setting.
To turn off the rear fan, slide the control to OFF.
Ventilation Tips
Keep the hood and front air inlet free of ice, snow
or any other obstruction (such as leaves). This will
allow the heater and defroster to work much better,
reducing the chance of fogging the inside of
.- your windows.
When you enter a vehicle in cold weather, turn the
blower fan to HIGH for a few moments before
driving off. This helps clear the intake ducts of snow
and moisture, and reduces
the chance of fogging the
inside of your windows.
Keep the area around the base of the center
instrument panel console and
the air path under the
front seats clear of objects. This helps air to circulate
throughout your vehicle.
ProCarManuals.com
Page 155 of 372
I
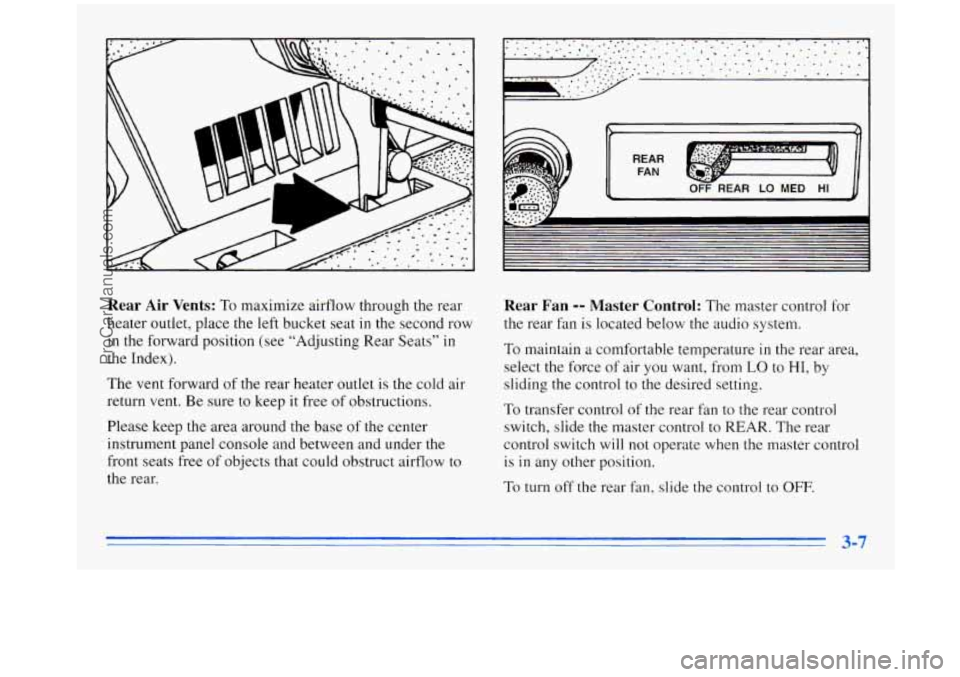
Rear Air Vents: To maximize airflow through the rear
heater outlet, place the
left bucket seat in the second row
in
the forward position (see “Adjusting Rear Seats” in
the Index).
The vent forward of the rear heater outlet is
the cold air
return vent. Be sure to keep
it free of obstructions.
Please keep the area around the base
of the center
instrument panel console and between and under the
front seats free of objects that could obstruct airflow
to
the rear.
Rear Fan -- Master Control: The master control for
the rear fan is located below the audio system.
To maintain a comfortable temperature in the rear area,
select the force of air
you want, from LO to HI, by
sliding the control to the desired setting.
To transfer control of the rear fan to the rear control
switch, slide the master control to REAR. The rear
control switch will not operate when the master control
is in any other position.
To turn off the rear
fan, slide the control to OFF.
ProCarManuals.com
Page 157 of 372

Rear Window Defogger
Press R. DEF (Rear Defog) to warm the defogger grid on
the rear window. The indicator light will glow while the
rear window defogger is operating. The rear window
defogger will turn
off automatically after about 10 minutes
of use. If you
turn it on again, the defogger will operate
for about five minutes only. You can also turn the defogger
off by turning off the ignition or pressing the switch again.
Do not attach a temporary vehicle license across the
defogger grid on the rear window.
I NOTICE:
Don’t use a razor blade or something else sharp
on the inside
of the rear window. If you do, you
could cut or damage the warming grid, and the
repairs wouldn’t be covered
by your warranty.
Audio Systems
Your Delco@ audio system has been designed to operate
easily and give years
of listening pleasure. You will get
the most enjoyment out
of it if you acquaint yourself
with it first. Find out what your Delco system can do
and how to operate all its controls, to be sure you’re
getting the most out of the advanced engineering that
went into it.
Setting the Clock for AM-FM Stereo
Press SET. Within five seconds, press and hold SEEK
down arrow
until the correct hour appears. Press and
hold SEEK up arrow
until the correct minute appears.
Setting the Clock for AM-FM Stereo with
Cassette Tape Player
Press SET. Within five seconds, press and hold SEEK
left arrow until the correct hour appears. Press and hold
SEEK right arrow until the correct minute appears.
Setting the Clock for AM-FM Stereo with
Compact Disc Player
Press SET. Within five seconds, press and hold SEEK
until the correct hour appears. Press and hold SCAN
until the correct minute appears.
ProCarManuals.com
Page 168 of 372
6. Press SEEK to make the second and third digits of
your code appear.
7. Press AM-FM and 000 will appear on the display
again. Now
you are ready to enter the last three
digits
of your code.
code appear.
code appear.
8. Press SEEK to make the fourth digit of your
9. Press SCAN to make the last two digits of your
10. Press AM-FM and REP will appear on the display
for five seconds, and then
000 will appear on
the display.
11. For verification, repeat Steps 6 through 11. If SEC
appears on the display, your audio system is secured.
If
--- shows on the display, your system is not
secured.
You must restart the entire procedure again
from Step
4.
Unlockin-
Power Loss
! Theft-Deterrent Feature After a
Enter your secret code as follows; pause no more than
15 seconds between steps:
2. Press SET and 000 will appear on the display.
3. Press SCAN to make the first digit of your
code appear.
4. Press SEEK to make the second and third digits of
your code appear.
5. Press AM-FM and 000 will appear on the display
again. Now you are ready
to enter the last three
digits
of your code.
6. Press SCAN to make the fourth digit of your
code appear.
7. Press SEEK to make the last two digits of your
code appear.
8. Press AM-FM. If the time appears, the unlocking
sequence was successful. If the display shows
SEC,
the digits did not match and the unit is still secured.
9. Press AM-FM after you have confirmed that the
code matches the secret code you have written down.
The display will
show SEC, indicating the radio is
now operable and secure.
If you lose or forget your code, contact your retailer.
1. Turn the ignition on. (The radio should be off. LOC
will appear on the display.)
P--
ProCarManuals.com
Page 171 of 372

Understanding Radio Reception
FM Stereo
FM stereo will give you the best sound. But FM signals
will reach only about
10 to 40 miles (16 to 65 km). Tall
buildings or hills can interfere with
FM signals, causing
the sound
to come and go.
AWI
The range for most AM stations is greater than for FM,
especially at night. The longer range, however, can
cause stations to interfere with each other. AM can pick
up noise from things like storms and power lines. Try
reducing the treble to reduce this noise if you ever get it.
Tips About Your Audio System
Hearing damage from loud noise is almost undetectable
until it is too late. Your hearing can adapt to higher
volumes
of sound. Sound that seems normal can be
loud and harmful to your hearing. Take precautions by
adjusting the volume control
on your radio to a safe
sound level before your hearing adapts to it.
To help avoid hearing loss or damage:
0 Adjust the volume control to the lowest setting.
0 Increase volume slowly until you hear comfortably
and clearly.
I NOTICE:
Before you add any sound equipment to your
vehicle
-- like a tape player, CB radio, mobile
telephone or two-way radio
-- be sure you can
add what you want.
If you can, it’s very
important to do it properly. Added sound
equipment may interfere with the operation
of
your vehicle’s engine, Delco radio or other
systems, and even damage them. Your vehicle’s
systems may interfere with the operation of
sound equipment that has been added
improperly.
So, before adding sound equipment, check with
your retailer and be sure to check Federal rules
covering mobile radio and telephone units.
ProCarManuals.com
Page 274 of 372
Brake Pedal Travel Battery
See your retailer if the brake pedal does not return to
normal height, or if there is a rapid increase
in pedal
travel. This could be
a sign of brake trouble.
Brake Adjustment
Every time you apply the brakes, with or without the
vehicle moving, your brakes adjust for wear.
Replacing Brake System Parts
The braking system on a modern vehicle is complex.
Its many parts have to be of
top quality and work well
together
if the vehicle is to have really good braking.
Vehicles we design and test have top-quality
GM brake
parts
in them, as your Oldsmobile does when it is new.
When you replace parts of your braking system
-- for
example, when your brake linings wear down and you
have to have new ones
put in -- be sure you get new
genuine
GM replacement parts. If you don’t, your
brakes may no longer work properly. For example, if
someone puts
in brake linings that are wrong for your
vehicle, the balance between your front and rear brakes
can change
-- for the worse. The braking performance
you’ve come to expect can change in many other ways
if
someone puts in the wrong replacement brake parts. Every
new Oldsmobile has
a Delco Freedom@ battery.
You never have to add water to one of these. When it’s
time for
a new battery, we recommend a Delco Freedom
battery. Get one that has the replacement number shown
on the original battery’s label.
Vehicle Storage
If you’re not going to drive your vehicle for 25 days or more,
take
off the black, negative (-) cable from the battery. lhs
will help keep your battery from running down.
I
/II CAUTIPV:
Batteries have acid that can burn you and gas
that can explode. You can be badly hurt if you
aren’t careful. See “Jump Starting” in the Index
for tips on working around a battery without
getting hurt.
Contact your retailer to learn how to prepare your
vehicle for longer storage periods.
Also, for your audio system, see “Theft-Deterrent
Feature” in the Index.
6-28
ProCarManuals.com
Page 340 of 372

Part B: Owner Checks and Services
Listed below are owner checks and services which
should be performed at the intervals specified
to help
ensure the safety, dependability and emission control
performance of your vehicle.
Be sure any necessary repairs are completed at once.
Whenever any fluids or lubricants are added to your
vehicle, make sure they are the proper ones, as shown
in Part D.
At Each Fuel Fill
It is important for you or a service station attendant to
pevforrn these underhood checks at each fixelfill.
Engine Oil Level Check
Check the engine oil level and add the proper oil if
necessary. See “Engine Oil” in
the Index for
further details.
Engine Coolant Level Check
Check the engine coolant level and add the proper
coolant mix if necessary. See “Engine Coolant” in the
Index for further details.
Windshield Washer Fluid Level Check
Check the windshield washer fluid level in the
windshield washer tank and add the proper fluid if
necessary. See “Windshield Washer Fluid” in the Index
for further details.
At Least Once a - -011
Tire Inflation Check
Make sure tires are inflated to the correct pressures.
See “Tires” in the Index for further details.
Cassette Deck Service
Clean cassette deck. Cleaning should be done every
50 hours of tape play. See “Audio Systems” in the Index
for further details.
7-34
ProCarManuals.com