check engine light OLDSMOBILE SILHOUETTE 1996 Owners Manual
[x] Cancel search | Manufacturer: OLDSMOBILE, Model Year: 1996, Model line: SILHOUETTE, Model: OLDSMOBILE SILHOUETTE 1996Pages: 372, PDF Size: 19.39 MB
Page 136 of 372

Rip Odometer
UNLEADED FUEL ONLY
The trip odometer can tell you how far your vehicle has
been driven since
you last set it to zero. To set it to zero,
push the reset button located above the fuel gage.
Warning Lights, Gages and Indicators
This part describes the warning lights and gages that may
be on
your vehicle. The pictures will help you locate them.
Warning lights and gages can signal that something is
wrong before
it becomes serious enough to cause an
expensive repair or replacement. Paying attention to
your warning lights and gages could also save you or
others from injury.
Warning lights come on when there may be or
is a
problem with one of your vehicle’s functions.
As you
will see in the details on the next few pages, some
warning lights come on briefly when you start the
engine just to let you know they’re working.
If you are
familiar with this section, you should not be alarmed
when this happens.
Gages can indicate when there may be or
is a problem
with one
of your vehicle’s functions. Often gages and
warning lights work together to let you know when
there’s a problem with
your vehicle.
When one
of the warning lights comes on and stays on
when you are driving, or when one of the gages shows
there may be a problem, check the section that tells you
what to do about
it. Please follow this manual’s advice.
Waiting
to do repairs can be costly -- and even
dangerous.
So please get to know your warning lights
and gages. They’re a big help.
ProCarManuals.com
Page 142 of 372

I NOTICE:
If you keep driving your vehicle with this light
on, after a while, your emission controls may not
work as well, your fuel economy may not be
as
good and your engine may not run as smoothly.
This could lead to costly repairs that may not be
covered by your warranty.
This light should come on, as a check to show you it is
working, when the ignition is on and the engine is not
running. If the light doesn’t come on, have
it repaired.
This light will also come on during
a malfunction in one
of two ways:
0
0
Light Flashing -- A misfire condition has been
detected. A misfire increases vehicle emissions and
may damage the emission control system
on your
vehicle. Retailer or qualified service center diagnosis
and service is required.
Light On Steady -- An emission control system
malfunction has been detected on your vehicle.
Retailer or qualified service center diagnosis and
service may be required. The
following
may prevent more serious damage to
your vehicle:
0 Reduce vehicle speed.
0 Avoid hard accelerations.
0 Avoid steep uphill grades.
0 If towing a trailer, reduce the amount of cargo being
hauled as soon
as it is possible.
If the light stops flashing and remains on steady, see “If
the Light
Is On Steady” following.
If the light continues to flash, when it is safe to do so,
stop the vehicle. Put your vehicle in PARK (P). Turn the
key off, wait at least 10 seconds and restart the engine.
If the light remains on steady, see
“If the Light Is On
Steady” following.
If the light is still flashing follow the
previous steps, and drive the vehicle to your retailer
or
qualified service center for service.
ProCarManuals.com
Page 143 of 372

If 3 Light Is On Steady
IOU may be able to correct the emission system
malfunction by considering the following:
Did you just put fuel into your vehicle?
If
so, reinstall the fuel cap, making sure to fully install
the cap. The diagnostic system
can determine if the fuel
cap has been
left off or improperly installed. This will
allow fuel to evaporate into the atmosphere.
A few
driving trips should turn the light off.
Did you just drive through a deep puddle of water?
If
so, your electrical system may be wet. The condition
will usually be corrected when the electrical system
dries out. A few driving trips should turn the light off.
Are you low on fuel?
As your engine starts to run out of fuel, your engine may
not run as efficiently
as designed since small amounts of
air are sucked into the fuel line causing a misfire. The
system can detect this. Adding fuel should correct this
condition. Make sure
to install the fuel cap properly.
It will take
a few driving trips to turn the light off. Have
you recently changed brands of fuel?
If
so, be sure to fuel your vehicle with quality fuel (see
“Fuel”
in the Index). Poor fuel quality will cause your
engine not to run as efficiently
as designed. You may
notice this
as stalling after start-up, stalling when you
put the vehicle into gear, misfiring, hesitation on
acceleration or stumbling on acceleration. (These
conditions may go away once the engine is warmed up.)
This will be detected by the system and cause the light
to turn on.
If you experience this condition, change the fuel brand
you use. It will require at least one full tank of the
proper fuel to turn the light off.
If none of the above steps have made the light turn off,
have your retailer or qualified service center check the
vehicle. Your retailer has the proper test equipment and
diagnostic tools to fix any mechanical or electrical
problems that may have developed.
ProCarManuals.com
Page 145 of 372

Low OilLi -
LOW
OIL
If this light comes on, it
means your engine is low
on oil.
Power Sliding Door Warning Light
With the optional power
sliding door, the sliding
door ajar symbol on your
instrument panel will come
on
if your sliding door is
not completely closed.
You need to check the
oil level right away. Driving your
vehicle without enough oil can cause extensive engine
damage. Have your vehicle serviced immediately. If you shift the transaxle out of PARK (P) while the
sliding door is open or
in the process of closing, and the
power sliding door
ON/OFF switch is in the ON
position, the power sliding door warning light will flash
and a buzzer will sound. This is
a warning that the
sliding door is not completely closed.
ProCarManuals.com
Page 180 of 372

Avoid needless heavy braking. Some people drive in
spurts
-- heavy acceleration followed by heavy
braking
-- rather than keeping pace with traffic. This is a
mistake. Your brakes may not have time to cool between
hard stops. Your brakes will wear out much faster
if you
do a lot of heavy braking. If you keep pace with the
traffic and allow realistic following distances, you will
eliminate a lot of unnecessary braking. That means
better braking and longer brake life.
If your engine ever stops while you’re driving, brake
normally but don’t pump your brakes. If you do, the
pedal may get harder to push down.
If your engine
stops, you will still have some power brake assist. But
you will use it when you brake. Once the power assist is
used up, it may take longer to stop and the brake pedal
will be harder
to push.
Anti-Lock Brakes
Your vehicle has anti-lock brakes (ABS). ABS is an
advanced electronic braking system that will
help
prevent a braking skid.
When you start your engine, or when you begin to drive
away, your anti-lock brake system will check itself. You
may hear a momentary motor or clicking noise while
this test
is going on, and you may even notice that your
brake pedal moves a little. (You may also hear a clicking
noise
if you leave the ignition in the RUN position for
about four seconds before starting the vehicle.) This
is normal.
If there’s a problem with the
anti-lock brake system, this
warning light will stay on or
flash. See “Anti-Lock
Brake System Warning
Light”
in the Index.
4-6
ProCarManuals.com
Page 200 of 372

Snow can trap exhaust gases under your vehicle.
This can cause deadly
CO (carbon monoxide) gas
to get inside.
CO could overcome you and kill
you. You can’t see it
or smell it, so you might not
know it is in your vehicle. Clear away snow from
around the base
of your vehicle, especially any
that is blocking your exhaust pipe. And check
around again from time to time to be sure snow
doesn’t collect there.
Open a window just
a little on the side of the
vehicle that’s away from the wind. This
will help
keep
CO out.
Run your engine only as long as you must. This saves
fuel. When you run the engine, make it
go a little faster
than just idle. That is, push the accelerator slightly. This
uses less fuel for the heat that you get and it keeps the
battery charged. You will need a well-charged battery to
restart the vehicle, and possibly for signaling later
on
with your headlamps. Let the heater run for awhile.
Then, shut the engine off and close the window almost
all the way to preserve the heat. Start the engine again
and repeat this only when you feel really uncomfortable
from the cold. But do it as little as possible. Preserve the
fuel as long as you can.
To help keep warm, you can get
out of the vehicle and do some fairly vigorous exercises
every half hour or
so until help comes.
4-26
ProCarManuals.com
Page 217 of 372

&!, CAWTION:
Using a match near a battery can cause battery
gas to explode. People have been hurt doing this,
and some have been blinded.
Use a flashlight if
you need more light.
Be sure the battery has enough water. You don’t
need to add water to the Delco Freedom@ battery
(or batteries) installed in every new
GM vehicle.
But if
a battery has filler caps, be sure the right
amount of fluid is there.
If it is low, add water to
take care
of that first. If you don’t, explosive gas
could be present.
Battery fluid contains acid that can burn you.
Don’t get
it on you. If you accidentally get it in
your eyes or on your skin, flush the place with
water and get medical help immediately.
6. Check that the jumper cables don’t have loose or
missing insulation.
If they do, you could get a shock.
The vehicles could be damaged, too.
Before you connect the cables, here are some things
you should know. Positive
(+) will go to positive (+)
and negative (-) will go to negative (-) or a metal
engine part. Don’t connect positive
(+) to negative (-)
or you’ll get a short that would damage the battery
and maybe other
parts, too.
Fans or other moving engine parts can injure you
badly. Keep your hands away from moving parts
once the engines are running.
7. Connect the red positive (+) cable to the positive (+)
terminal of the vehicle with the dead battery. Use a
remote positive
(+) terminal if the vehicle has one.
5-5
ProCarManuals.com
Page 255 of 372

Pull forward on the hood prop to release it from its
storage clip.
Put the end of the hood prop into the slot in
the underside of the hood.
Before closing the hood, be sure all the filler caps are on
properly. Lift the hood to relieve the pressure on
the
hood prop. Remove the hood prop from the slot in the
hood and return the prop to its retainer. Let the hood
down and close
it firmly.
Underhood Lamp
Your underhood lamp will go on when you open
the hood.
Engine Oil
LOW
OIL
If the LOW OIL light on the
instrument panel comes
on,
it means you need to check
your engine oil level right
away.
For more information,
see "LOW
OIL Light" in the
Index. You should check
your engine oil level
regularly; this is
an
added reminder. It's
a good idea
to check your engine oil every time you
get fuel.
In order to get an accurate reading, the oil must
be warm and the vehicle must be on level ground.
.-
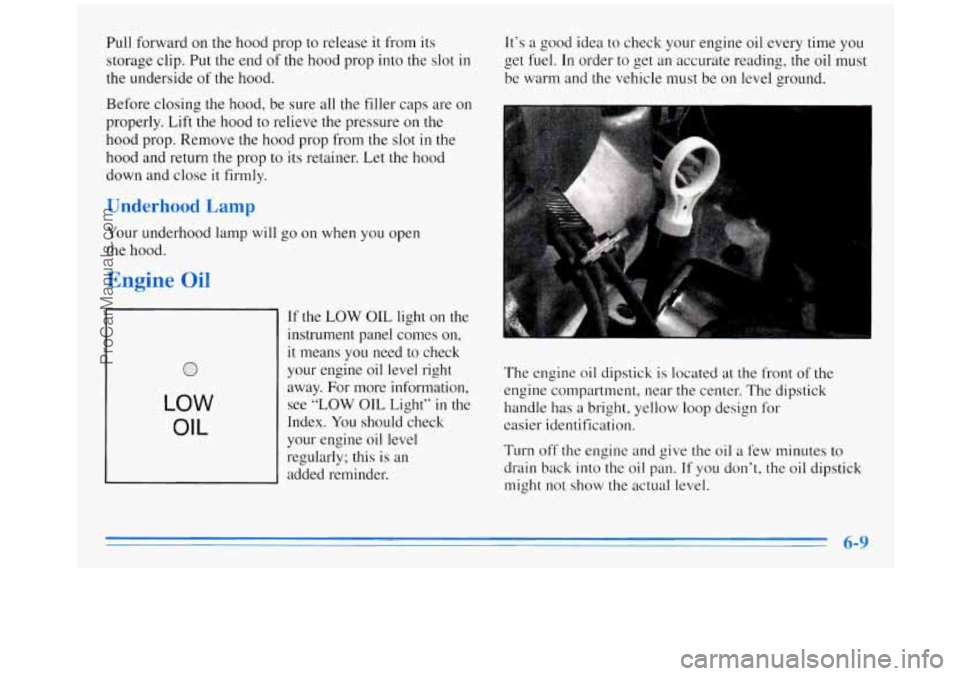
The engine oil dipstick is located at the front of the
engine compartment, near the center. The dipstick
handle has
a bright, yellow loop design for
easier identification.
Turn off the engine
and give the oil a few minutes to
drain back into the
oil pan. If you don't, the oil dipstick
might not show the actual level.
ProCarManuals.com
Page 264 of 372

DW to 2 dl uid
Refer to the Maintenance Schedule to determine what
kind
of transaxle fluid to use. See “Recommended
Fluids and Lubricants” in the Index.
If the fluid level is low, add only enough
of the proper
fluid to bring the level into the cross-hatched area on
the dipstick.
1. Pull out the dipstick.
2. Using a long-neck funnel, add enough fluid at the
dipstick hole to bring it
to the proper level. It doesn’t
take much fluid, generally less than a pint
(0.5 L).
Don ’t overfill. We recommend you use only fluid
labeled DEXRON@-111, because fluid with that
label is made especially for your automatic transaxle.
Damage caused
by fluid other than DEXRON-111 is
not covered by your new vehicle warranty.
0 After adding fluid, recheck the fluid level as
described under “How
to Check.”
When the correct fluid level is obtained, push the
dipstick back in all the way. The
cooling system in your vehicle is filled with new
DEX-COOL
TM (orange-colored, silicate-free) engine
coolant. This coolant is designed to remain in your
vehicle for
5 years or 100,000 miles (166 000 km),
whichever occurs first.
The following explains your cooling system and how to
add coolant when it is low.
If you have a problem with
engine overheating, see “Engine Overheating” in
the Index.
A 50/50 mixture of water and the proper coolant for
your Oldsmobile will:
0 Give freezing protection down to -34°F (-37°C).
0 Give boiling protection up to 265°F (129°C).
Protect against rust and corrosion.
0 Help keep the proper engine temperature.
0 Let the warning lights and gages work as they should.
ProCarManuals.com
Page 365 of 372

LockDelay ..................................... 2-9
Locking Storage Bin
............................ 2-59
Automatic Door
............................... 2-6
Cylinders
................................... 7-35
Door
........................................ 2-4
Key Lock Cylinder Service
..................... 7-35
Liftgate
..................................... 2-21
Power Door
.................................. 2-5
Sliding Door Security .......................... 2- 18
Steering Column Lock Check
................... 7-37
Low Coolant Warning Light
...................... 2-77
LowFuelLight
................................ 2-84
LowOilLight
................................. 2-81
Lubricants and Fluids
............................ 7-39
Lubrication Service. Body
........................ 7-35
Luggagecarrier
................................ 2-62
Locks
......................................... 2-4
. Sliding Door ................................. 2-13
Maintenance. Normal Replacement Parts
........... 6-60
Maintenance Record
............................ 7-4 1
Maintenance Schedule ............................ 7- 1
How the Section is Organized .................... 7-2
Long Trip/Highway Definition
................... 7-5
Long Trip/Highway Intervals
..................... 7-5
Owner Checks and Services
..................... 7-34
Periodic Maintenance Inspections
................ 7-38
Recommended Fluids and Lubricants
............. 7-39 Scheduled Maintenance Services
.................. 7-3
Short Trip/City Definition
....................... 7-4
Short Trip/City Intervals
........................ 7-4
Your Vehicle and the Environment
................ 7-1
Maintenance. Underbody ......................... 6-49
Maintenance When Trailer Towing
................. 4-37
Malfunction Indicator Lamp
...................... 2-77
Manual Front Seat
............................... 1-2
Matching Transmitters to Your Vehicle
.............. 2-10
Mirrors
....................................... 2-52
Convex Outside
.............................. 2-53
Inside Daymight Rearview
..................... 2-52
Power Remote Control
......................... 2-52
Visorvanity
................................. 2-65
Mode Buttons. Climate Control System
.............. 3-2
MountainRoads
................................ 4-21
Multifunction Lever
............................. 2-39
Net. Convenience .............................. 2-61
Neutral
....................................... 2-28
New Vehicle “Break-In”
......................... 2-22
Nightvision
................................... 4-14
odometer
.................................... 2-71
Odometer. Trip
................................. 2-72
Off-Road Recovery
............................. 4-10
Oil. Engine
..................................... 6-9
9-7
ProCarManuals.com