oil dipstick OLDSMOBILE SILHOUETTE 1996 Owners Manual
[x] Cancel search | Manufacturer: OLDSMOBILE, Model Year: 1996, Model line: SILHOUETTE, Model: OLDSMOBILE SILHOUETTE 1996Pages: 372, PDF Size: 19.39 MB
Page 254 of 372

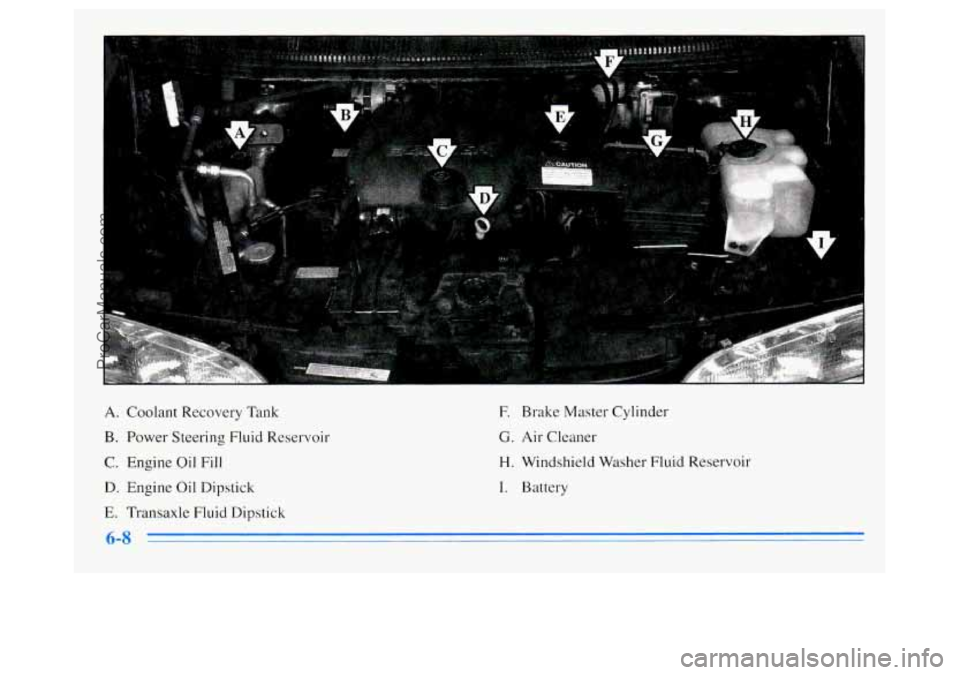
A. Coolant Recovery Tank
B. Power Steering Fluid Reservoir
C. Engine Oil Fill
D. Engine Oil Dipstick
E. Transaxle Fluid Dipstick
E Brake Master Cylinder
G. Air Cleaner
H. Windshield Washer Fluid Reservoir
I. Battery
ProCarManuals.com
Page 255 of 372

Pull forward on the hood prop to release it from its
storage clip.
Put the end of the hood prop into the slot in
the underside of the hood.
Before closing the hood, be sure all the filler caps are on
properly. Lift the hood to relieve the pressure on
the
hood prop. Remove the hood prop from the slot in the
hood and return the prop to its retainer. Let the hood
down and close
it firmly.
Underhood Lamp
Your underhood lamp will go on when you open
the hood.
Engine Oil
LOW
OIL
If the LOW OIL light on the
instrument panel comes
on,
it means you need to check
your engine oil level right
away.
For more information,
see "LOW
OIL Light" in the
Index. You should check
your engine oil level
regularly; this is
an
added reminder. It's
a good idea
to check your engine oil every time you
get fuel.
In order to get an accurate reading, the oil must
be warm and the vehicle must be on level ground.
.-
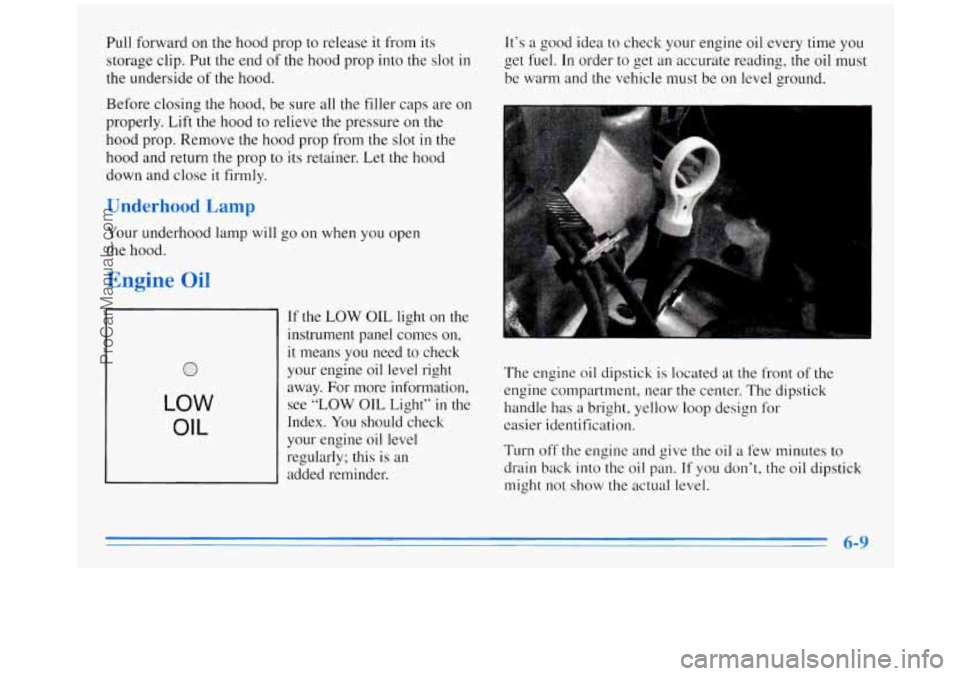
The engine oil dipstick is located at the front of the
engine compartment, near the center. The dipstick
handle has
a bright, yellow loop design for
easier identification.
Turn off the engine
and give the oil a few minutes to
drain back into the
oil pan. If you don't, the oil dipstick
might not show the actual level.
ProCarManuals.com
Page 256 of 372

Checking Engine Oil
Pull out the dipstick and clean it with a paper towel or
cloth, then push it back in all
the way. Remove it again,
keeping the tip down, and check the level.
I
When to Add Oil
If the oil is at or below the ADD mark, then you’ll need
to add some oil. But you must use the right kind. This
part explains what kind
of oil to use. For crankcase
capacity, see “Capacities and Specifications’’
in
the Index.
NOTICE:
Don’t add too much oil. If your engine has so
much oil that the oil level gets above the
cross-hatched area that shows the proper
operating range, your engine could be damaged.
6-10
ProCarManuals.com
Page 257 of 372

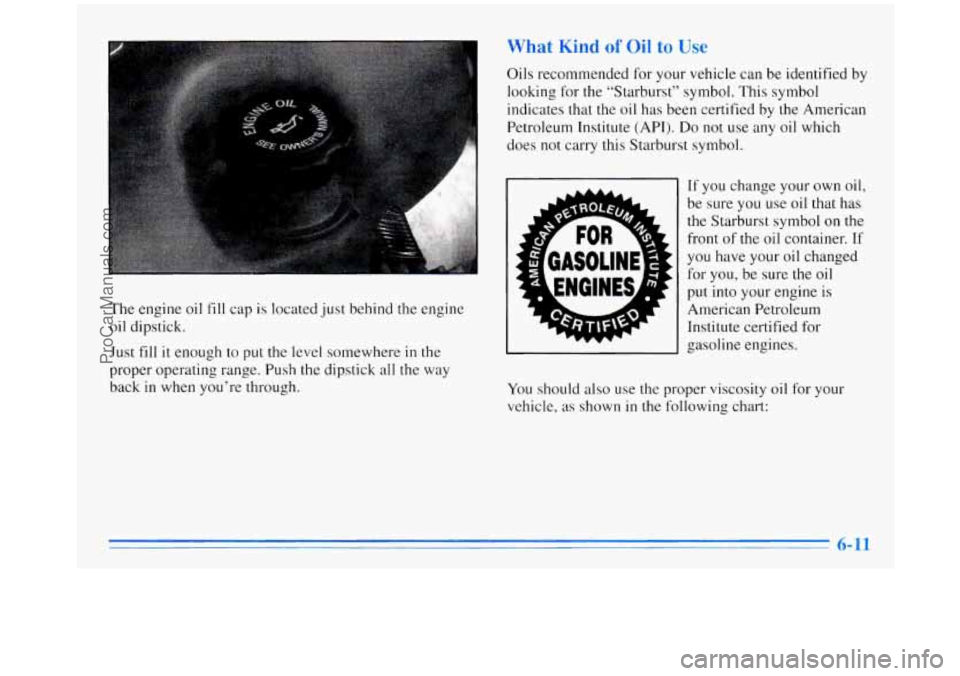
The engine oil fill cap is located just behind the engine
oil dipstick.
Just fill
it enough to put the level somewhere in the
proper operating range. Push the dipstick all the way
back
in when you’re through. Oils
recommended for your vehicle can be identified by
looking for the “Starburst” symbol. This symbol
indicates that the oil has been certified by the American
Petroleum Institute (API).
Do not use any oil which
does not carry this Starburst symbol.
What Kind of Oil to Use
If you change your own oil,
be sure you use oil that has
the Starburst symbol on the
front of the oil container. If
you have your oil changed
for you, be sure the oil
put into your engine is
American Petroleum Institute certified for
gasoline engines.
You should also use the proper viscosity oil for your
vehicle,
as shown in the following chart:
6-11
ProCarManuals.com
Page 264 of 372

DW to 2 dl uid
Refer to the Maintenance Schedule to determine what
kind
of transaxle fluid to use. See “Recommended
Fluids and Lubricants” in the Index.
If the fluid level is low, add only enough
of the proper
fluid to bring the level into the cross-hatched area on
the dipstick.
1. Pull out the dipstick.
2. Using a long-neck funnel, add enough fluid at the
dipstick hole to bring it
to the proper level. It doesn’t
take much fluid, generally less than a pint
(0.5 L).
Don ’t overfill. We recommend you use only fluid
labeled DEXRON@-111, because fluid with that
label is made especially for your automatic transaxle.
Damage caused
by fluid other than DEXRON-111 is
not covered by your new vehicle warranty.
0 After adding fluid, recheck the fluid level as
described under “How
to Check.”
When the correct fluid level is obtained, push the
dipstick back in all the way. The
cooling system in your vehicle is filled with new
DEX-COOL
TM (orange-colored, silicate-free) engine
coolant. This coolant is designed to remain in your
vehicle for
5 years or 100,000 miles (166 000 km),
whichever occurs first.
The following explains your cooling system and how to
add coolant when it is low.
If you have a problem with
engine overheating, see “Engine Overheating” in
the Index.
A 50/50 mixture of water and the proper coolant for
your Oldsmobile will:
0 Give freezing protection down to -34°F (-37°C).
0 Give boiling protection up to 265°F (129°C).
Protect against rust and corrosion.
0 Help keep the proper engine temperature.
0 Let the warning lights and gages work as they should.
ProCarManuals.com
Page 305 of 372

Capacities and Specifications
Engine Crankcase ...................................... 4.5 to 5 quarts
Oil change with filter change. Use your dipstick to measure.
Automatic Transaxle
When draining or replacing torque convertel; more fluid may be needed.
Pan Removal and Replacement ............................ 6 quarts
After Complete Overhaul
................................ 8 quarts
With Air Conditioning
.................................. 11.75 quarts
With Rear Climate Control
............................... 13.5 quarts
Cooling System
NOTE: All capacities are approximate. When adding, be sure to fill to the appropriate level,
as recommended in this manual.
Refrigerant (R-l34a), Air Conditioning
FrontA/Conly ........................................ 2.25 lbs. 1.02 kg
Front and Rear A/C ..................................... 3 lbs. 1.36 kg
Not all air conditioning refrigerants are the same. rfthe air conditioning system in your vehicle needs refrigerant,
be sure the proper refrigerant is used.
lfyou ’re not sure, ask your Oldsmobile retailez For additional information,
see
your “Warranty and Owner Assistance Information ” booklet.
FuelTank ............................................. 20gallons 76 L
WheelNutTorque ...................................... 100 lb-ft 140 N-m
NOTE: All capacities are approximate. When adding, be sure to fill to the appropriate level,
as recommended
in this manual. 3.75
L
5.70 L
7.60 L
11.25 L
12.75 L
6-59
ProCarManuals.com