stop start OLDSMOBILE SILHOUETTE 1996 Owners Manual
[x] Cancel search | Manufacturer: OLDSMOBILE, Model Year: 1996, Model line: SILHOUETTE, Model: OLDSMOBILE SILHOUETTE 1996Pages: 372, PDF Size: 19.39 MB
Page 43 of 372
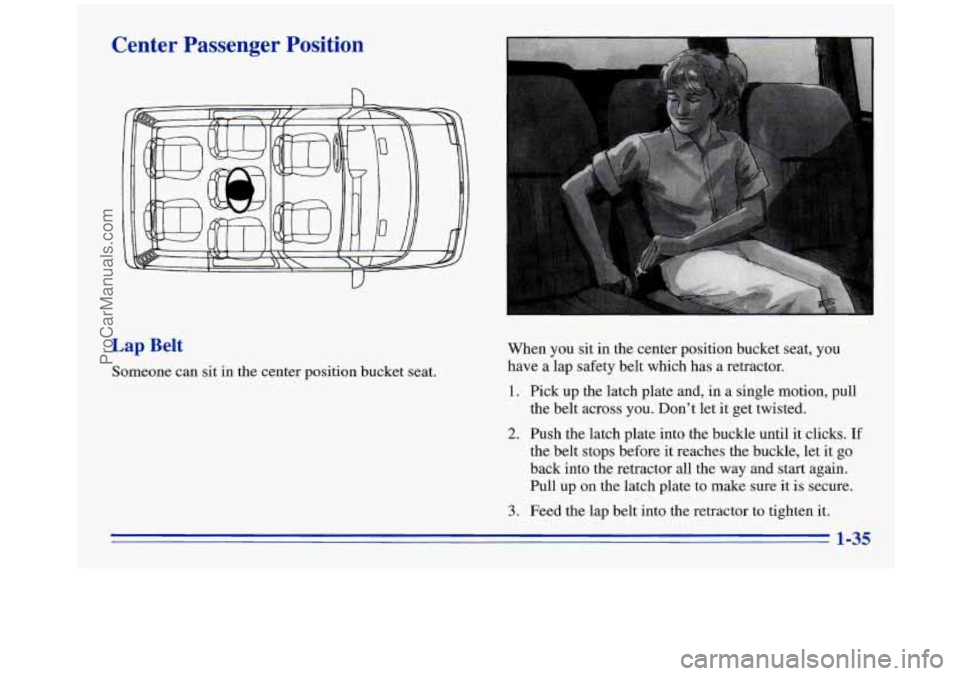
Center Passenger Position
Lap Belt
Someone can sit in the center position bucket seat. When
you sit in the center position bucket seat, you
have a lap safety belt which has a retractor.
1. Pick up the latch plate and, in a single motion, pull
the belt across you. Don’t let it get twisted.
2. Push the latch plate into the buckle until it clicks. If
the belt stops before it reaches the buckle, let it go
back into the retractor all the way and start again.
Pull up on the latch plate to make sure
it is secure.
3. Feed the lap belt into the retractor to tighten it.
1-35
ProCarManuals.com
Page 86 of 372

Parking Lots
If you park in a lot where someone will be watching
your vehicle, it’s best to lock it up and take your keys.
But what if you have to leave your ignition key? What
if
you have to leave something valuable in your vehicle?
Put your valuables in a storage area, like your glove
box
or locking storage bin.
Lock the storage bin.
0 Lock all the doors except the driver’s.
0 Then take the door key with you.
New Vehicle “Break-In”
NOTICE:
Your modern Oldsmobile doesn’t need an
elaborate “break-in.” But it will perform better
in the long run if you follow these guidelines:
Don’t drive at any one speed -- fast or
slow
-- for the first 500 miles (804 km). Don’t
make full-throttle starts.
200 miles (322 km) or so. During this time
your new brake linings aren’t yet broken
in. Hard stops with new linings can mean
premature wear and earlier replacement.
Follow this breaking-in guideline every
time you get new brake linings.
0 Don’t tow a trailer during break-in. See
“Towing a Trailer” in the Index for more
.
information.
Avoid making hard stops for the first
2-22
ProCarManuals.com
Page 88 of 372

Note that even if the engine is not running, the positions
ACCESSORY and RUN are on positions that allow you
to operate your electrical accessories, such as the radio.
NOTICE:
If your key seems stuck in LOCK and you can’t
turn it, be sure it is
all the way in. If it is, then
turn the steering wheel left and right while you
turn the key hard. But turn the key only with
your hand. Using
a tool to force it could break
the key or the ignition switch. If none of this
works, then your vehicle needs service.
Starting Your Engine
Move your shift lever to PARK (P) or NEUTRAL (N).
Your engine won’t start in any other position -- that’s a
safety feature.
To restart when you’re already moving,
use NEUTRAL
(N) only.
I NOTICE:
Don’t try to shift to PARK (P) if your Oldsmobile
is moving. If you do, you could damage the
transaxle. Shift
to PARK (P) only when your
vehicle is stopped.
1. Without pushing the accelerator pedal, turn your
ignition key to START. When the engine starts, let
go
of the key. The idle speed will go down as your
engine gets warm.
2-24
ProCarManuals.com
Page 89 of 372

NOTICE:
Holding your key in START for longer than
15 seconds at a time will cause your battery to be
drained much sooner. And the excessive heat can
damage your
starter motor.
2.
3.
If it doesn’t start right away, hold your key in
START. If it doesn’t start in three seconds (or starts
but then stops), push the accelerator pedal about
one-quarter
of the way down for 12 more seconds, or
until it starts.
If your engine still won’t start (or starts but then
stops), it could be flooded with too much gasoline.
Try this:
Wait
15 seconds to let the starter motor cool down.
Then push your accelerator pedal all the way to the
floor. Hold it there. Then hold the key
in START.
This clears the extra gasoline from the engine. When
the engine starts, let go of the key and the accelerator
pedal.
If the engine still doesn’t start, wait another
15 seconds and repeat this step.
NOTICE:
Your engine is designed to work with the
electronics in your vehicle.
If you add electrical
parts or accessories, you could change the
way
the engine operates. Before adding electrical
equipment, check with your retailer.
If you don’t,
your engine might not perform properly.
If you ever have to have your vehicle towed, see
the part
of this manual that tells how to do it
without damaging your vehicle. See “Towing
Your Vehicle” in the Index.
2-25
ProCarManuals.com
Page 92 of 372
A CAUTION:
It is dangerous to get out of your vehicle if the
shift lever is not fully in PARK
(P) with the
parking brake firmly set. Your vehicle can roll.
Don’t leave your vehicle when the engine is
running unless you have to.
If you have left the
engine running, the vehicle can move suddenly.
You or others could be injured. To be sure your
vehicle won’t move, even when you’re on fairly
level ground, always set your parking brake and
move the shift lever to PARK
(P).
See “Shifting Into PARK (P)” in the Index. If
you’re pulling a trailer, see “Towing a Trailer’’ in
the Index. REVERSE
(R): Use this gear to back up.
NOTICE:
Shifting
to REVERSE (R) while your vehicle is
moving forward could damage your transaxle. Shift
to REVERSE
(R) only after your vehicle is stopped.
I ~~ ~
To rock your vehicle back and forth to get out of snow,
ice or sand without damaging your transaxle, see
“Stuck: In Sand, Mud, Ice or Snow” in the Index.
NEUTRAL (N): In this position, your engine doesn’t
connect with the wheels.
To restart when you’re
already moving, use NEUTRAL
(N) only. Also, use
NEUTRAL (N) when your vehicle is being towed.
2-2s
ProCarManuals.com
Page 125 of 372
Your vehicle will have an open storage compartment
and cupholder on either side of the third row.
onve--'en - 7 Net (Optic--
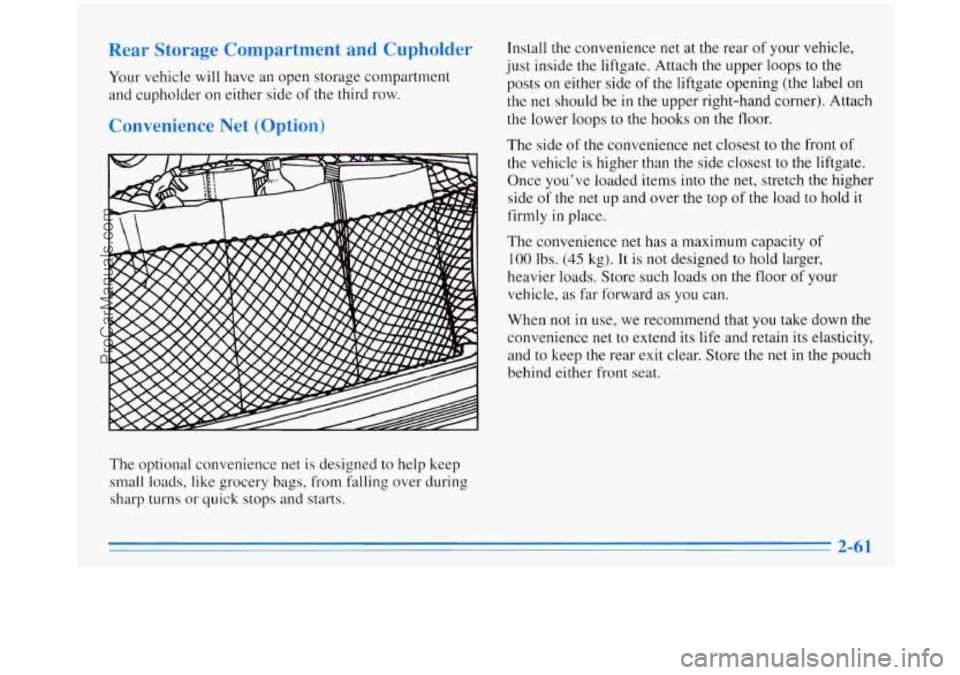
The optional convenience net is designed to help keep
small loads, like grocery bags, from falling over during
sharp turns or quick stops and starts. Install the
convenience net at the rear of your vehicle,
just inside
the liftgate. Attach the upper loops to the
posts on either side of the liftgate opening (the label on
the net should be
in the upper right-hand corner). Attach
the lower loops to the hooks on the floor.
The side of the convenience net closest
to the front of
the vehicle is higher than the side closest to the liftgate.
Once you've loaded items into the
net, stretch the higher
side of the
net up and over the top of the load to hold it
firmly in place.
The convenience net has a maximum capacity of
100 Ibs. (45 kg). It is not designed to hold larger,
heavier loads. Store such loads on the
floor of your
vehicle, as far forward
as you can.
When not
in use, we recommend that you take down the
convenience
net to extend its life and retain its elasticity,
and to keep
the rear exit clear. Store the net in the pouch
behind either front seat.
ProCarManuals.com
Page 139 of 372
Anti-Lock Brake System Warning Light
Your brake system may not be working properly
if the brake system warning light is on. Driving
with the brake system warning light on can lead
to an accident.
If the light is still on or if the
anti-lock brake system warning light is flashing
after you’ve pulled off the road and stopped
carefully, have the vehicle towed for service.
With the anti-lock brake
system, this light will
come on when you start
your engine and it will
stay on for three seconds.
That’s normal.
When the ignition is on, the brake system warning light
will also come
on when you set your parking brake. The
light will stay on if your parking brake doesn’t release
fully.
If it stays on after your parking brake is fully
released, it means you have a brake problem. If
the light flashes when you’re driving, you don’t have
anti-lock brakes and there could be a problem with your
regular brakes. Pull off the road and stop carefully. You
may notice that the pedal is harder to push. Or, the pedal
may go closer to the floor. It may take longer to stop.
Have the vehicle towed for service. (See “Towing Your
Vehicle”
in the Index.)
ProCarManuals.com
Page 140 of 372
A CAUTION:
Your regular brake system may not be working
properly if the anti-lock brake system warning light
is flashing. Driving with the anti-lock
brake system warning light flashing can lead to an accident. After you’ve pulled
off the road
and stopped carefully, have the vehicle towed
for service.
If the anti-lock brake system warning light stays on
longer than normal after you’ve started your engine, turn
the ignition off. Or, if the light comes on and stays on
when you’re driving, stop as soon as possible and turn
the ignition
off. Then start the engine again to reset the
system. If the light still stays on, or comes on again
while you’re driving, your Oldsmobile needs service. If
the light is on but not flashing and the regular brake
system warning light isn’t on, you still have brakes, but
you don’t have anti-lock brakes.
The anti-lock brake system warning light should come
on briefly when you turn the ignition key to
RUN. If the
light doesn’t come on then, have it fixed
so it will be
ready to warn you if there
is a problem.
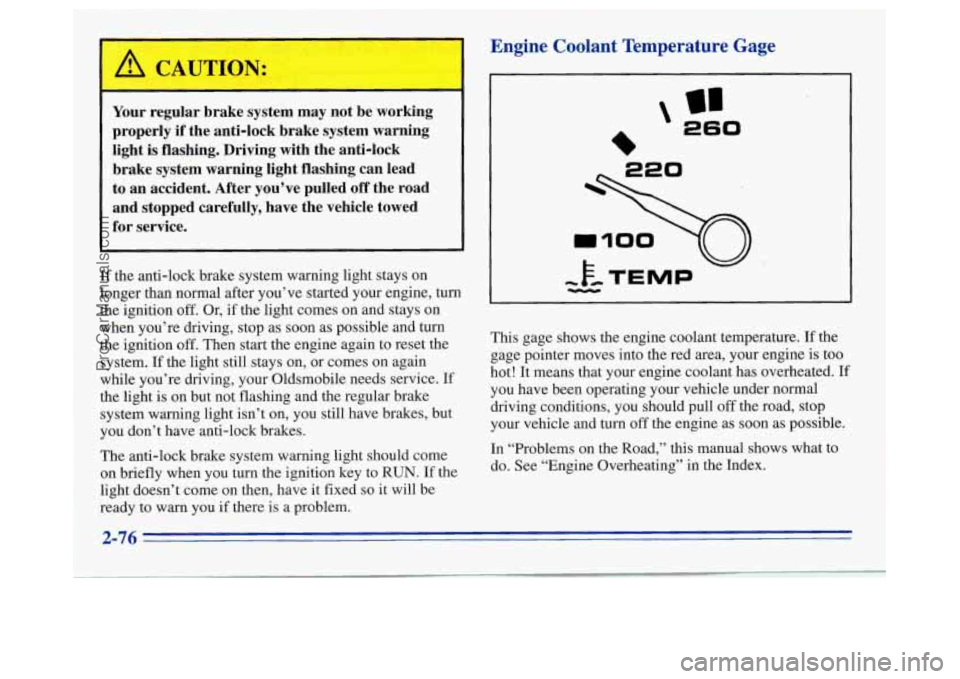
Engine Coolant Temperature Gage
’ 260
This gage shows the engine coolant temperature. If the
gage pointer moves into the red area, your engine
is too
hot! It means that your engine coolant has overheated. If
you have been operating your vehicle under normal
driving conditions, you should pull
off the road, stop
your vehicle and turn
off the engine as soon as possible.
In “Problems on the Road,” this manual shows what to
do. See “Engine Overheating” in the Index.
ProCarManuals.com
Page 142 of 372

I NOTICE:
If you keep driving your vehicle with this light
on, after a while, your emission controls may not
work as well, your fuel economy may not be
as
good and your engine may not run as smoothly.
This could lead to costly repairs that may not be
covered by your warranty.
This light should come on, as a check to show you it is
working, when the ignition is on and the engine is not
running. If the light doesn’t come on, have
it repaired.
This light will also come on during
a malfunction in one
of two ways:
0
0
Light Flashing -- A misfire condition has been
detected. A misfire increases vehicle emissions and
may damage the emission control system
on your
vehicle. Retailer or qualified service center diagnosis
and service is required.
Light On Steady -- An emission control system
malfunction has been detected on your vehicle.
Retailer or qualified service center diagnosis and
service may be required. The
following
may prevent more serious damage to
your vehicle:
0 Reduce vehicle speed.
0 Avoid hard accelerations.
0 Avoid steep uphill grades.
0 If towing a trailer, reduce the amount of cargo being
hauled as soon
as it is possible.
If the light stops flashing and remains on steady, see “If
the Light
Is On Steady” following.
If the light continues to flash, when it is safe to do so,
stop the vehicle. Put your vehicle in PARK (P). Turn the
key off, wait at least 10 seconds and restart the engine.
If the light remains on steady, see
“If the Light Is On
Steady” following.
If the light is still flashing follow the
previous steps, and drive the vehicle to your retailer
or
qualified service center for service.
ProCarManuals.com
Page 161 of 372
Adjusting the Speakers
BAL: Turn the control behind the upper knob to move
the sound
to the left or right speakers. The middle
position is a detent and balances the speakers.
FADE: Turn the control behind the lower knob to move
the sound to the front or rear speakers. The middle
position is a detent and balances
the speakers.
Playing a Cassette Tape
Your tape player is built to work best with tapes that are
30 to 45 minutes long on each side. Tapes longer than
that are
so thin they may not work well in this player.
The longer side with the tape visible goes in first. If
you
hear nothing or hear just a garbled sound, it may not be
in squarely. Press STOP-EJECT to remove the tape and
start over.
While the tape is playing, use the
VOL, FADE, BAL,
TREB and
BASS controls just as you do for the radio.
Other controls may have different functions when
a tape
is inserted. The display will show an
arrow to show
which side
of the tape is playing. Note
that cassette tape adapter kits for portable compact
disc players will not work in your cassette player. These
adapters will cause an error message to show on
the
display, and the adapter cassette will be ejected.
FORWARD: Press the right arrow to rapidly advance
the tape. It will continue forwarding until you press the
right arrow again lightly.
REVERSE: Press the left arrow to rapidly reverse the
tape. It will continue reversing
until you press the left
arrow again lightly.
PROG-RCL: Press this knob to hear the other side of a
tape that is playing.
STOP-EJECT Press this button to remove the tape or
stop playing the tape and switch
to the radio.
CLN: This message may appear on the display. If it
does, your cassette tape player needs to be cleaned. It
will still play tapes, but you should clean it as soon as
possible to prevent damage to your tapes and player.
See “Care of Your Cassette Tape Player” in the Index.
After you clean the player, press and hold STOP-EJECT
for five seconds to reset the CLN indicator. The radio
will display
--- to show the indicator was reset.
3-13
ProCarManuals.com