fuse OLDSMOBILE SILHOUETTE 1997 User Guide
[x] Cancel search | Manufacturer: OLDSMOBILE, Model Year: 1997, Model line: SILHOUETTE, Model: OLDSMOBILE SILHOUETTE 1997Pages: 436, PDF Size: 21.87 MB
Page 299 of 436
Section 6 Service and Appearance Care
Here you will find information about the care of your Oldsmobile. This section begins with service information, and
then it shows how to check important fluid and lubricant levels. There is also technical information about your
vehicle, and a part devoted
to its appearance care.
6-2
6- 3
6-4
6-5
6-7
6-10 6-15
6-16 6-17
6-20 6- 24
6-25
6-26
6-30 6-30
6-3
1
6-38 Doing
Your Own Service Work
What Kind
of Fuel to Use
Using Fuel in Foreign Countries
Where to Put the Fuel and Filling the Tank
Checking Things Under the Hood
Checking Your Engine
Oil
Air Cleaner
Pollen Filter
Automatic Transaxle Fluid
Engine Coolant
Power Steering Fluid
Where to Fill
the Windshielc 9 Washer Fluic
Important Brake Information
Information on Your Vehicle’s Battery
Tips on Vehicle Storage
Bulb Replacement Procedures
Windshield Wiper Blade Replacement 6-40
6-42
6-44
6-47 6-49
6-50
6-52
6-53 6-54
6-55 6-56
6-57
6-62
6-62
6-62 6-63
6-63 How and
When to Check Tire Inflation
When
it is Time to Buy New Tires
Wheel Alignment
Cleaning the Inside of Your Vehicle
Care of the Safety Belts
Cleaning
the Outside of Your Vehicle
How to Clean Aluminum Wheels
Underbody Maintenance
Recommended Appearance Care Materials
Your Vehicle Identification Number
(VIN)
The Electrical System
Fuses and Circuit Breakers
Replacement Bulb Types for Your Vehicle
Capacities and Specifications
Air Conditioning Specifications
Vehicle Dimensions
Normal Replacement Parts
6-1
ProCarManuals.com
Page 300 of 436
Service
Your Oldsmobile retailer knows your vehicle best and
wants you to be happy with it. We hope you’ll go to
your retailer for all your service needs. You’ll get
genuine
GM parts and GM-trained and supported
service people.
We hope you’ll want to keep your GM vehicle all GM.
Genuine
GM parts have one of these marks:
n
Delco
Doing Your Own Service Work
If you want to do some of your own service work, u’ll Y 0‘
want to get the proper Oldsmobile Service Manual.
It tells you much more about how
to service your
Oldsmobile than this manual can.
To order the proper
service manual, see “Service and Owner Publications”
in the Index.
.-
Your vehicle has an air bag system. Before attempting to
do your own service work, see “Servicing Your Air
Bag-Equipped Oldsmobile” in the Index.
You should keep a record with all parts receipts and list
the mileage and the date of any service work you
perform. See “Maintenance Record” in the Index.
You can be injured and your vehicle could be
damaged if you try
to do service work on a
vehicle without knowing enough about it.
Be sure you have sufficient knowledge,
experience, the proper replacement parts
and tools before you attempt any vehicle
maintenance task.
Be sure to use the proper nuts, bolts and
other fasteners. “English” and “metric”
fasteners can be easily confused. If you use
the wrong fasteners, parts can later break
or fall off.
You could be hurt.
6-2
ProCarManuals.com
Page 307 of 436
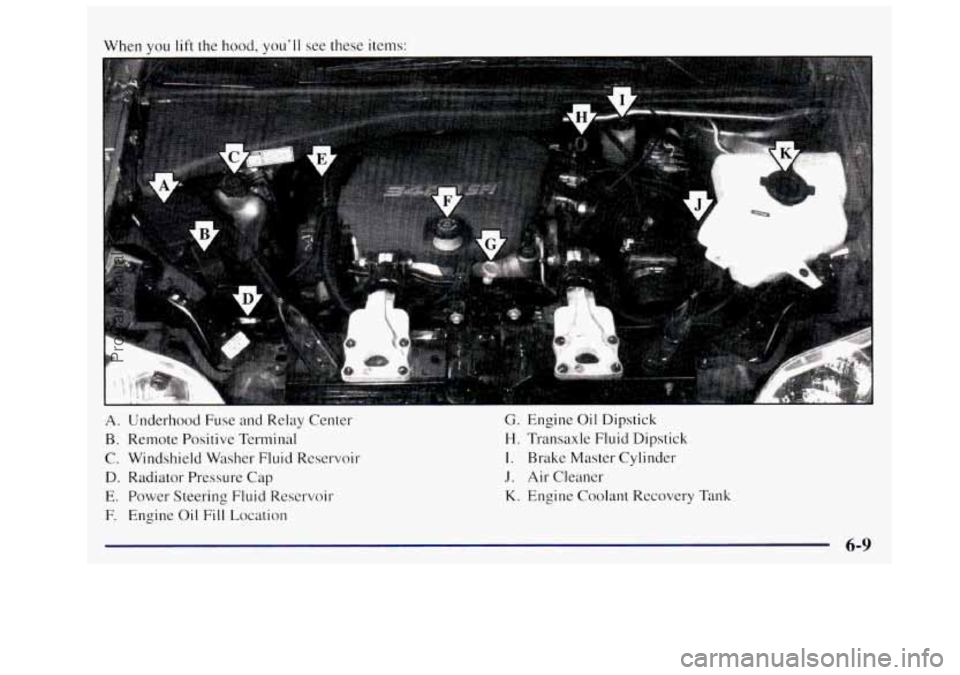
Nhen you lift the hood, you’ll see these items:
A. Underhood Fuse and Relay Center
B. Remote Positive Terminal
C. Windshield Washer Fluid Reservoir
D. Radiator Pressure Cap
E. Power Steering Fluid Reservoir
F. Engine Oil Fill Location
G. Engine Oil Dipstick
H. Transaxle Fluid Dipstick
I. Brake Master Cylinder
J. Air Cleancr
K. Engine Coolant Recovery Tank
6-9
ProCarManuals.com
Page 323 of 436
When to Check Power Steering Fluid
It is not necessary to regularly check power steering
fluid unless you suspect there
is a leak in the system or
you hear an unusual noise. A fluid loss in this system
could indicate
a problem. Have the system inspected
and repaired.
How To Check Power Steering Fluid
When the engine compartment is cool, unscrew the cap
and wipe the dipstick with
a clean rag. Replace the cap
and completely tighten
it. Then remove the cap again
and look at the fluid level on the dipstick.
When the engine compartment is hot,
the level should be
at the
H mark. When it’s cold, the level should be at the
C mark. If the fluid is at the ADD mark, you should
add fluid.
What to Use
Refer to the Maintenance Schedule to determine what
kind of fluid to use. See “Recommended Fluids and
Lubricants”
in the Index. Always use the proper fluid.
Failure to use the proper fluid can cause leaks and
damage hoses and seals.
Windshield Washer Fluid
What to Use
When you need windshield washer fluid, be sure to read
the manufacturer’s instructions before use.
If you will be
operating your vehicle
in an area where the temperature
may Pall below freezing, use
a fluid that has sufficient
protection against freezing.
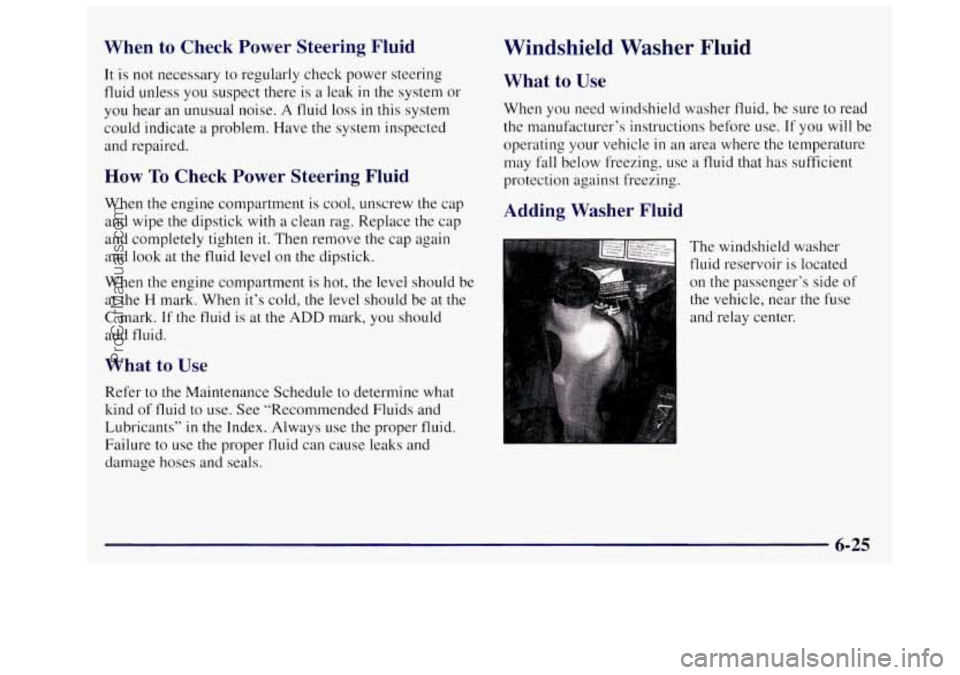
Adding Washer Fluid
The windshield washer
fluid reservoir is located
on the passenger’s side of
the vehicle, near the fuse
6-25
ProCarManuals.com
Page 354 of 436
Electrical System
Add-on Electrical Equipment
NOTICE:
Don’t add anything electrical to your Oldsmobile
unless you check with your retailer first. Some
electrical equipment can damage your vehicle
and the damage wouldn’t be covered by your
warranty. Some add-on electrical equipment
can keep other components
from working as
they should.
Your vehicle has an air bag system. Before attempting
to add anything electrical to your Oldsmobile, see
“Servicing Your Air Bag-Equipped Oldsmobile”
in
the Index.
Headlamp Wiring
The headlamp wiring is protected by an internal circuit
breaker
in the I/P fuse panel. An electrical overload will
cause the lamps
to go on and off, or in some cases to
remain off.
If this happens, have your headlamp wiring
checked right away.
Windshield Wipers
The windshield wiper motor is protected by an internal
circuit breaker and a fuse. If the motor overheats due to
heavy snow, etc., the wiper will stop
until the motor
cools. If the overload is caused by some electrical
problem, be sure
to get it fixed.
Power Windows and Other Power Options
Circuit breakers in the I/P fuse panel protect the power
windows and other power accessories. When
the current
load is too heavy,
the circuit breaker opens and closes,
protecting the circuit until
the problem is fixed.
6-56
ProCarManuals.com
Page 355 of 436
Fuses and Circuit Breakers
The wiring circuits in your vehicle are protected from
short circuits by a combination of fuses, circuit breakers
and fusible thermal links.
Look at the silver-colored band inside the fuse. If the
band
is broken or melted, replace the fuse. Be sure you
replace a bad fuse with a new one of the identical size
and rating.
If you ever have a problem on the road and don’t have a
spare fuse,
you can borrow one that has the same
amperage
or use one of the spare fuses in the underhood
fuse and relay center. Just pick some feature of your
vehicle that you can get along without
-- like the radio
or cigarette lighter -- and use its fuse, if it is the right
amperage. Replace it as soon as you can.
There are two fuse blocks in your vehicle: the
instrument panel fuse block and the underhood fuse and
relay center.
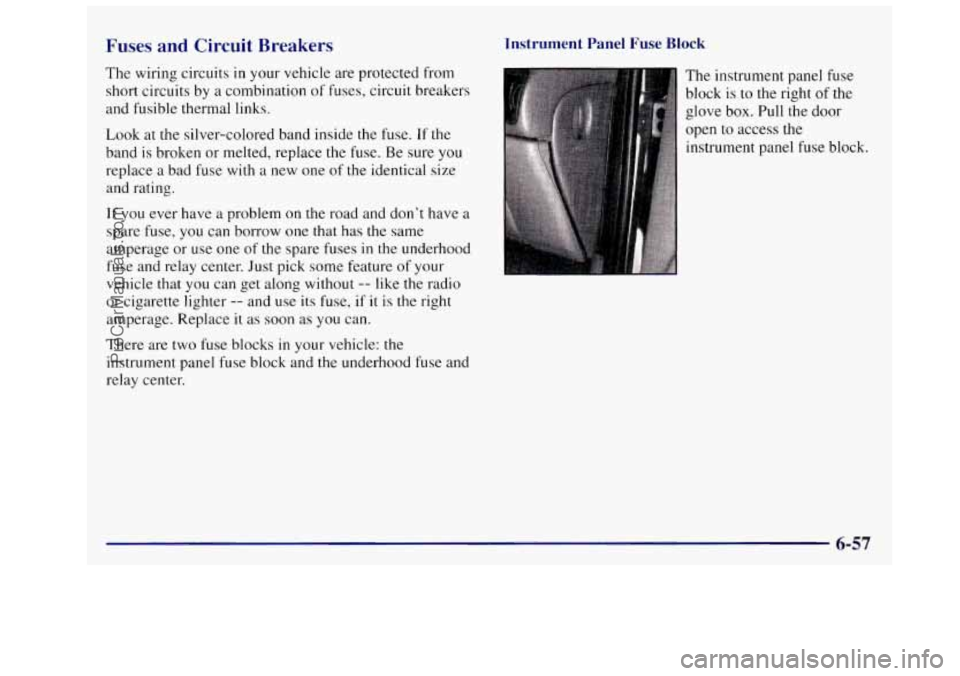
Instrument Panel Fuse Block
The instrument panel fuse
block
is to the right of the
glove box. Pull the door
open to access the
instrument panel fuse block.
ProCarManuals.com
Page 356 of 436
/ -.
FUSE USAGE CHART
BREAKERS
ELEC PRNDL RR DEFOG ELC
HEADlAMP
20
10 CRUISE 10 TlSlG 15 SIR 10 IGN 1 10 PSD
10 25
‘a 25
25 PWR OTR VENT RR HVAC FR$~~~~~~w’ SUNROOF HVAC/DRL
10
20 10
PIM WDQ/RR 2 10 M 20 FRT WPR WSHR SWC ACCY MALURADIO/DC RR WPR WSHR BCM PRGRM -- I PWGiAT, I HAZARD 15 STOP LAMP 15
L 20 PWR LOCK RR PWR SCKT ABS MOL BATT 20 10
FRT HVAC HI 20 2 K ABS SOL SWC BACK LIGHT
For More Information, See Owner’s Manual . Printed in 10250877 /
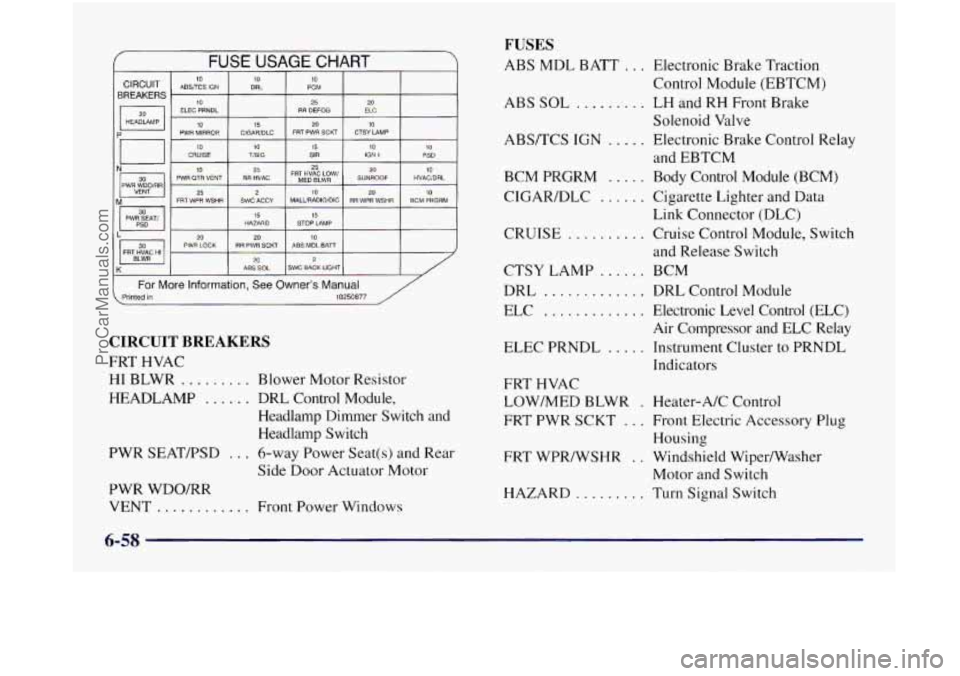
CIRCUIT BREAKERS
FRT HVAC
HI BLWR ......... Blower Motor Resistor
HEADLAMP
...... DRL Control Module,
Headlamp Dimmer Switch and
Headlamp Switch
PWR SEATFSD
... 6-way Power Seat(s) and Rear
Side Door Actuator Motor
PWR WDO/RR VENT
............ Front Power Windows
FUSES
ABS MDL BATT ... Electronic Brake Traction
ABS
SOL ......... LH and RH Front Brake
ABS/TCS
IGN ..... Electronic Brake Control Relay
BCM
PRGRM ..... Body Control Module (BCM)
CIGARDLC
...... Cigarette Lighter and Data
CRUISE
.......... Cruise Control Module, Switch
CTSY LAMP
...... BCM
DRL
............. DRL Control Module
ELC
............. Electronic Level Control (ELC)
Air Compressor and ELC Relay
ELEC PRNDL
..... Instrument Cluster to PRNDL
Indicators Control Module
(EBTCM)
Solenoid Valve
and EBTCM
Link Connector (DLC)
and Release Switch
FRT HVAC
LOW/MED BLWR
. Heater-A/C Control
FRT PWR SCKT
... Front Electric Accessory Plug
Housing
Motor and Switch
FRT
WPR/WSHR
. . Windshield Wiper/Washer
HAZARD
......... Turn Signal Switch
6-58
ProCarManuals.com
Page 357 of 436
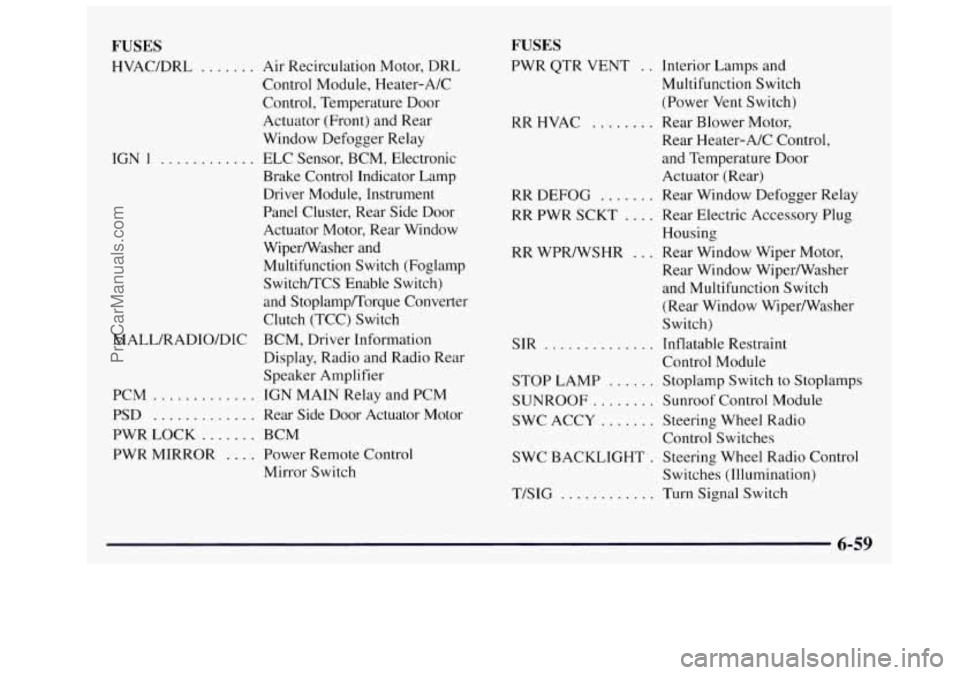
FUSES
HVAC/DRL ....... Air Recirculation Motor, DRL
IGN
1 ...........
MALL/RADIO/DIC Control Module, Heater-A/C
Control,
Temperature Door
Actuator (Front) and Rear
Window Defogger Relay
ELC Sensor, BCM, Electronic
Brake Control Indicator Lamp
Driver Module, Instrument
Panel Cluster, Rear Side Door
Actuator Motor, Rear Window
Wiperwasher and
Multifunction Switch (Foglamp
Switch/TCS Enable Switch)
and Stoplamp/Torque Converter
Clutch (TCC) Switch
BCM, Driver Information
Display, Radio and Radio Rear
Speaker Amplifier
PCM
............. IGN MAIN Relay and PCM
PSD
............. Rear Side Door Actuator Motor
PWR LOCK
....... BCM
PWR MIRROR
.... Power Remote Control
Mirror Switch
FUSES
PWR QTR VENT . . Interior Lamps and
Multifunction Switch
(Power
Vent Switch)
RR HVAC ........ Rear Blower Motor,
Rear Heater-A/C Control,
and Temperature Door
Actuator (Rear)
RR
DEFOG ....... Rear Window Defogger Relay
RR PWR SCKT .... Rear Electric Accessory Plug
Housing
Rear Window Wiper/Washer
and Multifunction Switch
(Rear Window Wiper/Washer
Switch)
Control Module
RR WPR/WSHR
... Rear Window Wiper Motor,
SIR
.............. Inflatable Restraint
STOP LAMP ...... Stoplamp Switch to Stoplamps
SUNROOF
........ Sunroof Control Module
SWC ACCY
....... Steering Wheel Radio
SWC BACKLIGHT
. Steering Wheel Radio Control
T/SIG ............ Turn Signal Switch
Control
Switches
Switches (Illumination)
6-59
ProCarManuals.com
Page 358 of 436
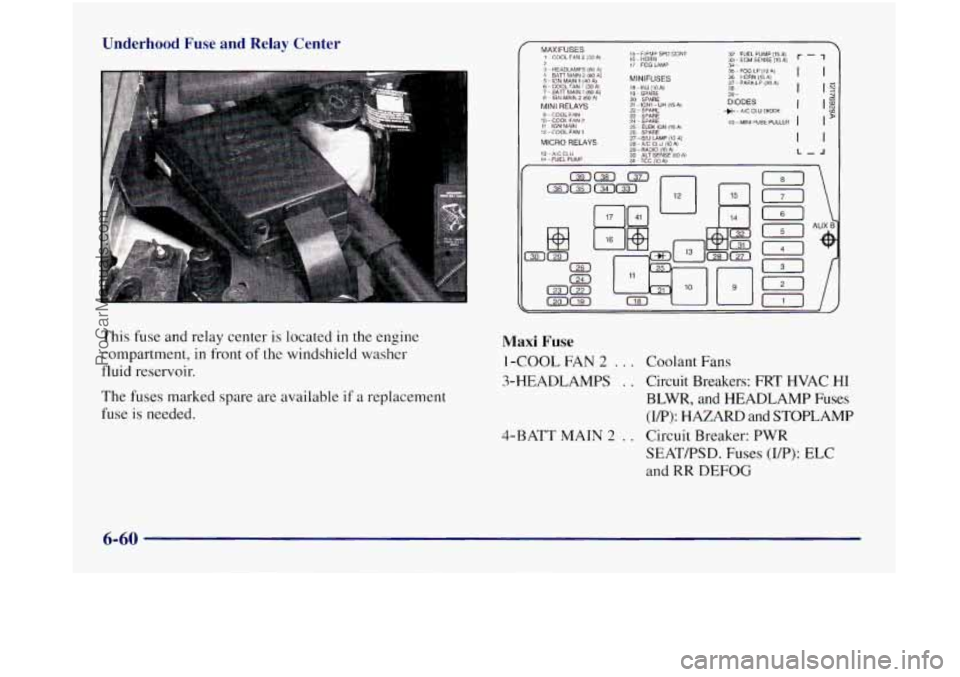
Underhood Fuse and Relay Center
This fuse and relay center is located in the engine
compartment, in front
of the windshield washer
fluid reservoir.
The fuses marked spare are available
if a replacement
fuse is needed.
OR 14
181
17j
EL AUX B
Maxi Fuse
I -COOL FAN 2 . . . Coolant Fans
3-HEADLAMPS
. . Circuit Breakers: FRT HVAC HI
BLWR, and HEADLAMP Fuses
(VP): HAZARD and STOPLAMP
SEAT/PSD. Fuses (UP): ELC
and RR DEFOG
4-BATT MAIN
2 . . Circuit Breaker: PWR
6-60
ProCarManuals.com
Page 359 of 436
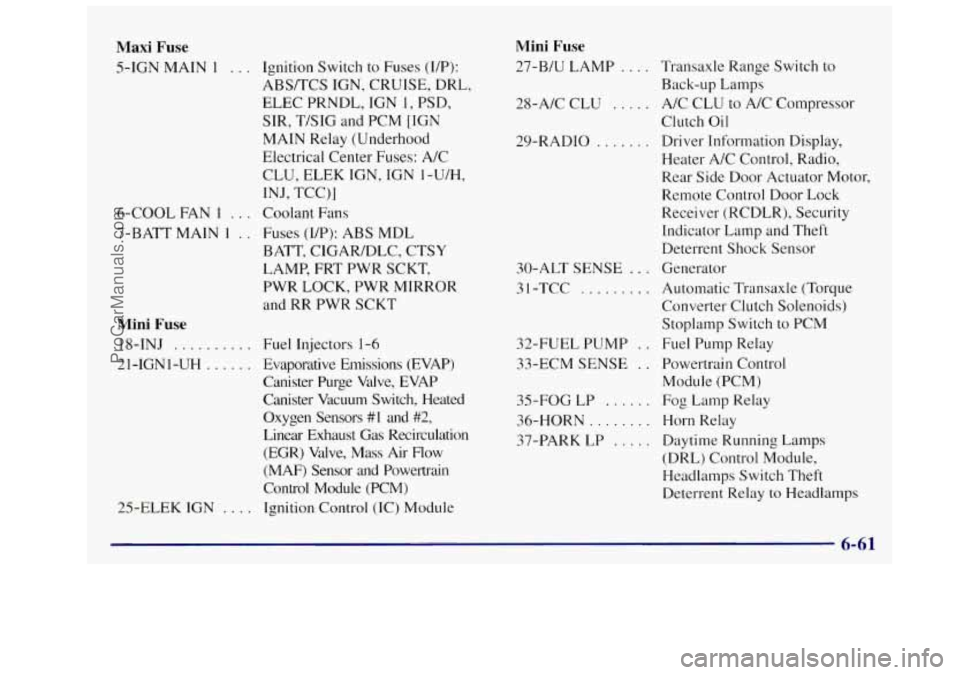
Maxi Fuse
5-IGN MAIN 1 . . . Ignition Switch to Fuses (UP):
ABS/TCS IGN, CRUISE, DRL,
ELEC PRNDL, IGN
1, PSD,
SIR, T/SIG and PCM [IGN
MAIN Relay (Underhood
Electrical Center Fuses: A/C
INJ, TCC)]
CLU,
ELEK
IGN, IGN 1-U/H,
6-COOL FAN
I . . . Coolant Fans
7-BATT MAIN
1 . . Fuses (IP): ABS MDL
BATT, CIGARIDLC, CTSY
LAMP, FRT PWR SCKT,
PWR LOCK, PWR MIRROR
and RR PWR SCKT
Mini Fuse
18-INJ . . . . . . . . . .
21-IGNI-UH . . . . . .
25-ELEK IGN . . .
Fuel Injectors 1-6
Evaporative Emissions (EVAP)
Canister Purge Valve, EVAP
Canister Vacuum Switch, Heated
Oxygen Sensors
#1 and #2,
Linear Exhaust Gas Recirculation
(EGR) Valve, Mass Air Flow
(MAF) Sensor and Powertrain
Control Module (PCM)
Ignition Control (IC) Module
Mini Fuse
27-B/U LAMP . . . . Transaxle Range Switch to
Back-up Lamps
28-A/C CLU
, . . . . A/C CLU to A/C Compressor
Clutch
Oil
29-RADIO . . . . . , , Driver Information Display,
Heater A/C Control, Radio,
Rear Side Door Actuator Motor,
Remote Control Door Lock
Receiver (RCDLR), Security
Indicator Lamp and Theft
Deterrent Shock Sensor
30-ALT SENSE
. . . Generator
3
1 -TCC . . . . . . . . . Automatic Transaxle (Torque
Converter Clutch Solenoids)
Stoplamp Switch to PCM
32-FUEL PUMP
. . Fuel Pump Relay
33-ECM SENSE
. . Powertrain Control
35-FOG
LP . . . . . . Fog Lamp Relay
36-HORN
. . . . . . . . Horn Relay
37-PARK LP
. . . . . Daytime Running Lamps
(DRL) Control Module,
Headlamps Switch Theft
Deterrent Relay to Headlamps
Module
(PCM)
6-61
ProCarManuals.com