light OLDSMOBILE SILHOUETTE 1998 Owner's Manual
[x] Cancel search | Manufacturer: OLDSMOBILE, Model Year: 1998, Model line: SILHOUETTE, Model: OLDSMOBILE SILHOUETTE 1998Pages: 444, PDF Size: 23.2 MB
Page 126 of 444
Arming with the Remote Lock
Control Transmitter
Your alarm system will arm when you use your remote
lock control transmitter to lock the doors, if the key is
not in the ignition. The security light will turn on to let
you know the system is arming. After all doors and
the
liftgate are closed and locked, the security light will
begin flashing at a very slow rate to let you know the
system is armed.
Arming with Your Key
Your alarm system will arm when you use your key to
lock the doors. The security light will turn on to let you
know the system is arming. After all doors and the
liftgate are closed and locked, the security light will
begin flashing at a very slow rate to let you know the
system is armed. If you would like your key not
to arm
the system, see “Locks and Lighting Choices” in
the Index.
Arming Confirmation
If remote unlock confirmation is on (see “Locks and
Lighting Choices”
in the Index), your parking lamps
will flash briefly to let you know when your alarm
system has armed.
Disarming with the Remote Lock
Control Transmitter
Your alarm system will disarm when you use your
remote lock control transmitter to unlock the doors. The
security light will stop flashing to let you know the
system is no longer armed.
Disarming with Your Key
Your alarm system will disarm when you use your key
to unlock the doors. The security light will stop flashing
to let you know the system is no longer armed. If you
would like your key not to disarm the alarm system, see
“Locks and Lighting Choices” in the Index.
2-24
ProCarManuals.com
Page 127 of 444

Nuisance Alarms New Vehicle “Break-In”
If you experience nuisance alarms (alarms which are not
caused by the opening of a door or the liftgate and are
not desirable), you may need to reduce the damage
detection sensitivity. Try programming the Content
Theft-Deterrent to Mode
1.
If you continue to experience nuisance alarms, you may
want to try turning
off damage detection by
programming your Content Theft-Deterrent to Mode
2.
If you are still having trouble with nuisance alarms, you
can
turn off the Content Theft-Deterrent system by
programming your Content Theft-Deterrent to Mode
3.
See “Locks and Lighting Choices” in the Index for more
information. See
your retailer or qualified technician
for service.
NOTICE:
Your vehicle doesn’t need an elaborate
“break-in.” But
it will perform better in the long
run
if you follow these guidelines:
0 Don’t drive at any one speed -- fast or
slow
-- for the first 500 miles (805 km).
Don’t make full-throttle starts.
200 miles (322 km) or so. During this time
your new brake linings aren’t yet broken
in. Hard stops with new linings can mean
premature wear and earlier replacement.
Follow
this breaking-in guideline every
time you get new brake linings.
See “Towing
a Trailer’’ in the Index for
more information.
Avoid making hard stops for the first
0 Don’t tow a trailer during break-in.
2-25
ProCarManuals.com
Page 128 of 444
Ignition Positions
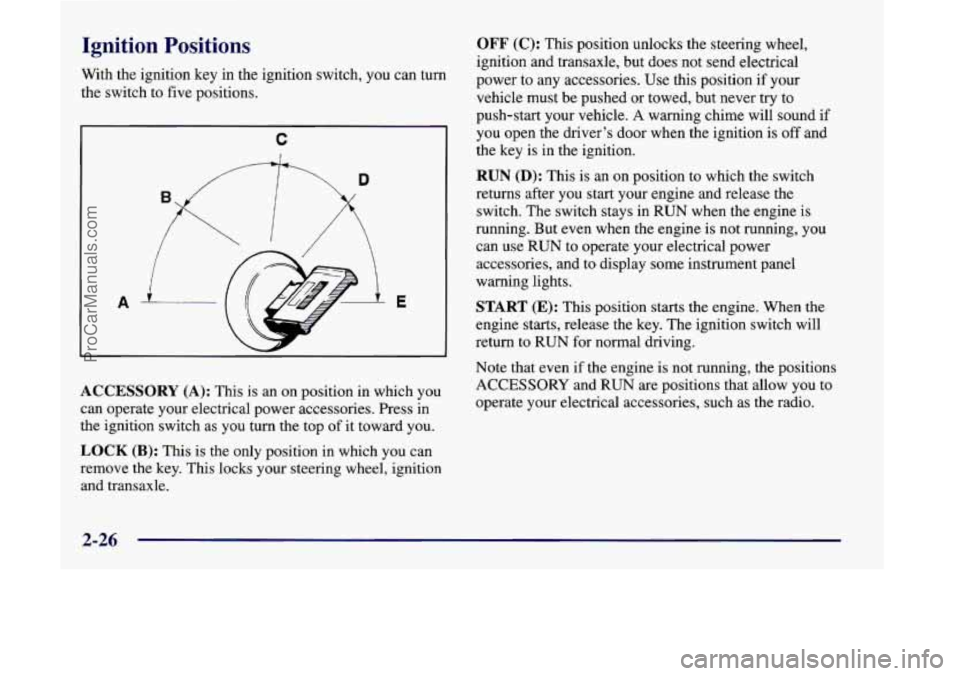
With the ignition key in the ignition switch, you can turn
the switch to five positions.
C
ACCESSORY (A): This is an on position in which you
can operate your electrical power accessories. Press in
the ignition switch as you turn the top
of it toward you.
LOCK (B): This is the only position in which you can
remove the key. This locks your steering wheel, ignition
and transaxle.
OFF (C): This position unlocks the steering wheel,
ignition and transaxle, but does not send electrical
power to any accessories. Use this position if your
vehicle must be pushed or towed, but never try to
push-start your vehicle.
A warning chime will sound if
you open the driver’s door when the ignition is off and
the key is in the ignition.
RUN (D): This is an on position to which the switch
returns after you start your engine and release the
switch.
The switch stays in RUN when the engine is
running. But
even when the engine is not running, you
can use RUN to operate your electrical power
accessories, and to display some instrument panel
warning lights.
START (E): This position starts the engine. When the
engine starts, release the key. The ignition switch will
return to RUN for normal driving.
Note that even
if the engine is not running, the positions
ACCESSORY and RUN are positions that allow you to
operate your electrical accessories, such as the radio.
2-26
ProCarManuals.com
Page 136 of 444
Parking Brake
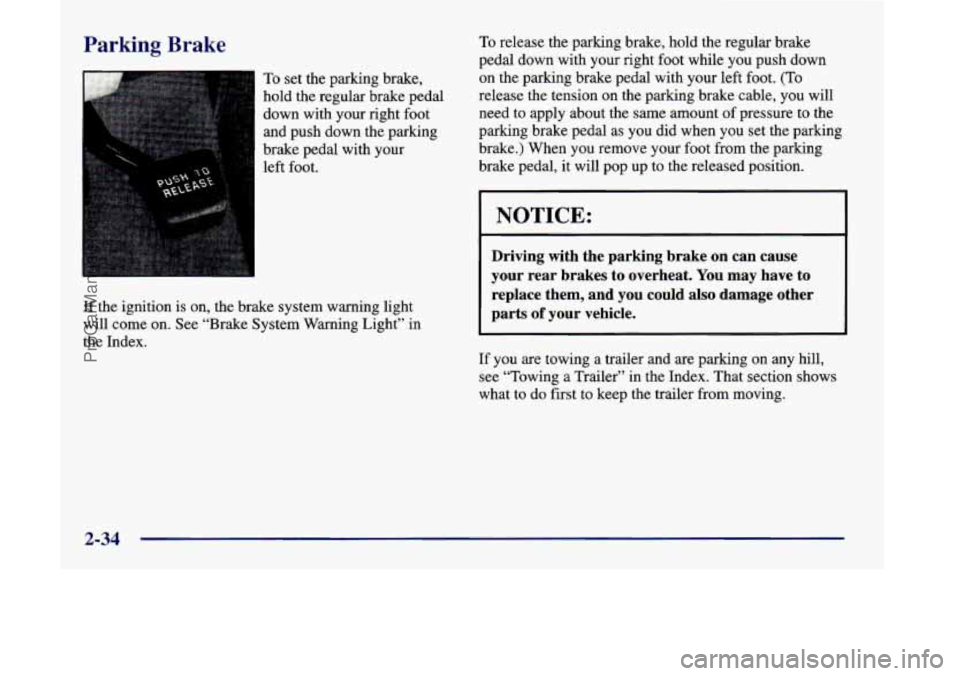
To set the parking brake,
hold the regular brake pedal
down with your right foot
and push down the parking
brake pedal with your
left foot.
If the ignition is on, the brake system warning light
will come on. See “Brake System Warning Light” in
the Index.
To release the parking brake, hold the regular brake
pedal down with your right foot while you push down
on the parking brake pedal with your left foot.
(To
release the tension on the parking brake cable, you will
need to apply about the same amount of pressure to the
parking brake pedal as you did when you set the parking
brake.) When you remove your foot from the parking
brake pedal,
it will pop up to the released position.
NOTICE:
Driving with the parking brake on can cause
your rear brakes to overheat. You may have to
replace them, and you could also damage other
parts
of your vehicle.
If you are towing a trailer and are parking on any hill,
see “Towing a Trailer” in the Index. That section shows
what to do first to keep the trailer from moving.
2-34
ProCarManuals.com
Page 142 of 444
Locks and Lighting Choices
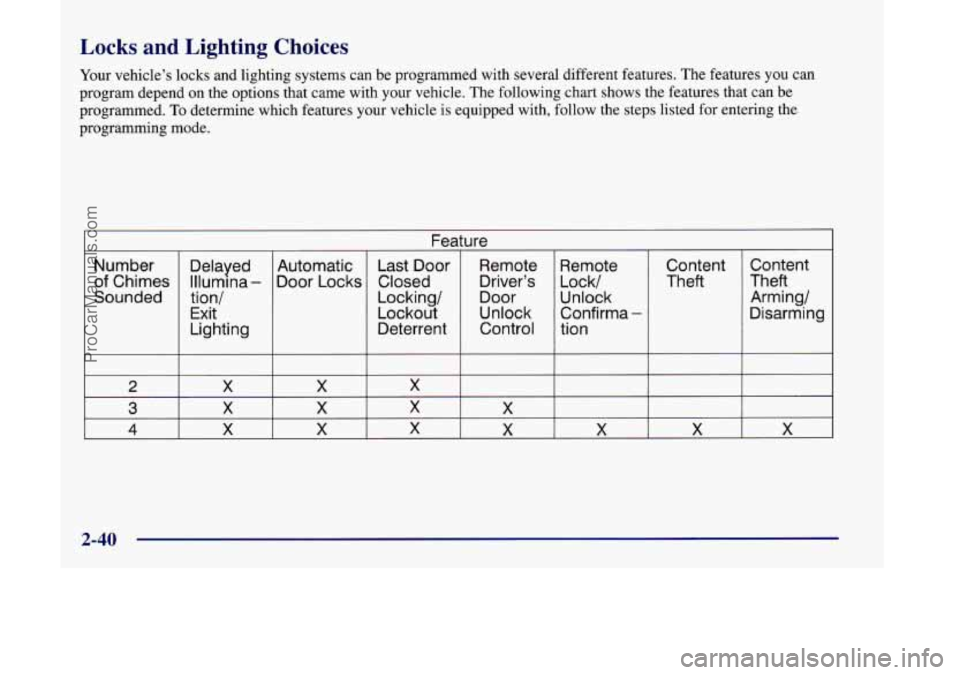
Your vehicle’s locks and lighting systems can be programmed with several different features. The features you can
program depend on the options that came with your vehicle. The following chart shows the features that can be
programmed.
To determine which features your vehicle is equipped with, follow the steps listed for entering the
programming mode.
Number of Chimes
Sounded
2
3
4
Delayed
lllumlna
-
tion/
Exit
Lighting Automatic
Door Locks Feature
Last Door Remote
Closed Driver’s
Locking/ Door
Lockout Unlock
Deterrent Control Remote
Lock/
Unlock
Confirma
-
tion Content
Theft
X I X I X I I I
X I X I X I X I I
X X X X X X
Content
Theft
Arming/
Disarming
A
2-40
ProCarManuals.com
Page 143 of 444

Entering Programming Mode
To program features, your vehicle must be in the
programming mode. Follow these steps:
1.
2.
3.
4.
5.
The Content Theft-Deterrent system (if equipped)
must be disarmed. See “Content Theft-Deterrent
System” in this section.
Remove the BCM PRGRM fuse from the instrument
panel fuse block, located to the right
of the glove
box. (See “Fuses and Circuit Breakers” in the Index.)
Close the driver’s door.
Turn the ignition switch towards you to
ACCESSORY.
Count the number of chimes you hear.
You will hear
two
to four chimes depending on the features your
vehicle is equipped with. Refer to the chart
shown previously.
You can now program your choices.
10 exit the programming mode, follow the steps
listed under “Exiting Programming Mode” later in
this section.
Delayed Illumination and Exit Lighting
With Delayed Illumination, the interior lamps will stay
on for about
25 seconds after all the doors and the
liftgate are closed.
With Exiting Lighting, the interior lamps will come on
and stay on for about
25 seconds whenever you remove
the key from the ignition.
To customize these features to your preference, see
“Programmable Modes” following.
Programmable Modes
Your vehicle can be programmed to one of the
following modes.
Mode 1: Both Features Off (The interior lamps will turn on
or
off at the same instant that a door is opened or closed.)
Mode 2: Delayed Illumination Only (The interior lamps
will stay
on for about 25 seconds after all the doors and
liftgate are closed, or until you lock the doors.)
2-41
ProCarManuals.com
Page 144 of 444

Mode 3: Exit Lighting Only (The interior lamps will
come on whenever you remove the key from the ignition
and stay on for about
25 seconds, or until you lock
the doors.)
Mode 4: Both Features On (This combines Modes 2
and 3.)
Vehicles are delivered programmed in Mode 4.
To change the mode:
1. Follow the instructions for “Entering Programming
Mode” listed previously.
2. Turn the interior lamps dial all the way to the right
and then back slightly to the left.
3. Count the number of chimes you hear. The number
of chimes tells you which mode your vehicle is in.
You can change the mode by turning the interior
lamps dial all the way
to the right and then back
slightly to the
left.
4. Repeat Step 2 until you hear the number of chimes
that matches the mode you want.
The mode you selected is now set. You can either exit
the programming mode by following the instructions
later in this section or program the next feature available
on your vehicle.
Automatic Door Locks
With Automatic Door Locks, all doors will
automatically lock when you shift out of PARK
(P) and
automatically unlock when the ignition is turned to
OFF.
To customize these features to your preference, see
“Programmable Modes” following.
Programmable Modes
Your vehicle can be programmed to one of the
following modes.
Mode 1: Both Features Off (Automatic door locking
and unlocking is disabled. You will always need to
lock your doors manually before driving to increase
occupant safety.)
Mode 2: Automatic Door Locking Only
0 The automatic door unlock feature is turned off.
Shift out of PARK (P) with the ignition on and the
driver’s door closed;
all doors will lock automatically.
Mode 3: Automatic Unlocking with the Ignition Off
Turn off the ignition with the transaxle in PARK (P);
all doors will unlock automatically.
Shift out of PARK (P) with the ignition on and the
driver’s door closed;
all doors will lock automatically.
2-42
ProCarManuals.com
Page 155 of 444
Turn and Lane Change Signals
The turn signal has two upward (for right) and two
downward (for left) positions. These positions allow you
to signal a turn or a lane change.
To signal a
turn, move the lever all the way up or down.
When the
turn is finished, the lever will retwn automatically.
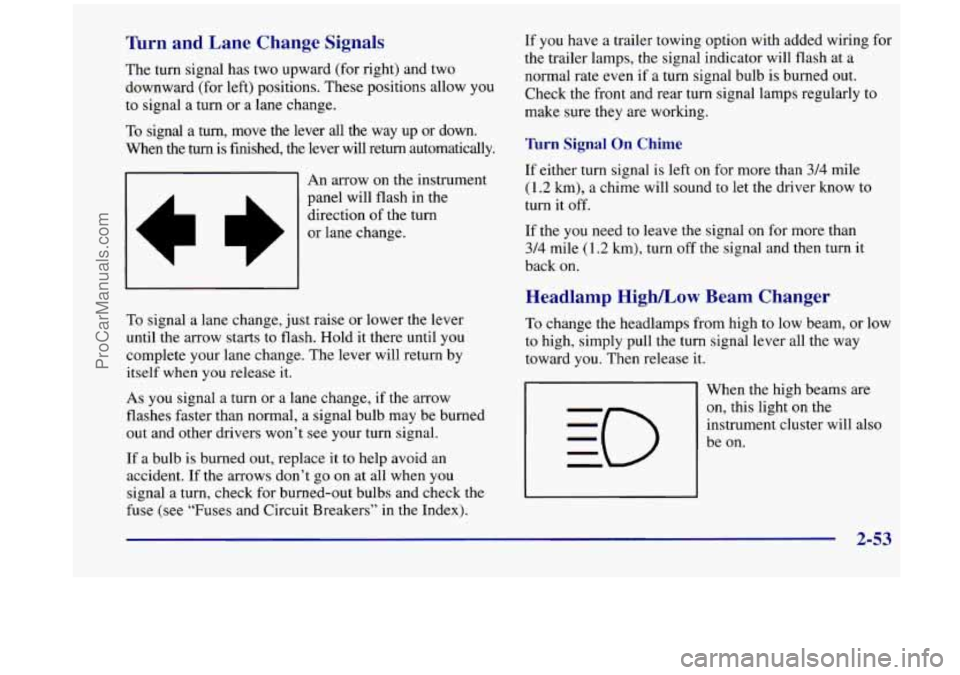
An arrow on the instrument
panel will flash in the
direction of the turn
or lane change.
To signal a lane change, just raise or lower the lever
until the arrow starts to flash. Hold it there until you
complete your lane change. The lever will return by
itself when you release it.
As you signal a turn or a lane change, if the arrow
flashes faster than normal, a signal bulb may be burned
out and other drivers won’t see your turn signal.
If a bulb is burned out, replace it to help avoid an
accident.
If the arrows don’t go on at all when you
signal a turn, check for burned-out bulbs and check the
fuse (see “Fuses and Circuit Breakers”
in the Index). If
you have a trailer towing option with added wiring for
the trailer lamps, the signal indicator will flash at a
normal rate even
if a turn signal bulb is burned out.
Check the front and rear turn signal lamps regularly to
make sure they are working.
Turn Signal On Chime
If either turn signal is left on for more than 3/4 mile
(1.2 km), a chime will sound to let the driver know to
turn it off.
If the you need to leave the signal on for more than
3/4 mile (1.2 km), turn off the signal and then turn it
back on.
Headlamp HigWLow Beam Changer
To change the headlamps from high to low beam, or low
to high, simply pull the turn signal lever all the way
toward you. Then release it.
When the high beams are
on, this light on the
instrument cluster will also
be on.
2-53
ProCarManuals.com
Page 156 of 444

Windshield Wipers Windshield Washer
You control the windshield wipers by turning the band
marked
WIPER.
For a single wiping cycle, turn the band to MIST. Hold
it there until the wipers start, then let go. The wipers will
stop after one cycle.
If you want more cycles, hold the
band on mist longer.
For delayed wiping cycles, you can set the wiper speed
for a long or short delay between wipes. This can be
very useful in light rain or snow. Turn the band to
choose the delay time. The closer to LOW, the shorter
the delay time.
For steady wiping cycles, at low speed, turn the band
away from you to the
LOW position. For high-speed
wiping, turn the band further to
HIGH. To stop the
wipers, move the band to
OFF.
Remember that damaged wiper blades may prevent you
from seeing well enough to drive safely. To avoid damage,
be sure to clear ice and snow
fiom the wiper blades before
using them.
If they’re frozen to the windshield, carefidly
loosen or thaw them.
If your blades do become damaged,
get new blades or blade inserts.
Heavy snow or ice can overload your wipers.
A circuit
breaker will stop them until the motor cools. Clear away
snow or ice to prevent an overload. To
wash your windshield, press and hold the windshield
washer paddle. The washers and wipers will operate.
When you release the paddle, the washers will stop, and
the wipers will continue to operate for two cycles, unless
your wipers had already been on. In that case, the wipers
will resume the wiper speed you had selected
earl+.
In freezing weather, don’t use your washer until
the windshield is warmed. Otherwise the washer
fluid can form ice on the windshield, blocking
your vision.
2-54
ProCarManuals.com
Page 160 of 444
Increasing Speed While Using Cruise Control
There are two ways to go to a higher speed:
0 Use the accelerator pedal to get to the higher speed.
Push the
SET button at the end of the lever, then
release the button and the accelerator pedal. You’ll
now cruise at the higher speed.
Move the cruise switch from ON to WA. Hold it
there until you get up to the speed you want, and
then release the switch.
(To increase your speed in
very small amounts, move the switch
to WA for
less than half a second and then release it. Each time
you do this, your vehicle will go about
1 mph
(1.6 krn/h) faster.)
The accelerate feature will work whether or not you
have set an initial cruise control speed.
Reducing Speed While Using Cruise Control
There are two ways to reduce speed while using
cruise control:
0 Push in the button at the end of the lever until you
reach the lower speed you want, then release
it.
0 To slow down in very small amounts, push the
button for less than half a second. Each time you do
this, you’ll go
1 mph (1.6 km/h) slower.
Passing Another Vehicle While Using Cruise Control
Use the accelerator pedal to increase your speed. When
you take your foot off the pedal, your vehicle will slow
down to the cruise control speed you set earlier.
Using Cruise Control on Hills
How well your cruise control will work on hills depends
upon your speed, load and the steepness of the hills.
When going up steep hills, you may have to step on the
accelerator pedal to maintain your speed. When going
downhill, you may have to brake or shift to a lower gear
to keep your speed down. Of course, applying the brake
takes you out of cruise control. Many drivers find this to
be too much trouble and don’t use cruise control on
steep hills.
Ending Cruise Control
There are two ways to turn off the cruise control:
Step lightly on the brake pedal; or
Move the cruise switch to OFF.
Erasing Cruise Speed Memory
When you turn off the cruise control or the ignition,
your cruise control set speed memory is erased.
2-58
ProCarManuals.com