Oldsmobile Silhouette 1999 s Manual PDF
Silhouette 1999
Oldsmobile
Oldsmobile
https://www.carmanualsonline.info/img/31/9591/w960_9591-0.png
Oldsmobile Silhouette 1999 s Manual PDF
Trending: capacities and specifications, flat tire, fuel pump, manual transmission, ECO mode, windshield wipers, spare tire
Page 71 of 432
yellowblue
1-65
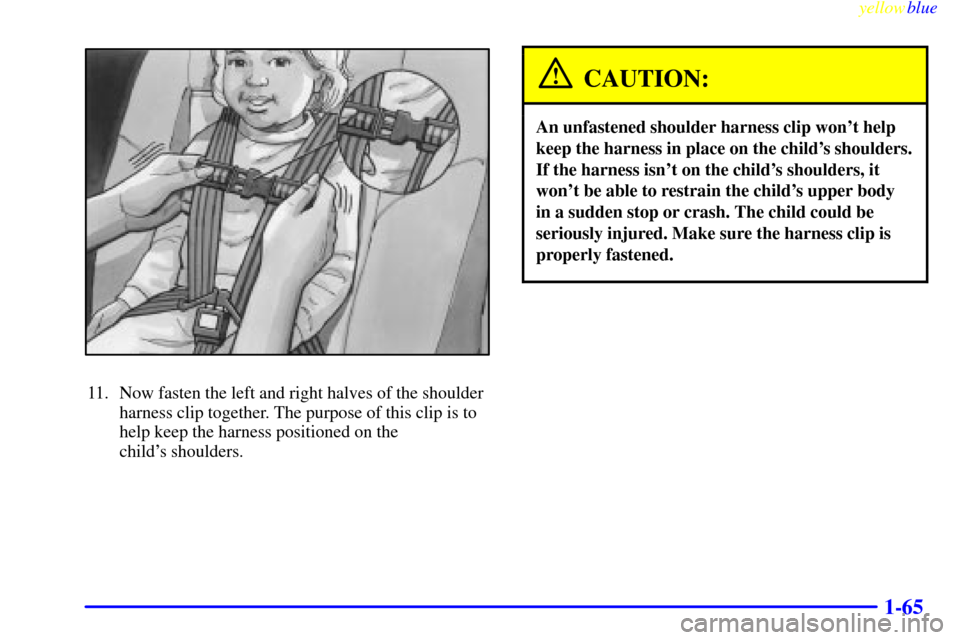
11. Now fasten the left and right halves of the shoulder
harness clip together. The purpose of this clip is to
help keep the harness positioned on the
child's shoulders.
CAUTION:
An unfastened shoulder harness clip won't help
keep the harness in place on the child's shoulders.
If the harness isn't on the child's shoulders, it
won't be able to restrain the child's upper body
in a sudden stop or crash. The child could be
seriously injured. Make sure the harness clip is
properly fastened.
Page 72 of 432
yellowblue
1-66
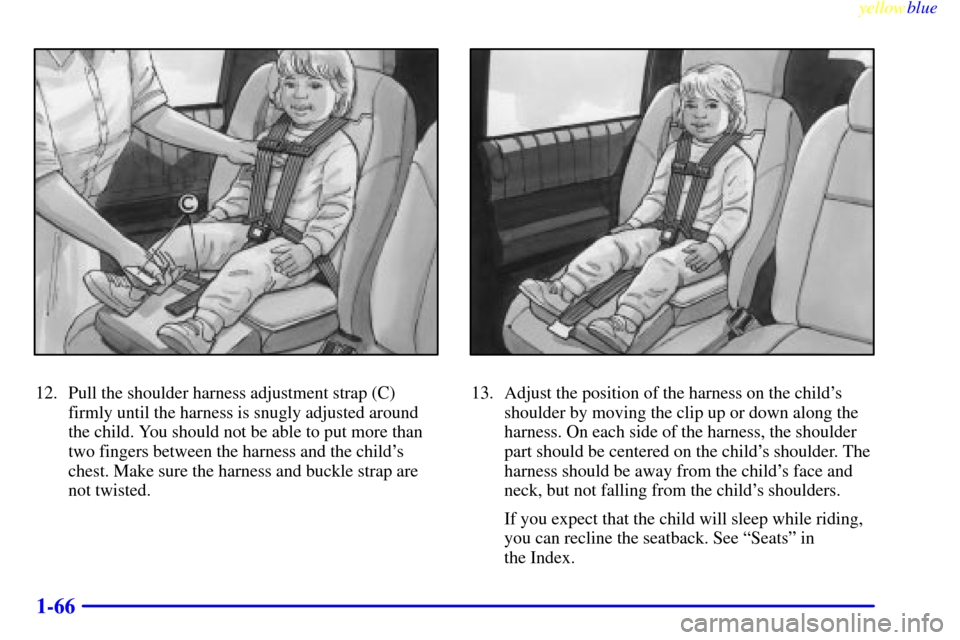
12. Pull the shoulder harness adjustment strap (C)
firmly until the harness is snugly adjusted around
the child. You should not be able to put more than
two fingers between the harness and the child's
chest. Make sure the harness and buckle strap are
not twisted.13. Adjust the position of the harness on the child's
shoulder by moving the clip up or down along the
harness. On each side of the harness, the shoulder
part should be centered on the child's shoulder. The
harness should be away from the child's face and
neck, but not falling from the child's shoulders.
If you expect that the child will sleep while riding,
you can recline the seatback. See ªSeatsº in
the Index.
Page 73 of 432
yellowblue
1-67 Removing the Child from the Built-In
Child Restraint
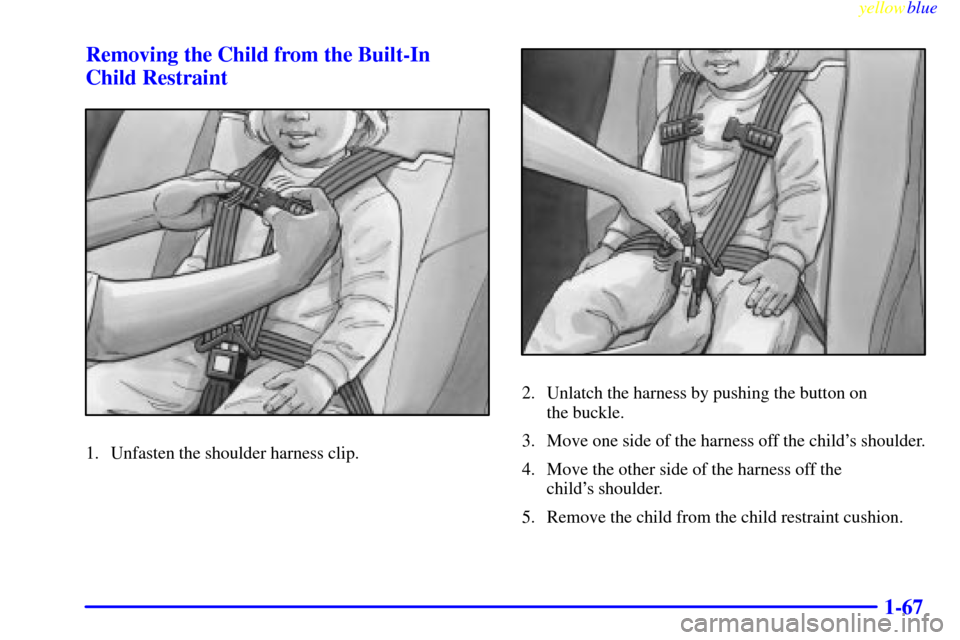
1. Unfasten the shoulder harness clip.
2. Unlatch the harness by pushing the button on
the buckle.
3. Move one side of the harness off the child's shoulder.
4. Move the other side of the harness off the
child's shoulder.
5. Remove the child from the child restraint cushion.
Page 74 of 432
yellowblue
1-68 Storing the Built-In Child Restraint
Always properly store the built-in child restraint before
using the vehicle's lap
-shoulder belt.
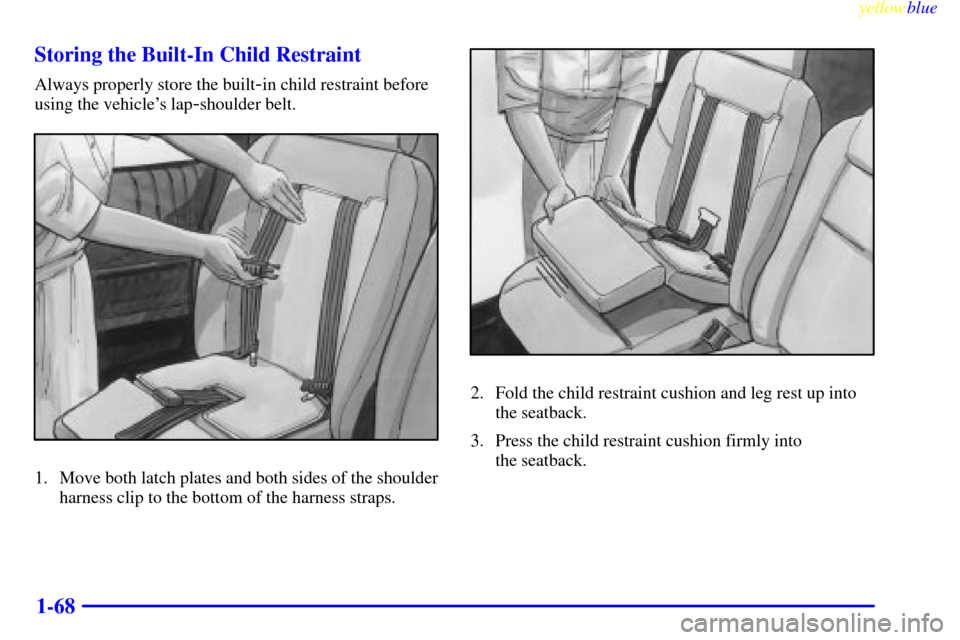
1. Move both latch plates and both sides of the shoulder
harness clip to the bottom of the harness straps.
2. Fold the child restraint cushion and leg rest up into
the seatback.
3. Press the child restraint cushion firmly into
the seatback.
Page 75 of 432
yellowblue
1-69
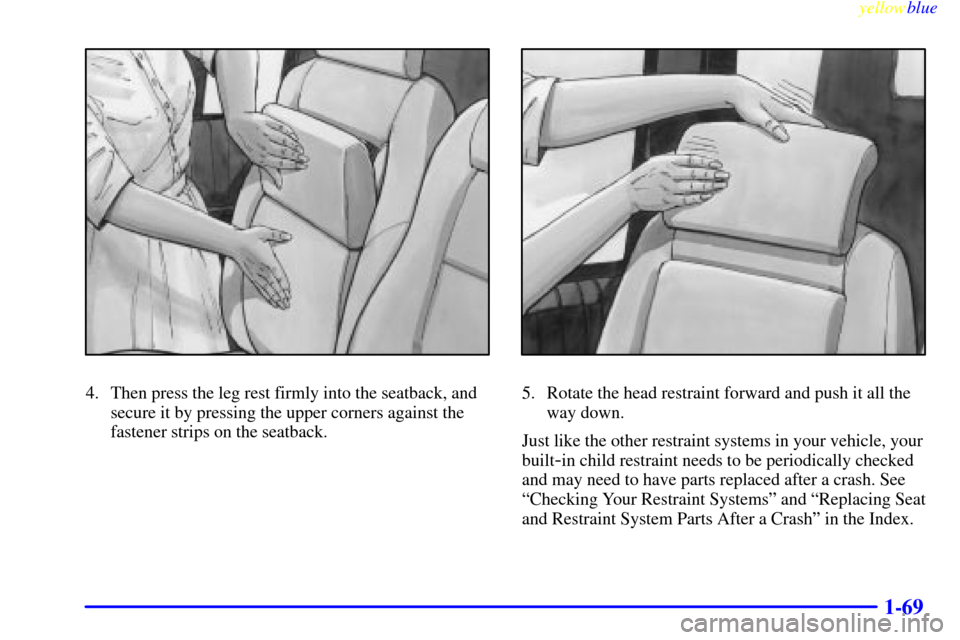
4. Then press the leg rest firmly into the seatback, and
secure it by pressing the upper corners against the
fastener strips on the seatback.5. Rotate the head restraint forward and push it all the
way down.
Just like the other restraint systems in your vehicle, your
built
-in child restraint needs to be periodically checked
and may need to have parts replaced after a crash. See
ªChecking Your Restraint Systemsº and ªReplacing Seat
and Restraint System Parts After a Crashº in the Index.
Page 76 of 432
yellowblue
1-70
Child Restraints
Every time infants and young children ride in
vehicles, they should have protection provided by
appropriate restraints.
Q:What are the different types of add-on
child restraints?
A:Add-on child restraints are available in four basic
types. When selecting a child restraint, take into
consideration not only the child's weight and size,
but also whether or not the restraint will be
compatible with the motor vehicle in which it will
be used.
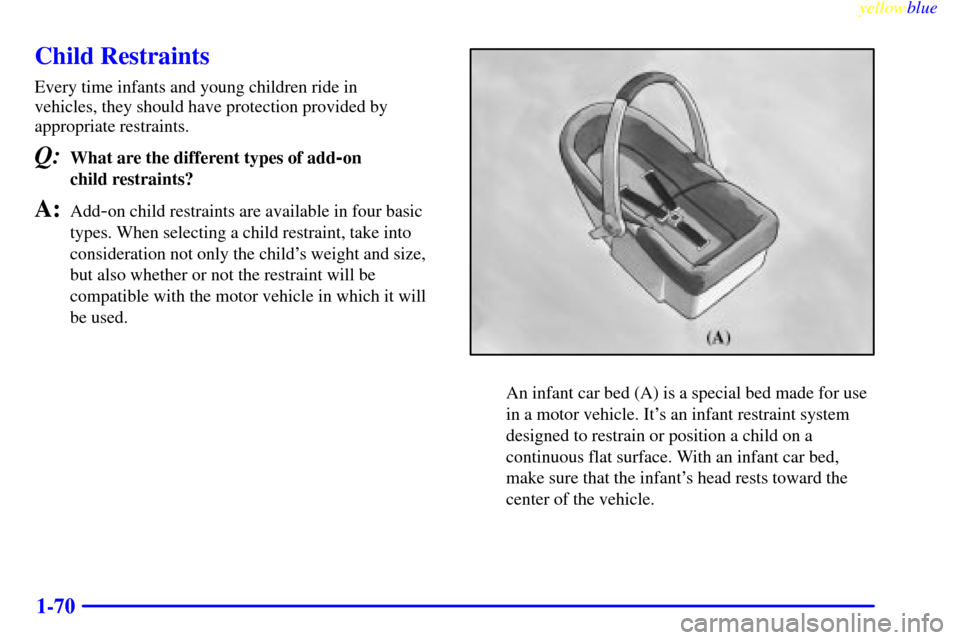
An infant car bed (A) is a special bed made for use
in a motor vehicle. It's an infant restraint system
designed to restrain or position a child on a
continuous flat surface. With an infant car bed,
make sure that the infant's head rests toward the
center of the vehicle.
Page 77 of 432
yellowblue
1-71
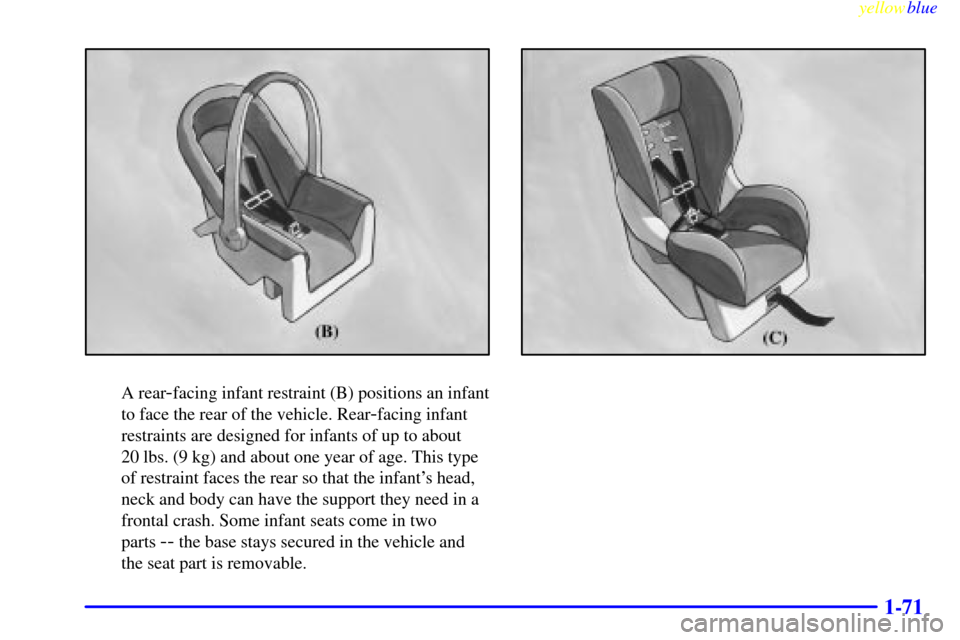
A rear-facing infant restraint (B) positions an infant
to face the rear of the vehicle. Rear
-facing infant
restraints are designed for infants of up to about
20 lbs. (9 kg) and about one year of age. This type
of restraint faces the rear so that the infant's head,
neck and body can have the support they need in a
frontal crash. Some infant seats come in two
parts
-- the base stays secured in the vehicle and
the seat part is removable.
Page 78 of 432
yellowblue
1-72
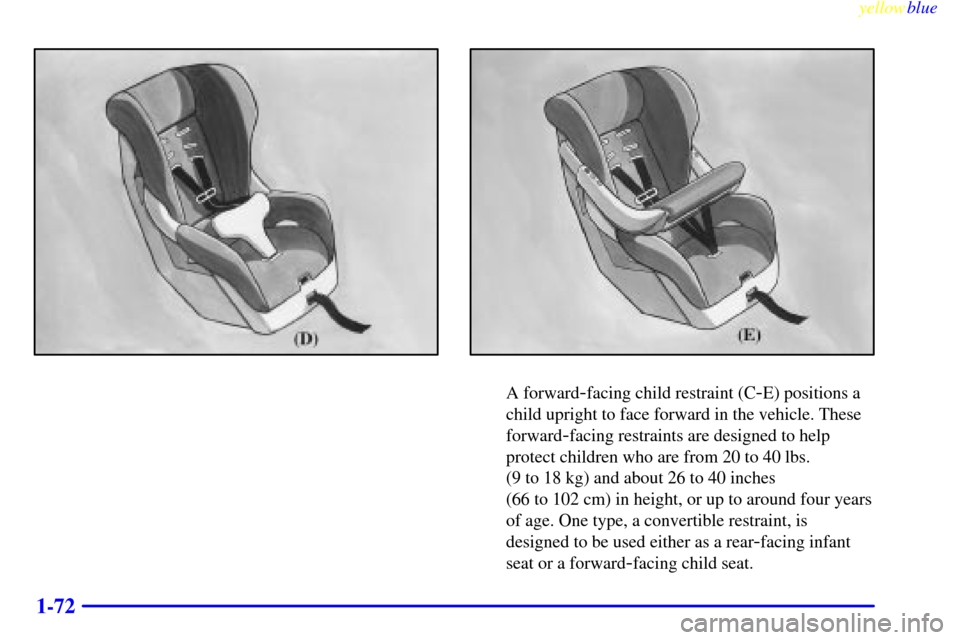
A forward-facing child restraint (C-E) positions a
child upright to face forward in the vehicle. These
forward
-facing restraints are designed to help
protect children who are from 20 to 40 lbs.
(9 to 18 kg) and about 26 to 40 inches
(66 to 102 cm) in height, or up to around four years
of age. One type, a convertible restraint, is
designed to be used either as a rear
-facing infant
seat or a forward
-facing child seat.
Page 79 of 432
yellowblue
1-73
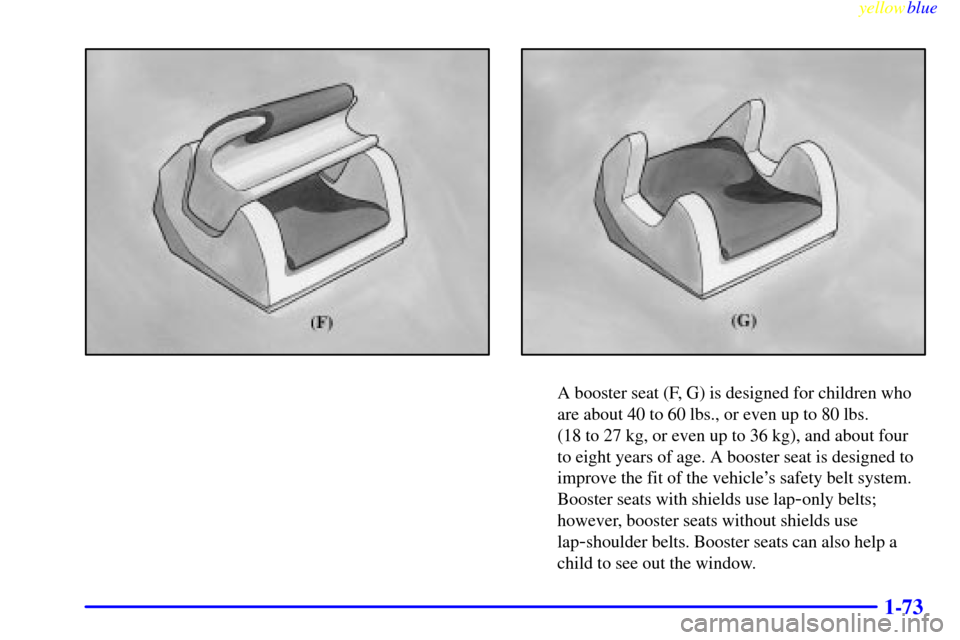
A booster seat (F, G) is designed for children who
are about 40 to 60 lbs., or even up to 80 lbs.
(18 to 27 kg, or even up to 36 kg), and about four
to eight years of age. A booster seat is designed to
improve the fit of the vehicle's safety belt system.
Booster seats with shields use lap
-only belts;
however, booster seats without shields use
lap
-shoulder belts. Booster seats can also help a
child to see out the window.
Page 80 of 432
yellowblue
1-74
When choosing a child restraint, be sure the child
restraint is designed to be used in a vehicle. If it is, it
will have a label saying that it meets federal motor
vehicle safety standards.
Then follow the instructions for the restraint. You may
find these instructions on the restraint itself or in a
booklet, or both. These restraints use the belt system in
your vehicle, but the child also has to be secured within
the restraint to help reduce the chance of personal injury.
The instructions that come with the infant or child
restraint will show you how to do that. Both the owner's
manual and the child restraint instructions are important,
so if either one of these is not available, obtain a
replacement copy from the manufacturer.
Where to Put the Restraint
Accident statistics show that children are safer if they
are restrained in the rear rather than the front seat. We at
General Motors therefore recommend that you put your
child restraint in a rear seat. Never put a rear
-facing
child restraint in the front passenger seat. Here's why:
CAUTION:
A child in a rear-facing child restraint can be
seriously injured or killed if the right front
passenger's air bag inflates, even though your
vehicle has Next Generation frontal air bags. This
is because the back of the rear
-facing child
restraint would be very close to the inflating air
bag. Always secure a rear
-facing child restraint
in a rear seat.
You may secure a forward-facing child restraint
in the right front seat, but before you do, always
move the front passenger seat as far back as it
will go. It's better to secure the child restraint in
a rear seat.
Wherever you install it, be sure to secure the child
restraint properly.
Keep in mind that an unsecured child restraint can move
around in a collision or sudden stop and injure people in
the vehicle. Be sure to properly secure any child
restraint in your vehicle
-- even when no child is in it.
Trending: mileage, remote control, emergency towing, heater, maintenance schedule, power steering fluid, horn
