charging OPEL AMPERA E 2017.5 Manual user
[x] Cancel search | Manufacturer: OPEL, Model Year: 2017.5, Model line: AMPERA E, Model: OPEL AMPERA E 2017.5Pages: 265, PDF Size: 6.24 MB
Page 90 of 265
88Instruments and controls
Charging
Charge mode selection 3 197.
Programmable charging
Programmable charging 3 197.
Energy information To view Energy details , Energy usage
score and Efficiency History touch
Energy and then Information . Touch
< or > to go to the next screen.
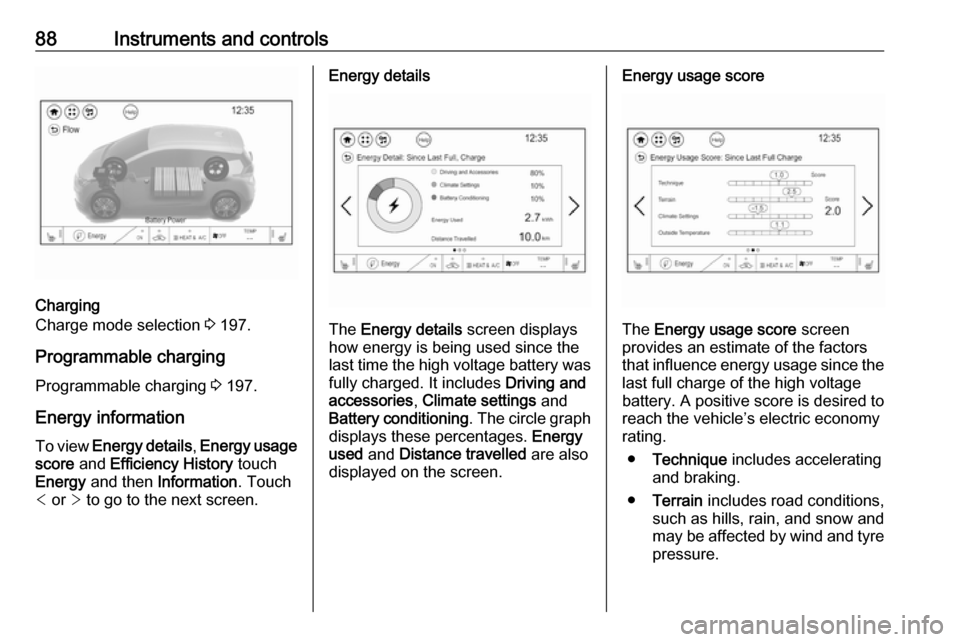
Energy details
The Energy details screen displays
how energy is being used since the
last time the high voltage battery was
fully charged. It includes Driving and
accessories , Climate settings and
Battery conditioning . The circle graph
displays these percentages. Energy
used and Distance travelled are also
displayed on the screen.
Energy usage score
The Energy usage score screen
provides an estimate of the factors
that influence energy usage since the last full charge of the high voltage
battery. A positive score is desired to
reach the vehicle’s electric economy
rating.
● Technique includes accelerating
and braking.
● Terrain includes road conditions,
such as hills, rain, and snow and
may be affected by wind and tyre
pressure.
Page 91 of 265
Instruments and controls89●Climate settings includes how the
heating and air conditioning are
used.
● Outside temperature includes the
effect that hot or cold air has on
vehicle aerodynamics.
● Score is the sum of the individual
scores.
The individual scores provide an
understanding of how electric
economy are different from day-to-
day, even when travelling the same
route.
All values are reset after a complete
charge and may not be stable until approximately 16 km have beendriven.Efficiency History
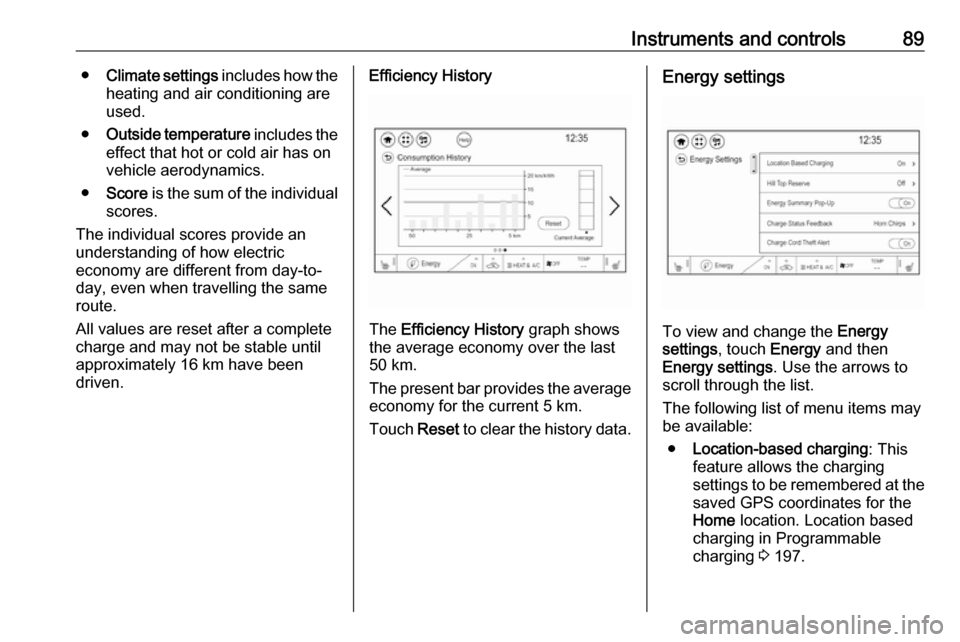
The Efficiency History graph shows
the average economy over the last
50 km.
The present bar provides the average economy for the current 5 km.
Touch Reset to clear the history data.
Energy settings
To view and change the Energy
settings , touch Energy and then
Energy settings . Use the arrows to
scroll through the list.
The following list of menu items may
be available:
● Location-based charging : This
feature allows the charging settings to be remembered at the
saved GPS coordinates for the
Home location. Location based
charging in Programmable
charging 3 197.
Page 92 of 265
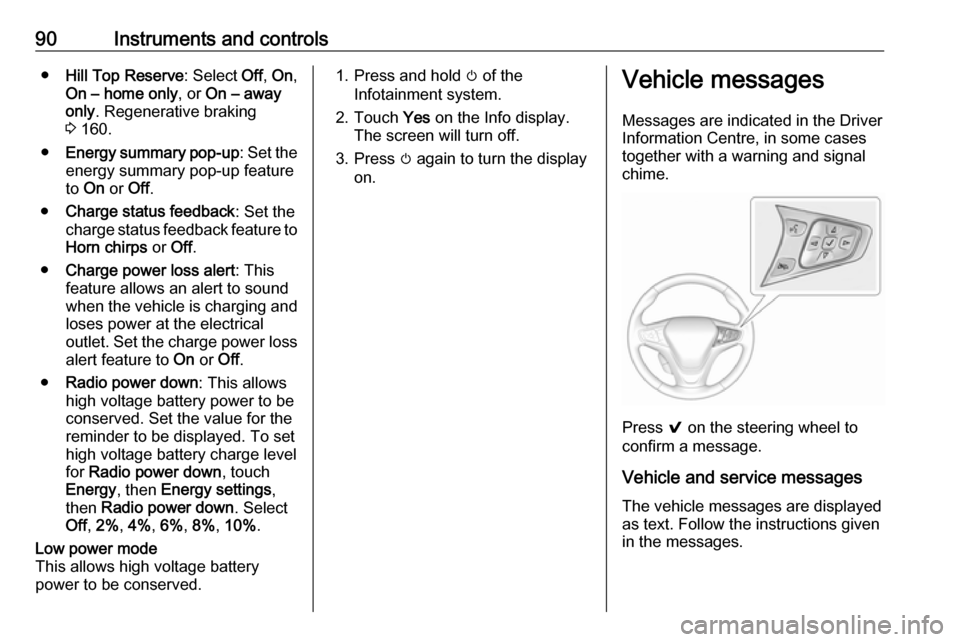
90Instruments and controls●Hill Top Reserve : Select Off, On ,
On – home only , or On – away
only . Regenerative braking
3 160.
● Energy summary pop-up : Set the
energy summary pop-up feature
to On or Off.
● Charge status feedback : Set the
charge status feedback feature to Horn chirps or Off.
● Charge power loss alert : This
feature allows an alert to sound
when the vehicle is charging and
loses power at the electrical
outlet. Set the charge power loss alert feature to On or Off.
● Radio power down : This allows
high voltage battery power to be
conserved. Set the value for the
reminder to be displayed. To set
high voltage battery charge level
for Radio power down , touch
Energy , then Energy settings ,
then Radio power down . Select
Off , 2% , 4% , 6% , 8% , 10% .Low power mode
This allows high voltage battery
power to be conserved.1. Press and hold m of the
Infotainment system.
2. Touch Yes on the Info display.
The screen will turn off.
3. Press m again to turn the display
on.Vehicle messages
Messages are indicated in the Driver
Information Centre, in some cases
together with a warning and signal
chime.
Press 9 on the steering wheel to
confirm a message.
Vehicle and service messages
The vehicle messages are displayed
as text. Follow the instructions given
in the messages.
Page 93 of 265

Instruments and controls91Some important messages may
appear additionally in the Info display.
Some messages only pop-up for a
few seconds.
Warning chimes
When starting the propulsion
system or whilst driving
Only one warning chime will sound at a time.
The warning chime regarding not
fastened seat belts has priority over
any other warning chime.
● If seat belt is not fastened.
● If a door or the tailgate is not fully
closed when starting off.
● If a certain speed is exceeded with parking brake applied.
● If approaching a vehicle ahead too rapidly.
● If a programmed speed or speed
limit is exceeded.
● If a warning message appears in the Driver Information Centre.
● If the electronic key is not in the passenger compartment.● If the parking assist detects anobject.
● If an unintended lane change occurs.
● If safety function of the power tailgate detects obstacles in the
moving area.
When the vehicle is parked and/or the driver's door is opened
● With exterior lights on.
Battery voltage When the vehicle battery voltage is
running low, a warning message will
appear in the Driver Information
Centre.
1. Switch off any electrical consumers which are not requiredfor a safe drive, e.g. seat heating,
heated rear window or other main consumers.
2. Charge the vehicle battery by driving continuously for a while or
by using a charging device.The warning message will disappear
after the vehicle has been started
twice without a voltage drop.
If the vehicle battery cannot be
recharged, have the cause of the fault
remedied by a workshop.
Page 137 of 265
Infotainment system135Pairing a deviceImportant information ● Up to ten devices can be paired to the system.
● Only one paired device can be connected to the Infotainment
system at a time.
● Pairing only needs to be carried out once, unless the device is
deleted from the list of paired
devices. If the device has been connected previously, the
Infotainment system establishes the connection automatically.
● Bluetooth operation considerably
drains the device's battery.
Therefore, connect the device to
the USB port for charging.
Pairing a new device 1. Activate the Bluetooth function of the Bluetooth device. For further
information, see the operating
instructions for the Bluetooth
device.
2. Press p and then select 1 in the
top left corner of the screen todisplay the application overview
screen.
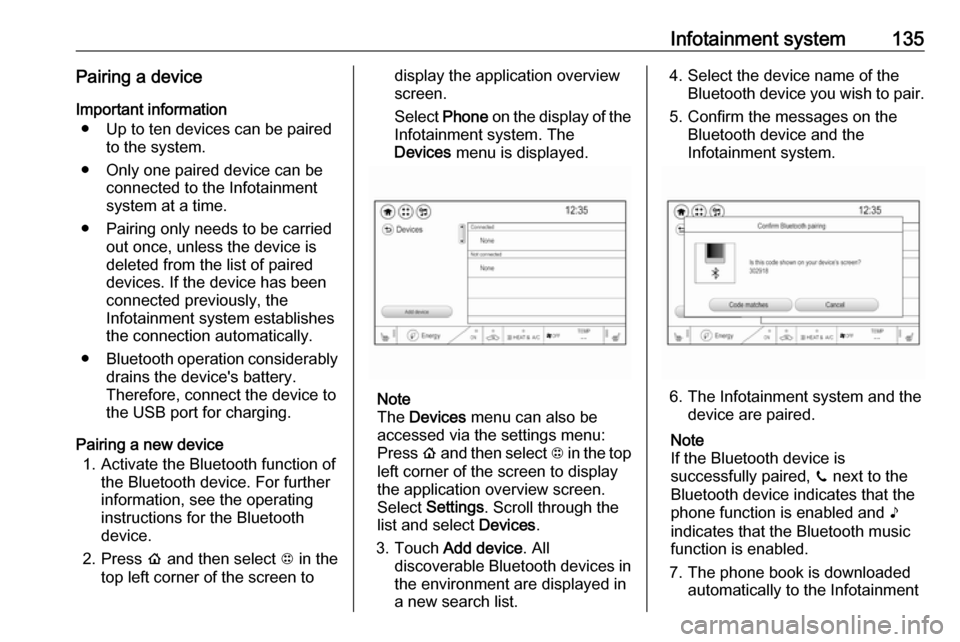
Select Phone on the display of the
Infotainment system. The Devices menu is displayed.
Note
The Devices menu can also be
accessed via the settings menu: Press p and then select 1 in the top
left corner of the screen to display
the application overview screen.
Select Settings . Scroll through the
list and select Devices.
3. Touch Add device . All
discoverable Bluetooth devices in
the environment are displayed in
a new search list.
4. Select the device name of the Bluetooth device you wish to pair.
5. Confirm the messages on the Bluetooth device and the
Infotainment system.
6. The Infotainment system and the device are paired.
Note
If the Bluetooth device is
successfully paired, ? next to the
Bluetooth device indicates that the phone function is enabled and >
indicates that the Bluetooth music
function is enabled.
7. The phone book is downloaded automatically to the Infotainment
Page 150 of 265

148Driving and operatingDriving and
operatingDriving hints ............................... 148
Driving economically ...............148
Control of the vehicle ...............149
Starting and operating ...............149
New vehicle running-in ............149
Power button ........................... 149
Retained power off ..................151
Starting and stopping the vehicle .................................... 151
Parking .................................... 152
Electric vehicle operation modes ........................................ 154
Operation ................................. 154
Drive modes ............................ 154
Electric drive unit .......................155
Operation ................................. 155
Brakes ........................................ 158
Antilock brake system .............158
Parking brake .......................... 159
Regenerative braking ..............160
Ride control systems .................162
Traction Control system ..........162
Electronic Stability Control ......163Driver assistance systems .........164
Cruise control .......................... 164
Speed limiter ........................... 165
Forward collision alert .............167
Following distance indication ...169
Active emergency braking .......169
Front pedestrian protection .....172
Parking assist .......................... 174
Side blind spot alert .................181
Lane change alert ....................183
Panoramic view system ...........184
Rear view camera ...................185
Rear cross traffic alert .............187
Traffic sign assistant ................188
Lane keep assist .....................191
Charging .................................... 193
Programmable charging ..........197
Programmed charging override .................................. 203
Charging status .......................204
Charge cord ............................. 205
Electrical requirements ............208
Towing ....................................... 209
General information .................209Driving hints
Driving economically The following advice is intended to
help maximise energy efficiency and
range.
In colder temperatures, while these
efficiency tips will help, the electric
vehicle's driving range may be lower
due to higher energy usage.
The weight of additional cargo in the
vehicle affects efficiency and range.
Avoid carrying more than is needed.
Avoid unnecessary use of electrical
accessories. Power used for
functions other than propelling the
vehicle will reduce electric vehicle
range.
Always keep the tyres properly
inflated and the vehicle properly
aligned.
Driving style
Avoid unnecessary rapid
accelerations and decelerations.
Use cruise control when appropriate.
Page 163 of 265

Driving and operating161Regeneration on demand
Regeneration on demand allows
increased deceleration by pressing
and holding the steering wheel
paddle. It works in D (Drive) and L
(Low). The accelerator pedal must be mostly released for it to work.
If regenerative braking is active, the regenerative active icon with arrowsis shown as green. Regenerative
braking 3 77.
Cruise control will switch off and the
brake lights may come on when this
feature is activated.
If the vehicle is in D (Drive) and is
brought to a complete stop while the regenerative braking paddle is held,
the vehicle will not creep forward
when the paddle is released. The
accelerator pedal must be pressed to
move the vehicle forward. Refer to
"One-pedal driving” in Electric drive
unit 3 155.
If the vehicle is on a steep gradient,
the brake pedal will be required to
hold the vehicle.
The brake controller applies the
hydraulic brakes using a pump. You
may hear the pump during some
braking manoeuvres, such as rapid
brake application or during
regenerative braking as the vehicle
comes to a stop. This is normal
operation.
Hill Top ReserveHill Top Reserve enables you to
maximise regenerative braking
efficiency when driving from a higher
elevation immediately after charging.
When switched on, this feature will
stop the charging process before thehigh voltage battery is full, allowing space for energy from regenerative
braking.
This feature also integrates with the Location-based charging feature,
allowing you to configure the system
so it is enabled when you are at home ( On – home only ) or away (On – away
only ). See "Location based charging"
in Programmable charging 3 197.
Page 195 of 265

Driving and operating193Switch off the system if the system is
disturbed by tar marks, shadows,
road cracks, temporary or
construction lane markings, or other
road imperfections.9 Warning
Always keep your attention on the
road and maintain proper vehicle
position within the lane, otherwise
vehicle damage, injury or death
could occur.
Lane keep assist does not
continuously steer the vehicle.
The system may not keep the
vehicle in the lane or give an alert,
even if a lane marking is detected.
The steering of the lane keep
assist may not be sufficient to
avoid a lane departure.
The system may not detect hands-
off driving due to external
influences (road condition and
surface, weather etc). The driver
has full responsibility to control the
vehicle and is always required to keep the hands on the steeringwheel while driving.
Using the system while driving on
slippery roads could cause loss of
control of the vehicle and a crash.
Switch the system off.Charging
This section explains the process of charging the vehicle's high voltage
battery. Do not allow the vehicle to
remain in places with extremes of
temperature for long periods without
being driven or plugged in.
It is recommended to keep the vehicle
plugged in, even if fully charged, to
keep the high voltage battery
temperature ready for the next drive.
The vehicle must be plugged in when
the temperatures are below -25° C, to operate properly and to maximise
high voltage battery life.
However, we recommend plugging in
the vehicle when temperatures drop
below 0° C or raise above 32° C.
When using the portable charge cord, it will take approximately 33 hours to
charge the vehicle with the
10 ampere setting.
When using a 230-volt charging
station, it will take approximately
10 hours to charge the vehicle with the 32 ampere setting.
Page 196 of 265
194Driving and operatingCharge times will vary based on high
voltage battery condition and outside
temperature. There are three ways to program how the vehicle is charged.
Programmable charging 3 197.
The charging system may run fans and pumps resulting in noises coming
from the vehicle while it is turned off.
Additional clicking sounds may be
caused by the electrical devices used
while charging.
While the charge cord is plugged into the vehicle, the vehicle cannot be
driven.
When to charge
When the high voltage battery is getting low, charging messages may be displayed.
The Charge vehicle soon message
indicates that the driving range is low
and the vehicle needs to be charged
soon. As the charge level drops, the
Propulsion power is reduced
message is displayed and the
accelerator pedal response is
reduced. In addition, the remainingrange value will change to Low
indicating the vehicle should be
charged immediately.
When the energy is fully depleted, the Out of power. Charge vehicle now
message is displayed and the vehicle
slows to a stop. Brake and steering
assist will still operate. Once the
vehicle has stopped, switch the
vehicle off.
AC (alternating current) charging
Start charging
A portable charge cord used to
charge the vehicle high voltage
battery is stored under the rear floor
storage cover in the load
compartment.
1. Shift into P (Park) and switch off
the vehicle.
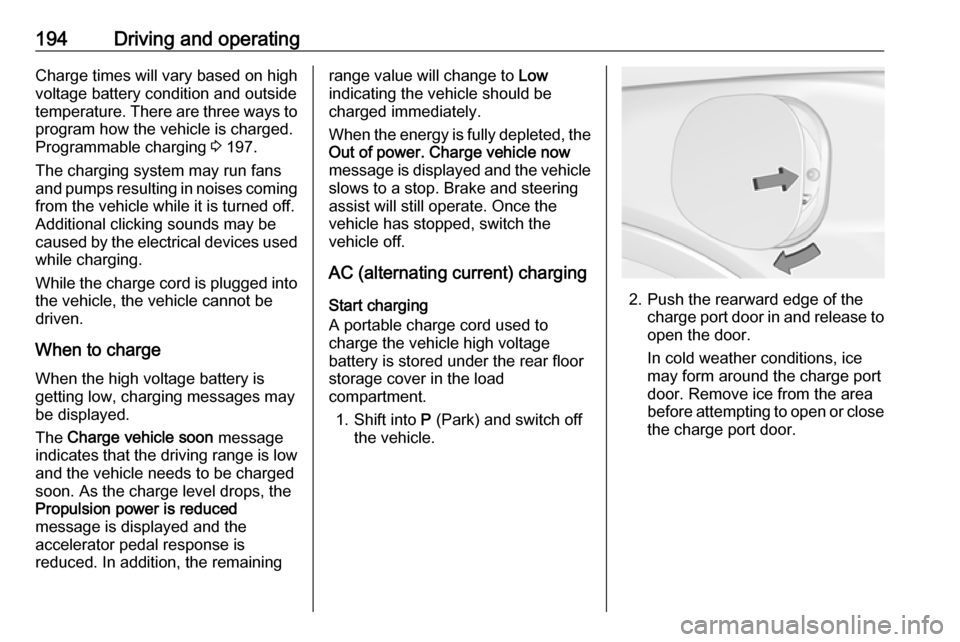
2. Push the rearward edge of the charge port door in and release to
open the door.
In cold weather conditions, ice
may form around the charge port
door. Remove ice from the area
before attempting to open or close
the charge port door.
Page 197 of 265

Driving and operating195
3. Open the tailgate. Lift the rearfloor storage cover and remove
the charge cord.
4. Plug the charge cord into the electrical outlet. Electrical
requirements 3 208.
Verify the charge cord status.
Charge cord 3 205.
Select the appropriate charge
level. See "Charge limit selection" in Programmable charging
3 197.5. Plug in the vehicle plug of the
charge cord into the charge port
on the vehicle. Verify that the
charging status indicator
illuminates on top of the
instrument panel and an audible
beep occurs. Charging status
3 204.
6. Once charging, the vehicle plug will be locked to the charge port
and cannot be disconnected while
charging is active.
Stop charging 1. To stop charging, when inside the
vehicle, use the Stop button on
the Charging screen. See
"Temporary charge mode
override and cancel” in Programmable charging 3 197.
Additionally, the stop charge button on the radio remote control may also be used. Press and hold
5 on the radio remote control.
This will also unlock the vehicle
plug.
2. Unplug the vehicle plug of the charge cord from the vehicle.
3. Close the charge port door by pressing firmly in the centre until it
engages.
4. Unplug the charge cord from the electrical outlet.
5. Place the charge cord into the storage compartment.