windscreen OPEL AMPERA E 2018.5 Owner's Guide
[x] Cancel search | Manufacturer: OPEL, Model Year: 2018.5, Model line: AMPERA E, Model: OPEL AMPERA E 2018.5Pages: 273, PDF Size: 6.6 MB
Page 193 of 273
Driving and operating191Alternatively, 9 can be pressed for
3 seconds to clear the content of the
page.
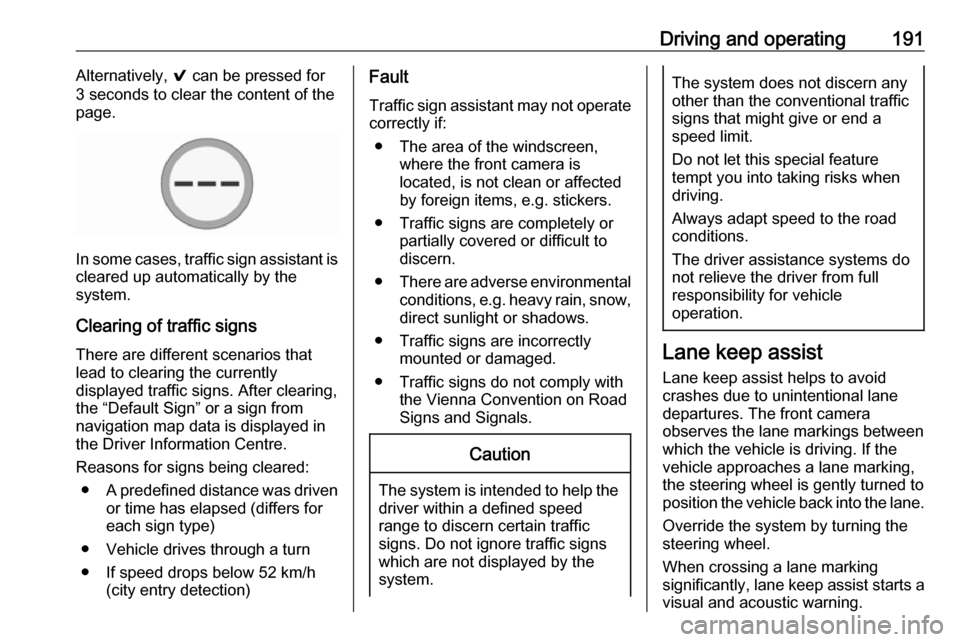
In some cases, traffic sign assistant is
cleared up automatically by the
system.
Clearing of traffic signs
There are different scenarios that
lead to clearing the currently
displayed traffic signs. After clearing,
the “Default Sign” or a sign from
navigation map data is displayed in
the Driver Information Centre.
Reasons for signs being cleared: ● A predefined distance was driven
or time has elapsed (differs for
each sign type)
● Vehicle drives through a turn
● If speed drops below 52 km/h (city entry detection)
Fault
Traffic sign assistant may not operate
correctly if:
● The area of the windscreen, where the front camera is
located, is not clean or affected
by foreign items, e.g. stickers.
● Traffic signs are completely or partially covered or difficult to
discern.
● There are adverse environmental
conditions, e.g. heavy rain, snow,
direct sunlight or shadows.
● Traffic signs are incorrectly mounted or damaged.
● Traffic signs do not comply with the Vienna Convention on Road
Signs and Signals.Caution
The system is intended to help the driver within a defined speed
range to discern certain traffic
signs. Do not ignore traffic signs
which are not displayed by the
system.
The system does not discern any other than the conventional traffic
signs that might give or end a
speed limit.
Do not let this special feature
tempt you into taking risks when
driving.
Always adapt speed to the road
conditions.
The driver assistance systems do not relieve the driver from full
responsibility for vehicle
operation.
Lane keep assist
Lane keep assist helps to avoid
crashes due to unintentional lane
departures. The front camera
observes the lane markings between
which the vehicle is driving. If the
vehicle approaches a lane marking, the steering wheel is gently turned to
position the vehicle back into the lane.
Override the system by turning the
steering wheel.
When crossing a lane marking
significantly, lane keep assist starts a
visual and acoustic warning.
Page 195 of 273
Driving and operating193timing of alert and the occurrence of
alert. Move the steering wheel to stop
the alert.
Deactivation The system is deactivated by
pressing a. The LED in the button
extinguishes.
The system is reactivated the next time the vehicle is switched on.
Fault
The system performance may be affected by:
● windscreen not clean or affected by foreign items, e.g. stickers
● close vehicles ahead
● banked roads
● winding or hilly roads
● road edges
● roads with poor lane markings
● sudden lighting changes
● adverse environmental conditions e.g. heavy rain or
snow
● vehicle modifications, e.g. tyresSwitch off the system if the system is
disturbed by tar marks, shadows,
road cracks, temporary or
construction lane markings, or other
road imperfections.9 Warning
Always keep your attention on the
road and maintain proper vehicle
position within the lane, otherwise
vehicle damage, injury or death
could occur.
The system does not detect
pedestrians, cyclists or animals on
the road. Steer the vehicle
manually to avoid injuries and
deaths.
Lane keep assist does not
continuously steer the vehicle.
The system may not keep the
vehicle in the lane or give an alert, even if a lane marking is detected.
The steering of the lane keep
assist may not be sufficient to
avoid a lane departure.
The system may not detect hands-
off driving due to external
influences (road condition and
surface, weather etc). The driver
has full responsibility to control the vehicle and is always required tokeep the hands on the steeringwheel while driving.
Using the system while driving on
slippery roads could cause loss of control of the vehicle and a crash.
Switch off the system.
Page 206 of 273

204Driving and operatingProgrammable charging disabled
When the programmable charging
system is disabled, the Unable to
charge screen will be displayed.
Programmed charging override
To temporarily override a delayed charge event, unplug the charge cord from the charge port and then plug it
back in within 5 seconds. A single
horn chirp will sound and charging will begin immediately.
To cancel a temporary override,
unplug the charge cord, wait for
10 seconds, and then plug the charge cord back in. A double horn chirp will
sound and charging will be delayed.
Programmable charging 3 197.
Charging status
The vehicle has a charging status
indicator at the centre of the
instrument panel near the
windscreen. When the vehicle is
plugged in and the vehicle power is
off, the charging status indicator
indicates the following:
● Short flashing green – One horn chirp: Vehicle is plugged in. High
voltage battery is not fully
charged. High voltage battery is
charging. Flash rate increases
from one to four flashes as the
high voltage battery charges.
● Short flashing green – Two audible beeps: Vehicle is
charging but will delay by
programmable charging at least
once before the charge is
complete. Flash rate increases
from one to four flashes as the high voltage battery charges.
● Short flashing green – Four audible beeps: Insufficient time to
fully charge by departure time due to the selected rate
preference. To increase the high
voltage battery state of charge at
the departure time perform a
delayed charging override.
Programmable charging 3 197.
● Long flashing green – Two horn chirps: Charging is delayed by
programmable charging.
Charging will begin later.
Page 218 of 273
216Vehicle careWasher fluid
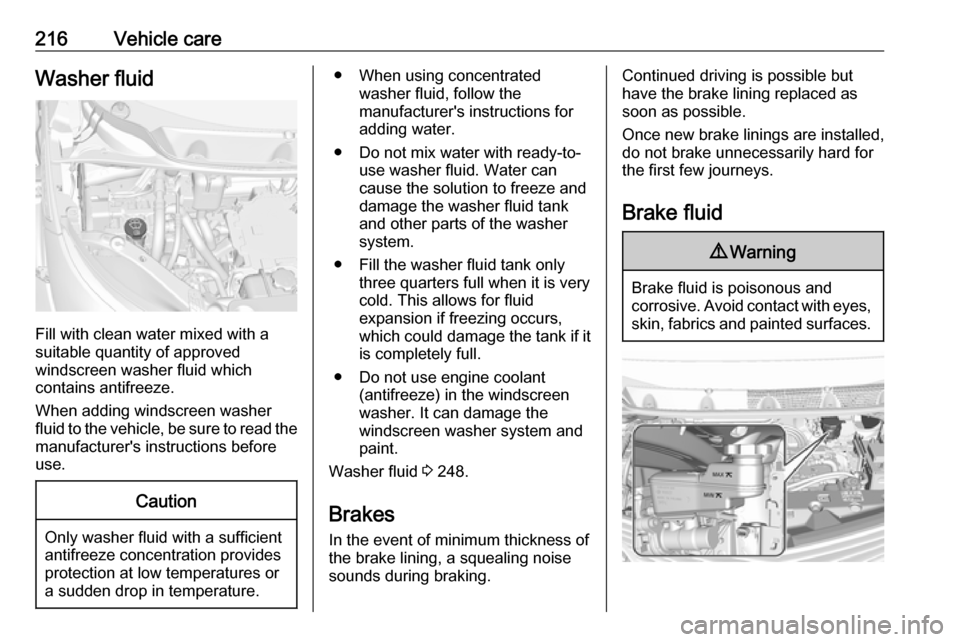
Fill with clean water mixed with a
suitable quantity of approved
windscreen washer fluid which
contains antifreeze.
When adding windscreen washer
fluid to the vehicle, be sure to read the
manufacturer's instructions before
use.
Caution
Only washer fluid with a sufficient
antifreeze concentration provides
protection at low temperatures or
a sudden drop in temperature.
● When using concentrated washer fluid, follow the
manufacturer's instructions for
adding water.
● Do not mix water with ready-to- use washer fluid. Water can
cause the solution to freeze and
damage the washer fluid tank
and other parts of the washer
system.
● Fill the washer fluid tank only three quarters full when it is verycold. This allows for fluid
expansion if freezing occurs,
which could damage the tank if it
is completely full.
● Do not use engine coolant (antifreeze) in the windscreen
washer. It can damage the
windscreen washer system and
paint.
Washer fluid 3 248.
Brakes In the event of minimum thickness ofthe brake lining, a squealing noise
sounds during braking.Continued driving is possible but
have the brake lining replaced as
soon as possible.
Once new brake linings are installed,
do not brake unnecessarily hard for
the first few journeys.
Brake fluid9 Warning
Brake fluid is poisonous and
corrosive. Avoid contact with eyes,
skin, fabrics and painted surfaces.
Page 221 of 273
Vehicle care219Wiper blade replacement
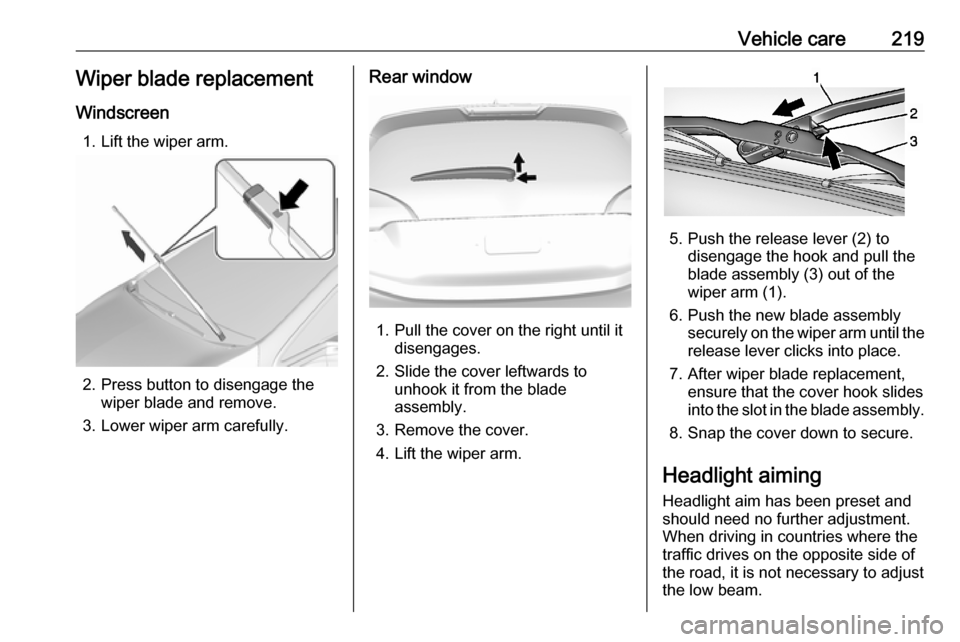
Windscreen 1. Lift the wiper arm.
2. Press button to disengage the wiper blade and remove.
3. Lower wiper arm carefully.
Rear window
1. Pull the cover on the right until it disengages.
2. Slide the cover leftwards to unhook it from the blade
assembly.
3. Remove the cover.
4. Lift the wiper arm.
5. Push the release lever (2) to disengage the hook and pull the
blade assembly (3) out of the
wiper arm (1).
6. Push the new blade assembly securely on the wiper arm until the
release lever clicks into place.
7. After wiper blade replacement, ensure that the cover hook slides
into the slot in the blade assembly.
8. Snap the cover down to secure.
Headlight aiming Headlight aim has been preset andshould need no further adjustment.
When driving in countries where the
traffic drives on the opposite side of the road, it is not necessary to adjust
the low beam.
Page 225 of 273

Vehicle care223Electrical system
High voltage devices and wiring9 Warning
Exposure to high voltage may
cause shock, burns, and even
death. The high voltage
components in the vehicle should
only be serviced by specially
trained technicians.
High voltage components are
identified by labels. Do not
remove, open, take apart, or
modify these components. High
voltage cable or wiring has orange covering. Do not probe, tamper
with, cut, or modify high voltage
cable or wiring.
Electrical system overload
The vehicle has fuses and circuit
breakers to protect against an
electrical system overload.
If the current electrical load is too
heavy, the circuit breaker will open
and close, protecting the circuit until
the current load returns to normal or the problem is fixed. This greatly
reduces the chance of circuit
overload and fire caused by electrical
problems.
Fuses and circuit breakers protect the
following parts in the vehicle:
● Headlight wiring
● Windscreen wiper motor
● Power windows and other power accessories
Headlight wiring An electrical overload may cause the
lights to go on and off or in some
cases to remain off. In this case, have
the headlight wiring checked
immediately by a workshop.
Windscreen wipers
If the wiper motor overheats due to
blockage from heavy snow or ice, the windscreen wipers will stop until themotor has cooled down and the wiper
control has been turned off. Afterremoval of the blockage, the wiper
motor will restart when moving the
wiper control to the desired operating
position.
Although the circuit is protected from
electrical overload, mechanical
overload due to heavy snow or ice
may cause wiper linkage damage.
Always clear ice and heavy snow
from the windscreen before using the windscreen wipers. If the overload is
caused by an electrical problem and
not snow or ice, it must be serviced.
Fuses
Data on the replacement fuse must match the data on the defective fuse.
There are two fuse boxes in the
vehicle:
● at the front left side of the engine
compartment
● at the left side of the instrument panel
Before replacing a fuse, turn off the
respective switch and the vehicle.
Page 245 of 273
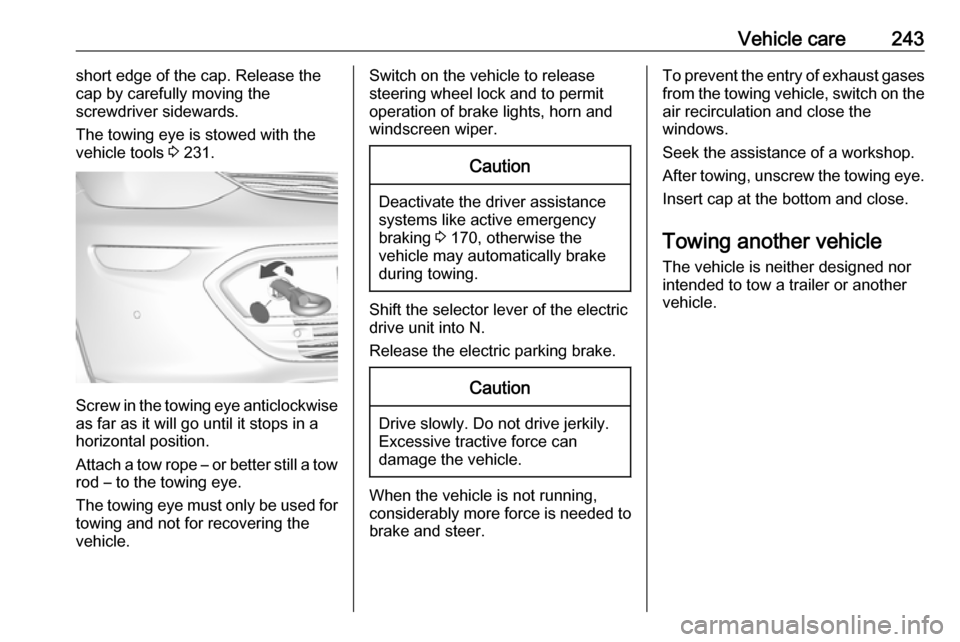
Vehicle care243short edge of the cap. Release the
cap by carefully moving the
screwdriver sidewards.
The towing eye is stowed with the vehicle tools 3 231.
Screw in the towing eye anticlockwise
as far as it will go until it stops in a
horizontal position.
Attach a tow rope – or better still a tow
rod – to the towing eye.
The towing eye must only be used for
towing and not for recovering the
vehicle.
Switch on the vehicle to release
steering wheel lock and to permit
operation of brake lights, horn and
windscreen wiper.Caution
Deactivate the driver assistance
systems like active emergency
braking 3 170, otherwise the
vehicle may automatically brake during towing.
Shift the selector lever of the electric
drive unit into N.
Release the electric parking brake.
Caution
Drive slowly. Do not drive jerkily.
Excessive tractive force can
damage the vehicle.
When the vehicle is not running, considerably more force is needed to
brake and steer.
To prevent the entry of exhaust gases from the towing vehicle, switch on the
air recirculation and close the
windows.
Seek the assistance of a workshop.
After towing, unscrew the towing eye.
Insert cap at the bottom and close.
Towing another vehicle The vehicle is neither designed nor
intended to tow a trailer or another
vehicle.
Page 246 of 273
244Vehicle careAppearance careExterior care
Locks The locks are lubricated at the factoryusing a high quality lock cylinder
grease. Use de-icing agent only when
absolutely necessary, as this has a
degreasing effect and impairs lock function. After using a de-icing agent, have the locks regreased by a
workshop.
Washing The paintwork of your vehicle is
exposed to environmental influences. Wash and wax your vehicle regularly.
When using automatic vehicle
washes, select a programme that
includes waxing.
Do not apply waxes or polishes to uncoated plastic, vinyl, rubber,
decals, simulated wood, or flat paint
as damage can occur.Bird droppings, dead insects, resin,
pollen and the like should be cleaned
off immediately, as they contain
aggressive constituents which can cause paint damage.
If using a vehicle wash, comply with
the vehicle wash manufacturer's instructions. The windscreen wiperand rear window wiper must be
switched off. Remove external
accessories such as roof racks etc.
If you wash your vehicle by hand,
make sure that the insides of the
wheel housings are also thoroughly
rinsed out.
Clean edges and folds on opened
doors and the bonnet as well as the
areas they cover.
Clean bright metal mouldings with a
cleaning solution approved for
aluminium to avoid damages.Caution
Always use a cleaning agent with
a pH value of four to nine.
Do not use cleaning agents on hot surfaces.
Do not clean the engine compartmentwith a steam-jet or high-pressure jet
cleaner.
Thoroughly rinse and leather-off the vehicle. Rinse leather frequently. Use
separate leathers for painted and
glass surfaces: remnants of wax on
the windows will impair vision.
Have the door hinges of all doors
greased by a workshop.
Do not use hard objects to remove
spots of tar. Use tar removal spray on
painted surfaces.
Exterior lights
Headlight and other light covers are
made of plastic. Do not use any
abrasive or caustic agents, do not use an ice scraper, and do not clean them
dry.
Polishing and waxing
Wax the vehicle regularly (at the
latest when water no longer beads).
Otherwise, the paintwork will dry out.
Polishing is necessary only if the paint
has become dull or if solid deposits
have become attached to it.
Page 247 of 273

Vehicle care245Paintwork polish with silicone forms a
protective film, making waxing
unnecessary.
Plastic body parts must not be treated
with wax or polishing agents.
Windows and windscreen wiper
blades
Use a soft lint-free cloth or chamois
leather together with window cleaner
and insect remover.
When cleaning the rear window from
inside, always wipe in parallel to the
heating element to prevent damage.
For mechanical removal of ice, use a
sharp-edged ice scraper. Press the
scraper firmly against the glass so
that no dirt can get under it and
scratch the glass.
Remove dirt residues from smearing
wiper blades by using a soft cloth and window cleaner. Also make sure to
remove any residues such as wax,
insect residues and similar from the
window.
Ice residues, pollution and continuous wiping on dry windows will damage or
even destroy the wiper blades.Wheels and tyres
Do not use high-pressure jet
cleaners.
Clean rims with a pH-neutral wheel
cleaner.
Rims are painted and can be treated
with the same agents as the body.
Paintwork damage Rectify minor paintwork damage witha touch-up pen before rust forms.
Have more extensive damage or rust areas repaired by a workshop.
Underbody
Some areas of the vehicle underbody
have a PVC undercoating while other
critical areas have a durable
protective wax coating.
After the underbody is washed, check the underbody and have it waxed if
necessary.
Bitumen / rubber materials could
damage the PVC coating. Have
underbody work carried out by a
workshop.Before and after winter, wash the
underbody and have the protective
wax coating checked.
Interior care
Interior and upholstery
Only clean the vehicle interior,
including the instrument panel fascia
and panelling, with a dry cloth or
interior cleaner.
Clean the leather upholstery with
clear water and a soft cloth. In case of heavy soiling, use leather care.
The instrument cluster and the
displays should only be cleaned using
a soft damp cloth. If necessary use a
weak soap solution.
Do not spray cleaners directly on any switches or controls.
Clean fabric upholstery with a
vacuum cleaner and brush. Remove
stains with an upholstery cleaner.
Clothing fabrics may not be
colourfast. This could cause visible
discolourations, especially on light-
Page 252 of 273

250Technical dataTechnical dataVehicle identification..................250
Vehicle Identification Number ..250
Identification plate ...................250
Vehicle data ............................... 252
Engine data ............................. 252
Performance ............................ 252
Vehicle weight ......................... 252
Vehicle dimensions .................253
Tyre pressures ........................ 254Vehicle identification
Vehicle IdentificationNumber
The Vehicle Identification Number
may be embossed on the instrument
panel, visible through the windscreen, or in the engine compartment on the
right body panel.
The Vehicle Identification Number
may be stamped on the identification
plate, or in the engine compartment on the body panel.
Identification plate
The identification plate is located on
the front left or right door frame.