Full charge OPEL AMPERA E 2018 Manual user
[x] Cancel search | Manufacturer: OPEL, Model Year: 2018, Model line: AMPERA E, Model: OPEL AMPERA E 2018Pages: 267, PDF Size: 6.45 MB
Page 201 of 267

Driving and operating199
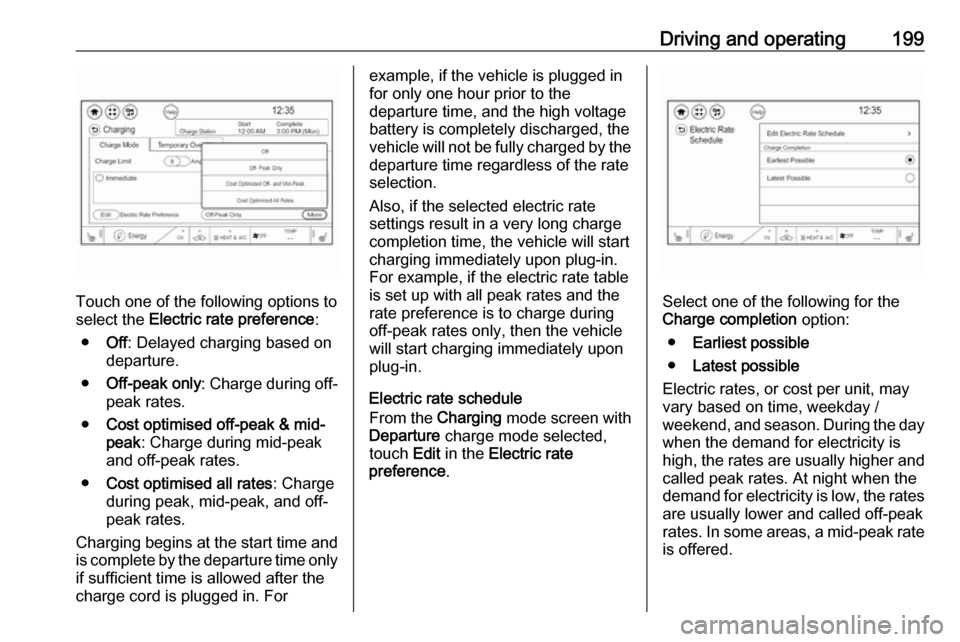
Touch one of the following options to
select the Electric rate preference :
● Off: Delayed charging based on
departure.
● Off-peak only : Charge during off-
peak rates.
● Cost optimised off-peak & mid-
peak : Charge during mid-peak
and off-peak rates.
● Cost optimised all rates : Charge
during peak, mid-peak, and off-
peak rates.
Charging begins at the start time and
is complete by the departure time only if sufficient time is allowed after the
charge cord is plugged in. For
example, if the vehicle is plugged in
for only one hour prior to the
departure time, and the high voltage
battery is completely discharged, the vehicle will not be fully charged by the
departure time regardless of the rate
selection.
Also, if the selected electric rate
settings result in a very long charge
completion time, the vehicle will start
charging immediately upon plug-in.
For example, if the electric rate table
is set up with all peak rates and the
rate preference is to charge during
off-peak rates only, then the vehicle will start charging immediately uponplug-in.
Electric rate schedule
From the Charging mode screen with
Departure charge mode selected,
touch Edit in the Electric rate
preference .
Select one of the following for the
Charge completion option:
● Earliest possible
● Latest possible
Electric rates, or cost per unit, may
vary based on time, weekday /
weekend, and season. During the day
when the demand for electricity is
high, the rates are usually higher and
called peak rates. At night when the
demand for electricity is low, the rates
are usually lower and called off-peak
rates. In some areas, a mid-peak rate is offered.
Page 205 of 267

Driving and operating203Programmable charging disabled
When the programmable charging
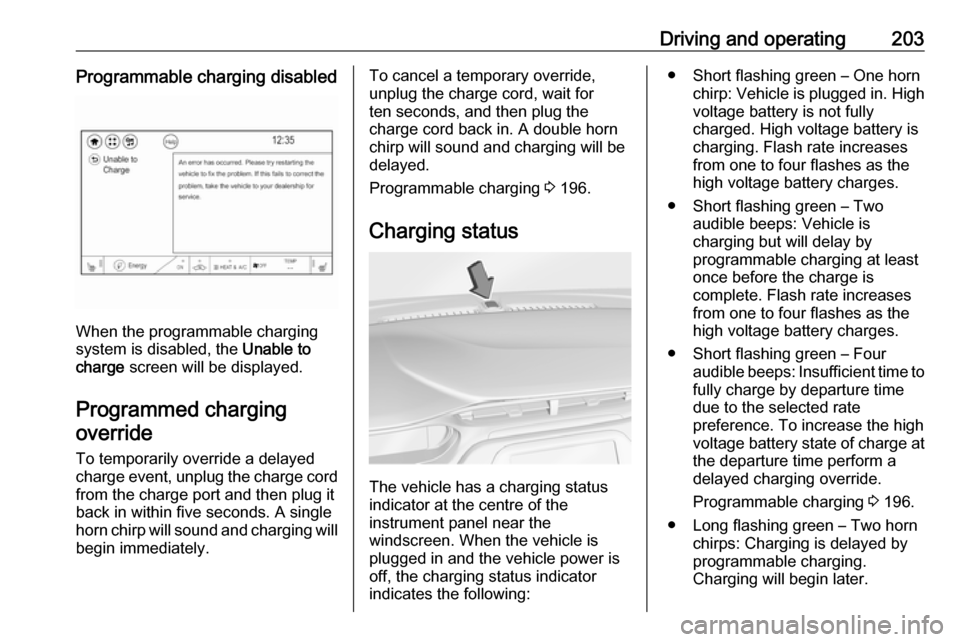
system is disabled, the Unable to
charge screen will be displayed.
Programmed charging override
To temporarily override a delayed charge event, unplug the charge cord from the charge port and then plug it
back in within five seconds. A single
horn chirp will sound and charging will begin immediately.
To cancel a temporary override,
unplug the charge cord, wait for
ten seconds, and then plug the
charge cord back in. A double horn
chirp will sound and charging will be delayed.
Programmable charging 3 196.
Charging status
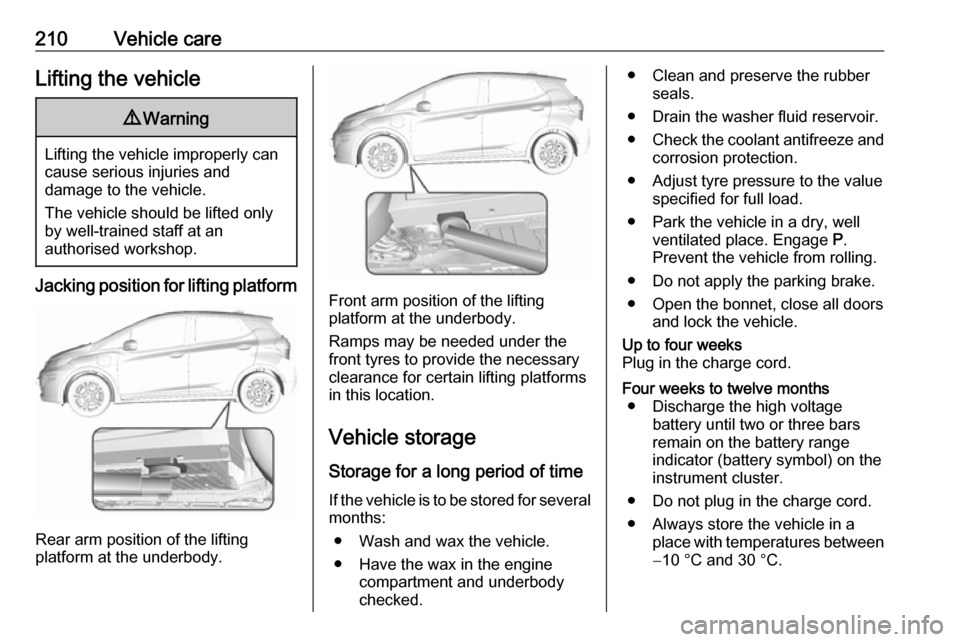
The vehicle has a charging status
indicator at the centre of the
instrument panel near the
windscreen. When the vehicle is
plugged in and the vehicle power is
off, the charging status indicator
indicates the following:
● Short flashing green – One horn chirp: Vehicle is plugged in. High
voltage battery is not fully
charged. High voltage battery is
charging. Flash rate increases
from one to four flashes as the
high voltage battery charges.
● Short flashing green – Two audible beeps: Vehicle is
charging but will delay by
programmable charging at least
once before the charge is
complete. Flash rate increases
from one to four flashes as the high voltage battery charges.
● Short flashing green – Four audible beeps: Insufficient time to
fully charge by departure time due to the selected rate
preference. To increase the high
voltage battery state of charge at
the departure time perform a
delayed charging override.
Programmable charging 3 196.
● Long flashing green – Two horn chirps: Charging is delayed by
programmable charging.
Charging will begin later.
Page 212 of 267

210Vehicle careLifting the vehicle9Warning
Lifting the vehicle improperly can
cause serious injuries and
damage to the vehicle.
The vehicle should be lifted only by well-trained staff at an
authorised workshop.
Jacking position for lifting platform
Rear arm position of the lifting
platform at the underbody.
Front arm position of the lifting
platform at the underbody.
Ramps may be needed under the
front tyres to provide the necessary
clearance for certain lifting platforms
in this location.
Vehicle storage Storage for a long period of timeIf the vehicle is to be stored for several months:
● Wash and wax the vehicle.
● Have the wax in the engine compartment and underbody
checked.
● Clean and preserve the rubber seals.
● Drain the washer fluid reservoir.
● Check the coolant antifreeze and
corrosion protection.
● Adjust tyre pressure to the value specified for full load.
● Park the vehicle in a dry, well ventilated place. Engage P.
Prevent the vehicle from rolling.
● Do not apply the parking brake.
● Open the bonnet, close all doors and lock the vehicle.Up to four weeks
Plug in the charge cord.Four weeks to twelve months ● Discharge the high voltage battery until two or three bars
remain on the battery range
indicator (battery symbol) on the
instrument cluster.
● Do not plug in the charge cord.
● Always store the vehicle in a place with temperatures between−10 °C and 30 °C.
Page 218 of 267

216Vehicle careWhen the vehicle has not been
running for at least 1 minute, the
maximum fluid level is at the top of the reservoir body. When the vehicle is
running, the brake fluid level must be
between the MIN and MAX marks.
If the brake fluid level is below MIN
seek the assistance of a workshop.
After work is done on the brake
hydraulic system, make sure the fluid
level is in the proper operating range
between the MIN and MAX marks
when the vehicle is running. Only use high-performance brake fluid
approved for the vehicle. Consult a
workshop.
Brake fluid 3 245.
Vehicle battery9 Danger
Only a trained service technician
with the proper knowledge and
tools may inspect, test or replace
the high voltage battery.
Seek the assistance of a
workshop if the high voltage
battery needs service.
This vehicle has a high voltage
battery and a 12 V vehicle battery.
If the vehicle is involved in a crash, the
sensing system may shut down the
high voltage system. If this occurs,
the high voltage battery will be
disconnected and the vehicle will not
start.
A service message will be displayed
in the Driver Information Centre.
Before the vehicle can be operated
again, it must be serviced at a
workshop.
Airbag system 3 45.
A vehicle cover, which can reduce
sun loading on the vehicle and
improve high voltage battery life, is
available from your Opel Ampera-e
Service Partner.
The Opel Ampera-e authorised
repairer has information on how to recycle the high voltage battery.
Keep the vehicle plugged in, even
when fully charged, to keep the high
voltage battery temperature ready for
the next drive. This is important when
outside temperatures are extremely
hot or cold.
Refer to the replacement number
shown on the original 12 V vehicle
battery label if a new 12 V vehicle
battery is required. The vehicle has
an Absorbed Glass Mat (AGM) 12 V
vehicle battery.
Installation of a standard 12 V vehicle battery will result in reduced 12 V
vehicle battery life. When using a 12 V battery charger on the AGM12 V vehicle battery, note that somechargers have an AGM battery
setting on the charger. If available,
use the AGM setting on the charger
to limit charge voltage to 14.8 V.
Follow the charger manufacturer's
instructions.
Page 241 of 267

Vehicle care239Route the leads so that they cannot
catch on rotating parts in the engine
compartment.
To start the vehicle: 1. Start the engine of the vehicle providing the jump.
2. After five minutes, press POWER m to switch on the
vehicle.
After the instrument cluster
initialises, the vehicle will use
power from the high voltage
battery to charge the 12 V vehicle
battery.
3. Switch on electrical consumers (e.g. headlights, heated rear
window) of the vehicle receiving
the jump start.
4. Reverse above sequence exactly when removing leads.Towing
Towing the vehicleCaution
Incorrect towing of a disabled
vehicle may cause damage to the
vehicle. The disabled vehicle
should only be towed on a flatbed
car carrier.
Ensure the vehicle is only towed
by well trained technicians.
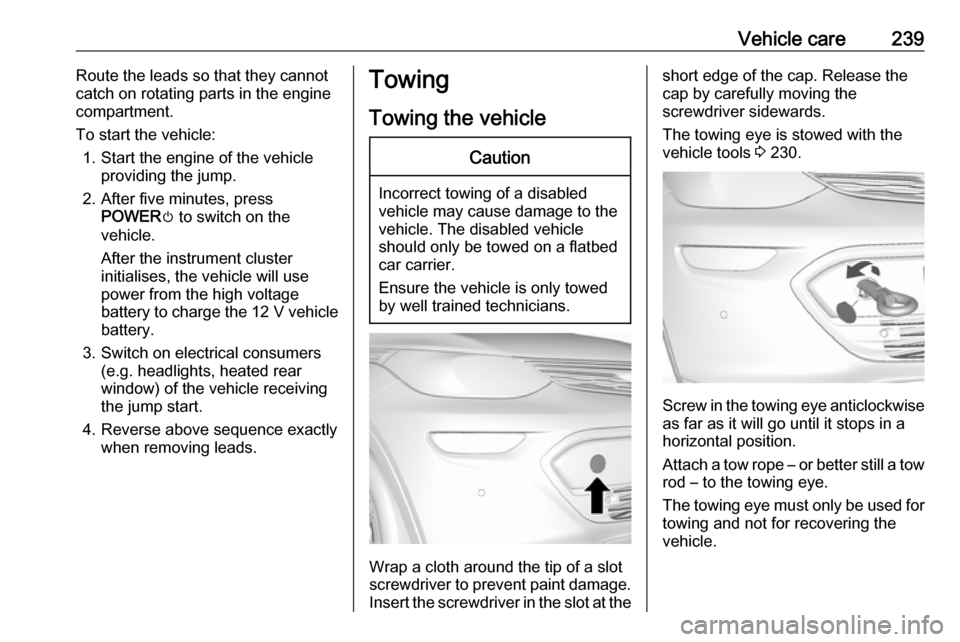
Wrap a cloth around the tip of a slot
screwdriver to prevent paint damage. Insert the screwdriver in the slot at the
short edge of the cap. Release the
cap by carefully moving the
screwdriver sidewards.
The towing eye is stowed with the vehicle tools 3 230.
Screw in the towing eye anticlockwise
as far as it will go until it stops in a
horizontal position.
Attach a tow rope – or better still a tow
rod – to the towing eye.
The towing eye must only be used for
towing and not for recovering the
vehicle.