window OPEL AMPERA E 2018 Manual user
[x] Cancel search | Manufacturer: OPEL, Model Year: 2018, Model line: AMPERA E, Model: OPEL AMPERA E 2018Pages: 267, PDF Size: 6.45 MB
Page 33 of 267

Keys, doors and windows31message is displayed in the Driver
Information Centre after switching on
the vehicle.
Vehicle messages 3 89.
Immobiliser The system is part of the ignition
switch and checks whether the
vehicle is allowed to be started with the key being used.
The immobiliser is activated
automatically after the electronic key
has been removed from the vehicle.
If control indicator d flashes when the
vehicle is on, there is a fault in the
system; the propulsion system cannot
be started. Switch off the vehicle and
repeat the start attempt.
If control indicator d continues
flashing, attempt to start the
propulsion system using the spare
key and seek the assistance of a
workshop.Note
Radio Frequency Identification
(RFID) tags may cause interference with the key. Do not have it placednear the key when starting the
vehicle.
Note
The immobiliser does not lock the doors. You should always lock the
vehicle after leaving it and switch on the anti-theft alarm system 3 20,
3 29.
Control indicator d 3 80.Exterior mirrors
Convex shape
The shape of the mirror makes
objects appear smaller, which will affect the ability to estimate
distances.
Side blind zone alert 3 181.
Page 34 of 267
32Keys, doors and windowsElectric adjustment
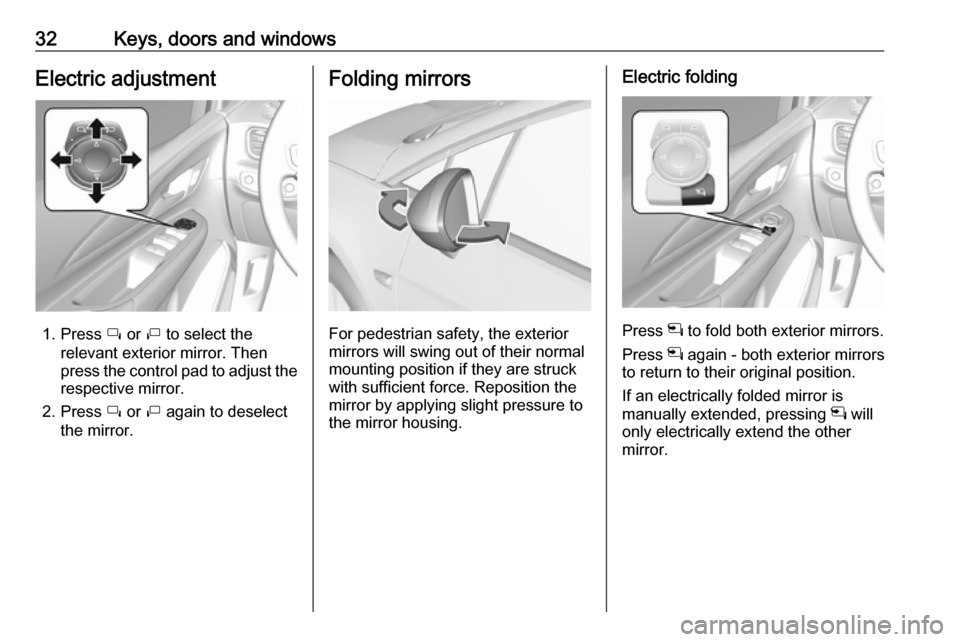
1. Press í or ì to select the
relevant exterior mirror. Then
press the control pad to adjust the respective mirror.
2. Press í or ì again to deselect
the mirror.
Folding mirrors
For pedestrian safety, the exterior
mirrors will swing out of their normal
mounting position if they are struck
with sufficient force. Reposition the mirror by applying slight pressure tothe mirror housing.
Electric folding
Press n to fold both exterior mirrors.
Press n again - both exterior mirrors
to return to their original position.
If an electrically folded mirror is
manually extended, pressing n will
only electrically extend the other
mirror.
Page 35 of 267
Keys, doors and windows33Heated mirrors
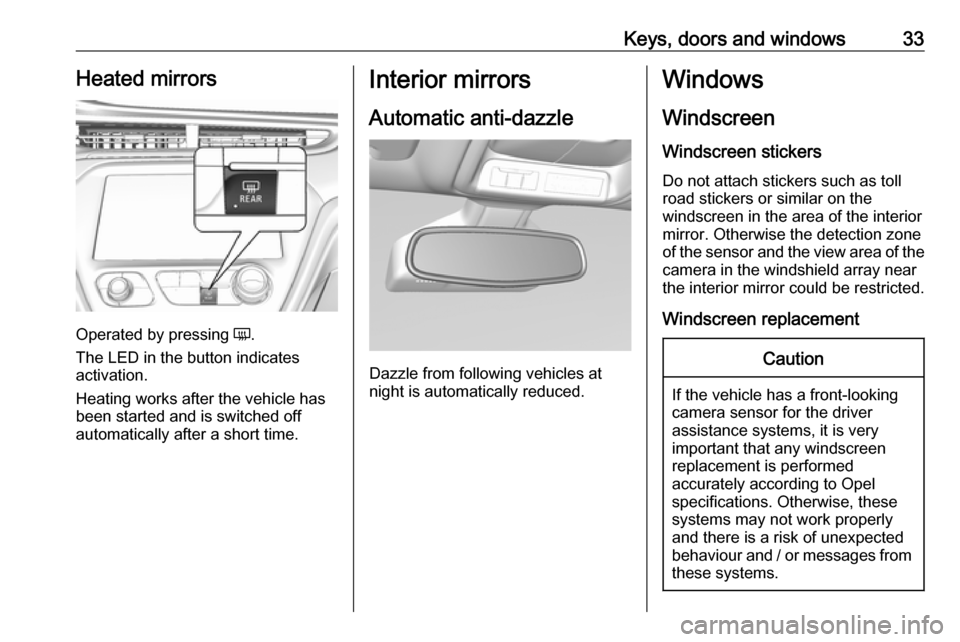
Operated by pressing Ü.
The LED in the button indicates
activation.
Heating works after the vehicle has
been started and is switched off
automatically after a short time.
Interior mirrors
Automatic anti-dazzle
Dazzle from following vehicles at
night is automatically reduced.
Windows
Windscreen Windscreen stickers
Do not attach stickers such as toll
road stickers or similar on the
windscreen in the area of the interior
mirror. Otherwise the detection zone
of the sensor and the view area of the camera in the windshield array near
the interior mirror could be restricted.
Windscreen replacementCaution
If the vehicle has a front-looking
camera sensor for the driver
assistance systems, it is very
important that any windscreen
replacement is performed
accurately according to Opel
specifications. Otherwise, these
systems may not work properly
and there is a risk of unexpected
behaviour and / or messages from these systems.
Page 36 of 267
34Keys, doors and windowsPower windows9Warning
Take care when operating the
power windows. Risk of injury,
particularly to children.
If there are children on the rear seats, switch on the child safety
system for the power windows.
Keep a close watch on the
windows when closing them.
Ensure that nothing becomes
trapped in them as they move.
Switch on the vehicle to operate
power windows. Retained power off
3 150.
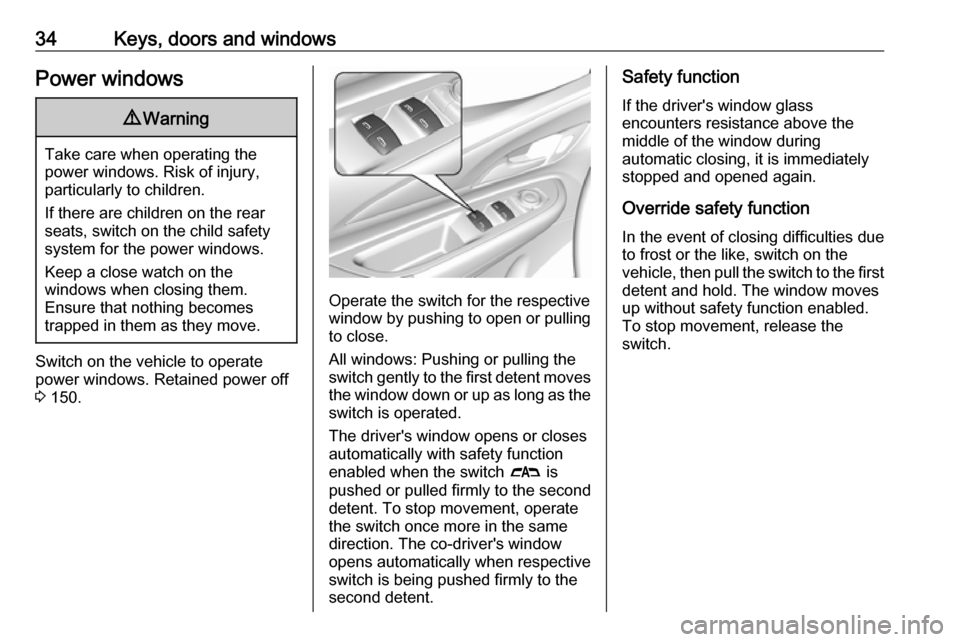
Operate the switch for the respective
window by pushing to open or pulling to close.
All windows: Pushing or pulling the
switch gently to the first detent moves
the window down or up as long as the switch is operated.
The driver's window opens or closes
automatically with safety function
enabled when the switch # is
pushed or pulled firmly to the second detent. To stop movement, operate
the switch once more in the same
direction. The co-driver's window
opens automatically when respective
switch is being pushed firmly to the
second detent.
Safety function
If the driver's window glass
encounters resistance above the
middle of the window during
automatic closing, it is immediately
stopped and opened again.
Override safety function In the event of closing difficulties due
to frost or the like, switch on the
vehicle, then pull the switch to the first
detent and hold. The window moves
up without safety function enabled.
To stop movement, release the
switch.
Page 37 of 267
Keys, doors and windows35Child safety system for rear
windows
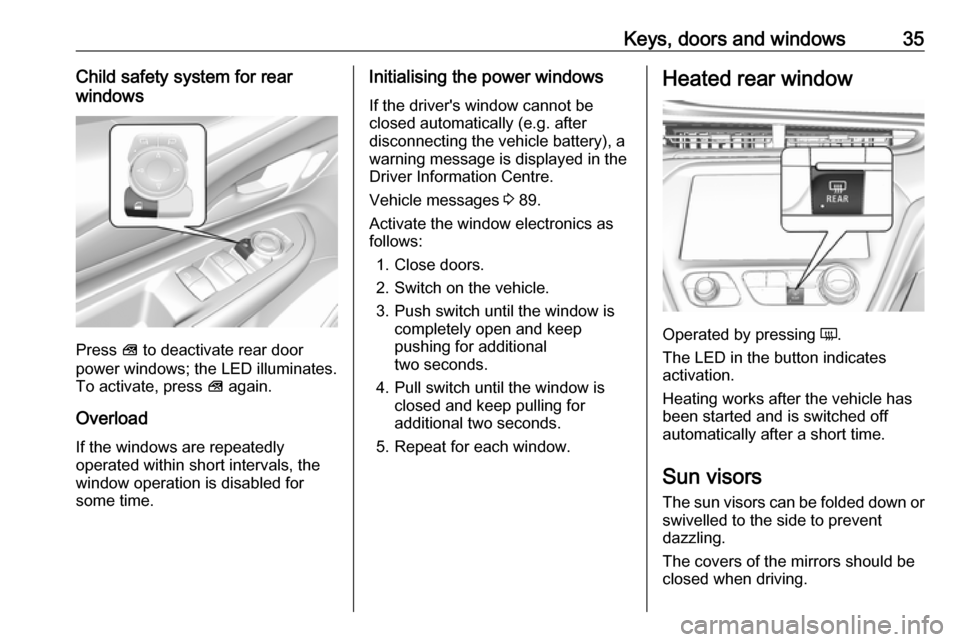
Press V to deactivate rear door
power windows; the LED illuminates.
To activate, press V again.
Overload
If the windows are repeatedly
operated within short intervals, the
window operation is disabled for
some time.
Initialising the power windows
If the driver's window cannot be
closed automatically (e.g. after
disconnecting the vehicle battery), a
warning message is displayed in the
Driver Information Centre.
Vehicle messages 3 89.
Activate the window electronics as
follows:
1. Close doors.
2. Switch on the vehicle.
3. Push switch until the window is completely open and keep
pushing for additional
two seconds.
4. Pull switch until the window is closed and keep pulling for
additional two seconds.
5. Repeat for each window.Heated rear window
Operated by pressing Ü.
The LED in the button indicates
activation.
Heating works after the vehicle has
been started and is switched off
automatically after a short time.
Sun visors The sun visors can be folded down or
swivelled to the side to prevent
dazzling.
The covers of the mirrors should be
closed when driving.
Page 38 of 267

36Keys, doors and windowsA ticket holder is located on the
backside of the sun visor.
Page 66 of 267

64Instruments and controlsInstruments and
controlsControls ....................................... 65
Steering wheel adjustment ........65
Steering wheel controls .............65
Heated steering wheel ...............65
Horn ........................................... 66
Pedestrian safety alert ...............66
Windscreen wiper/washer .........66
Rear window wiper/washer .......67
Outside temperature ..................68
Clock ......................................... 68
Power outlets ............................. 69
Inductive charging .....................70
Warning lights, gauges and indi‐ cators ........................................... 72
Instrument cluster ......................72
Speedometer ............................. 74
Odometer .................................. 74
Battery gauge ............................ 74
Driving efficiency gauge ............74
Power indicator gauge ...............76
Regenerative braking ................76
Total vehicle range ....................77
Service display .......................... 77
Control indicators ......................77Turn signal................................. 77
Seat belt reminder .....................77
Airbag and belt tensioners .........78
Airbag deactivation ....................78
Charging system .......................78
Service vehicle soon .................79
Brake system ............................. 79
Electric parking brake ................79
Electric parking brake fault ........79
Antilock brake system (ABS) .....79
Sport mode ................................ 80
Lane keep assist .......................80
Electronic Stability Control off ...80
Electronic Stability Control and Traction Control system ...........80
Traction Control system off .......80
Tyre pressure monitoring system ...................................... 80
Immobiliser ................................ 80
Vehicle ready ............................. 81
Exterior light .............................. 81
High beam ................................. 81
High beam assist .......................81
Rear fog light ............................. 81
Cruise control ............................ 81
Vehicle detected ahead .............81
Pedestrian detection ..................81
Speed limiter ............................. 81
Traffic sign assistant ..................81
Door open .................................. 82Information displays.....................82
Driver Information Centre ..........82
Info display ................................ 85
Vehicle messages ........................89
Warning chimes .........................90
Battery voltage .......................... 90
Vehicle personalisation ................91
Telematics service .......................94
OnStar ....................................... 94
Page 69 of 267

Instruments and controls67Wiper lever in position AUTO.
Turn the adjuster wheel to adjust the
sensitivity of the rain sensor.
Low sensitivity: turn adjuster wheel
downwards
High sensitivity: turn adjuster wheel upwards
Keep the sensor free from dust, dirt
and ice.
Windscreen washer
Pull lever. Washer fluid is sprayed
onto the windscreen and the wiper
wipes a few times.
Washer fluid 3 215.
Rear window wiper/washer
Rear window wiper
Turn outer cap to activate the rear
window wiper:
OFF:offINT:intermittent operationON:continuous operation
Do not use if the rear window is
frozen.
Switch off in car washes.
The rear window wiper comes on
automatically when the windscreen
wiper is switched on and reverse gear
is engaged.
Page 70 of 267
68Instruments and controlsActivation or deactivation of this
function can be changed in the menu Settings in the Info display.
Vehicle personalisation 3 91.
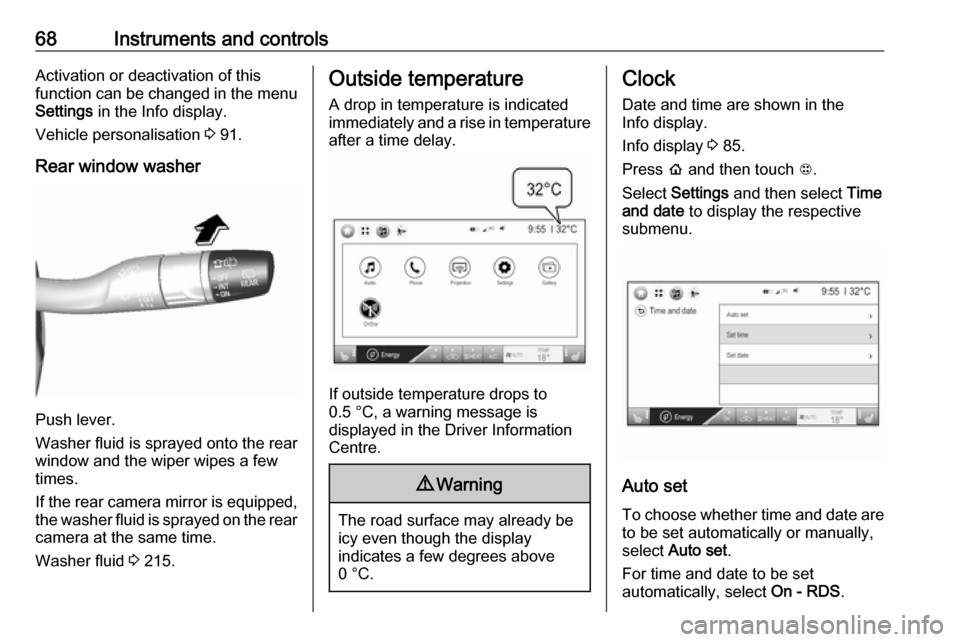
Rear window washer
Push lever.
Washer fluid is sprayed onto the rear
window and the wiper wipes a few
times.
If the rear camera mirror is equipped,
the washer fluid is sprayed on the rear camera at the same time.
Washer fluid 3 215.
Outside temperature
A drop in temperature is indicated
immediately and a rise in temperature
after a time delay.
If outside temperature drops to
0.5 °C, a warning message is
displayed in the Driver Information
Centre.
9 Warning
The road surface may already be
icy even though the display
indicates a few degrees above
0 °C.
Clock
Date and time are shown in the
Info display.
Info display 3 85.
Press p and then touch 1.
Select Settings and then select Time
and date to display the respective
submenu.
Auto set
To choose whether time and date are to be set automatically or manually,
select Auto set .
For time and date to be set
automatically, select On - RDS.
Page 92 of 267

90Instruments and controlsSome important messages may
appear additionally in the Info display.
Some messages only pop-up for a few seconds.
Warning chimes When starting the propulsion
system or whilst driving
Only one warning chime will sound at a time.
The warning chime regarding not
fastened seat belts has priority over
any other warning chime.
● If seat belt is not fastened.
● If a door or the tailgate is not fully
closed when starting off.
● If a certain speed is exceeded with parking brake applied.
● If approaching a vehicle ahead too rapidly.
● If a programmed speed or speed
limit is exceeded.
● If a warning message appears in the Driver Information Centre.
● If the electronic key is not in the passenger compartment.● If the parking assist detects an object.
● If an unintended lane change occurs.
● If safety function of the power tailgate detects obstacles in the
moving area.
When the vehicle is parked and /
or the driver's door is opened
● With exterior lights on.
Battery voltage When the voltage of the 12 V vehicle
battery is running low, a warning
message will appear in the Driver
Information Centre.
1. Switch off any electrical consumers which are not requiredfor a safe drive, e.g. seat heating,
heated rear window or other main consumers.
2. Charge the 12 V vehicle battery by
driving continuously for a while or
by using a charging device.The warning message will disappear
after the vehicle has been started
twice without a voltage drop.
If the 12 V vehicle battery cannot be
recharged, have the cause of the fault
remedied by a workshop.