light OPEL AMPERA E 2018 Manual user
[x] Cancel search | Manufacturer: OPEL, Model Year: 2018, Model line: AMPERA E, Model: OPEL AMPERA E 2018Pages: 267, PDF Size: 6.45 MB
Page 103 of 267
Lighting101Daytime running lightsDaytime running lights increase
visibility of the vehicle during daylight.
While the daytime running light is
active, the tail lights and the sidelights are switched off.
Please remember that the low beam
should be switched on when required.
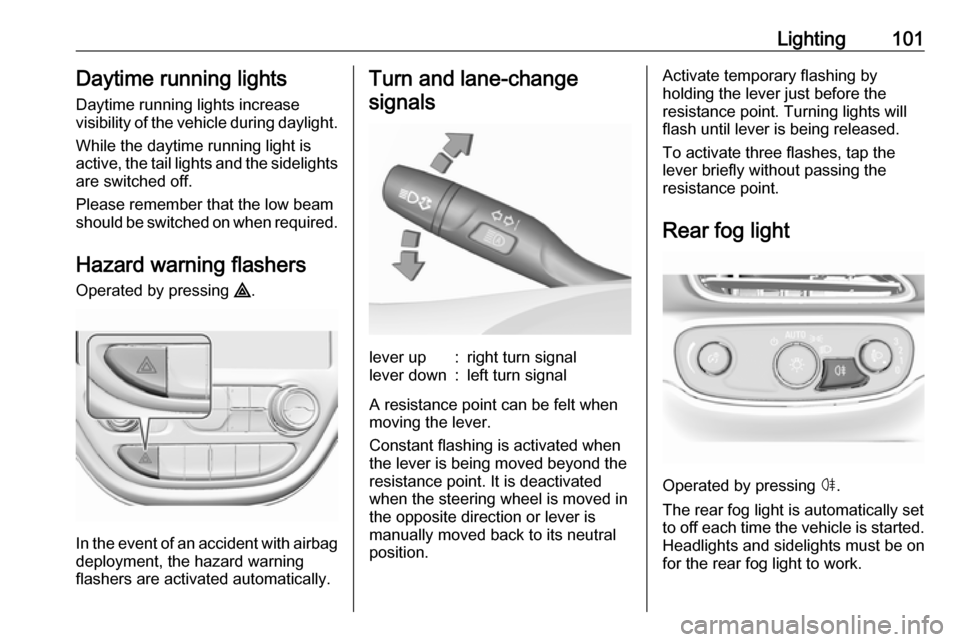
Hazard warning flashers
Operated by pressing ¨.
In the event of an accident with airbag
deployment, the hazard warning
flashers are activated automatically.
Turn and lane-change
signalslever up:right turn signallever down:left turn signal
A resistance point can be felt when
moving the lever.
Constant flashing is activated when
the lever is being moved beyond the
resistance point. It is deactivated
when the steering wheel is moved in
the opposite direction or lever is
manually moved back to its neutral
position.
Activate temporary flashing by
holding the lever just before the
resistance point. Turning lights will
flash until lever is being released.
To activate three flashes, tap the
lever briefly without passing the
resistance point.
Rear fog light
Operated by pressing ø.
The rear fog light is automatically set
to off each time the vehicle is started.
Headlights and sidelights must be on
for the rear fog light to work.
Page 104 of 267
102LightingParking lights
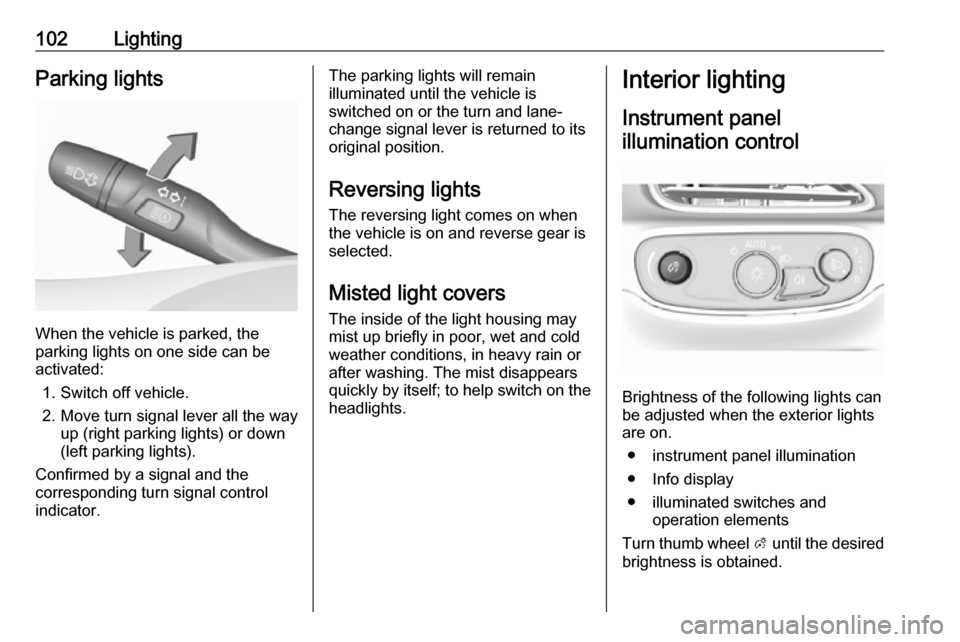
When the vehicle is parked, the
parking lights on one side can be
activated:
1. Switch off vehicle.
2. Move turn signal lever all the way up (right parking lights) or down
(left parking lights).
Confirmed by a signal and the
corresponding turn signal control
indicator.
The parking lights will remain
illuminated until the vehicle is
switched on or the turn and lane-
change signal lever is returned to its
original position.
Reversing lights
The reversing light comes on when
the vehicle is on and reverse gear is selected.
Misted light covers
The inside of the light housing may
mist up briefly in poor, wet and cold weather conditions, in heavy rain or
after washing. The mist disappears
quickly by itself; to help switch on the
headlights.Interior lighting
Instrument panel illumination control
Brightness of the following lights can
be adjusted when the exterior lights
are on.
● instrument panel illumination
● Info display
● illuminated switches and operation elements
Turn thumb wheel A until the desired
brightness is obtained.
Page 105 of 267
Lighting103Interior lights
During entry and exit of the vehicle,
the courtesy lights automatically
switch on and then off after a delay.
Front courtesy light
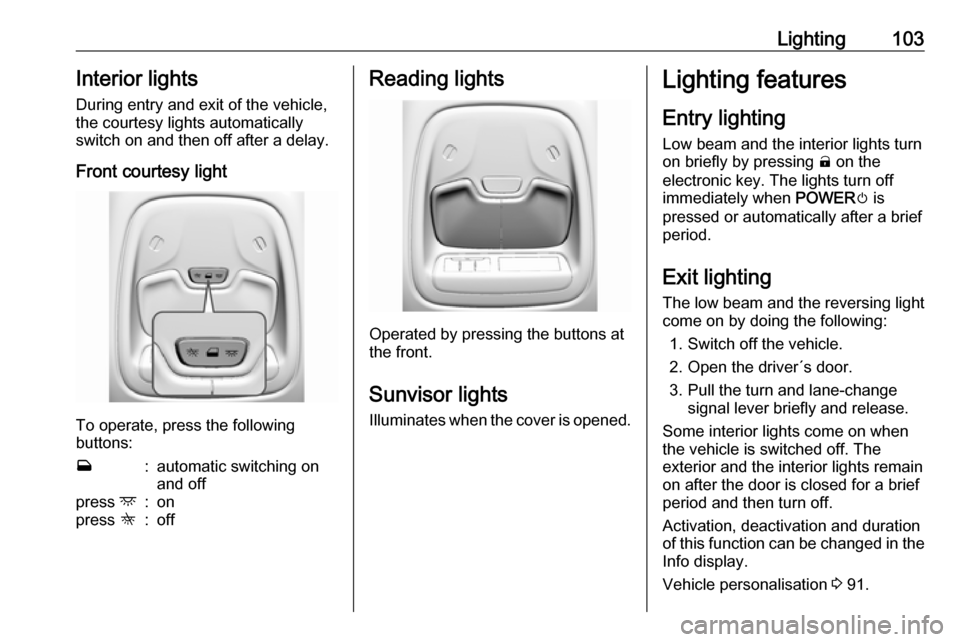
To operate, press the following
buttons:
w:automatic switching on
and offpress d:onpress K:offReading lights
Operated by pressing the buttons at
the front.
Sunvisor lights
Illuminates when the cover is opened.
Lighting features
Entry lighting Low beam and the interior lights turn
on briefly by pressing ( on the
electronic key. The lights turn off
immediately when POWERm is
pressed or automatically after a brief period.
Exit lighting The low beam and the reversing light
come on by doing the following:
1. Switch off the vehicle.
2. Open the driver´s door.
3. Pull the turn and lane-change signal lever briefly and release.
Some interior lights come on when
the vehicle is switched off. The
exterior and the interior lights remain
on after the door is closed for a brief
period and then turn off.
Activation, deactivation and duration
of this function can be changed in the
Info display.
Vehicle personalisation 3 91.
Page 106 of 267

104LightingBattery discharge protection
Vehicle battery state of charge
function
The vehicle battery saver feature is
designed to protect the 12 V vehicle
battery. If any interior light is left on
and the vehicle is switched off, the
vehicle battery discharge protection
system automatically turns the lights
off after approx. 10 minutes.
If the exterior lights are left on, they
turn off when the vehicle is switched
off. If the sidelights are switched on
when the vehicle is switched off, the
sidelights remain on until they are
manually switched off.
Page 152 of 267
150Driving and operatingOther objects, e.g. other keys,
transponder, tags, coins etc. must
be removed.
2. With the vehicle in P or N depress
the brake pedal and press
POWER m.
To switch off the vehicle, press
POWER m again. Remove the
electronic key from the centre
console.
This option is intended for
emergencies only. Replace the
electronic key battery as soon as
possible 3 19.
For unlocking or locking the doors,
see fault in radio remote control unit
or electronic key system 3 20.
Retained power off
The following electronic systems can
work until the driver's door is opened
or for ten minutes after the vehicle is
switched off:
● power windows
● Infotainment system
● power outlets
Starting and stopping the
vehicleMove the selector lever into P or N.
The propulsion system does not start
in any other position.
Note
Do not try to shift into P when the
vehicle is moving, as the electric
drive unit could be damaged. Shift
into P only when the vehicle is
stationary.
The electronic key must be inside the
vehicle. Depress the brake pedal,
then press POWERm.
If the electronic key is not in the
vehicle or something is interfering
with the transmitter, a message is
displayed in the Driver Information
Centre.
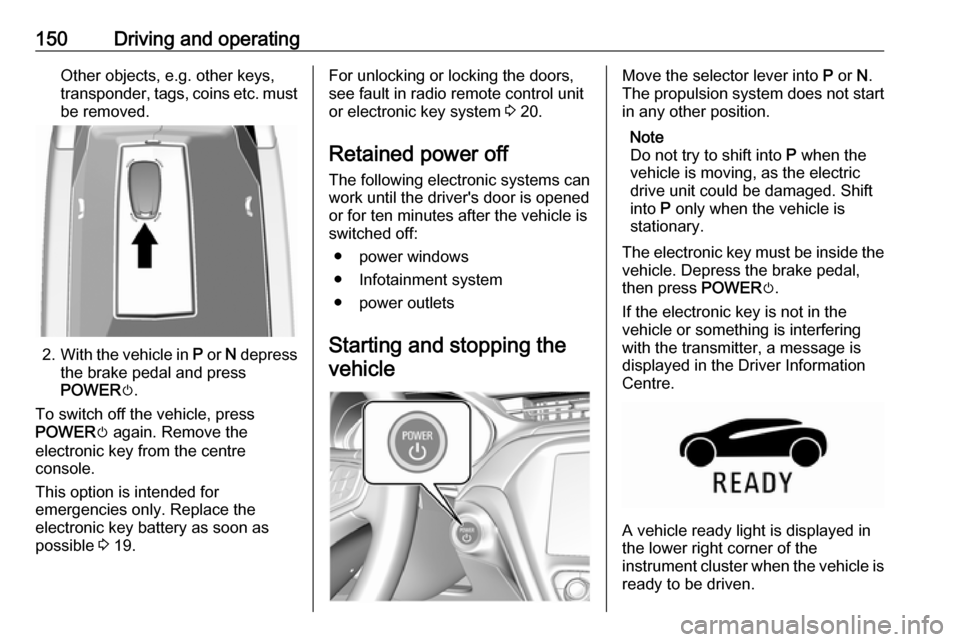
A vehicle ready light is displayed in
the lower right corner of the
instrument cluster when the vehicle is ready to be driven.
Page 162 of 267
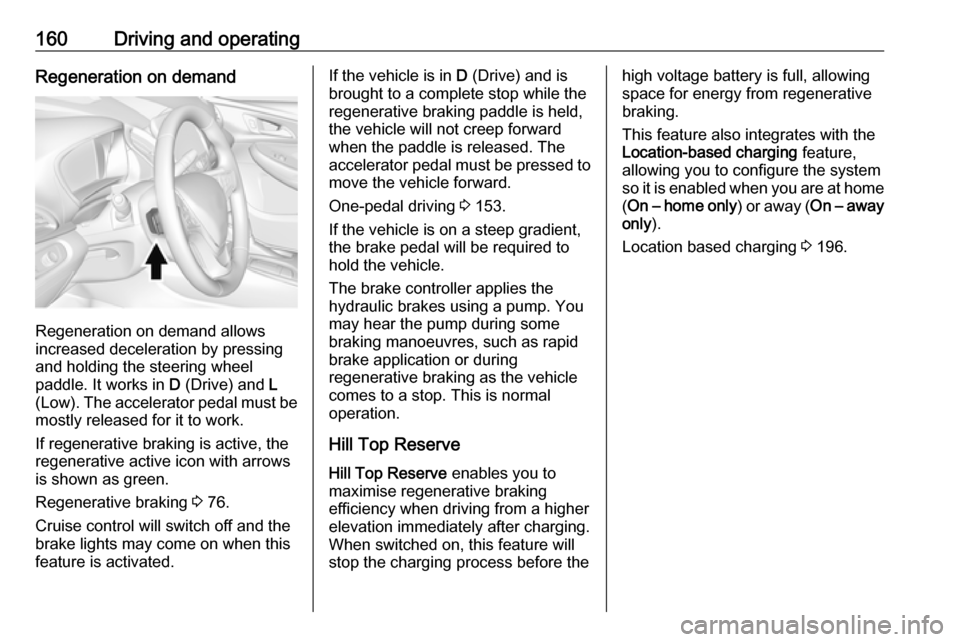
160Driving and operatingRegeneration on demand
Regeneration on demand allows
increased deceleration by pressing
and holding the steering wheel
paddle. It works in D (Drive) and L
(Low). The accelerator pedal must be mostly released for it to work.
If regenerative braking is active, the regenerative active icon with arrowsis shown as green.
Regenerative braking 3 76.
Cruise control will switch off and the
brake lights may come on when this
feature is activated.
If the vehicle is in D (Drive) and is
brought to a complete stop while the regenerative braking paddle is held,
the vehicle will not creep forward
when the paddle is released. The
accelerator pedal must be pressed to
move the vehicle forward.
One-pedal driving 3 153.
If the vehicle is on a steep gradient,
the brake pedal will be required to
hold the vehicle.
The brake controller applies the
hydraulic brakes using a pump. You
may hear the pump during some
braking manoeuvres, such as rapid
brake application or during
regenerative braking as the vehicle
comes to a stop. This is normal
operation.
Hill Top ReserveHill Top Reserve enables you to
maximise regenerative braking
efficiency when driving from a higher
elevation immediately after charging.
When switched on, this feature will
stop the charging process before thehigh voltage battery is full, allowing space for energy from regenerative
braking.
This feature also integrates with the Location-based charging feature,
allowing you to configure the system
so it is enabled when you are at home ( On – home only ) or away (On – away
only ).
Location based charging 3 196.
Page 168 of 267
166Driving and operatingResume limit speed
Press RES/+ . The stored speed limit
will be obtained.
Switching off
Press L, the speed limit indication
extinguishes in the Driver Information Centre. The stored speed is deleted.
By pressing m to activate cruise
control or adaptive cruise control,
speed limiter is also deactivated and
the stored speed is deleted.
By switching off the vehicle, speed
limiter is also deactivated, but the
speed limit will be stored for next
speed limiter activation.
Forward collision alert The forward collision alert may help toavoid or reduce the harm caused by
front-end crashes.
The forward collision alert uses the
front camera system in the
windscreen to detect a vehicle
directly ahead, in your path, within a
distance of approx. 60 m.
A vehicle ahead is indicated by the
control indicator A.
If a vehicle directly ahead is
approached too quickly, a warning
chime is sounded.
Additionally, the driver is notified by a
flashing red LED stripe which is
projected on the windscreen in the
driver's field of view.
A precondition is that forward collision alert is not deactivated in the vehicle
personalisation 3 91.
Activation
Forward collision alert operates
automatically above 8 km/h, if it is not deactivated in the vehicle
personalisation menu.
Alerting the driver
The vehicle ahead control indicator
A illuminates green in the instrument
cluster when the system has detected
a vehicle in the driving path.
The control indicator A changes to
yellow when the distance to a
preceding moving vehicle gets too
small or when approaching another
vehicle too rapidly.Caution
The colour lighting of this control
indicator does not correspond to
local traffic laws on following
distance. The driver bears full
responsibility for maintaining safe
following distance according to
applicable traffic rules, weather
and road conditions etc. at all
times.
When the time to a potential collision
with a vehicle in front gets too small
and a collision is imminent, the driver
is notified by a flashing red LED stripe which is projected on the windscreen
in the driver's field of view.
Page 171 of 267

Driving and operating169supplemental use only to reduce
the vehicle speed before a
collision.
The system may not react to
animals. After a sudden lane
change, the system needs a
certain time to detect the next
preceding vehicle.
The driver must always be ready
to take action and apply the brakes
and steer to avoid collisions.
Functionality
If equipped only with front camera the
active emergency braking operates in
a forward gear above walking speed
up to 80 km/h.
A precondition is that the system is
not deactivated in the vehicle
personalisation menu 3 91.
The system includes: ● brake preparation system
● emergency automatic braking ● forward looking brake assist
● front pedestrian protection system
Brake preparation system
When approaching a vehicle ahead
or a pedestrian so quickly that a
collision is likely, the brake
preparation system slightly
pressurises the brakes. This reduces
the response time, when a manual or automatic braking is requested.
The brake system is prepared so that
braking can occur more rapidly.
If equipped only with front camera the system operates up to a speed of
80 km/h.
Emergency automatic braking After activation of brake preparation
system and just before the imminent
collision, this function automatically
applies limited braking to reduce the
impact speed of the collision or
prevent a crash.
Depending on the situation, the
vehicle may automatically brake
moderately or hard. This front
automatic braking can only occur if a
vehicle ahead is detected, indicated
by the vehicle ahead indicator A
3 166. On vehicles with frontpedestrian protection, automatic
braking can also occur when a
pedestrian ahead is detected,
indicated by the pedestrian ahead
indicator 7.
The system operates up to a speed of
80 km/h.
Below a speed of 40 km/h the system can apply full braking.
Emergency automatic braking may slow the vehicle to a complete stop to
try to avoid a potential crash. If this
happens, emergency automatic
braking may engage the electric
parking brake to hold the vehicle at a
stop. To release, push the electric
parking brake switch or firmly depress the accelerator pedal.9 Warning
Emergency automatic braking is
an emergency crash preparation
feature and is not designed to
avoid crashes. Do not rely on the
system to brake the vehicle.
Emergency automatic braking will
Page 185 of 267
Driving and operating183Detection zones
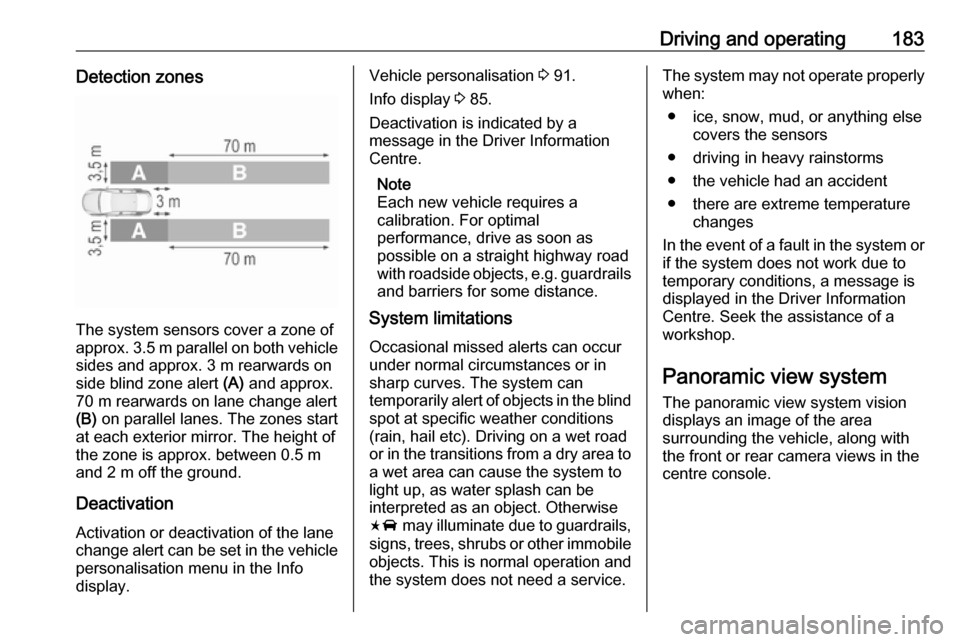
The system sensors cover a zone of
approx. 3.5 m parallel on both vehicle
sides and approx. 3 m rearwards on
side blind zone alert (A) and approx.
70 m rearwards on lane change alert (B) on parallel lanes. The zones start
at each exterior mirror. The height of
the zone is approx. between 0.5 m
and 2 m off the ground.
Deactivation Activation or deactivation of the lane
change alert can be set in the vehicle personalisation menu in the Info
display.
Vehicle personalisation 3 91.
Info display 3 85.
Deactivation is indicated by a
message in the Driver Information
Centre.
Note
Each new vehicle requires a
calibration. For optimal
performance, drive as soon as
possible on a straight highway road
with roadside objects, e.g. guardrails
and barriers for some distance.
System limitations
Occasional missed alerts can occur
under normal circumstances or in
sharp curves. The system can
temporarily alert of objects in the blind spot at specific weather conditions
(rain, hail etc). Driving on a wet road
or in the transitions from a dry area to
a wet area can cause the system to
light up, as water splash can be
interpreted as an object. Otherwise F may illuminate due to guardrails,
signs, trees, shrubs or other immobile
objects. This is normal operation and
the system does not need a service.The system may not operate properly
when:
● ice, snow, mud, or anything else covers the sensors
● driving in heavy rainstorms
● the vehicle had an accident
● there are extreme temperature changes
In the event of a fault in the system or if the system does not work due to
temporary conditions, a message is
displayed in the Driver Information
Centre. Seek the assistance of a
workshop.
Panoramic view system The panoramic view system vision
displays an image of the area
surrounding the vehicle, along with
the front or rear camera views in the
centre console.
Page 187 of 267

Driving and operating185Shown distances may be different
from actual distances. Do not drive or park the vehicle using only
these camera(s). Always check
behind and around the vehicle
before driving. Failure to use
proper care may result in injury, death, or vehicle damage.
The system also works when the
surrounding is dark, but performance
may be restricted.
Rear view camera
The rear view camera assists the
driver when reversing by displaying a view of the area behind the vehicle.
The view of the camera is displayed
in the Info display.
9 Warning
The rear view camera does not
replace driver vision. Note that
objects that are outside the
camera's field of view and the
advanced parking assist sensors,
e.g. below the bumper or
underneath the vehicle, are not
displayed.
Do not reverse the vehicle by only looking at the Info-Display and
check the surrounding area
behind and around the vehicle
before reversing.
Activation
Rear view camera is automatically
activated when reverse gear is
engaged.
Functionality
The camera is mounted between the
number plate lights and has a viewing angle of 130°.
The area displayed by the camera is
limited. The distance of the image that
appears on the display differs from
the actual distance.
Guiding lines
Dynamic guiding lines are horizontal
lines at 1 m intervals projected onto
the picture to define the distance to
displayed objects.