ESP OPEL AMPERA E 2018 Manual user
[x] Cancel search | Manufacturer: OPEL, Model Year: 2018, Model line: AMPERA E, Model: OPEL AMPERA E 2018Pages: 267, PDF Size: 6.45 MB
Page 9 of 267
In brief7Exterior mirrors
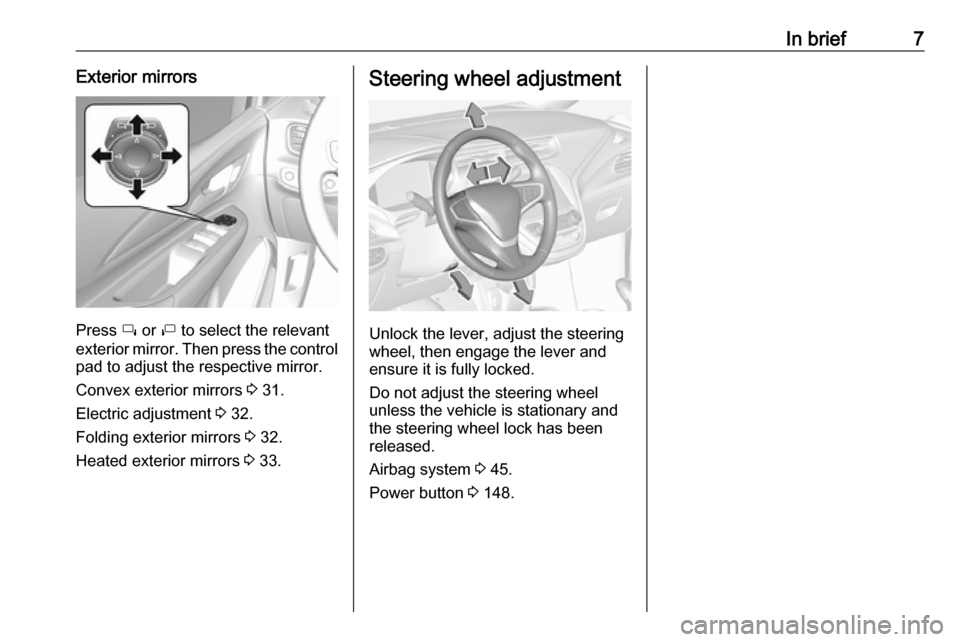
Press í or ì to select the relevant
exterior mirror. Then press the control
pad to adjust the respective mirror.
Convex exterior mirrors 3 31.
Electric adjustment 3 32.
Folding exterior mirrors 3 32.
Heated exterior mirrors 3 33.
Steering wheel adjustment
Unlock the lever, adjust the steering
wheel, then engage the lever and
ensure it is fully locked.
Do not adjust the steering wheel
unless the vehicle is stationary and the steering wheel lock has been
released.
Airbag system 3 45.
Power button 3 148.
Page 22 of 267

20Keys, doors and windowsBattery replacement in the electronic
key 3 17.
Electronic key synchronisation
The electronic key synchronises itself automatically during every starting
procedure.
Fault
If the central locking cannot be
operated or the propulsion system
cannot be started, the cause may be
one of the following:
● Fault in electronic key.
● Electronic key is out of reception range.
● The battery voltage is too low.
● Overload of the central locking system by operating at frequent
intervals, the power supply is
interrupted for a short time.
● Interference from higher-power radio waves from other sources.
To rectify the cause of the fault,
change the position of the electronic
key.
Manual unlocking 3 20.Memorised settings
Whenever the vehicle is switched off, the following settings are
automatically memorised by the
electronic key:
● automatic climate control
● lighting
● Infotainment system
● central locking system
● comfort settings
The saved settings are automatically
used the next time the vehicle is
switched on with the memorised
electronic key 3 19.
A precondition is that Personalisation
by driver is activated in the personal
settings of the Info display. This must
be set for each electronic key which is
used. The status change is available
only after locking and unlocking the
vehicle.
Vehicle personalisation 3 91.
Central locking system
Unlocks and locks doors, load
compartment and charge port door.A pull on an interior door handle
unlocks the respective door. Pulling
the handle once more opens the door.
Note
In the event of an accident in which
airbags or belt pretensioners are
deployed, the vehicle is
automatically unlocked.
Note
A short time after unlocking with the
remote control the doors are locked
automatically if no door has been
opened. A precondition is that the
setting is activated in the vehicle
personalisation 3 91.
Page 24 of 267
22Keys, doors and windowsUnlocking
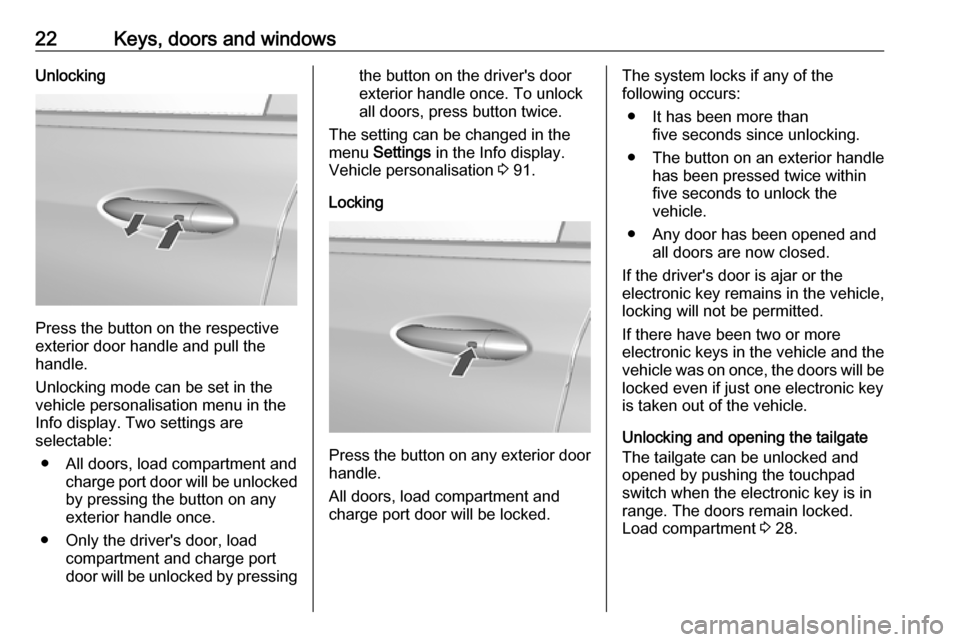
Press the button on the respective
exterior door handle and pull the
handle.
Unlocking mode can be set in the
vehicle personalisation menu in the
Info display. Two settings are
selectable:
● All doors, load compartment and charge port door will be unlocked
by pressing the button on any
exterior handle once.
● Only the driver's door, load compartment and charge portdoor will be unlocked by pressing
the button on the driver's doorexterior handle once. To unlock
all doors, press button twice.
The setting can be changed in the
menu Settings in the Info display.
Vehicle personalisation 3 91.
Locking
Press the button on any exterior door
handle.
All doors, load compartment and
charge port door will be locked.
The system locks if any of the
following occurs:
● It has been more than five seconds since unlocking.
● The button on an exterior handle has been pressed twice within
five seconds to unlock the
vehicle.
● Any door has been opened and all doors are now closed.
If the driver's door is ajar or the
electronic key remains in the vehicle,
locking will not be permitted.
If there have been two or more
electronic keys in the vehicle and the
vehicle was on once, the doors will be
locked even if just one electronic key
is taken out of the vehicle.
Unlocking and opening the tailgate The tailgate can be unlocked and
opened by pushing the touchpad
switch when the electronic key is in
range. The doors remain locked.
Load compartment 3 28.
Page 34 of 267
32Keys, doors and windowsElectric adjustment
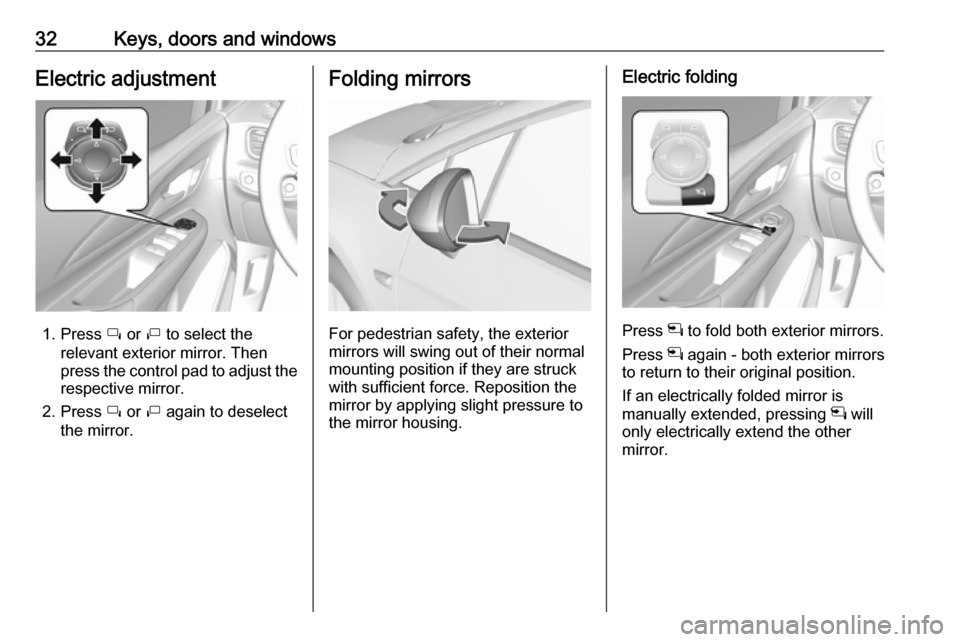
1. Press í or ì to select the
relevant exterior mirror. Then
press the control pad to adjust the respective mirror.
2. Press í or ì again to deselect
the mirror.
Folding mirrors
For pedestrian safety, the exterior
mirrors will swing out of their normal
mounting position if they are struck
with sufficient force. Reposition the mirror by applying slight pressure tothe mirror housing.
Electric folding
Press n to fold both exterior mirrors.
Press n again - both exterior mirrors
to return to their original position.
If an electrically folded mirror is
manually extended, pressing n will
only electrically extend the other
mirror.
Page 36 of 267
34Keys, doors and windowsPower windows9Warning
Take care when operating the
power windows. Risk of injury,
particularly to children.
If there are children on the rear seats, switch on the child safety
system for the power windows.
Keep a close watch on the
windows when closing them.
Ensure that nothing becomes
trapped in them as they move.
Switch on the vehicle to operate
power windows. Retained power off
3 150.
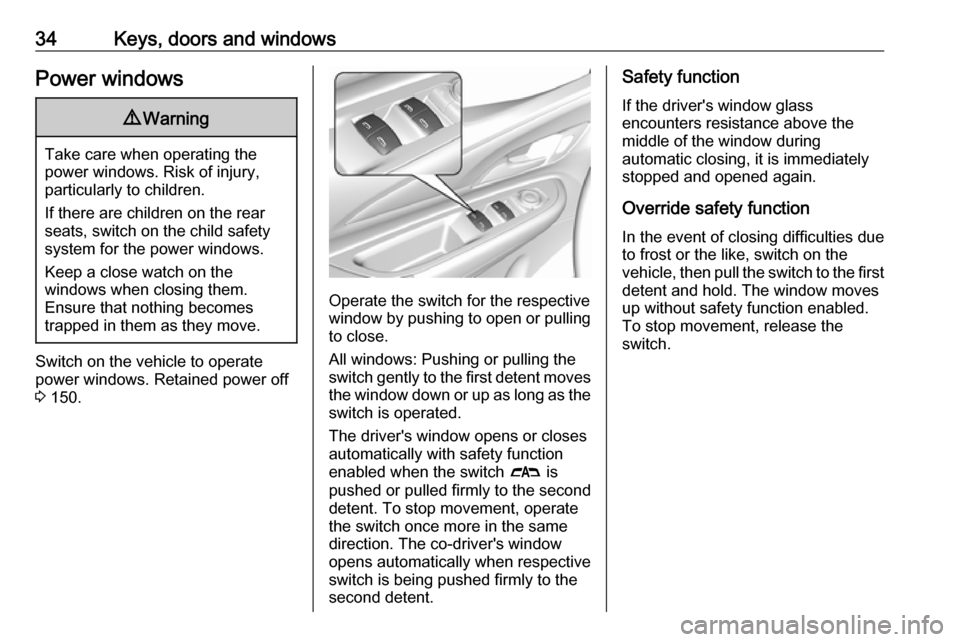
Operate the switch for the respective
window by pushing to open or pulling to close.
All windows: Pushing or pulling the
switch gently to the first detent moves
the window down or up as long as the switch is operated.
The driver's window opens or closes
automatically with safety function
enabled when the switch # is
pushed or pulled firmly to the second detent. To stop movement, operate
the switch once more in the same
direction. The co-driver's window
opens automatically when respective
switch is being pushed firmly to the
second detent.
Safety function
If the driver's window glass
encounters resistance above the
middle of the window during
automatic closing, it is immediately
stopped and opened again.
Override safety function In the event of closing difficulties due
to frost or the like, switch on the
vehicle, then pull the switch to the first
detent and hold. The window moves
up without safety function enabled.
To stop movement, release the
switch.
Page 40 of 267
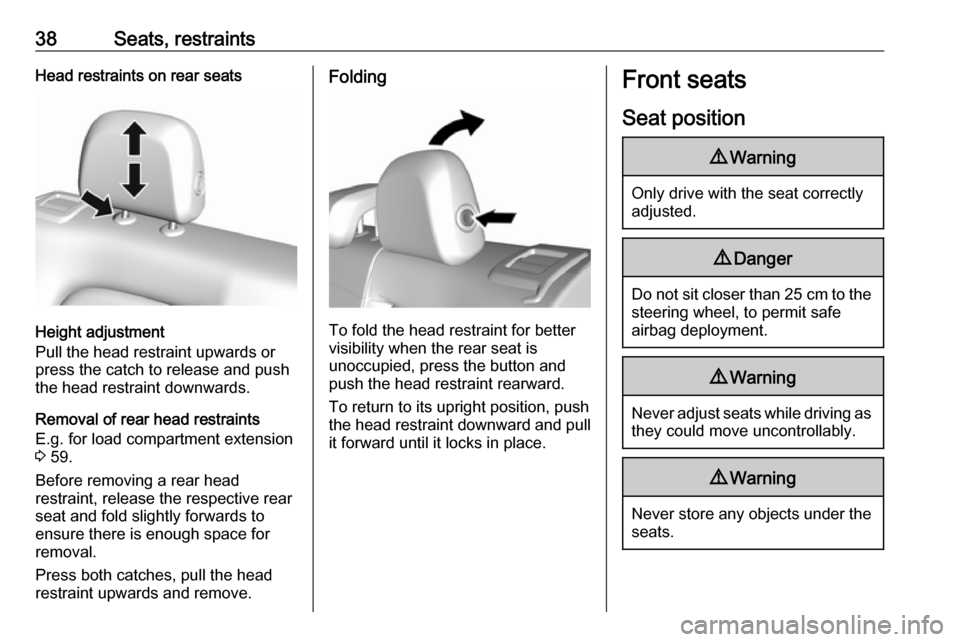
38Seats, restraintsHead restraints on rear seats
Height adjustment
Pull the head restraint upwards or
press the catch to release and push the head restraint downwards.
Removal of rear head restraints
E.g. for load compartment extension
3 59.
Before removing a rear head
restraint, release the respective rear
seat and fold slightly forwards to
ensure there is enough space for
removal.
Press both catches, pull the head restraint upwards and remove.
Folding
To fold the head restraint for better
visibility when the rear seat is
unoccupied, press the button and
push the head restraint rearward.
To return to its upright position, pushthe head restraint downward and pull
it forward until it locks in place.
Front seats
Seat position9 Warning
Only drive with the seat correctly
adjusted.
9 Danger
Do not sit closer than 25 cm to the
steering wheel, to permit safe
airbag deployment.
9 Warning
Never adjust seats while driving as
they could move uncontrollably.
9 Warning
Never store any objects under the
seats.
Page 43 of 267
Seats, restraints41Heating
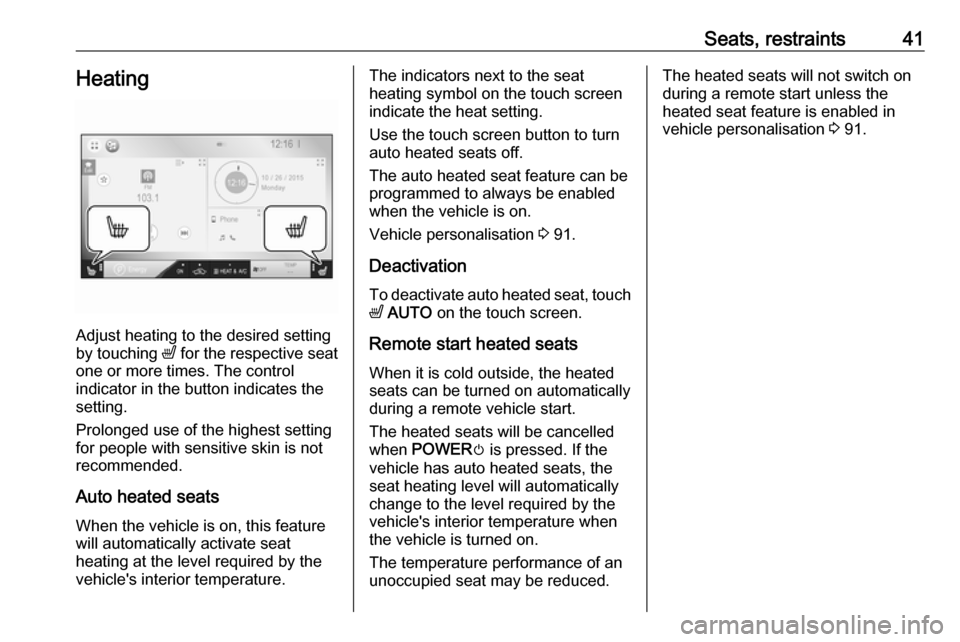
Adjust heating to the desired setting
by touching ß for the respective seat
one or more times. The control
indicator in the button indicates the
setting.
Prolonged use of the highest setting
for people with sensitive skin is not
recommended.
Auto heated seats
When the vehicle is on, this feature
will automatically activate seat
heating at the level required by the
vehicle's interior temperature.
The indicators next to the seat
heating symbol on the touch screen
indicate the heat setting.
Use the touch screen button to turn
auto heated seats off.
The auto heated seat feature can be programmed to always be enabled
when the vehicle is on.
Vehicle personalisation 3 91.
Deactivation To deactivate auto heated seat, touchß AUTO on the touch screen.
Remote start heated seats When it is cold outside, the heatedseats can be turned on automaticallyduring a remote vehicle start.
The heated seats will be cancelled
when POWER m is pressed. If the
vehicle has auto heated seats, the
seat heating level will automatically
change to the level required by the
vehicle's interior temperature when
the vehicle is turned on.
The temperature performance of an
unoccupied seat may be reduced.The heated seats will not switch on
during a remote start unless the
heated seat feature is enabled in
vehicle personalisation 3 91.
Page 44 of 267
42Seats, restraintsRear seats
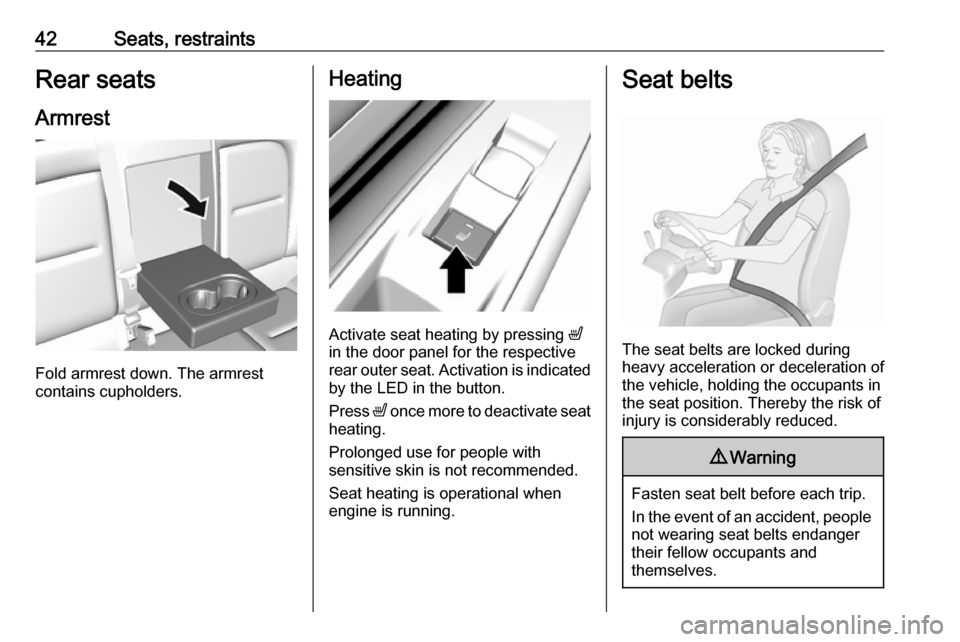
Armrest
Fold armrest down. The armrest
contains cupholders.
Heating
Activate seat heating by pressing ß
in the door panel for the respective
rear outer seat. Activation is indicated
by the LED in the button.
Press ß once more to deactivate seat
heating.
Prolonged use for people with
sensitive skin is not recommended.
Seat heating is operational when
engine is running.
Seat belts
The seat belts are locked during
heavy acceleration or deceleration of
the vehicle, holding the occupants in
the seat position. Thereby the risk of
injury is considerably reduced.
9 Warning
Fasten seat belt before each trip.
In the event of an accident, people
not wearing seat belts endanger their fellow occupants and
themselves.
Page 55 of 267

Seats, restraints53Child restraint installation locations
Permissible options for fastening a child restraint system with a three-point seat belt
Weight class
On front passenger seat
On rear outboard seatsOn rear centre seat
activated airbagdeactivated airbagGroup 0: up to 10 kgXU 1,2U/L 3UGroup 0+: up to 13 kgXU1,2U/L 3UGroup I: 9 to 18 kgXU1,2,4U/L 3,4U4Group II: 15 to 25 kgU1,2,4XU/L 3,4U4Group III: 22 to 36 kgU1,2,4XU/L 3,4U4U:universal suitability in conjunction with three-point seat beltL:suitable for particular child restraint systems of the 'specific-vehicle', 'restricted' or 'semi-universal' categories. The
child restraint system must be approved for the specific vehicle type (refer to the vehicle type list of the child restraint
system)X:no child restraint system permitted in this weight class1:move seat forwards as far as necessary and adjust seat backrest as far as necessary to a vertical position to ensure that the belt runs forwards from the upper anchorage point2:move seat upwards as far as necessary and adjust seat backrest as far as necessary to a vertical position to ensurethat the belt is tight on the buckle side3:move the respective front seat ahead of the child restraint system forwards as far as necessary4:adjust the respective headrest as necessary or remove if required
Page 57 of 267

Seats, restraints55IL:suitable for particular ISOFIX restraint systems of the 'specific-vehicle', 'restricted' or 'semi-universal' categories.The ISOFIX restraint system must be approved for the specific vehicle type (refer to the vehicle type list of the child
restraint system)IUF:suitable for ISOFIX forward-facing child restraint systems of universal category approved for use in this weight classX:no ISOFIX child restraint system approved in this weight class1:move seat forwards as far as necessary and adjust seat backrest as far as necessary to a vertical position to ensure
that the belt runs forwards from the upper anchorage point2:move seat upwards as far as necessary and adjust seat backrest as far as necessary to a vertical position to ensure
that the belt is tight on the buckle side3:move the respective front seat ahead of the child restraint system forwards as far as necessary and adjust seat
backrest as far as necessary to a vertical position4:adjust the respective headrest as necessary or remove if required
ISOFIX size class and seat device
A – ISO/F3:forward-facing child restraint system for children of maximum size in the weight class 9 to 18 kgB – ISO/F2:forward-facing child restraint system for smaller children in the weight class 9 to 18 kgB1 – ISO/F2X:forward-facing child restraint system for smaller children in the weight class 9 to 18 kgC – ISO/R3:rear-facing child restraint system for children of maximum size in the weight class up to 18 kgD – ISO/R2:rear-facing child restraint system for smaller children in the weight class up to 18 kgE – ISO/R1:rear-facing child restraint system for young children in the weight class up to 13 kgF - ISO/L1:left lateral facing position child restraint system (carry-cot)G - ISO/L2:right lateral facing position child restraint system (carry-cot)
Permissible options for fitting an i-Size child restraint system with ISOFIX brackets
On front passenger seat
On rear outboard seatsOn rear centre seat
activated airbagdeactivated airbagi-Size child restraint systemsXXXX