buttons OPEL AMPERA E 2019 Manual user
[x] Cancel search | Manufacturer: OPEL, Model Year: 2019, Model line: AMPERA E, Model: OPEL AMPERA E 2019Pages: 271, PDF Size: 6.7 MB
Page 131 of 271

Infotainment system129To delete a song, fling the respective
list item to the right. The favourite is
wiped from the favourites list.
Alternatively, touch s. The favourite
is deleted from the list and the screen
button changes to t.
Retrieving songs
Activate the < tab to display the
favourites list.
Select the preset screen button on
which the desired song is stored.
Audio settings
Activate the desired audio source and then select Menu.
Select the Audio settings tab. Adjust
the settings as desired.
To return from the audio menu to the
audio main screen, select Now
playing .
Displaying pictures
You can view pictures from a USB
device connected to the USB port.Note
For your safety, some features are
disabled while driving.
Activating the picture function
If the device is not yet connected to
the Infotainment system, connect the
device 3 125.
Press p and then select 1 in the top
left corner of the screen to display the application overview screen.
Select Gallery to open the media
main menu.
Select y to open the picture main
menu to display a list of items stored on the USB device. Select the desired
picture. If this is stored within a folder, select the respective folder first.
Touch the screen to hide the menu
bar. Touch the screen again to
redisplay the menu bar.
Function buttons
Viewing the next or previous picture
Touch j to view the next picture.
Touch i to view the previous picture.
Rotating a picture
Select v to rotate the picture.
Zoom in on a picture
Touch ½ to zoom in on a picture or to
return to its original size.
Page 132 of 271
130Infotainment systemViewing a slide show
Select r to view the pictures stored
on the USB device in a slide show.
Touch the screen to end the slide
show.
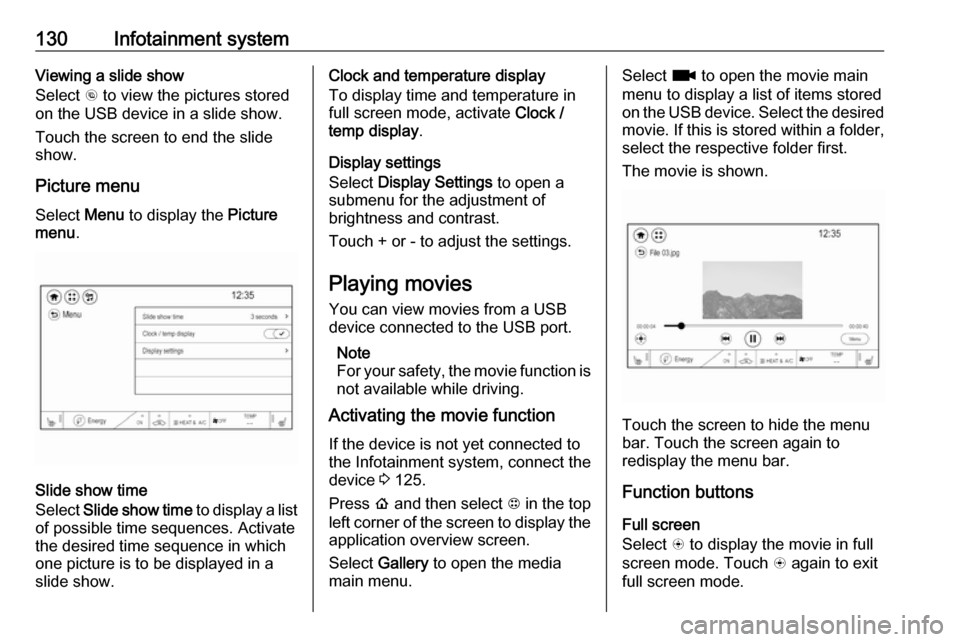
Picture menu
Select Menu to display the Picture
menu .
Slide show time
Select Slide show time to display a list
of possible time sequences. Activate
the desired time sequence in which
one picture is to be displayed in a
slide show.
Clock and temperature display
To display time and temperature in
full screen mode, activate Clock /
temp display .
Display settings
Select Display Settings to open a
submenu for the adjustment of brightness and contrast.
Touch + or - to adjust the settings.
Playing movies You can view movies from a USBdevice connected to the USB port.
Note
For your safety, the movie function is not available while driving.
Activating the movie function
If the device is not yet connected to
the Infotainment system, connect the
device 3 125.
Press p and then select 1 in the top
left corner of the screen to display the application overview screen.
Select Gallery to open the media
main menu.Select z to open the movie main
menu to display a list of items stored on the USB device. Select the desired
movie. If this is stored within a folder, select the respective folder first.
The movie is shown.
Touch the screen to hide the menu
bar. Touch the screen again to
redisplay the menu bar.
Function buttons
Full screen
Select q to display the movie in full
screen mode. Touch q again to exit
full screen mode.
Page 134 of 271

132Infotainment systemConnecting the mobile phoneConnect the smartphone to the USBport 3 125.
When first connecting a device, a
privacy consent message may be
displayed. Confirm the message to
continue the connection procedure.
Starting phone projection Press p and then select 1 in the top
left corner of the screen to display the application overview screen.
To start the phone projection function,
select Projection .
Note
If the application is recognised by
the Infotainment system, the
application icon may change to
Apple CarPlay or Android Auto .
Alternatively, press and hold p.
The phone projection screen
displayed depends on your
smartphone and software version.
Returning to the home screen
Press p.Speech recognition
General information
The voice pass-thru application of the
Infotainment system allows access to the speech recognition commands on
your smartphone. See your
smartphone manufacturer's
operating instructions to find out
whether your smartphone supports
this feature.
In order to use the voice pass-thru
application, the smartphone must be
connected to the Infotainment system via USB cable 3 125 or via Bluetooth
3 133.
Usage
Activating speech recognition Press and hold w on the steering
wheel to start a speech recognition
session. A voice command message
is displayed on the screen.As soon as a beep is heard, you can
say a command. For information on
the commands supported, see the
operating instructions for your
smartphone.
Adjusting the volume of voice
prompts
Turn m on the control panel or press
the volume buttons behind the
steering wheel to increase or
decrease the volume of voice
prompts.
Deactivating speech recognition Press n on the steering wheel. The
voice command message disappears
and the speech recognition session is
ended.
Page 145 of 271
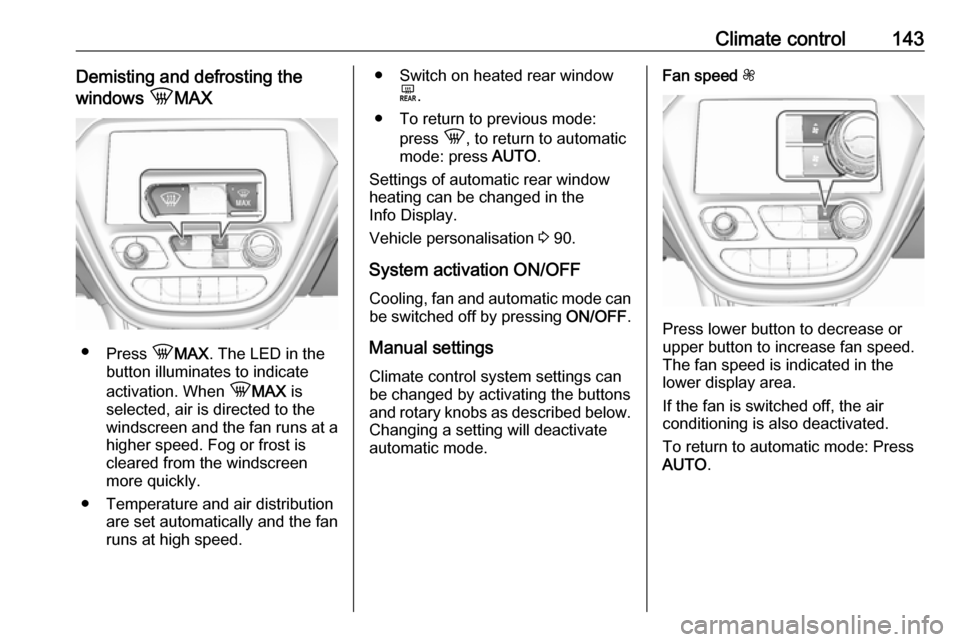
Climate control143Demisting and defrosting the
windows hMAX
●
Press hMAX . The LED in the
button illuminates to indicate
activation. When hMAX is
selected, air is directed to the
windscreen and the fan runs at a
higher speed. Fog or frost is cleared from the windscreenmore quickly.
● Temperature and air distribution are set automatically and the fan
runs at high speed.
● Switch on heated rear window
f.
● To return to previous mode: press h, to return to automatic
mode: press AUTO.
Settings of automatic rear window
heating can be changed in the
Info Display.
Vehicle personalisation 3 90.
System activation ON/OFF Cooling, fan and automatic mode can
be switched off by pressing ON/OFF.
Manual settings Climate control system settings can
be changed by activating the buttons
and rotary knobs as described below.
Changing a setting will deactivate
automatic mode.Fan speed Z,
Press lower button to decrease or
upper button to increase fan speed.
The fan speed is indicated in the
lower display area.
If the fan is switched off, the air
conditioning is also deactivated.
To return to automatic mode: Press
AUTO .
Page 151 of 271

Driving and operating149If the vehicle will not start, place the
electronic key in the transmitter
pocket inside the centre console.
Starting and stopping the vehicle 3 150.Switching on the vehicle
With the vehicle off and the brake
pedal applied, pressing POWERm
once will switch on the vehicle. When
4 illuminates in the instrument
cluster, the vehicle is ready to be
driven. This could take up to
15 seconds at extremely cold
temperatures.Switching off the vehicle
With the vehicle in P, press
POWER m briefly in service mode or
when engine is running and vehicle is stationary. Some functions remain
active until driver's door is opened.
If the vehicle is not in P when
switching off the vehicle, P will be
automatically engaged before the
vehicle is switched off.A chime will sound if the driver's door is opened while the vehicle is
switched on. Always press
POWER m to switch off the vehicle
before exiting the vehicle.Emergency shut off during driving
If the vehicle needs to be switched off during driving in case of emergency,
press POWER m for more than
2 seconds or press twice briefly within
5 seconds.
Starting and stopping the vehicle
3 150.
Service mode
This power mode is available for
service and diagnostics and to verify
the proper operation of the service
vehicle soon control indicator as may
be required for emission inspection
purposes.
With the vehicle switched off and the
brake pedal not applied, pressing and holding POWER m for more than
5 seconds will place the vehicle in service mode. The instruments and
audio systems will operate as they do when the vehicle is switched on, but
the vehicle will not be able to be
driven. The propulsion system will not start in service mode. Press
POWER m again to switch off the
vehicle.Caution
Service mode will discharge the
12 V vehicle battery. Do not use
service mode for an extended
period, or the vehicle may not
start.
Operation in case of failure
If the vehicle does not start due to a
low electronic key battery, a message
will be displayed in the Driver
Information Centre.
To still drive the vehicle, proceed as
follows:
1. Open the centre console and remove the small tray from the
centre console. Place the
electronic key in the pocket with
the buttons facing the bottom of
the vehicle.
Page 170 of 271
168Driving and operatingapproaching a vehicle ahead too
rapidly, it may not provide you
enough time to avoid a collision.
The driver accepts full
responsibility for the appropriate
following distance based on traffic, weather and visibility conditions.
The complete attention of the
driver is always required while
driving. The driver must always be
ready to take action and apply the
brakes.
System limitations
Forward collision alert is designed to warn about vehicles only, but may
react also to other objects.
In the following cases, forward
collision alert may not detect a vehicle ahead or sensor performance is
limited:
● on winding roads
● when weather limits visibility, such as fog, rain, or snow
● when the sensor is blocked by snow, ice, slush, mud, dirt,
windscreen damage or affected
by foreign items, e.g. stickers
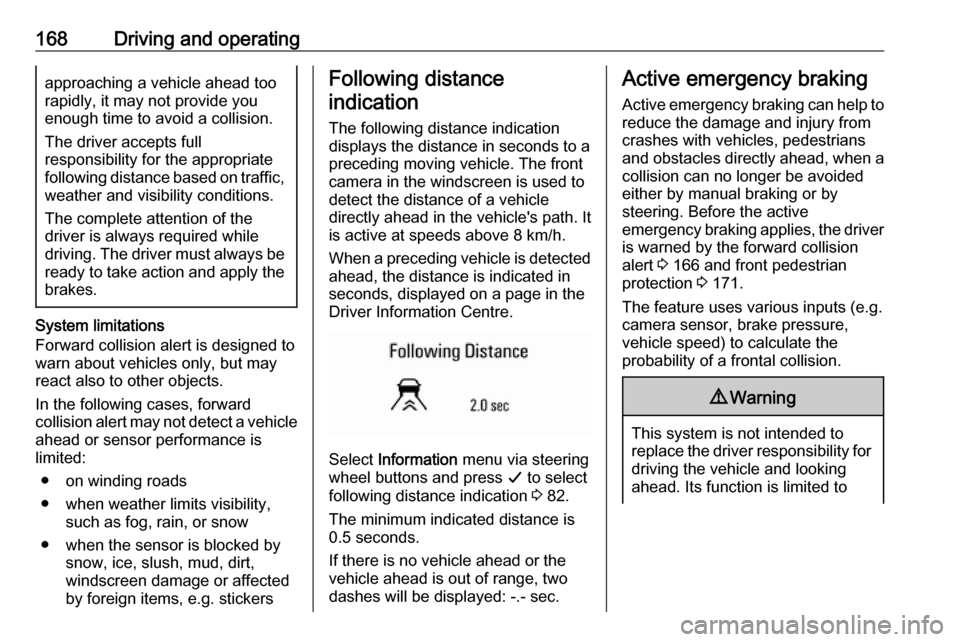
Following distance
indication
The following distance indication
displays the distance in seconds to a
preceding moving vehicle. The front
camera in the windscreen is used to
detect the distance of a vehicle
directly ahead in the vehicle's path. It
is active at speeds above 8 km/h.
When a preceding vehicle is detected
ahead, the distance is indicated in
seconds, displayed on a page in the
Driver Information Centre.
Select Information menu via steering
wheel buttons and press G to select
following distance indication 3 82.
The minimum indicated distance is
0.5 seconds.
If there is no vehicle ahead or the vehicle ahead is out of range, two
dashes will be displayed: -.- sec.
Active emergency braking
Active emergency braking can help toreduce the damage and injury from
crashes with vehicles, pedestrians and obstacles directly ahead, when a
collision can no longer be avoided
either by manual braking or by
steering. Before the active
emergency braking applies, the driver
is warned by the forward collision
alert 3 166 and front pedestrian
protection 3 171.
The feature uses various inputs (e.g.
camera sensor, brake pressure,
vehicle speed) to calculate the
probability of a frontal collision.9 Warning
This system is not intended to
replace the driver responsibility for driving the vehicle and looking
ahead. Its function is limited to
Page 191 of 271
Driving and operating189
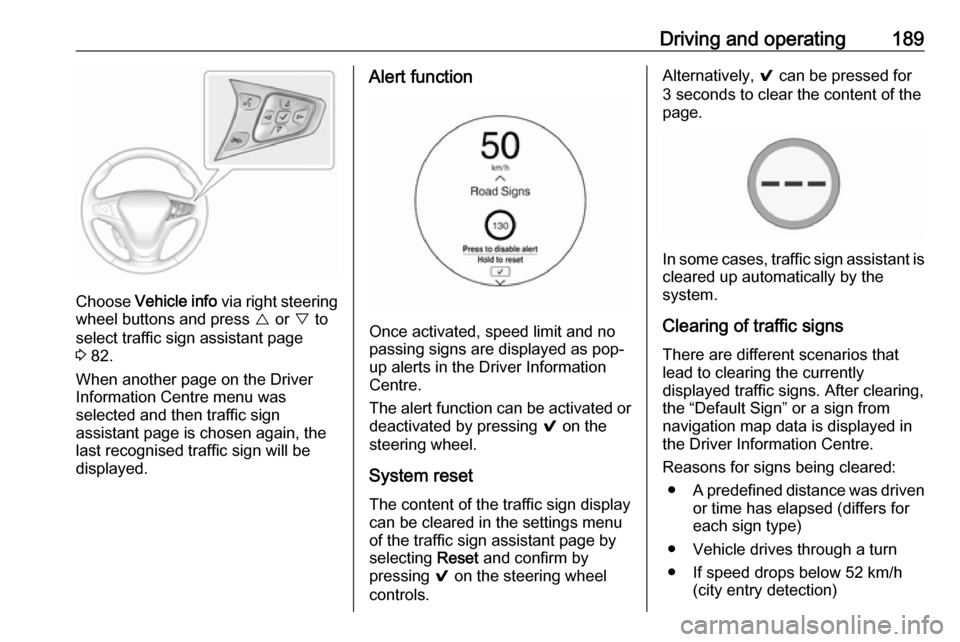
Choose Vehicle info via right steering
wheel buttons and press { or } to
select traffic sign assistant page
3 82.
When another page on the Driver Information Centre menu was
selected and then traffic sign
assistant page is chosen again, the
last recognised traffic sign will be
displayed.
Alert function
Once activated, speed limit and no
passing signs are displayed as pop-
up alerts in the Driver Information
Centre.
The alert function can be activated or
deactivated by pressing 9 on the
steering wheel.
System reset
The content of the traffic sign display
can be cleared in the settings menu
of the traffic sign assistant page by
selecting Reset and confirm by
pressing 9 on the steering wheel
controls.
Alternatively, 9 can be pressed for
3 seconds to clear the content of the page.
In some cases, traffic sign assistant is
cleared up automatically by the
system.
Clearing of traffic signs
There are different scenarios that
lead to clearing the currently
displayed traffic signs. After clearing,
the “Default Sign” or a sign from
navigation map data is displayed in
the Driver Information Centre.
Reasons for signs being cleared: ● A predefined distance was driven
or time has elapsed (differs for
each sign type)
● Vehicle drives through a turn
● If speed drops below 52 km/h (city entry detection)
Page 235 of 271
Vehicle care233
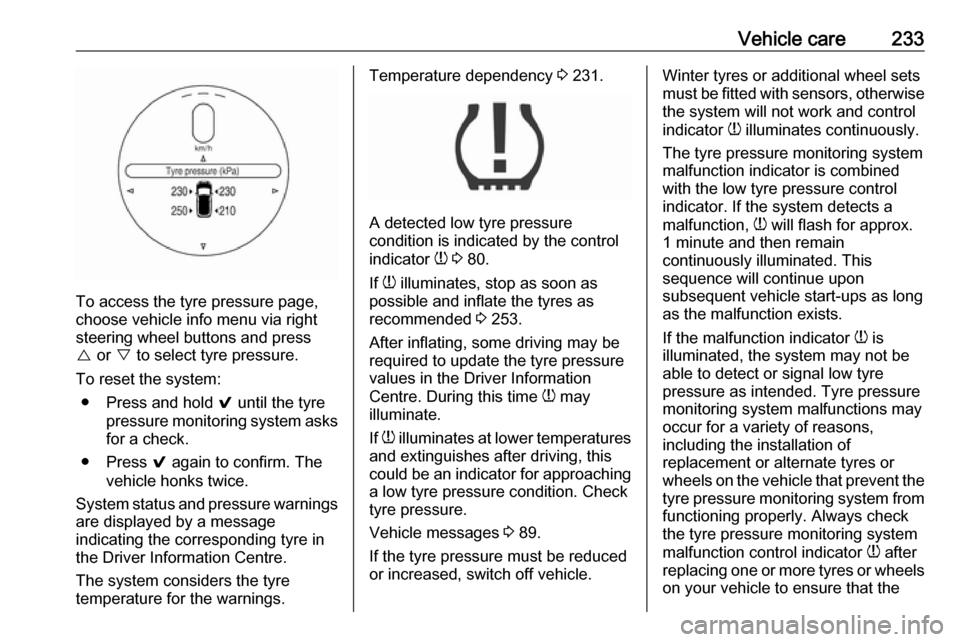
To access the tyre pressure page,
choose vehicle info menu via right
steering wheel buttons and press
{ or } to select tyre pressure.
To reset the system: ● Press and hold 9 until the tyre
pressure monitoring system asks
for a check.
● Press 9 again to confirm. The
vehicle honks twice.
System status and pressure warnings
are displayed by a message
indicating the corresponding tyre in
the Driver Information Centre.
The system considers the tyre
temperature for the warnings.
Temperature dependency 3 231.
A detected low tyre pressure
condition is indicated by the control
indicator w 3 80.
If w illuminates, stop as soon as
possible and inflate the tyres as
recommended 3 253.
After inflating, some driving may be
required to update the tyre pressure
values in the Driver Information
Centre. During this time w may
illuminate.
If w illuminates at lower temperatures
and extinguishes after driving, this
could be an indicator for approaching a low tyre pressure condition. Check
tyre pressure.
Vehicle messages 3 89.
If the tyre pressure must be reduced or increased, switch off vehicle.
Winter tyres or additional wheel sets
must be fitted with sensors, otherwise the system will not work and control
indicator w illuminates continuously.
The tyre pressure monitoring system
malfunction indicator is combined
with the low tyre pressure control
indicator. If the system detects a
malfunction, w will flash for approx.
1 minute and then remain
continuously illuminated. This
sequence will continue upon
subsequent vehicle start-ups as long
as the malfunction exists.
If the malfunction indicator w is
illuminated, the system may not be
able to detect or signal low tyre
pressure as intended. Tyre pressure
monitoring system malfunctions may
occur for a variety of reasons,
including the installation of
replacement or alternate tyres or wheels on the vehicle that prevent the
tyre pressure monitoring system from functioning properly. Always check
the tyre pressure monitoring system
malfunction control indicator w after
replacing one or more tyres or wheels
on your vehicle to ensure that the