display OPEL AMPERA E 2019 Manual user
[x] Cancel search | Manufacturer: OPEL, Model Year: 2019, Model line: AMPERA E, Model: OPEL AMPERA E 2019Pages: 271, PDF Size: 6.7 MB
Page 4 of 271

2IntroductionIntroduction
Your vehicle is a designed
combination of advanced technology,
safety, environmental friendliness
and economy.
This Owner's Manual provides you
with all the necessary information to
enable you to drive your vehicle
safely and efficiently.
Make sure your passengers are
aware of the possible risk of accident and injury which may result from
improper use of the vehicle.
You must always comply with the
specific laws and regulations of the
country that you are in. These laws
may differ from the information in this
Owner's Manual.
Disregarding the description given in
this manual may affect your warranty.
When this Owner's Manual refers to aworkshop visit, we recommend your
Opel Service Partner.All Opel Service Partners provide
first-class service at reasonable
prices. Experienced mechanics
trained by Opel work according to
specific Opel instructions.
The customer literature pack should
always be kept ready to hand in the
vehicle.
Using this manual ● This manual describes all options
and features available for this
model. Certain descriptions,
including those for display and
menu functions, may not apply to your vehicle due to model
variant, country specifications,
special equipment or
accessories.
● The "In brief" section will give you
an initial overview.
● The table of contents at the beginning of this manual and
within each section shows where
the information is located.
● The index will enable you to search for specific information.● Directional data, e.g. left or right, or front or back, always relate to
the direction of travel.
● Displays may not support your specific language.
● Display messages and interior labelling are written in bold
letters.
Danger, Warnings and
Cautions9 Danger
Text marked 9 Danger provides
information on risk of fatal injury.
Disregarding this information may
endanger life.
9 Warning
Text marked 9 Warning provides
information on risk of accident or
injury. Disregarding this
information may lead to injury.
Page 11 of 271

In brief91Power windows .....................34
2 Exterior mirrors .....................32
3 Central locking system ..........20
4 Side air vents ...................... 145
5 Turn lights, headlight
flash, low / high beam,
high beam assist .................102
Exit lighting ......................... 104
Parking lights ...................... 102
6 Regeneration on Demand ..160
7 Cruise control .....................163
Speed limiter ....................... 164
Forward collision alert .........166
Heated steering wheel ..........65
8 Instruments .......................... 74
Driver Information Centre ...... 82
9 Forward collision alert
indicator ............................. 166
Front pedestrian alert ..........171
10 Buttons for Driver
Information Centre ................82
11 Windscreen wiper and
washer, rear wiper and
washer ................................. 6612Centre air vents .................. 145
13 Info Display .......................... 85
14 Anti-theft alarm system
status LED ........................... 30
Light sensor .......................... 99
Charging status indicator ....203
15 Glovebox .............................. 57
16 Climate control system ........ 141
17 Hazard warning flashers ....101
Sport mode ........................ 153
Traction Control system .....161
Electronic Stability Control . 162
Parking assist / Advanced
parking assist .....................173
Lane keep assist ................190
18 Power outlet .......................... 69
19 Selector lever ...................... 153
20 USB port
21 Controls for Info Display
operation .............................. 85
22 Parking brake ......................158
23 Power button ....................... 148
24 Steering wheel adjustment ..65
25 Horn ..................................... 6626Bonnet release lever ..........212
27 Fuse box ............................ 227
28 Light switch .......................... 98
Headlight range
adjustment ......................... 101
Rear fog lights ....................102
Instrument illumination .......103
Page 21 of 271

Keys, doors and windows192. Insert the key blade for approx.6 mm and turn the key to open thehousing. Further insertion of the
key blade can damage the
housing.
3. Remove and replace battery. Use
CR 2032 or equivalent battery.
Pay attention to the installation
position.
4. Close the housing and insert key blade.
Radio remote control
synchronisation
After replacing the battery, unlock the
door with the key in the driver's door
lock. The radio remote control will be
synchronised when you switch on the
vehicle.
Fault
If the central locking system cannot
be operated with the radio remote
control, the cause may be one of the
following:
● Fault in radio remote control.
● The range is exceeded.
● The battery voltage is too low.● Frequent, repeated operation of the radio remote control while notin range, which will require re-
synchronisation.
● Overload of the central locking system by operating at frequent
intervals, the power supply is
interrupted for a short time.
● Interference from higher-power radio waves from other sources.
Manual unlocking 3 20.
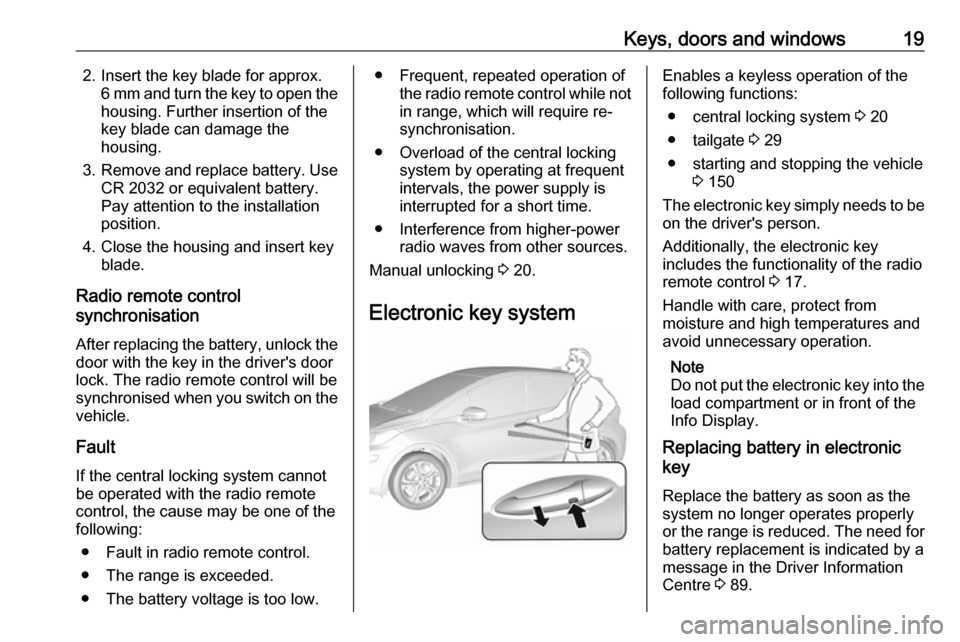
Electronic key systemEnables a keyless operation of the
following functions:
● central locking system 3 20
● tailgate 3 29
● starting and stopping the vehicle 3 150
The electronic key simply needs to be on the driver's person.
Additionally, the electronic key
includes the functionality of the radio
remote control 3 17.
Handle with care, protect from
moisture and high temperatures and
avoid unnecessary operation.
Note
Do not put the electronic key into the
load compartment or in front of the
Info Display.
Replacing battery in electronic
key
Replace the battery as soon as the
system no longer operates properly
or the range is reduced. The need for
battery replacement is indicated by a
message in the Driver Information
Centre 3 89.
Page 22 of 271

20Keys, doors and windowsBattery replacement in the electronic
key 3 17.
Electronic key synchronisation
The electronic key synchronises itself automatically during every starting
procedure.
Fault
If the central locking cannot be
operated or the propulsion system
cannot be started, the cause may be
one of the following:
● Fault in electronic key.
● Electronic key is out of reception range.
● The battery voltage is too low.
● Overload of the central locking system by operating at frequent
intervals, the power supply is
interrupted for a short time.
● Interference from higher-power radio waves from other sources.
To rectify the cause of the fault,
change the position of the electronic
key.
Manual unlocking 3 20.Memorised settings
Whenever the ignition is switched off, some functions of the following
settings may be automatically
memorised by the remote control unit
or the electronic key:
● automatic climate control
● lighting
● Infotainment system
● central locking system
● comfort settings
The saved settings are automatically
used the next time the vehicle is
switched on with the memorised
electronic key 3 19.
A precondition is that Personalisation
by driver is activated in the personal
settings of the Info Display. This must be set for each electronic key which is
used. The status change is available
only after locking and unlocking the
vehicle.
Vehicle personalisation 3 90.Central locking system
Unlocks and locks doors and load
compartment.
A pull on an interior door handle
unlocks the respective door. Pulling
the handle once more opens the door.
Note
In the event of an accident in which
airbags or belt pretensioners are
deployed, the vehicle is
automatically unlocked.
Note
A short time after unlocking with the
remote control the doors are locked
automatically if no door has been
opened. A precondition is that the
setting is activated in the vehicle
personalisation 3 90.
Page 23 of 271

Keys, doors and windows21Remote control operationUnlocking
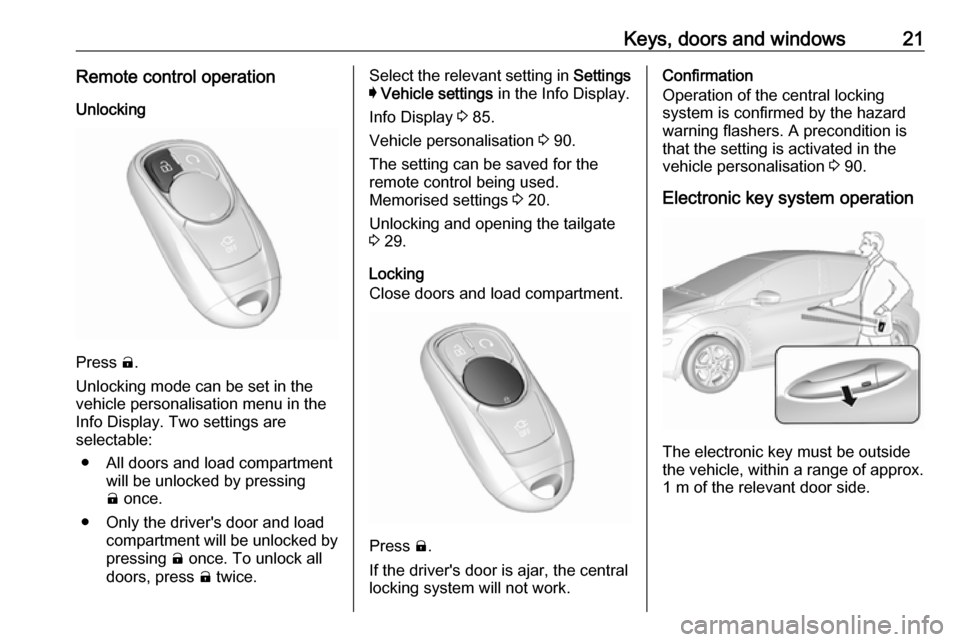
Press (.
Unlocking mode can be set in the vehicle personalisation menu in the
Info Display. Two settings are
selectable:
● All doors and load compartment will be unlocked by pressing
( once.
● Only the driver's door and load compartment will be unlocked by
pressing ( once. To unlock all
doors, press ( twice.
Select the relevant setting in Settings
I Vehicle settings in the Info Display.
Info Display 3 85.
Vehicle personalisation 3 90.
The setting can be saved for the remote control being used.
Memorised settings 3 20.
Unlocking and opening the tailgate 3 29.
Locking
Close doors and load compartment.
Press ).
If the driver's door is ajar, the central
locking system will not work.
Confirmation
Operation of the central locking
system is confirmed by the hazard warning flashers. A precondition is
that the setting is activated in the
vehicle personalisation 3 90.
Electronic key system operation
The electronic key must be outside
the vehicle, within a range of approx. 1 m of the relevant door side.
Page 24 of 271

22Keys, doors and windowsUnlocking
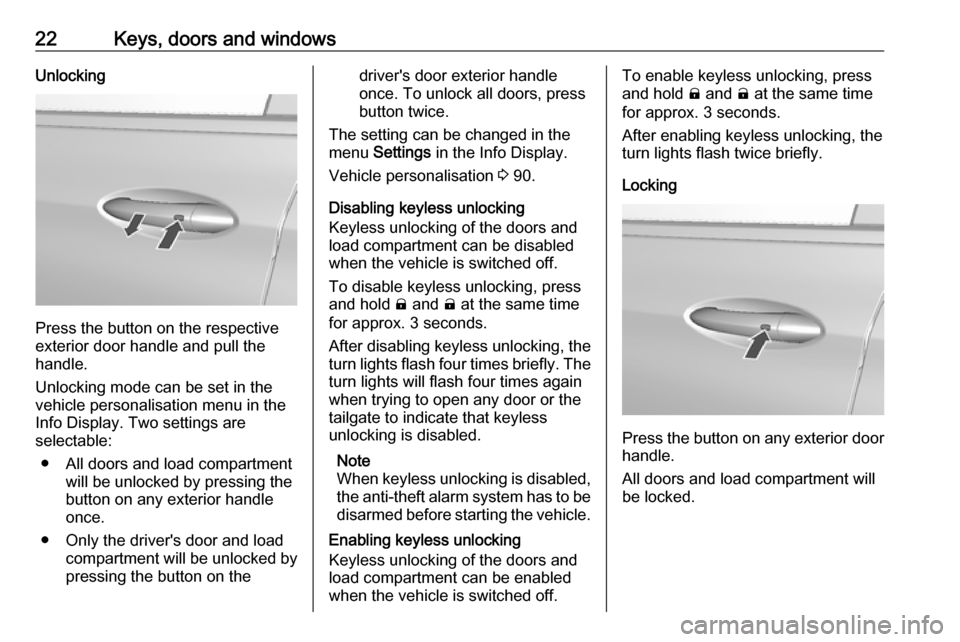
Press the button on the respective
exterior door handle and pull the
handle.
Unlocking mode can be set in the
vehicle personalisation menu in the
Info Display. Two settings are
selectable:
● All doors and load compartment will be unlocked by pressing thebutton on any exterior handle
once.
● Only the driver's door and load compartment will be unlocked by
pressing the button on the
driver's door exterior handle
once. To unlock all doors, press button twice.
The setting can be changed in the menu Settings in the Info Display.
Vehicle personalisation 3 90.
Disabling keyless unlocking
Keyless unlocking of the doors and
load compartment can be disabled when the vehicle is switched off.
To disable keyless unlocking, press
and hold ) and ( at the same time
for approx. 3 seconds.
After disabling keyless unlocking, the
turn lights flash four times briefly. The
turn lights will flash four times again
when trying to open any door or the
tailgate to indicate that keyless
unlocking is disabled.
Note
When keyless unlocking is disabled, the anti-theft alarm system has to be
disarmed before starting the vehicle.
Enabling keyless unlocking
Keyless unlocking of the doors and
load compartment can be enabled
when the vehicle is switched off.To enable keyless unlocking, press
and hold ) and ( at the same time
for approx. 3 seconds.
After enabling keyless unlocking, the turn lights flash twice briefly.
Locking
Press the button on any exterior door
handle.
All doors and load compartment will
be locked.
Page 28 of 271

26Keys, doors and windowsActivation or deactivation of
automatic locking can be set in the
menu Settings I Vehicle settings in
the Info Display.
Info Display 3 85.
Vehicle personalisation 3 90.
The setting can be saved for the electronic key being used 3 20.
Automatic relock after unlocking This feature can be configured to
automatically lock all doors and load
compartment a short time after
unlocking with the electronic key,
provided no door has been opened.
Activation or deactivation of
automatic relock can be set in the
menu Settings I Vehicle settings in
the Info Display.
Info Display 3 85.
Vehicle personalisation 3 90.
The setting can be saved for the electronic key being used 3 20.Passive door lock
This feature locks the vehicle
automatically after several seconds if an electronic key has been
recognised previously inside the
vehicle, all doors have then been
closed and the electronic key does
not remain within the vehicle.
If the electronic key remains in the
vehicle or the vehicle is not off,
passive door lock will not be
permitted.
If there have been two or more
electronic keys in the vehicle and the
vehicle was on once, the feature locks
the vehicle if just one electronic key is taken out of the vehicle.
To prevent locking of the vehicle e.g.
when passengers remain in the
vehicle, the system must be disabled.
To disable the system, press the
central locking button for a few
seconds while one door is open. The
function remains disabled until the
central locking button is pressed or
the vehicle is switched on.Activation or deactivation of passive
locking can be set in the menu
Settings I Vehicle settings I Remote
lock / unlock / start in the Info Display.
Info Display 3 85.
Vehicle personalisation 3 90.
The setting can be saved for the
electronic key being used 3 20.
Child locks
Page 29 of 271

Keys, doors and windows279Warning
Use the child locks whenever
children are occupying the rear
seats.
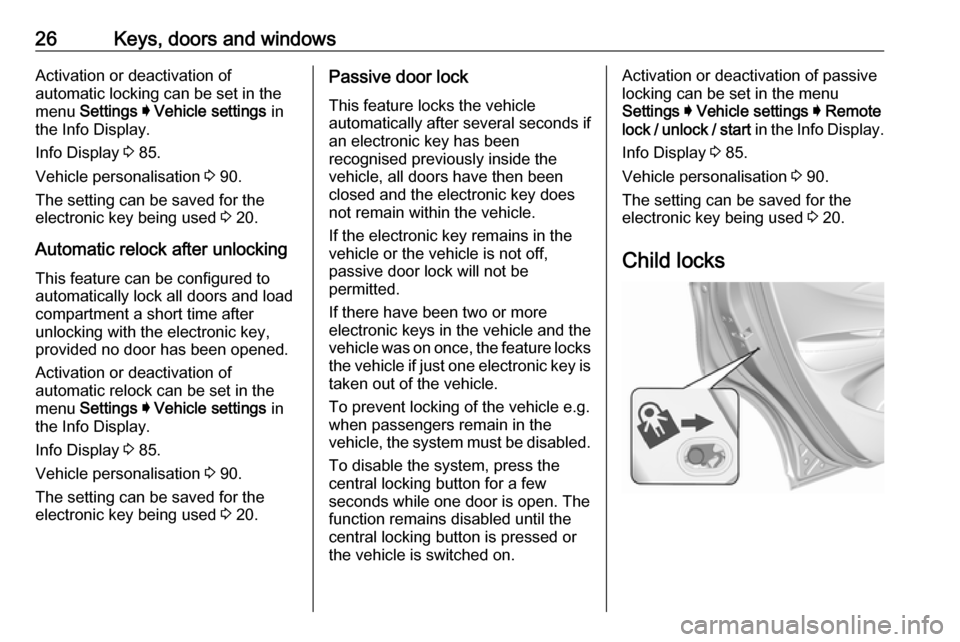
Move the pin in the rear door to the front position. The door cannot be
opened from the inside.
To deactivate, move the pin to the
rear position.
Smartphone remote
function
This feature allows a smartphone to
be connected to the vehicle and
remote vehicle functions to be
requested. Features vary depending
on availability.
Features include: ● Remote commands: Use to lock /
unlock the vehicle, remote start
for the cabin climate, or sound or cancel the horn and flash the
lights.
● Vehicle status: View the vehicle’s
range and high voltage battery
level, charging status, and tyre
pressure.
● Welcome lighting: Request light when approaching the vehicle.
● Location services: Save the parked location or start
navigation at the vehicle’s GPS
coordinates.Setup function ● KeyPass setup
● Managing priority setting ● Modifying priority setting
● RevocationActive remote function ● Door lock / unlock
● Start / stop
● Charge termination
● High voltage battery charge functions
● Temporary charging override
update
● Change the charging mode permanently● Update departure timeschedule
● High voltage battery priority charging activation and
deactivation
● Select charge level / limit preference screen
● Vehicle locator
● Vehicle rangePassive function
Approach detection / welcome
lightingVisual display for vehicle information ● Low high voltage battery indication
● Tyre pressure
● Odometer reading
● Tailgate ajar status
● Electric parking brake status
● Bonnet status
● High voltage battery state of charge status
Page 30 of 271

28Keys, doors and windows● Vehicle's position
● Charge mode status ● Vehicle range
● Charge start and end times status
● Full week of time based delayed charging status
● Disable rate based and delayed charging status
● High voltage charging system fault (unable to
charge)
● High voltage charger power level
● High voltage battery charge cord connected indication
● Charge complete
● Usable state of charge
● High voltage depletion mode range
● High voltage battery state of charge statusPairing
A smartphone must be paired to the KeyPass module and then it must be
connected to the vehicle before it can be used.
Setup information ● Up to three smartphones can be set up and connected to the
vehicle.
● Setup is disabled when the vehicle is moving.
● Pairing only needs to be completed once per smartphone,unless the pairing information on
the smartphone changes or the
smartphone is deleted.
Setup process 1. The vehicle must be switched on and the selector lever in P (Park).
2. Enable the KeyPass function through vehicle personalisation.
3. Download the myOpel app to the smartphone from the appropriate
app store.4. Open the app and search for new
vehicles.
5. Choose your vehicle and confirm.
6. Aim the smartphone camera at the QR code on the Info Display toscan the security key. If the
camera is not working, the QR
code can be entered manually.
7. The Info Display provides confirmation that the pairing
process was completed
successfully.
● Select Settings on the Home
screen on the Info Display.
● Select KeyPass.
● Select Manage KeyPass
devices .
Deleting a paired smartphone 1. Select Settings on the Home
screen on the Info Display.
2. Select KeyPass.
3. Select Manage KeyPass devices .
4. Touch Delete next to the
smartphone to be deleted, and
follow the prompts.
Page 33 of 271

Keys, doors and windows31Electronic key system: Unlocking the
vehicle by pressing the button on any
exterior door handle deactivates the
anti-theft alarm system.
The electronic key must be outside
the vehicle, within a range of approx.
1 m of the relevant door side.
The system is not deactivated by
unlocking the driver's door with the
key or with the central locking button
in the passenger compartment.
AlarmWhen triggered, the alarm horn
sounds and the hazard warning lights
flash simultaneously. The number
and duration of alarm signals are
stipulated by legislation.
The anti-theft alarm system can be
deactivated by pressing (, by
pressing the button on the door
handle or switching on the vehicle.
A triggered alarm, which has not been interrupted by the driver, will be
indicated by the hazard warning
lights. They will flash quickly three
times the next time the vehicle is
unlocked with the radio remote
control. Additionally, a warningmessage is displayed in the Driver
Information Centre after switching on
the vehicle.
Vehicle messages 3 89.
Immobiliser The system is part of the ignition
switch and checks whether the
vehicle is allowed to be started with the key being used.
The immobiliser is activated
automatically after the electronic key
has been removed from the vehicle.
If control indicator d flashes when the
vehicle is on, there is a fault in the
system. The propulsion system
cannot be started. Switch off the
vehicle and repeat the start attempt.
If control indicator d continues
flashing, attempt to start the
propulsion system using the spare
key and seek the assistance of a
workshop.Note
Radio Frequency Identification
(RFID) tags may cause interference
with the key. Do not have it placed near the key when starting the
vehicle.
Note
The immobiliser does not lock the doors. You should always lock the
vehicle after leaving it and switch on the anti-theft alarm system 3 20,
3 30.
Control indicator d 3 81.