display OPEL AMPERA E 2019 Owner's Guide
[x] Cancel search | Manufacturer: OPEL, Model Year: 2019, Model line: AMPERA E, Model: OPEL AMPERA E 2019Pages: 271, PDF Size: 6.7 MB
Page 81 of 271
Instruments and controls79Illuminates when the propulsion
system is on
1. Move out of the flow of traffic as quickly as possible without
impeding other vehicles.
2. Stop, switch off the vehicle.
3. Seek the assistance of a workshop.
Driving while p illuminates could
drain the 12 V vehicle battery.
Starting and stopping the vehicle
3 150.
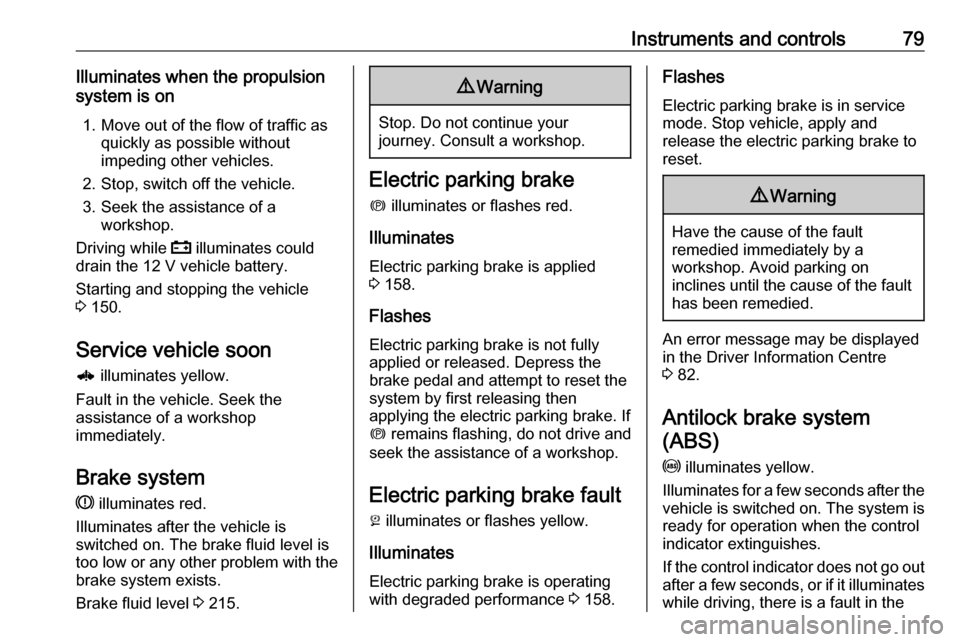
Service vehicle soon 6 illuminates yellow.
Fault in the vehicle. Seek the
assistance of a workshop
immediately.
Brake system
R illuminates red.
Illuminates after the vehicle is
switched on. The brake fluid level is
too low or any other problem with the
brake system exists.
Brake fluid level 3 215.9 Warning
Stop. Do not continue your
journey. Consult a workshop.
Electric parking brake
m illuminates or flashes red.
Illuminates
Electric parking brake is applied
3 158.
Flashes
Electric parking brake is not fully applied or released. Depress the
brake pedal and attempt to reset the system by first releasing then
applying the electric parking brake. If
m remains flashing, do not drive and
seek the assistance of a workshop.
Electric parking brake fault
j illuminates or flashes yellow.
Illuminates
Electric parking brake is operating
with degraded performance 3 158.
Flashes
Electric parking brake is in service
mode. Stop vehicle, apply and
release the electric parking brake to
reset.9 Warning
Have the cause of the fault
remedied immediately by a
workshop. Avoid parking on
inclines until the cause of the fault has been remedied.
An error message may be displayed
in the Driver Information Centre
3 82.
Antilock brake system
(ABS)
u illuminates yellow.
Illuminates for a few seconds after the
vehicle is switched on. The system is ready for operation when the control
indicator extinguishes.
If the control indicator does not go out after a few seconds, or if it illuminates
while driving, there is a fault in the
Page 84 of 271
82Instruments and controlsTraffic sign assistantL displays detected traffic signs as
control indicator.
Traffic sign assistant 3 187.
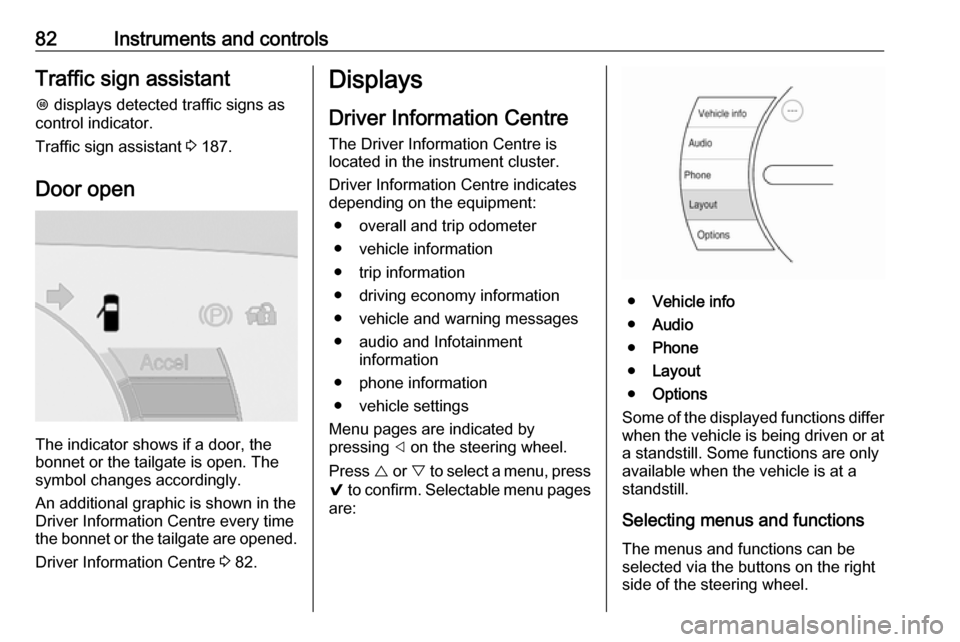
Door open
The indicator shows if a door, the
bonnet or the tailgate is open. The
symbol changes accordingly.
An additional graphic is shown in the
Driver Information Centre every time
the bonnet or the tailgate are opened.
Driver Information Centre 3 82.
Displays
Driver Information Centre The Driver Information Centre is
located in the instrument cluster.
Driver Information Centre indicates
depending on the equipment:
● overall and trip odometer
● vehicle information
● trip information
● driving economy information ● vehicle and warning messages
● audio and Infotainment information
● phone information
● vehicle settings
Menu pages are indicated by
pressing ] on the steering wheel.
Press { or } to select a menu, press
9 to confirm. Selectable menu pages
are:
● Vehicle info
● Audio
● Phone
● Layout
● Options
Some of the displayed functions differ
when the vehicle is being driven or at
a standstill. Some functions are only
available when the vehicle is at a
standstill.
Selecting menus and functionsThe menus and functions can be
selected via the buttons on the right
side of the steering wheel.
Page 85 of 271
![OPEL AMPERA E 2019 Owners Guide Instruments and controls83
● Press ] to open main menu
page.
● Select a main menu page with { or }.
● Confirm a main menu page with 9.
Once a main menu page is selected,
press { or } to selec OPEL AMPERA E 2019 Owners Guide Instruments and controls83
● Press ] to open main menu
page.
● Select a main menu page with { or }.
● Confirm a main menu page with 9.
Once a main menu page is selected,
press { or } to selec](/img/37/18757/w960_18757-84.png)
Instruments and controls83
● Press ] to open main menu
page.
● Select a main menu page with { or }.
● Confirm a main menu page with 9.
Once a main menu page is selected,
press { or } to select subpages.
● Press [ to open the next folder of
the selected subpage.
● Press { or } to select functions
or to set a numeric value, if
required.
● Press 9 to select and confirm a
function.
Vehicle and service messages pop-
up in the Driver Information Centre
when required.
Confirm messages by pressing 9.
Vehicle messages 3 89.
Vehicle info The following list contains all possible
Vehicle info menu pages. Some may
not be available for your particular
vehicle. Depending on the display,
some functions are symbolised.
Press { or } to select a page:
● Trip
● Tyre pressure (kPa)
● Average speed
● Timer
● Traffic sign assistant
● Following distance
● Blank page
Trip
Trip odometer displays the current
distance and the current average
electrical energy economy since a
certain reset.The distance counts up to
99,999.9 km then restarts at 0.
The average electrical energy
economy displays the approximate
average kWh per 100 km (kWh/100
km).
To reset, press and hold 9.
Tyre pressure (kPa)
Checks tyre pressure of all wheels
during driving 3 232.
Average speed
Display of average speed. The
measurement can be reset at any
time.
Timer
To start and stop, press 9. To reset,
press [ and confirm reset.
Traffic sign assistant
Displays the detected traffic signs for
the current route section 3 187.
Following distance
Displays the distance in seconds to a preceding moving vehicle 3 168.
Page 86 of 271

84Instruments and controlsBlank page
Shows a blank page without any
information.
Audio menu
In the main view of the Audio
application, press { or } to scroll
through radio stations or move to the next / previous track of a USB /
Bluetooth ®
device that is connected to
the vehicle.
Press 9 to select the Audio app, then
press [ to enter the Audio menu. In
the Audio menu browse for music,
select from the favourites, or change
the audio source.
Exit the Audio menu by pressing 9
or ].
Phone menu Press 9 to select the Phone
application, then press [ to enter the
Phone menu. In the Phone menu, if
there is no active phone call, view
recent calls, scroll through contacts,
or select from the favourites. If thereis an active call, mute or unmute the
phone or switch to handset or hands
free operation.
Exit the Phone menu by pressing 9
or ].
Layout menu Press 9 while display themes is
displayed. Select Basic, Standard or
Enhanced mode by pressing 9.
Options menu
The following list contains all possible Options menu pages:
● Unit
● Speed warning
● Tyre load
Units
Press [ while units page is displayed.
Select imperial or metric units by
pressing 9.
Speed warning
The speed warning function alerts the
driver when a set speed is exceeded.To set the speed warning, press 9
while the page is displayed. Press
[ and { or } to adjust the value.
Press 9 to set the speed. Once the
speed is set, this feature can be
turned off by pressing 9 while
viewing this page. If the selected
speed limit is exceeded, a pop-up
warning is displayed with a chime.
Tyre load
The tyre pressure category according to the actual tyre inflation pressure
can be selected 3 232.
Press { or } to select a category
Light , Eco or Max .
Press 9 to confirm category.
Help
Provides information about the
gauges which are available in the
different layouts ( Basic, Standard or
Enhanced ).
Open source software
System settings 3 116.
Page 87 of 271
Instruments and controls85Info DisplayThe Info Display can indicate: ● climate control 3 141
● Infotainment system 3 107
● settings for vehicle personalisation 3 90
● power flow information
● programmable charging settings
● energy information
● indication of rear view camera 3 184
● outside temperature 3 68
● indication of parking assist instructions 3 173
Selecting menus and settings
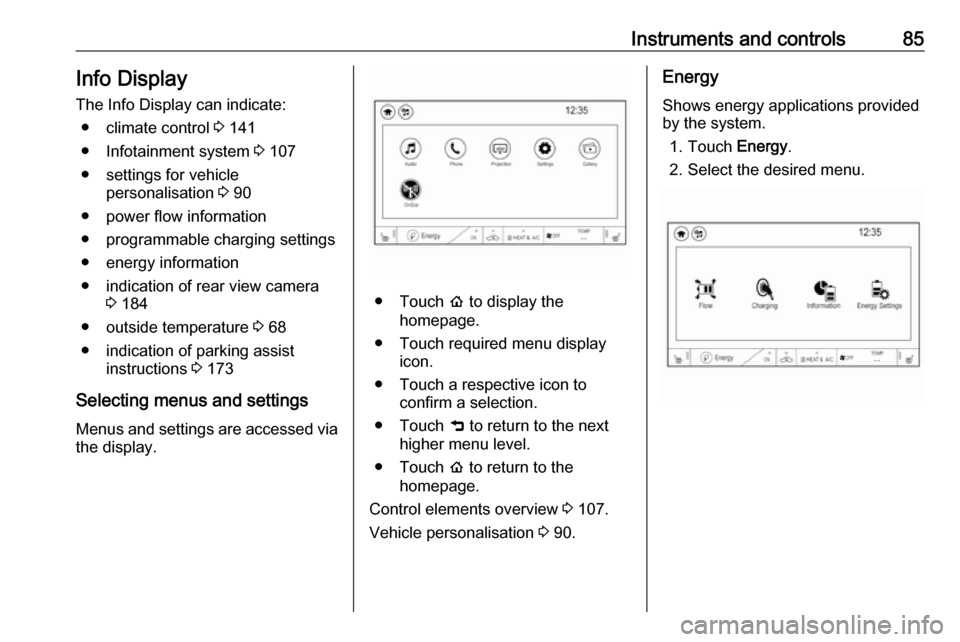
Menus and settings are accessed via the display.
● Touch p to display the
homepage.
● Touch required menu display icon.
● Touch a respective icon to confirm a selection.
● Touch 9 to return to the next
higher menu level.
● Touch p to return to the
homepage.
Control elements overview 3 107.
Vehicle personalisation 3 90.
Energy
Shows energy applications provided
by the system.
1. Touch Energy.
2. Select the desired menu.
Page 88 of 271
86Instruments and controlsCommunication error
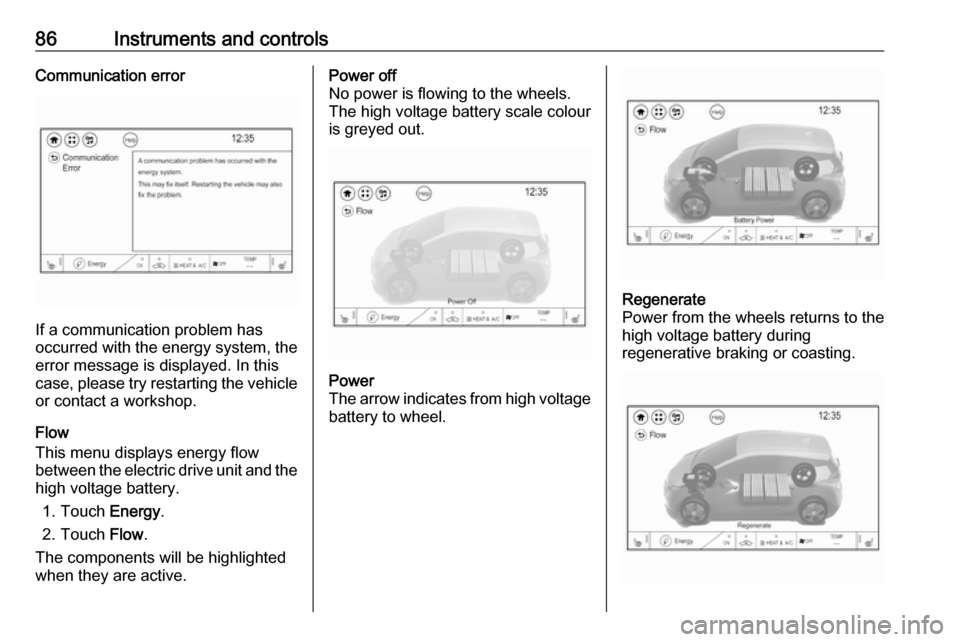
If a communication problem has
occurred with the energy system, the
error message is displayed. In this
case, please try restarting the vehicle
or contact a workshop.
Flow
This menu displays energy flow
between the electric drive unit and the high voltage battery.
1. Touch Energy.
2. Touch Flow.
The components will be highlighted
when they are active.
Power off
No power is flowing to the wheels.
The high voltage battery scale colour
is greyed out.Power
The arrow indicates from high voltage battery to wheel.Regenerate
Power from the wheels returns to the
high voltage battery during
regenerative braking or coasting.
Page 89 of 271
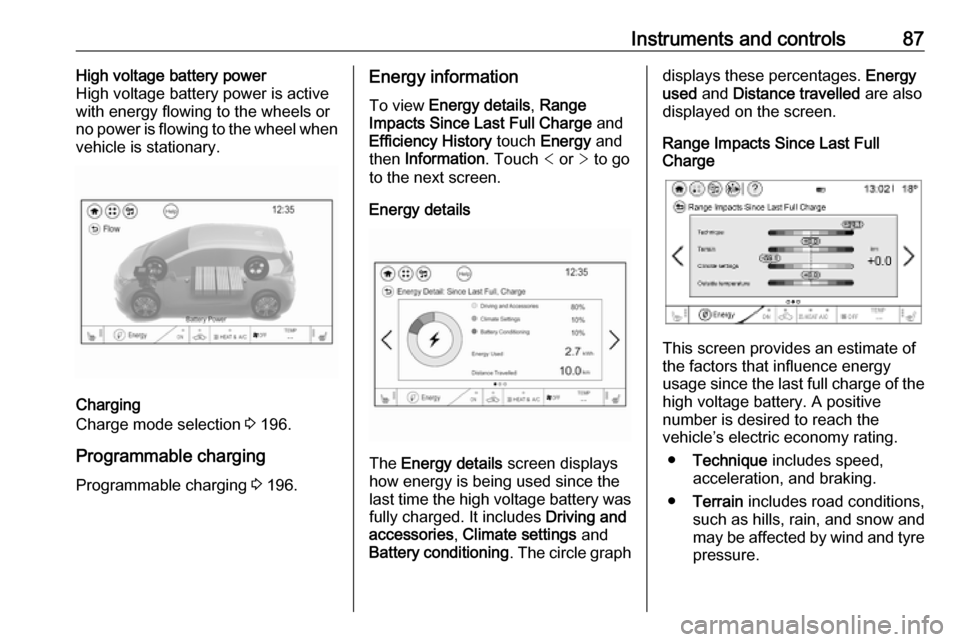
Instruments and controls87High voltage battery power
High voltage battery power is active
with energy flowing to the wheels or
no power is flowing to the wheel when
vehicle is stationary.
Charging
Charge mode selection 3 196.
Programmable charging
Programmable charging 3 196.
Energy information
To view Energy details , Range
Impacts Since Last Full Charge and
Efficiency History touch Energy and
then Information . Touch < or > to go
to the next screen.
Energy details
The Energy details screen displays
how energy is being used since the
last time the high voltage battery was
fully charged. It includes Driving and
accessories , Climate settings and
Battery conditioning . The circle graph
displays these percentages. Energy
used and Distance travelled are also
displayed on the screen.
Range Impacts Since Last Full
Charge
This screen provides an estimate of
the factors that influence energy
usage since the last full charge of the
high voltage battery. A positive
number is desired to reach the
vehicle’s electric economy rating.
● Technique includes speed,
acceleration, and braking.
● Terrain includes road conditions,
such as hills, rain, and snow and
may be affected by wind and tyre pressure.
Page 90 of 271
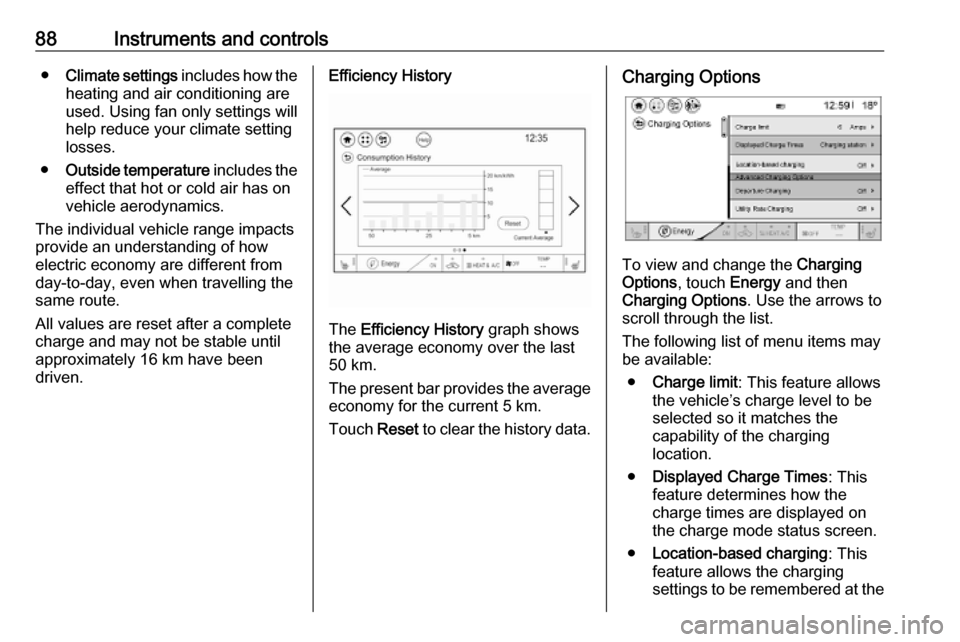
88Instruments and controls●Climate settings includes how the
heating and air conditioning are
used. Using fan only settings will
help reduce your climate setting
losses.
● Outside temperature includes the
effect that hot or cold air has on
vehicle aerodynamics.
The individual vehicle range impacts
provide an understanding of how electric economy are different from
day-to-day, even when travelling the
same route.
All values are reset after a complete
charge and may not be stable until
approximately 16 km have been
driven.Efficiency History
The Efficiency History graph shows
the average economy over the last
50 km.
The present bar provides the average economy for the current 5 km.
Touch Reset to clear the history data.
Charging Options
To view and change the Charging
Options , touch Energy and then
Charging Options . Use the arrows to
scroll through the list.
The following list of menu items may
be available:
● Charge limit : This feature allows
the vehicle’s charge level to be selected so it matches the
capability of the charging
location.
● Displayed Charge Times : This
feature determines how the
charge times are displayed on
the charge mode status screen.
● Location-based charging : This
feature allows the charging
settings to be remembered at the
Page 91 of 271

Instruments and controls89saved GPS coordinates for the
Home location.
Location based charging in
Programmable charging 3 196.
● Departure Charging : This feature
allows charging during the least
expensive rate periods to
achieve a full battery charge by
the departure time.
● Utility Rate Charging : The vehicle
estimates the charging start time
based on the utility rate schedule,
utility rate preference, and
programmed departure time for
the current day of the week.
● Energy summary pop-up : Set the
energy summary pop-up feature to On or Off.
● Charge status feedback : Set the
charge status feedback feature to Horn chirps or Off.
● Charge power loss alert : This
feature allows an alert to sound
when the vehicle is charging andloses power at the electrical
outlet. Set the charge power loss alert feature to On or Off.
● Radio power down : This allows
high voltage battery power to be
conserved. Set the value for the
reminder to be displayed. To set
high voltage battery charge level
for Radio power down , touch
Energy , then Charging Options ,
then Radio power down . Select
Off , 2% , 4% , 6% , 8% , 10% .Low power mode
This allows high voltage battery power to be conserved.
1. Press and hold m of the
Infotainment system.
2. Touch Yes on the Info Display.
The screen will turn off.
3. Press m again to turn the display
on.Vehicle messages
Messages are indicated in the Driver
Information Centre, in some cases
together with a warning chime.
Press 9 on the steering wheel to
confirm a message.
Vehicle and service messages
The vehicle messages are displayed
as text. Follow the instructions given
in the messages.
Some important messages may
appear additionally in the Info
Display. Some messages only pop-
up for a few seconds.
Page 92 of 271
90Instruments and controlsWarning chimesIf several warnings appear at the
same time, only one warning chime
will sound.
When starting the propulsion
system or whilst driving
The warning chime regarding not
fastened seat belts has priority over any other warning chime.
● If seat belt is not fastened.
● If a door or the tailgate is not fully
closed when starting off.
● If a certain speed is exceeded with parking brake applied.
● If approaching a vehicle ahead too rapidly.
● If a programmed speed or speed
limit is exceeded.
● If a warning message appears in the Driver Information Centre.
● If the electronic key is not in the passenger compartment.
● If the parking assist detects an object.● If an unintended lane changeoccurs.
● If safety function of the power tailgate detects obstacles in the
moving area.
When the vehicle is parked and / or the driver's door is opened
● With exterior lights on.
Battery voltage When the voltage of the 12 V vehicle
battery is running low, a warning
message will appear in the Driver
Information Centre.
1. Switch off any electrical consumers which are not requiredfor a safe drive, e.g. seat heating, heated rear window or other main
consumers.
2. Charge the 12 V vehicle battery by
driving continuously for a while or
by using a charging device.
If the 12 V vehicle battery cannot be
recharged, have the cause of the fault
remedied by a workshop.Vehicle personalisation
The vehicle's behaviour can be
personalised by changing the settings in the Info Display.
Depending on vehicle equipment and
country-specific regulations some of
the functions described below may
not be available.
Some functions are only displayed or
active when the vehicle is on.
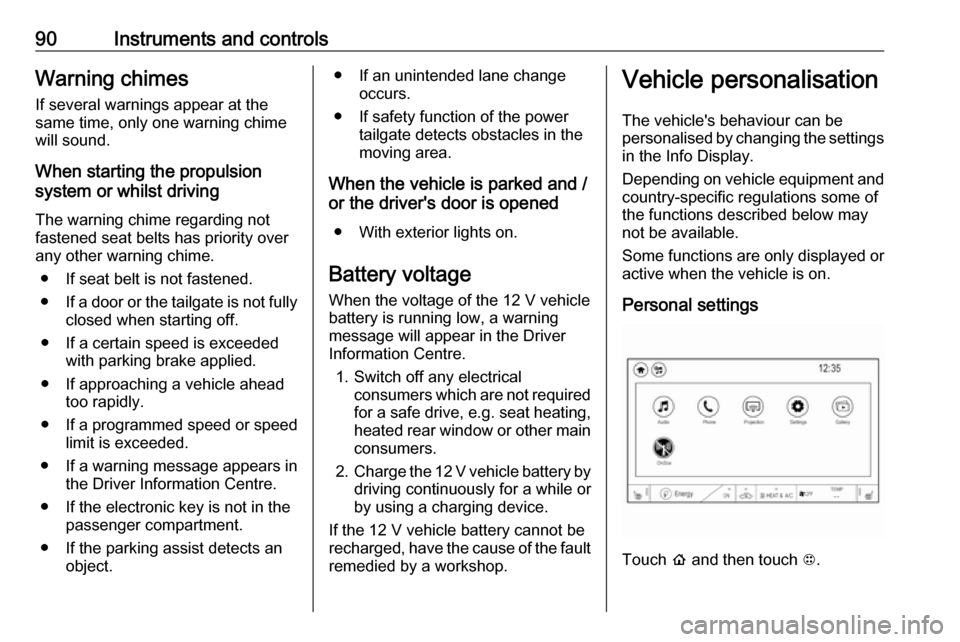
Personal settings
Touch p and then touch 1.