charge limit OPEL AMPERA E 2019 Owner's Manual
[x] Cancel search | Manufacturer: OPEL, Model Year: 2019, Model line: AMPERA E, Model: OPEL AMPERA E 2019Pages: 271, PDF Size: 6.7 MB
Page 29 of 271

Keys, doors and windows279Warning
Use the child locks whenever
children are occupying the rear
seats.
Move the pin in the rear door to the front position. The door cannot be
opened from the inside.
To deactivate, move the pin to the
rear position.
Smartphone remote
function
This feature allows a smartphone to
be connected to the vehicle and
remote vehicle functions to be
requested. Features vary depending
on availability.
Features include: ● Remote commands: Use to lock /
unlock the vehicle, remote start
for the cabin climate, or sound or cancel the horn and flash the
lights.
● Vehicle status: View the vehicle’s
range and high voltage battery
level, charging status, and tyre
pressure.
● Welcome lighting: Request light when approaching the vehicle.
● Location services: Save the parked location or start
navigation at the vehicle’s GPS
coordinates.Setup function ● KeyPass setup
● Managing priority setting ● Modifying priority setting
● RevocationActive remote function ● Door lock / unlock
● Start / stop
● Charge termination
● High voltage battery charge functions
● Temporary charging override
update
● Change the charging mode permanently● Update departure timeschedule
● High voltage battery priority charging activation and
deactivation
● Select charge level / limit preference screen
● Vehicle locator
● Vehicle rangePassive function
Approach detection / welcome
lightingVisual display for vehicle information ● Low high voltage battery indication
● Tyre pressure
● Odometer reading
● Tailgate ajar status
● Electric parking brake status
● Bonnet status
● High voltage battery state of charge status
Page 78 of 271
76Instruments and controlsPower indicator gauge
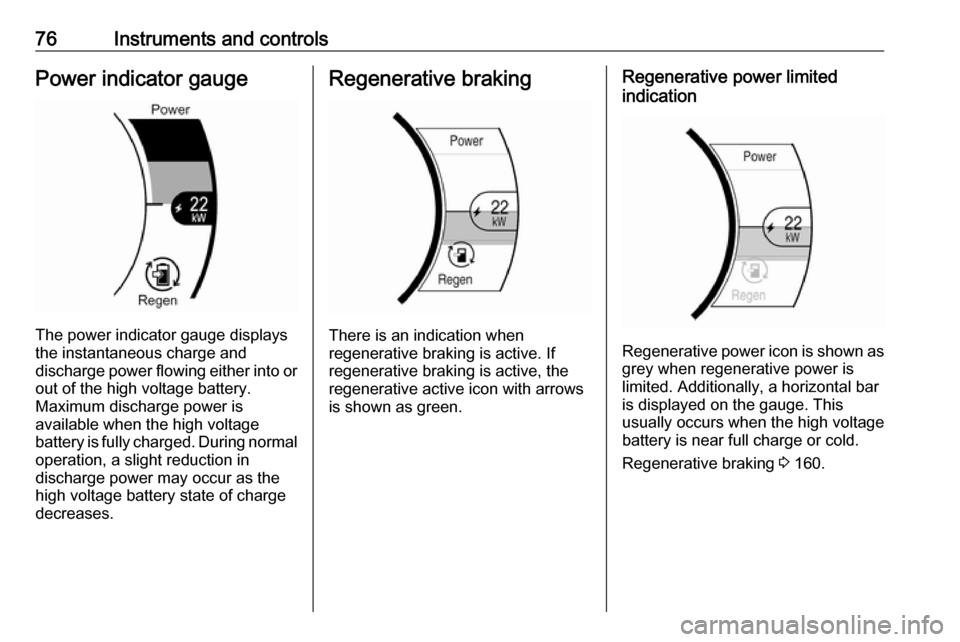
The power indicator gauge displays
the instantaneous charge and
discharge power flowing either into or out of the high voltage battery.
Maximum discharge power is
available when the high voltage
battery is fully charged. During normal
operation, a slight reduction in
discharge power may occur as the
high voltage battery state of charge
decreases.
Regenerative braking
There is an indication when
regenerative braking is active. If
regenerative braking is active, the regenerative active icon with arrowsis shown as green.
Regenerative power limited
indication
Regenerative power icon is shown as grey when regenerative power is
limited. Additionally, a horizontal bar
is displayed on the gauge. This
usually occurs when the high voltage
battery is near full charge or cold.
Regenerative braking 3 160.
Page 90 of 271
88Instruments and controls●Climate settings includes how the
heating and air conditioning are
used. Using fan only settings will
help reduce your climate setting
losses.
● Outside temperature includes the
effect that hot or cold air has on
vehicle aerodynamics.
The individual vehicle range impacts
provide an understanding of how electric economy are different from
day-to-day, even when travelling the
same route.
All values are reset after a complete
charge and may not be stable until
approximately 16 km have been
driven.Efficiency History
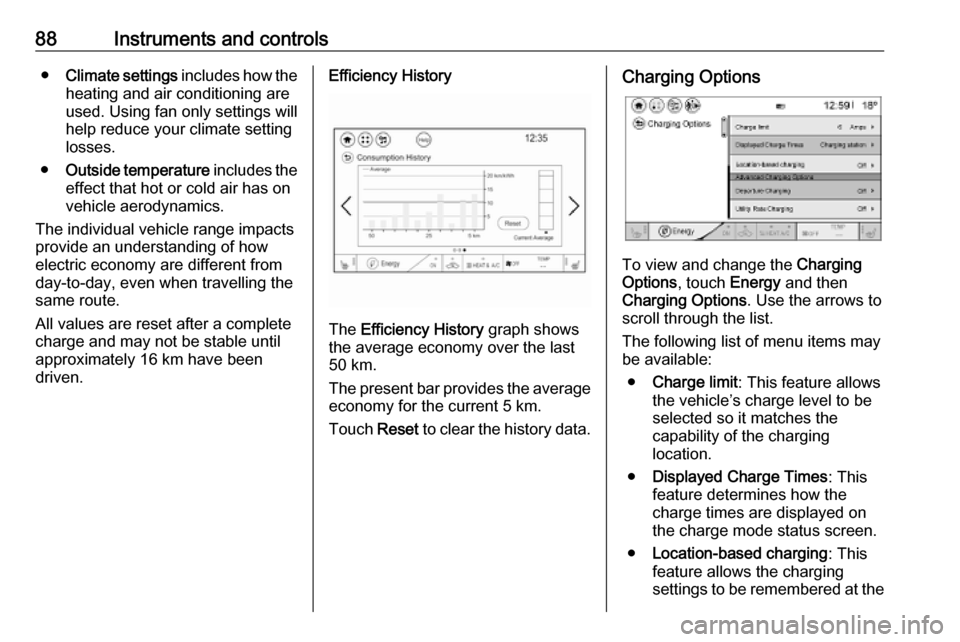
The Efficiency History graph shows
the average economy over the last
50 km.
The present bar provides the average economy for the current 5 km.
Touch Reset to clear the history data.
Charging Options
To view and change the Charging
Options , touch Energy and then
Charging Options . Use the arrows to
scroll through the list.
The following list of menu items may
be available:
● Charge limit : This feature allows
the vehicle’s charge level to be selected so it matches the
capability of the charging
location.
● Displayed Charge Times : This
feature determines how the
charge times are displayed on
the charge mode status screen.
● Location-based charging : This
feature allows the charging
settings to be remembered at the
Page 92 of 271
90Instruments and controlsWarning chimesIf several warnings appear at the
same time, only one warning chime
will sound.
When starting the propulsion
system or whilst driving
The warning chime regarding not
fastened seat belts has priority over any other warning chime.
● If seat belt is not fastened.
● If a door or the tailgate is not fully
closed when starting off.
● If a certain speed is exceeded with parking brake applied.
● If approaching a vehicle ahead too rapidly.
● If a programmed speed or speed
limit is exceeded.
● If a warning message appears in the Driver Information Centre.
● If the electronic key is not in the passenger compartment.
● If the parking assist detects an object.● If an unintended lane changeoccurs.
● If safety function of the power tailgate detects obstacles in the
moving area.
When the vehicle is parked and / or the driver's door is opened
● With exterior lights on.
Battery voltage When the voltage of the 12 V vehicle
battery is running low, a warning
message will appear in the Driver
Information Centre.
1. Switch off any electrical consumers which are not requiredfor a safe drive, e.g. seat heating, heated rear window or other main
consumers.
2. Charge the 12 V vehicle battery by
driving continuously for a while or
by using a charging device.
If the 12 V vehicle battery cannot be
recharged, have the cause of the fault
remedied by a workshop.Vehicle personalisation
The vehicle's behaviour can be
personalised by changing the settings in the Info Display.
Depending on vehicle equipment and
country-specific regulations some of
the functions described below may
not be available.
Some functions are only displayed or
active when the vehicle is on.
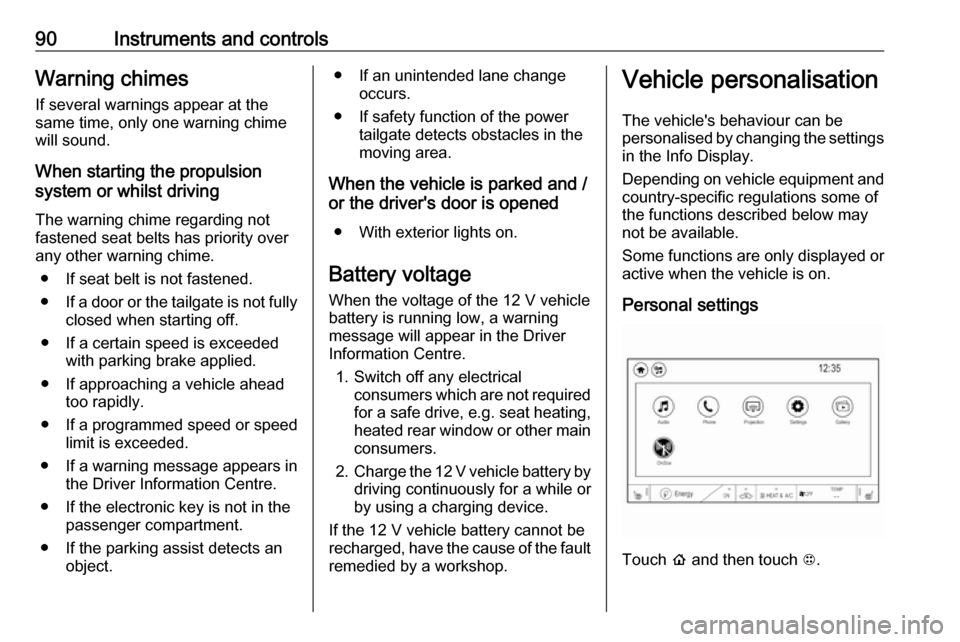
Personal settings
Touch p and then touch 1.
Page 149 of 271

Driving and operating147Driving and
operatingDriving hints ............................... 147
Driving economically ...............147
Control of the vehicle ...............148
Emergencies ........................... 148
Starting and operating ...............148
New vehicle running-in ............148
Power button ........................... 148
Retained power off ..................150
Starting and stopping the vehicle .................................... 150
Parking .................................... 151
Electric vehicle operation
modes ........................................ 153
Operation ................................. 153
Drive modes ............................ 153
Electric drive unit .......................153
Operation ................................. 153
Brakes ........................................ 157
Antilock brake system .............157
Parking brake .......................... 158
Regenerative braking ..............160Ride control systems .................161
Traction Control system ..........161
Electronic Stability Control ......162
Driver assistance systems .........163
Cruise control .......................... 163
Speed limiter ........................... 164
Forward collision alert .............166
Following distance indication ...168
Active emergency braking .......168
Front pedestrian protection .....171
Parking assist .......................... 173
Side blind zone assistant .........180
Lane change alert ....................181
Panoramic view system ...........183
Rear view camera ...................184
Rear cross traffic alert .............186
Traffic sign assistant ................187
Lane keep assist .....................190
Charging .................................... 192
Programmable charging ..........196
Programmed charging override .................................. 203
Charging status .......................203
Charge cord ............................. 205
Electrical requirements ............208Driving hints
Driving economically
The following advice is intended to
help maximise energy efficiency and
range.
In colder temperatures, while these
efficiency tips will help, the electric
vehicle's driving range may be lower
due to higher energy usage.
The weight of additional cargo in the
vehicle affects efficiency and range.
Avoid carrying more than is needed.
Avoid unnecessary use of electrical
accessories. Power used for
functions other than propelling the
vehicle will reduce electric vehicle
range.
Always keep the tyres properly
inflated and the vehicle properly
aligned.
Driving style
Avoid unnecessary rapid
accelerations and decelerations.
Use cruise control when appropriate.
Page 162 of 271
160Driving and operatingthe parking brake is fully released
and the control indicator m is off
before driving.
Automatic release
The electric parking brake is
automatically released when the
vehicle is running, placed into gear
and an attempt is made to drive away.
Avoid rapid acceleration when the
electric parking brake is applied, to
reduce wear of parking brake lining.
Electric parking brake control
indicator m 3 79.
Electric parking brake fault control
indicator j3 79.
Driver Information Centre 3 82.
Regenerative braking
Some braking energy from the
moving vehicle is turned back into
electrical energy. This energy is then
stored back into the high voltage
battery system, increasing energy
efficiency.
Regenerative power may be limited
when the high voltage battery is near
full charge or cold.Regeneration on demand
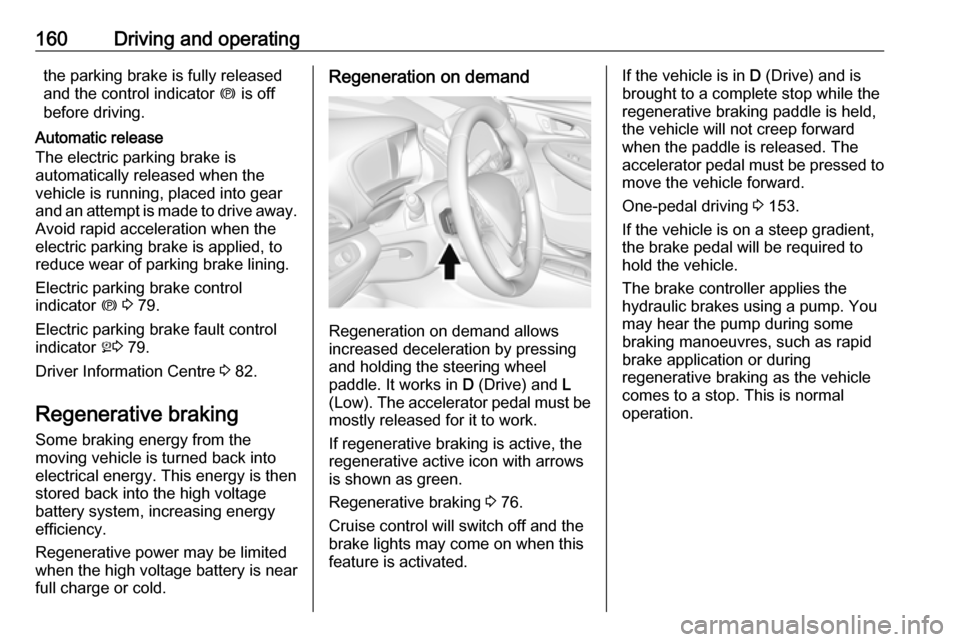
Regeneration on demand allows
increased deceleration by pressing
and holding the steering wheel
paddle. It works in D (Drive) and L
(Low). The accelerator pedal must be mostly released for it to work.
If regenerative braking is active, the regenerative active icon with arrowsis shown as green.
Regenerative braking 3 76.
Cruise control will switch off and the
brake lights may come on when this
feature is activated.
If the vehicle is in D (Drive) and is
brought to a complete stop while the regenerative braking paddle is held,
the vehicle will not creep forward
when the paddle is released. The
accelerator pedal must be pressed to
move the vehicle forward.
One-pedal driving 3 153.
If the vehicle is on a steep gradient,
the brake pedal will be required to
hold the vehicle.
The brake controller applies the
hydraulic brakes using a pump. You
may hear the pump during some
braking manoeuvres, such as rapid
brake application or during
regenerative braking as the vehicle
comes to a stop. This is normal
operation.
Page 196 of 271
194Driving and operating
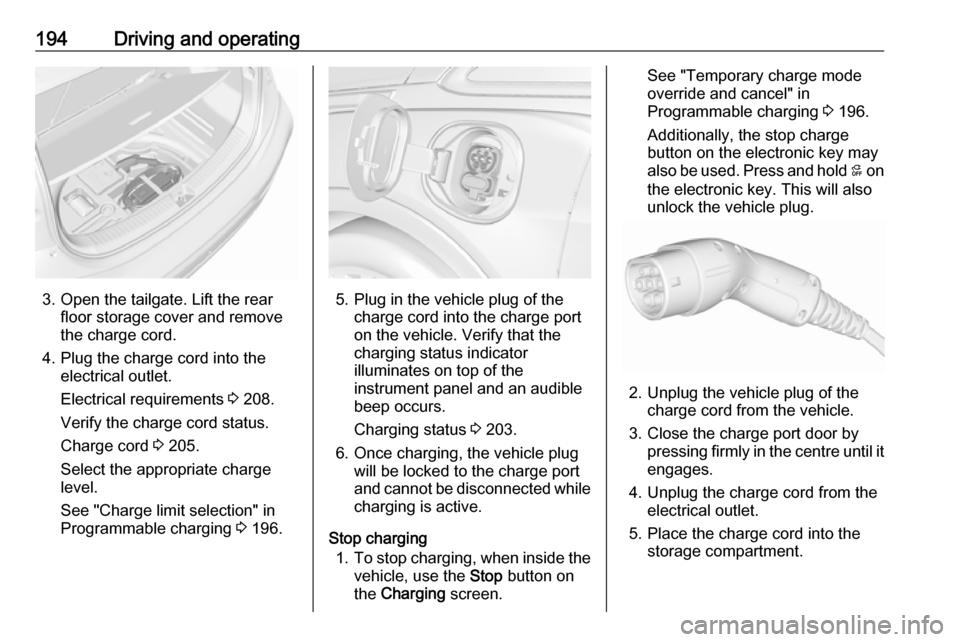
3. Open the tailgate. Lift the rearfloor storage cover and remove
the charge cord.
4. Plug the charge cord into the electrical outlet.
Electrical requirements 3 208.
Verify the charge cord status.
Charge cord 3 205.
Select the appropriate charge
level.
See "Charge limit selection" in
Programmable charging 3 196.5. Plug in the vehicle plug of the
charge cord into the charge port
on the vehicle. Verify that the
charging status indicator
illuminates on top of the
instrument panel and an audible
beep occurs.
Charging status 3 203.
6. Once charging, the vehicle plug will be locked to the charge port
and cannot be disconnected while
charging is active.
Stop charging 1. To stop charging, when inside the
vehicle, use the Stop button on
the Charging screen.
See "Temporary charge mode
override and cancel" in
Programmable charging 3 196.
Additionally, the stop charge button on the electronic key may
also be used. Press and hold 5 on
the electronic key. This will also
unlock the vehicle plug.
2. Unplug the vehicle plug of the charge cord from the vehicle.
3. Close the charge port door by pressing firmly in the centre until it
engages.
4. Unplug the charge cord from the electrical outlet.
5. Place the charge cord into the storage compartment.
Page 198 of 271
196Driving and operatingThere is also an available mobile appwith several charging functions.
Smartphone remote function 3 27.Automatic power supply cut-off
When the vehicle no longer needs to
use power from the charging station,
the charging process will be stopped.
Use the electronic key to unlock the
DC vehicle plug.
Energy can still be consumed from
the charging station when the
vehicle’s displays and indicators
show that the high voltage battery is
fully charged. This is to ensure the
high voltage battery is in optimal
temperature operating range to
maximise vehicle range.
Programmable charging 3 196.
End charging
1. Wait until the charging process has been fully stopped, the
vehicle plug is unlocked and the
charging status indicator is solid
green or off.
2. Unplug the DC vehicle plug from the DC charge port on the vehicle
and close the dust cover.
3. Close the charge port door by pressing firmly in the centre to
latch properly.
4. Manually disengage the electric parking brake before driving the
vehicle.
5. To start another DC charge, remove the DC vehicle plug and
reconnect.
Programmable charging
Programmable charge modes To view the current charge mode
status on the Info Display, touch Energy and then Charging.
The charge start and charge
complete time estimations are also
displayed on the screen. These
estimations are most accurate when
the vehicle is plugged in and in
moderate temperature conditions.
Also, to get an accurate time
estimate, the vehicle uses an internal clock for programmable charging, notthe clock in the instrument panel.Charge mode selection
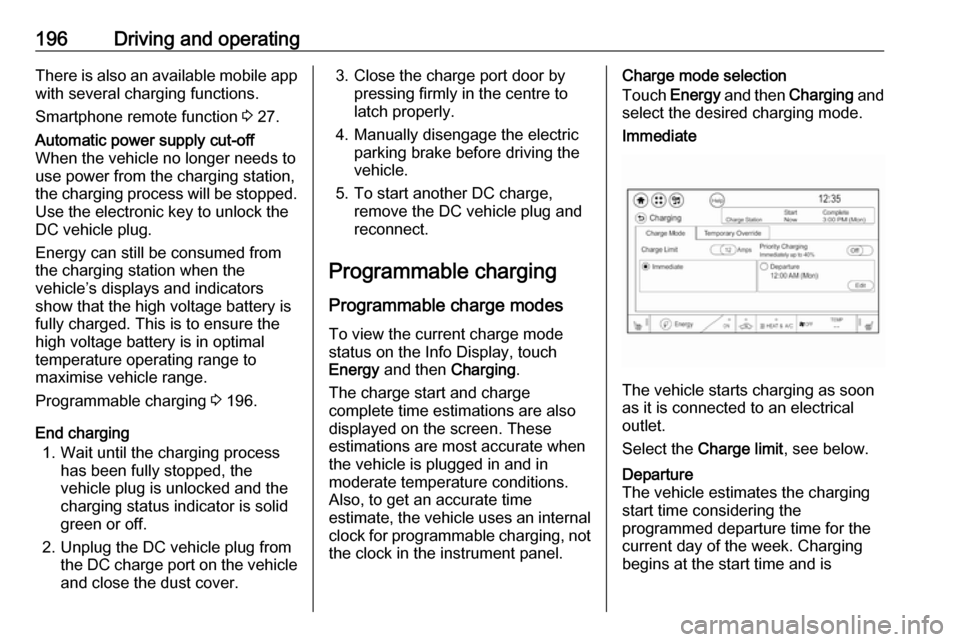
Touch Energy and then Charging and
select the desired charging mode.Immediate
The vehicle starts charging as soon
as it is connected to an electrical outlet.
Select the Charge limit , see below.
Departure
The vehicle estimates the charging start time considering the
programmed departure time for the
current day of the week. Charging
begins at the start time and is
Page 199 of 271
Driving and operating197complete by the departure time only if
sufficient time is allowed after the
charge cord is plugged in.
Select the Priority charging to On or
Off (Priority charging will immediately
charge the vehicle to a predefined
level).Departure time entry
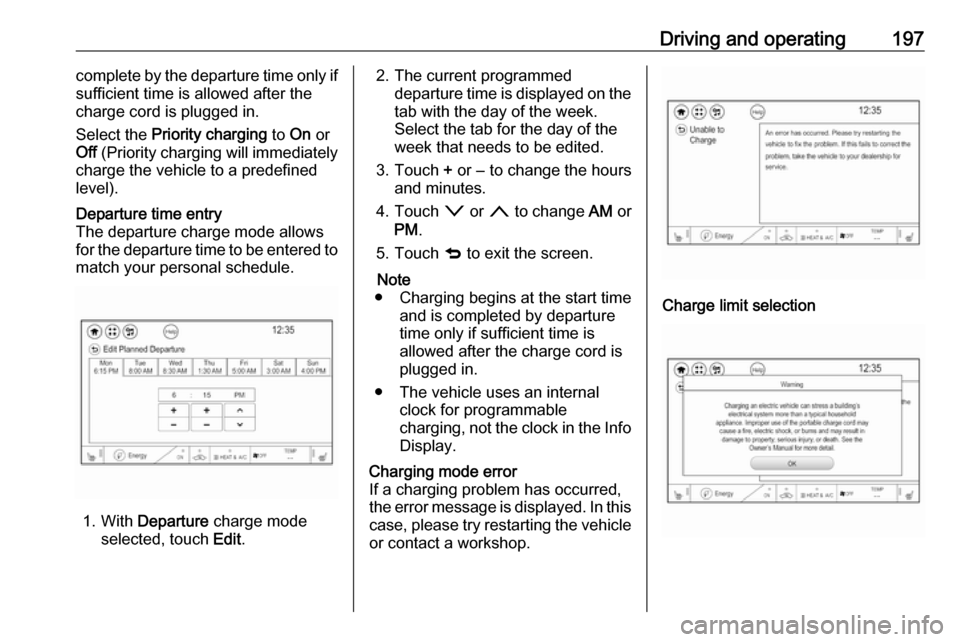
The departure charge mode allows
for the departure time to be entered to match your personal schedule.
1. With Departure charge mode
selected, touch Edit.
2. The current programmed
departure time is displayed on the
tab with the day of the week.
Select the tab for the day of the
week that needs to be edited.
3. Touch + or − to change the hours
and minutes.
4. Touch o or n to change AM or
PM .
5. Touch q to exit the screen.
Note
● Charging begins at the start time and is completed by departure
time only if sufficient time is
allowed after the charge cord is
plugged in.
● The vehicle uses an internal clock for programmable
charging, not the clock in the Info Display.Charging mode error
If a charging problem has occurred,
the error message is displayed. In this
case, please try restarting the vehicle or contact a workshop.
Charge limit selection
Page 200 of 271
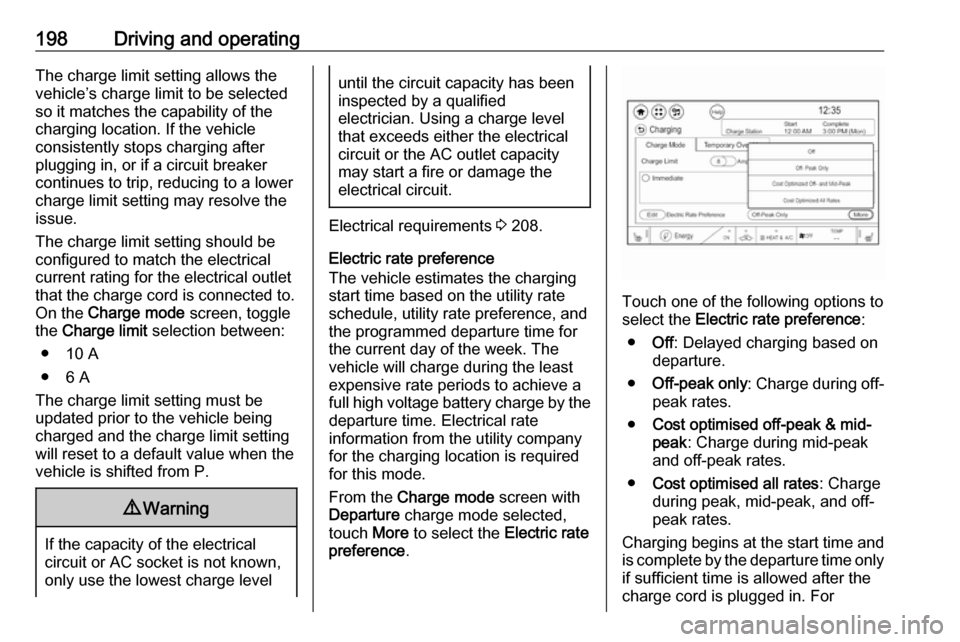
198Driving and operatingThe charge limit setting allows the
vehicle’s charge limit to be selected
so it matches the capability of the
charging location. If the vehicle
consistently stops charging after
plugging in, or if a circuit breaker
continues to trip, reducing to a lower
charge limit setting may resolve the
issue.
The charge limit setting should be
configured to match the electrical
current rating for the electrical outlet
that the charge cord is connected to.
On the Charge mode screen, toggle
the Charge limit selection between:
● 10 A
● 6 A
The charge limit setting must be
updated prior to the vehicle being
charged and the charge limit setting
will reset to a default value when the
vehicle is shifted from P.9 Warning
If the capacity of the electrical
circuit or AC socket is not known,
only use the lowest charge level
until the circuit capacity has been
inspected by a qualified
electrician. Using a charge level
that exceeds either the electrical
circuit or the AC outlet capacity
may start a fire or damage the
electrical circuit.
Electrical requirements 3 208.
Electric rate preference
The vehicle estimates the charging
start time based on the utility rate schedule, utility rate preference, and
the programmed departure time for
the current day of the week. The
vehicle will charge during the least
expensive rate periods to achieve a
full high voltage battery charge by the departure time. Electrical rate
information from the utility company
for the charging location is required
for this mode.
From the Charge mode screen with
Departure charge mode selected,
touch More to select the Electric rate
preference .
Touch one of the following options to
select the Electric rate preference :
● Off: Delayed charging based on
departure.
● Off-peak only : Charge during off-
peak rates.
● Cost optimised off-peak & mid-
peak : Charge during mid-peak
and off-peak rates.
● Cost optimised all rates : Charge
during peak, mid-peak, and off-
peak rates.
Charging begins at the start time and
is complete by the departure time only if sufficient time is allowed after the
charge cord is plugged in. For